Feb 19, 2014
mustardwithmutton

4 comments

Rick Stein’s Chicken Vindail Curry

Rick Stein's Chicken Vindail CurryA few months ago I was walking around my local shopping mall and came across a large display of Rick Stein’s new cook book “Rick Stein’s India – In Search of the Perfect Curry”. This was the first time I’d seen the book and I’d also somehow missed watching the TV series that accompanied it. After a quick flick through I knew I’d have to break my “no new cookbook” rule and purchase it. As I was paying I noticed a sign saying Rick Stein would be there that very day for a book signing. It would mean wasting another hour window shopping but I couldn’t miss the opportunity to meet one of my favourite chefs. As the time approached the queue became longer and the book signing, once Rick arrived, was fast and furious but he was charming and effusive about his trip to India and even went through my book making large ticks next to recipes that were his favourites. This recipe isn’t one that he ticked but I had all the ingredients handy, the accompanying picture was very enticing and the introduction to the recipe so charming (as are all of them actually) that I decided this would be the first recipe I’d  try from the book. Well it lived up to all expectations and if all of the recipes are as spot on as this one then I’ll be mighty pleased. Given the few ingredients I was surprised at how intense the flavours were and the whole house was filled with a wonderful curry aroma. The word “vindail” in the recipe means containing vinegar – a remnant of the French influence left on Pondicherry where this recipe hails from (the French had a base there for 300 years). I paired this wonderful chicken curry with some basmati rice, yogurt and a stir fried okra recipe from the same book which also turned out a treat.

Ingredients – serves 4-6   Adapted from Rick Stein’s India Cookbook

2-3 tablespoons vegetable oil
1 cinnamon stick
1 clove
1 star anise
2 medium onions, diced
10 cloves of garlic, crushed in a garlic press or grated
1 tablespoon ground cumin
2 teaspoons Kashmiri chilli powder (see note below)
½ teaspoon ground fenugreek
½ teaspoon turmeric
1 teaspoon salt
500g tomatoes, roughly chopped
1kg chicken thighs and drumsticks on the bone and skinned – you can use all thighs if you prefer
2 tablespoons white wine vinegar
1 teaspoon sugar
Note: Kashmiri chilli’s have an intense red colour but are milder than regular chillies. If you can’t find any you can substitute half ground chilli powder and half sweet paprika. This will give the same colour and mild heat as Kashmiri chilli powder. If you like less heat then add more paprika and less chilli powder.

Method

Heat the oil in a heavy based saucepan over medium heat and add the cinnamon, clove and star anise, and fry one minute until fragrant. Add the onions and fry for 10-15 minutes or until softened and golden brown. Don’t rush this step – browning the onions properly is an important step in all curries. Stir in  the cumin and garlic and fry for another 2 minutes, then add the chilli powder (see note above), fenugreek, turmeric, and salt and fry for 30 seconds. Add the tomatoes to the pan and cook for a further 5 minutes until they start to break down.

Add the chicken and stir everything together, then cover the pan with a lid and cook for 45 minutes, adding a splash of water if it starts to stick to the bottom. Stir in the vinegar and sugar and cook, uncovered, for a further 5 minutes.

Rick Stein's Chicken Vindail Curry

Feb 12, 2014
mustardwithmutton

no comments

Okonomiyaki with Sticky Soy Pork Belly

Ultimate Okonomiyaki with Sticky Soy Pork Belly

Okonomiyaki, which basically translates to “as you like it”, is a savoury fritter like pancake that’s sometimes referred to as the pizza of Japan. The similarity being the round disc shape and the fact that you can basically put anything you fancy into an okonomiyaki. The batters and toppings vary from region to region but the basic principle is the same; finely shredded cabbage and any other vegetables you like are added to a thin batter. You can include meat and seafood if you wish and a combination of dried bonito flakes, green onion, pickled ginger and tempura crumbs (I used panko bread crumbs instead) are added to boost the flavour. The mixture is then fried until golden and topped with mayonnaise and okonomiyaki sauce, which is similar in taste to barbecue sauce. This version, which is topped with slow cooked sticky pork belly with crispy crackling, takes okonomiyaki to a whole new level. This was the first time I’ve cooked okonomiyaki. I’ve ordered it many times but for some reason I didn’t think it could be easily replicated at home but I was wrong – this was just as good, and dare I say better, than many okonomiyakis I’ve had at restaurants. You don’t need to top the okonomiyaki with the pork belly if you don’t wish (but trust me it’s gorgeous with it), as the names says you can make it as you like and I’ll certainly be making these regularly. This is a fun dish to experiment with, changing the toppings and fillings to suit whatever you have on hand or are in the mood for – I find this is a great recipe to use when you have leftover bits and pieces sitting around in the fridge and vegetable drawer.

Ingredients – Serves 2-3  Inspired by a recipe in Australian Gourmet Traveller Magazine 

For the Okonomiyaki
250g finely shredded Chinese cabbage (napa cabbage)
1 large carrot, coarsely grated
4 spring onions, white and green sections, sliced
1 tablespoons pickled ginger, sliced
1 cup self-raising flour
¼ cup rice flour or potato flour
1 teaspoon dashi powder
1 teaspoon salt
¼ cup panko bread crumbs – use tempura crumbs if you have them
⅔ cup water
2 eggs
Vegetable oil

For the Soy Pork Belly
750g piece of boneless pork belly, with the skin on and scored
1½ cups chicken stock
½ cup soy sauce
¼ cup honey
1 tablespoon finely grated ginger
Sea salt flakes

To Serve
Finely sliced green onions
Japanese mayonnaise

Method

To make the pork belly, preheat oven to 250C. Place the stock, soy, honey and ginger into a small saucepan and bring to the boil. Dry the pork well and place it into a snug fitting roasting pan and season the skin of the pork generously with the salt flakes. Place in the hot oven and roast for 30 minutes or until the crackling has started to crisp up. Carefully pour the stock mixture around the pork, leaving the top skin dry. Reduce the oven temperature to 160C and cook for a further 2½ hours or until the pork is very tender. At this stage the cracking should be sufficiently crispy, but if it’s not increase the oven temperature and cook for a little longer at high heat until it crisps up to your liking. Remove the pork and let it rest for 10 minutes uncovered. Strain any fat from the sauce in the pan and set aside.

Roast Pork Belly for Okonomiyaki

Roast Pork Belly for Okonomiyaki Roast Pork Belly for Okonomiyaki

To make the okonomiyaki, mix the two different flours, the dashi, salt and water in large bowl. Add the cabbage, carrot, spring onions, ginger, panko crumbs and eggs. Stir until just combined, don’t over mix. Heat a small non-stick fry pan (about 15-20cm diameter) over medium heat. Add a small amount of vegetable oil and when hot add enough of the batter to make a fritter that covers the base of the pan and is about 1.5cm thick. Cook until it’s golden on the base and beginning to set, about 6-8 minutes. Turn and cook on the other side until it is cooked through about another 6-8 minutes. Remove and place on a baking tray and keep in a warm oven while you make the rest. Repeat the above process until all the batter is used – you should be able to get 2-3 pancakes, depending on the size of your pan and the thickness of the okonomiyakis.

Okonomiyaki Batter

Frying Okonomiyaki Okonomiyaki

To serve, place an okonomiyaki on each plate and drizzle the Japanese mayonnaise in thin stripes over the pancake. Cut the pork belly into thick slices and place some pork and crispy crackling on top of each pancake. Top with some of the reserved cooking juices and sliced spring onions.

Ultimate Okonomiyaki with Sticky Soy Pork Belly

Feb 6, 2014
mustardwithmutton

no comments

Shirin Polow – Persian Festive Rice With Saffron Poached Chicken

Shirin Polow - Persian Festive Jewelled Rice with Saffron Poached Chicken
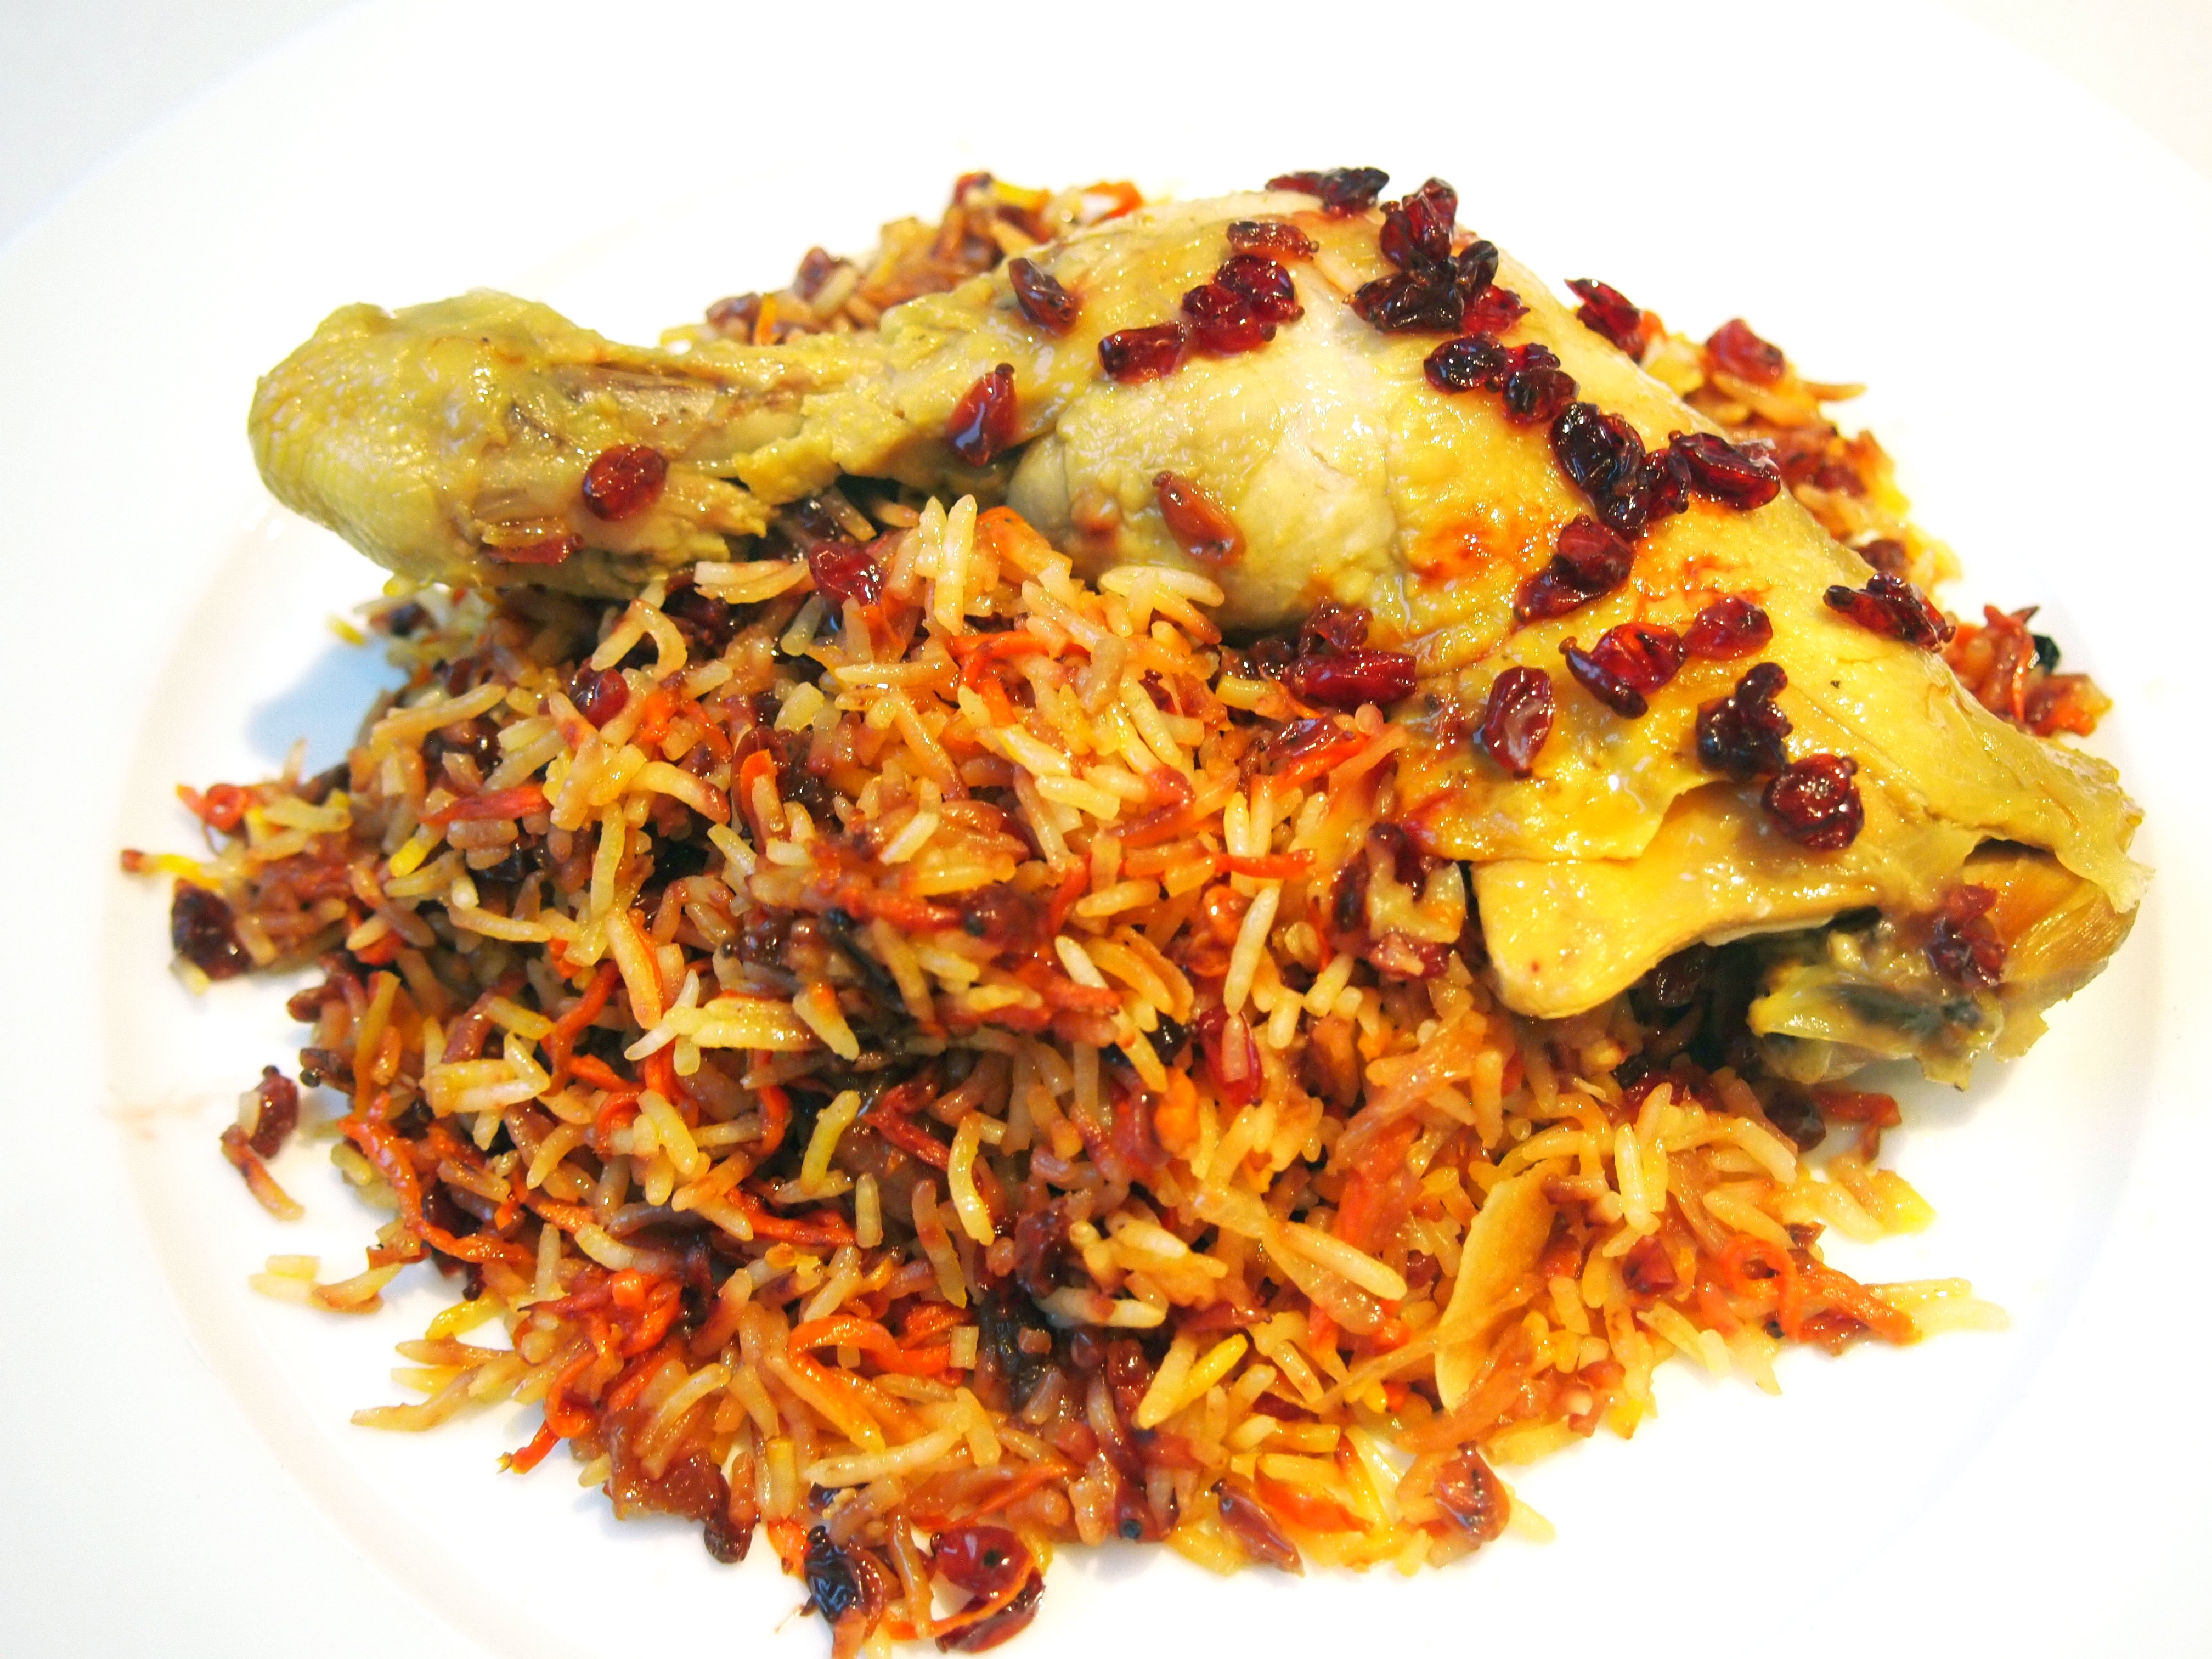
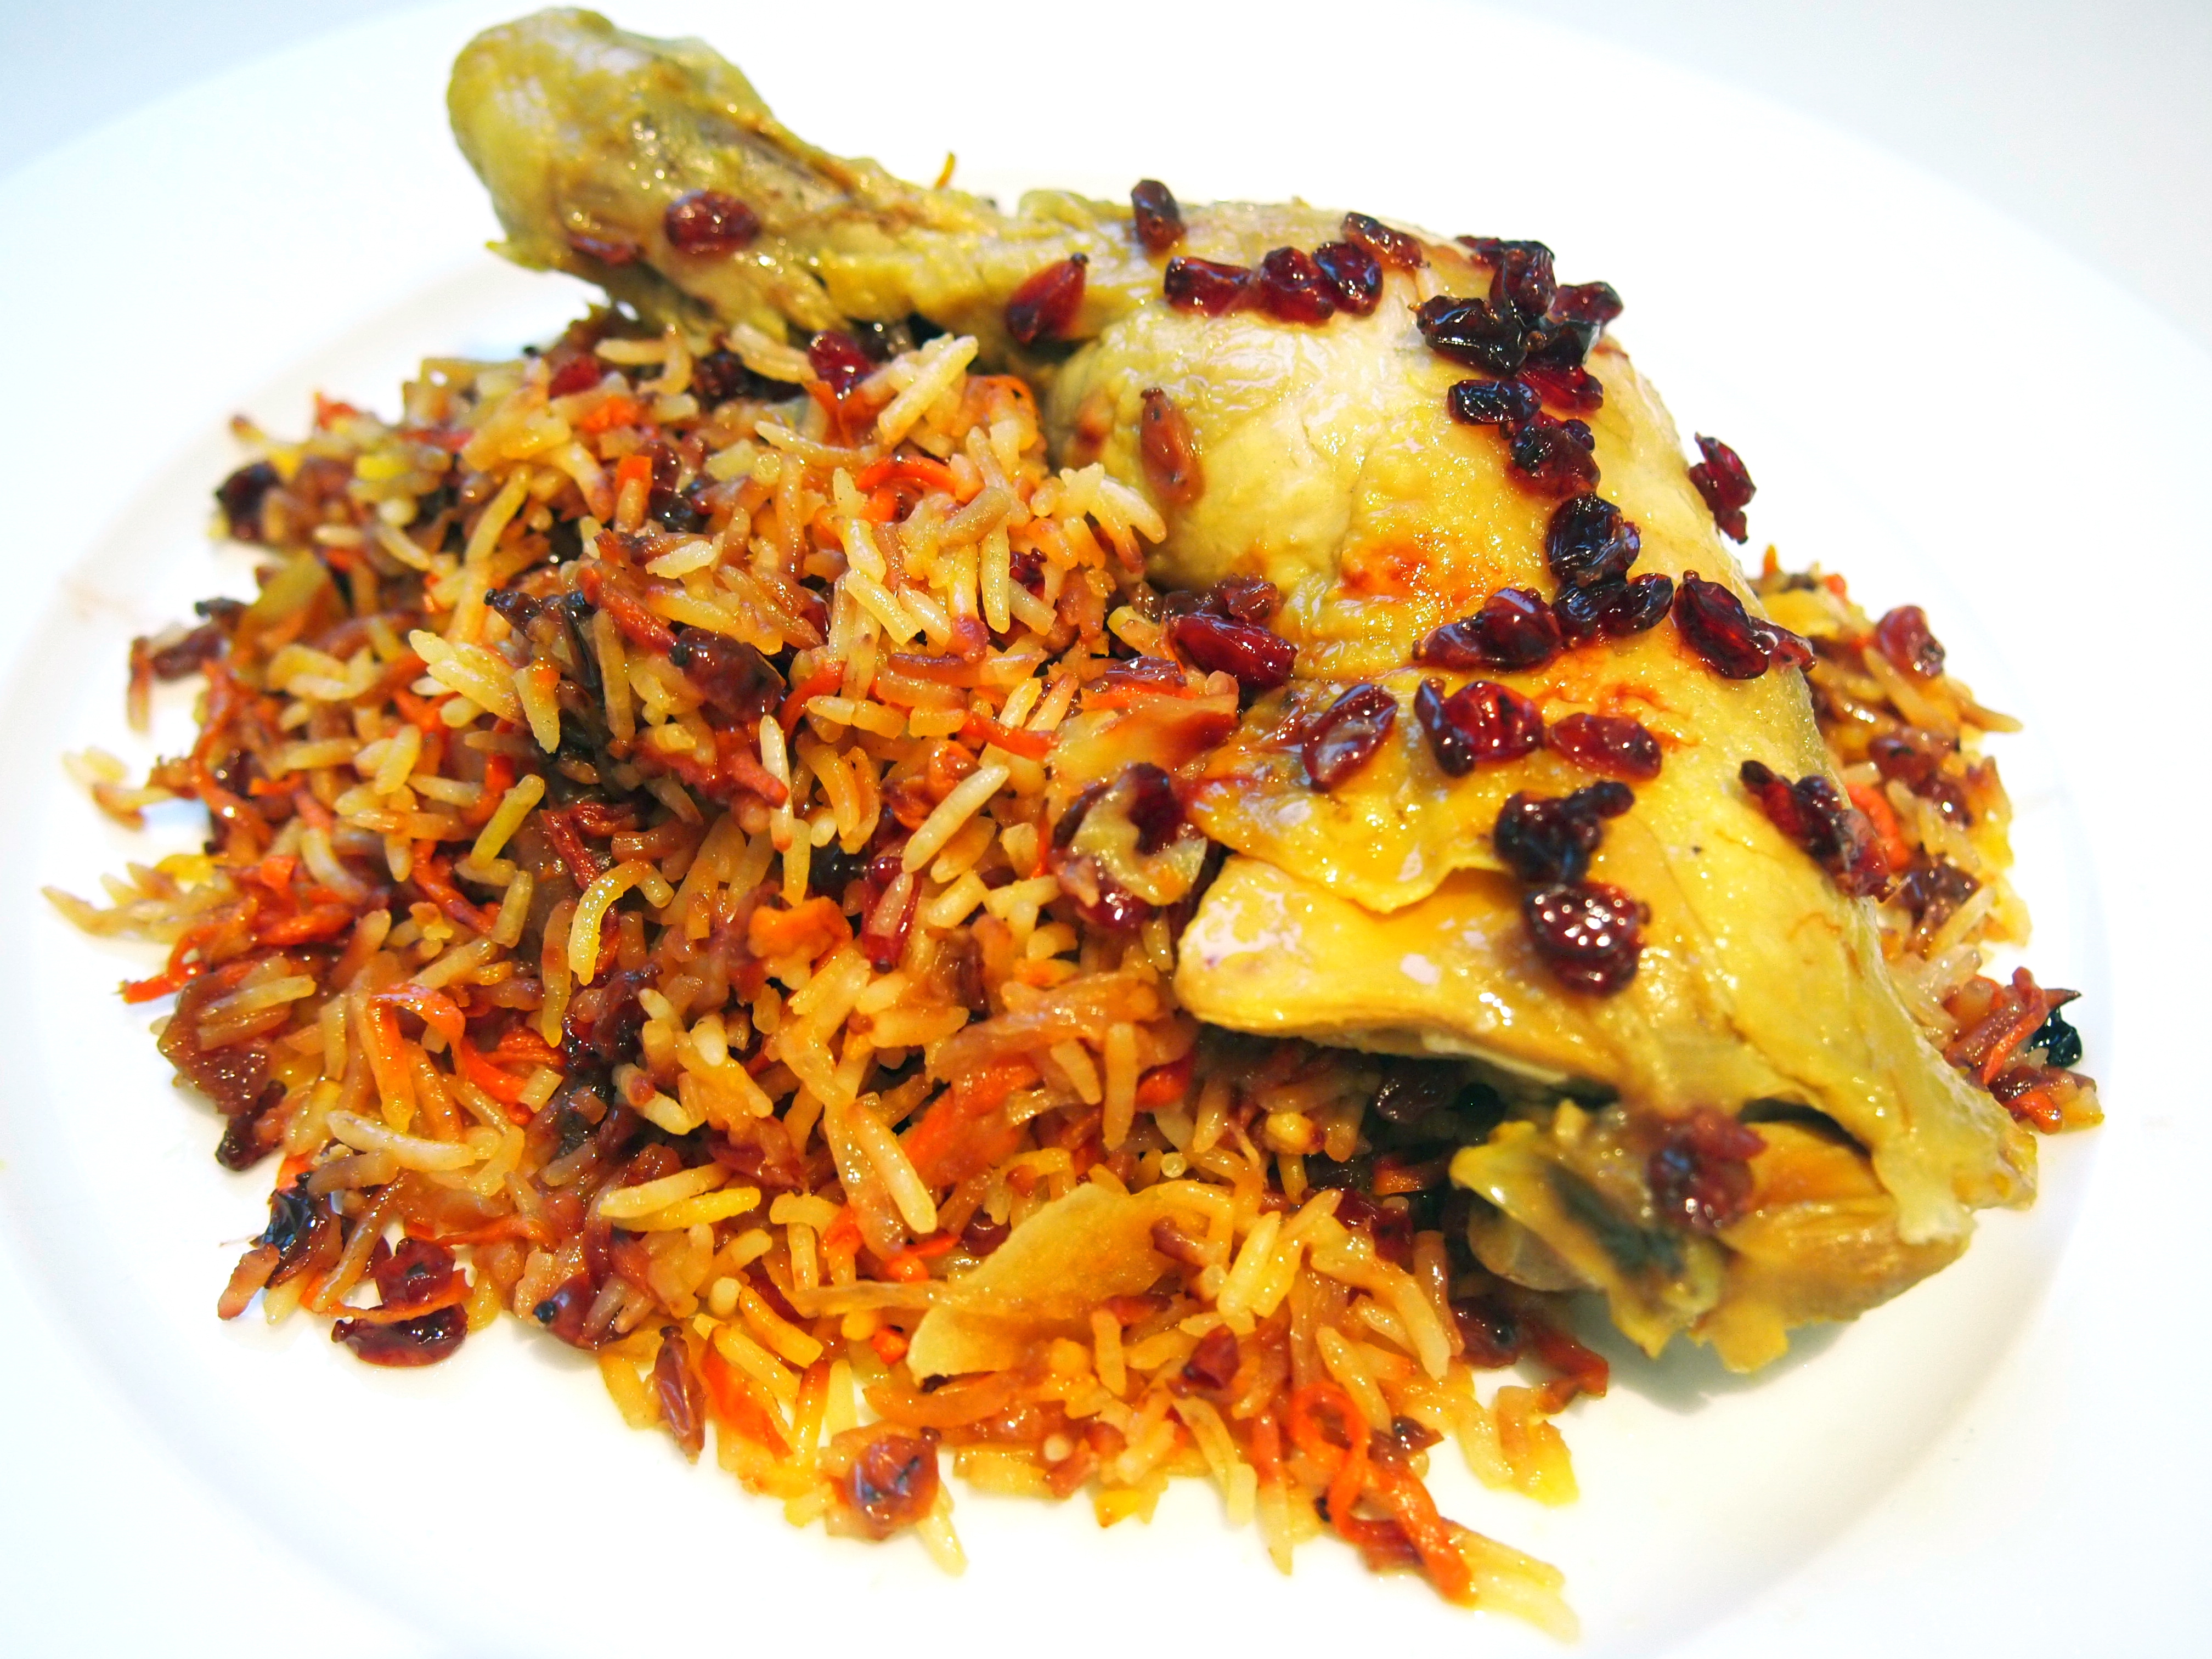
This would have to be one of my all time favourite Persian meals. It’s sometimes referred to as jewelled rice because of it’s wonderfully colourful appearance and it’s usually served as a celebratory meal on special occasions such as weddings. The ingredients used in making shirin polow can vary from household to household with a lot of recipes incorporating nuts, both in the rice and as a garnish, but I prefer the simplicity of this version, which we grew up eating – I find the crunch of nuts a little jarring for this delicate dish. My mother’s version consists only of beautifully caramelised onions (lots of them), finely shredded and caramelised carrots and barberries. Barberries (zereshk) are a small berry indigenous to Iran that have a slightly sour tang which creates a lovely contrast against the sweet onions and carrots. The barberries are lightly sautéed first with a little sugar before being incorporated into the rice where they sparkle and gleam like little jewels. Barberries, which are sold dried,  are becoming easier to find now and if you have a good Middle Eastern store near by they’re sure to stock them or you can order them online.

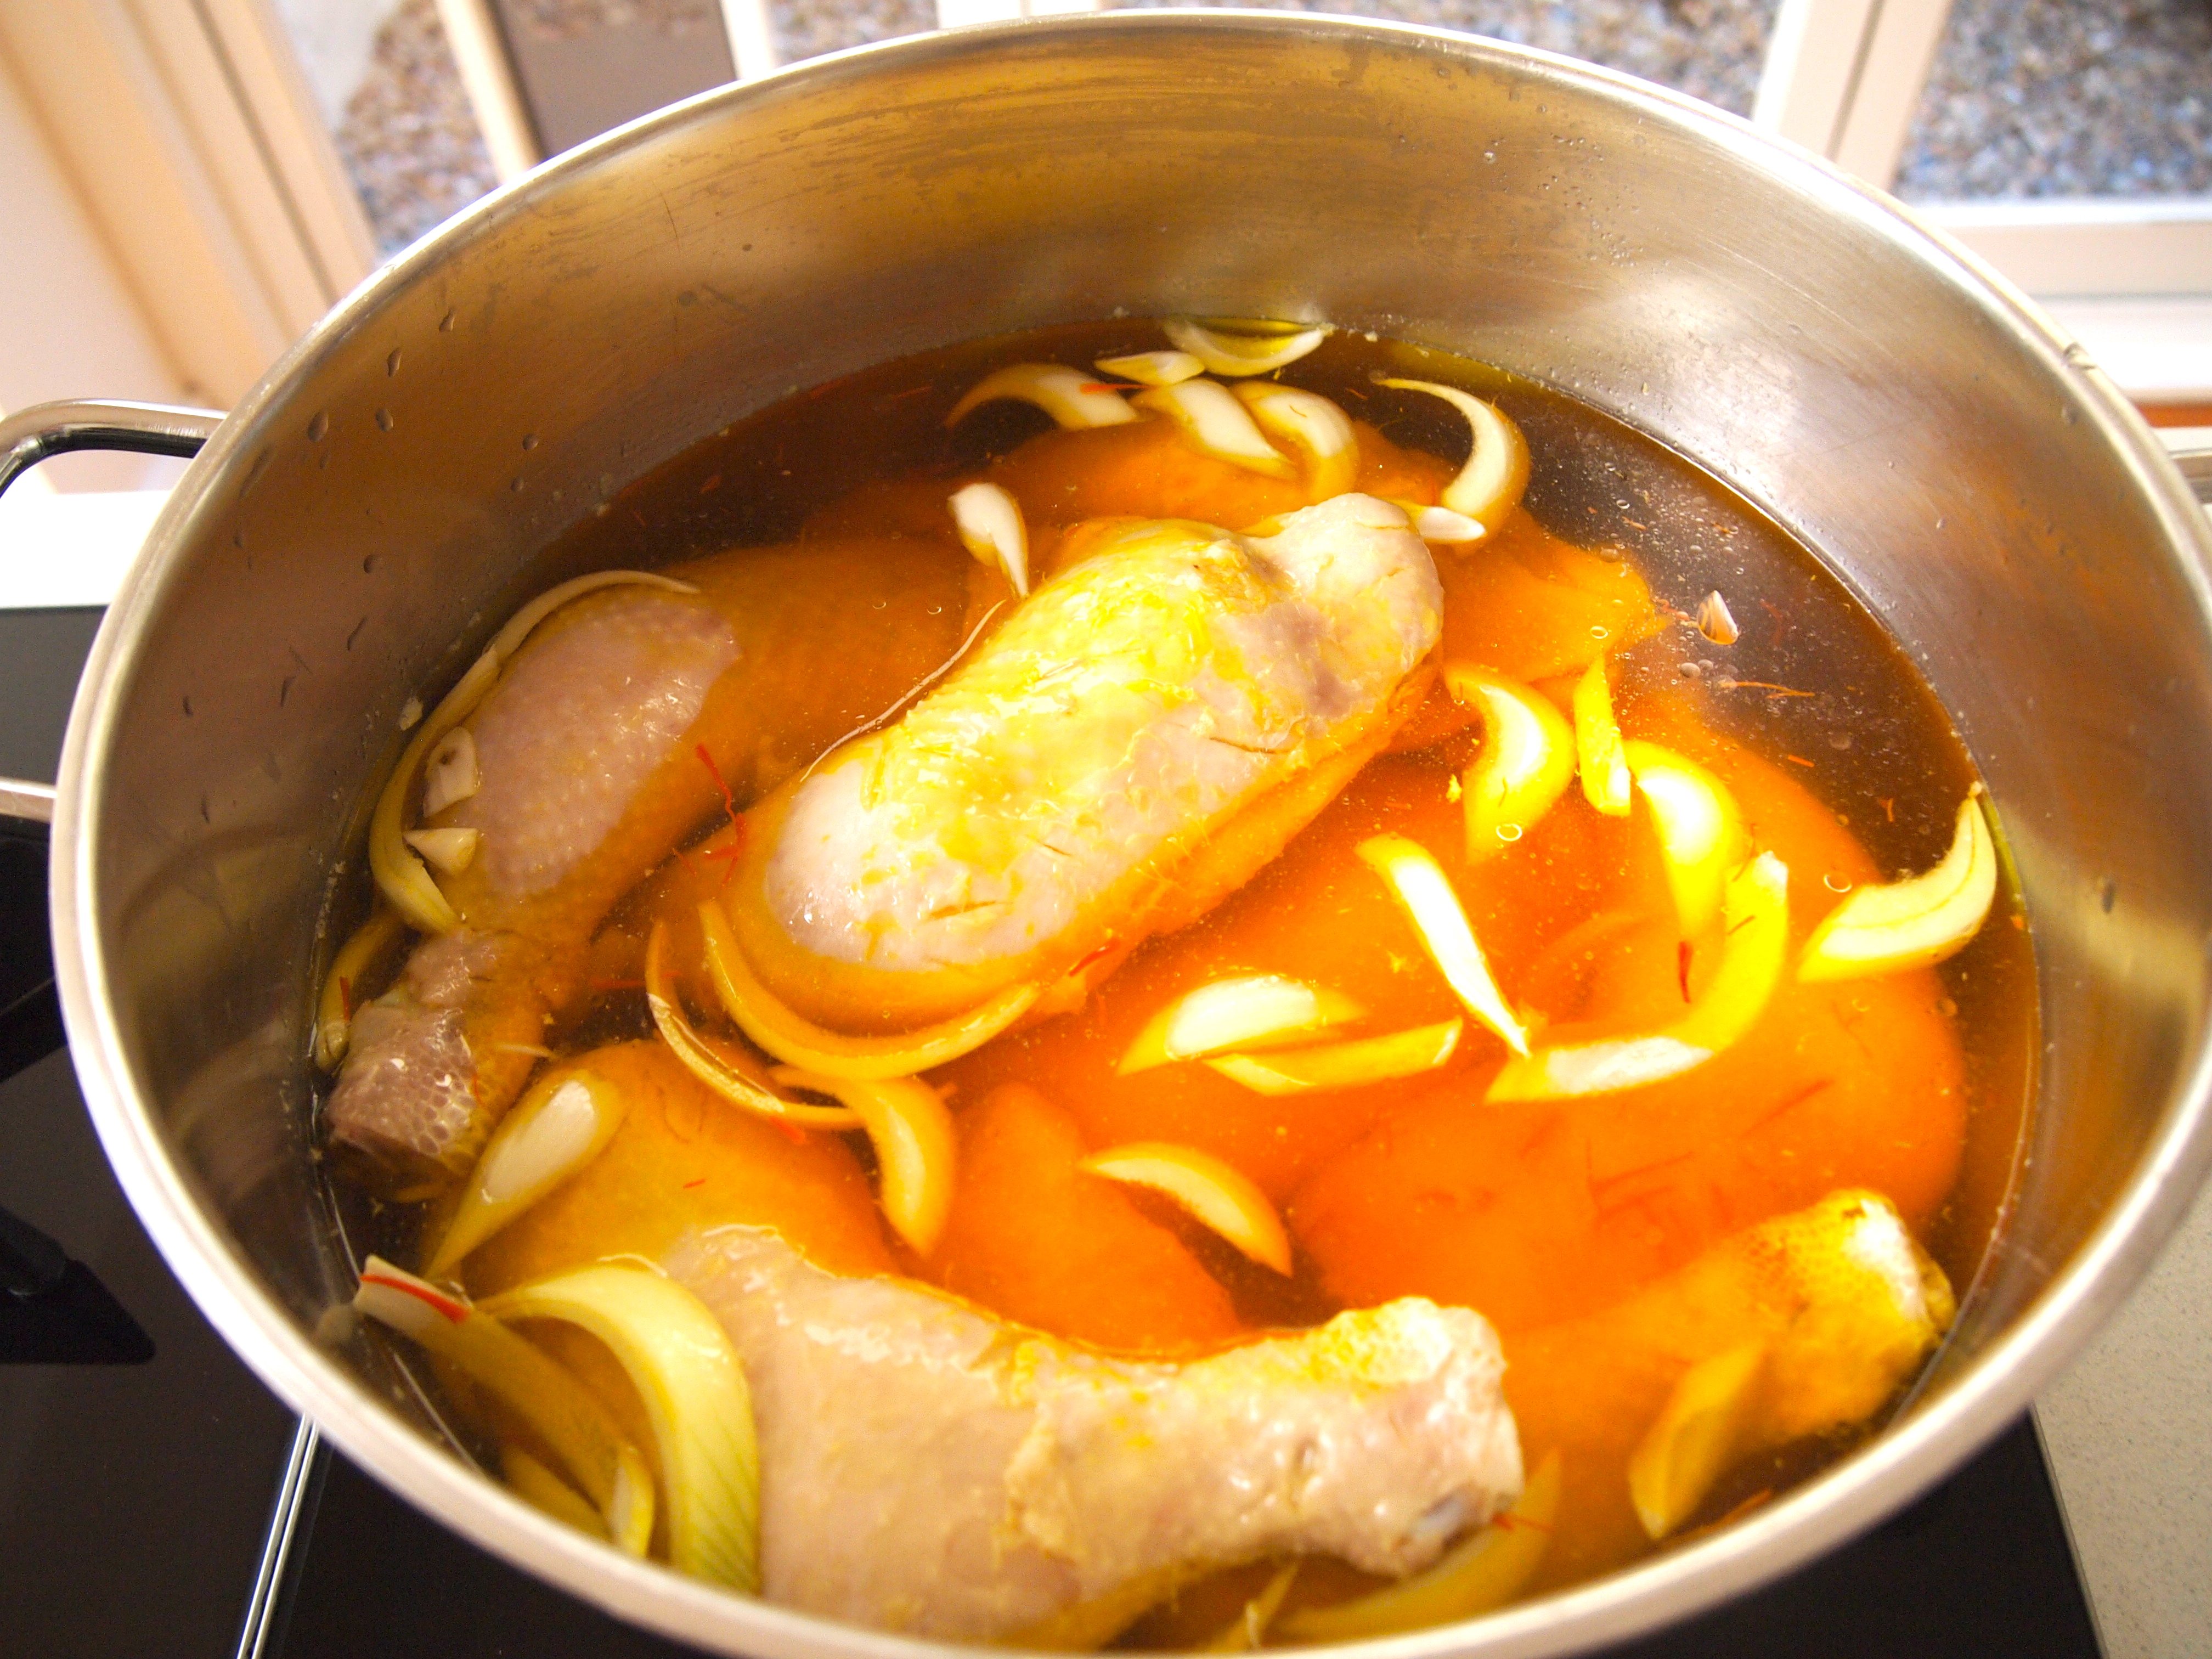
The traditional accompaniment to this polow is chicken that has been softly poached for a number of hours in saffron infused water until it’s meltingly tender. Similar in cooking style to this garlic poached chicken but with a generous pinch of saffron replacing the garlic. There are quite a few steps in this recipe and I very rarely try and do them all on the one day. Instead, I caramelise the onions and carrots a few days in advance and keep them refrigerated until the day I’m making the rice. Doing it this way makes it much less of a daunting task and whilst this still isn’t a quick meal by any means, the end results are well worth the time. If you’re a fan of Indian biryani’s then you’re going to love this dish, which I believe the biryani was originally based on, when centuries ago it was transported from Persia to India by the Moghul’s.

Ingredients – Serves 6

For the Rice
500g best quality Basmati rice
5 medium size onions, sliced into thin half moons
1kg carrots, peeled and cut in fine julienne or grated coarsely with a food processor
1 cup barberries, washed well in cold water and drained
1 tablespoon sugar
1 tablespoon butter
Ghee or neutral flavoured vegetable oil – i.e. not peanut or olive oil
1 piece of lebanese flat bread, separated/split into two halves
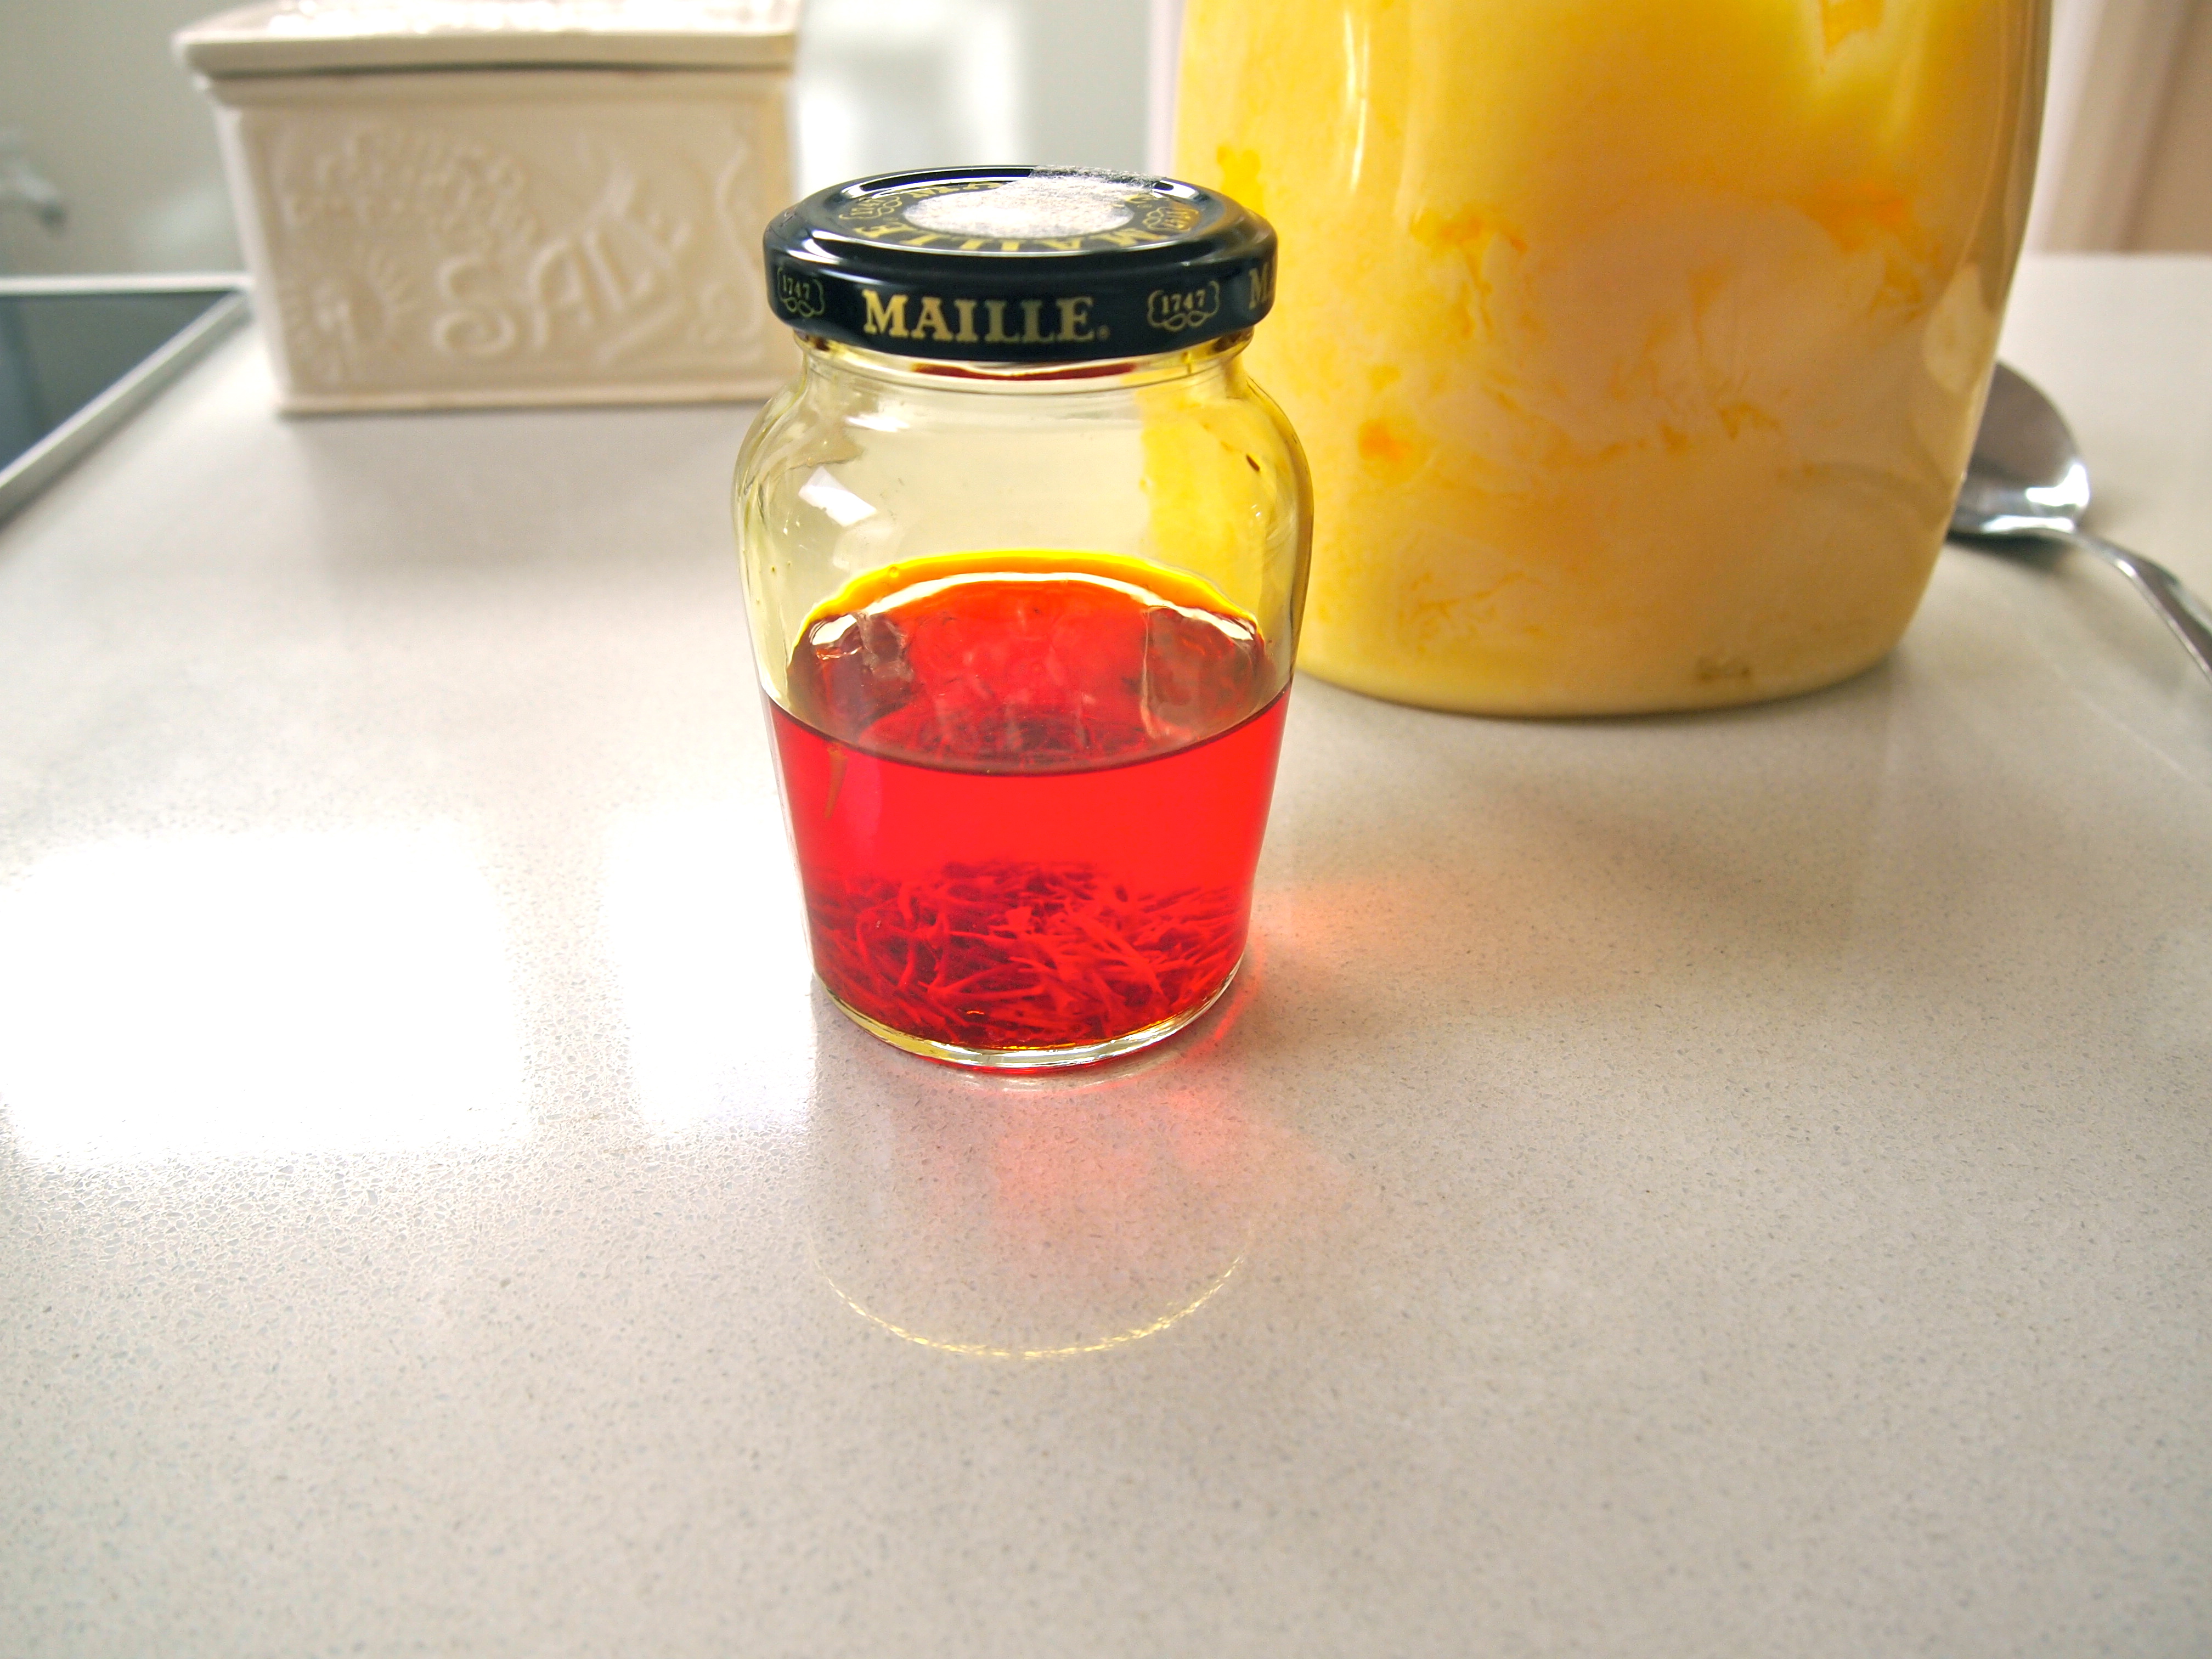
½ teaspoon saffron threads, crushed in a mortar and pestle and then soaked in 1/2 a cup of boiling water
Salt

For the Chicken
6 maryland chicken pieces (thigh and drumstick attached) with skin on
Large pinch of saffron threads, crushed in a mortar and pestle
1 onion, sliced
Salt

Method

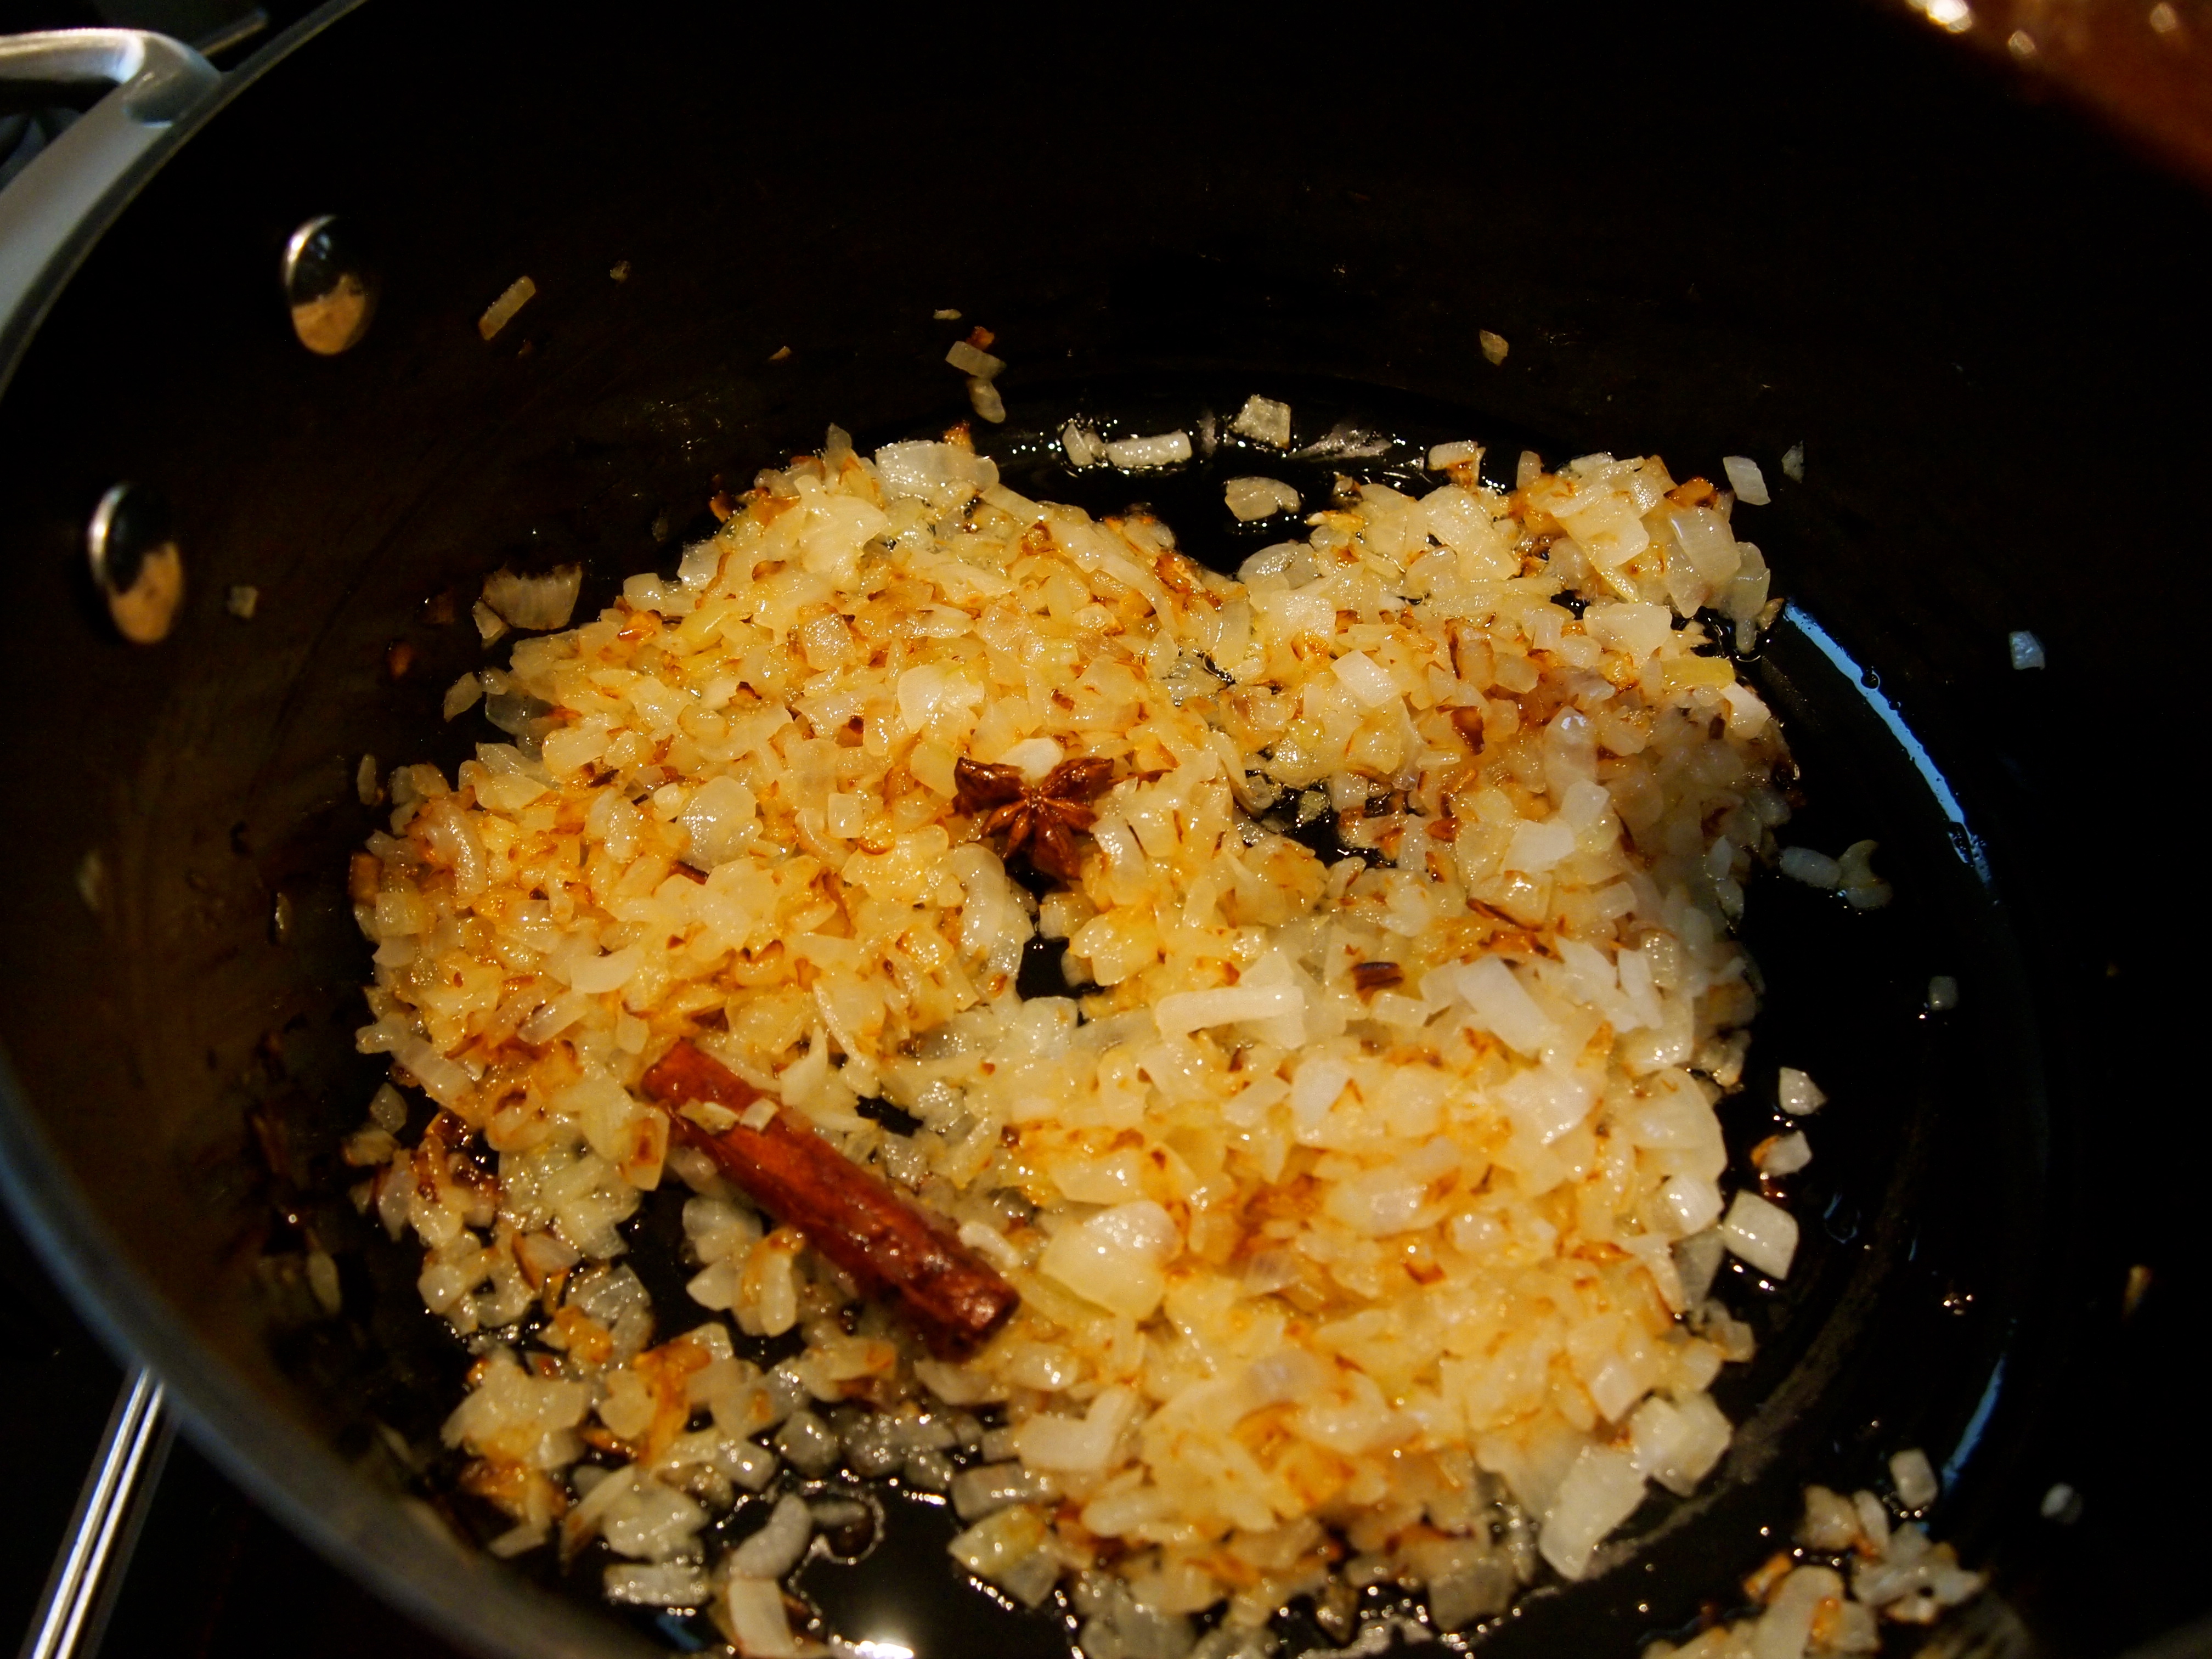
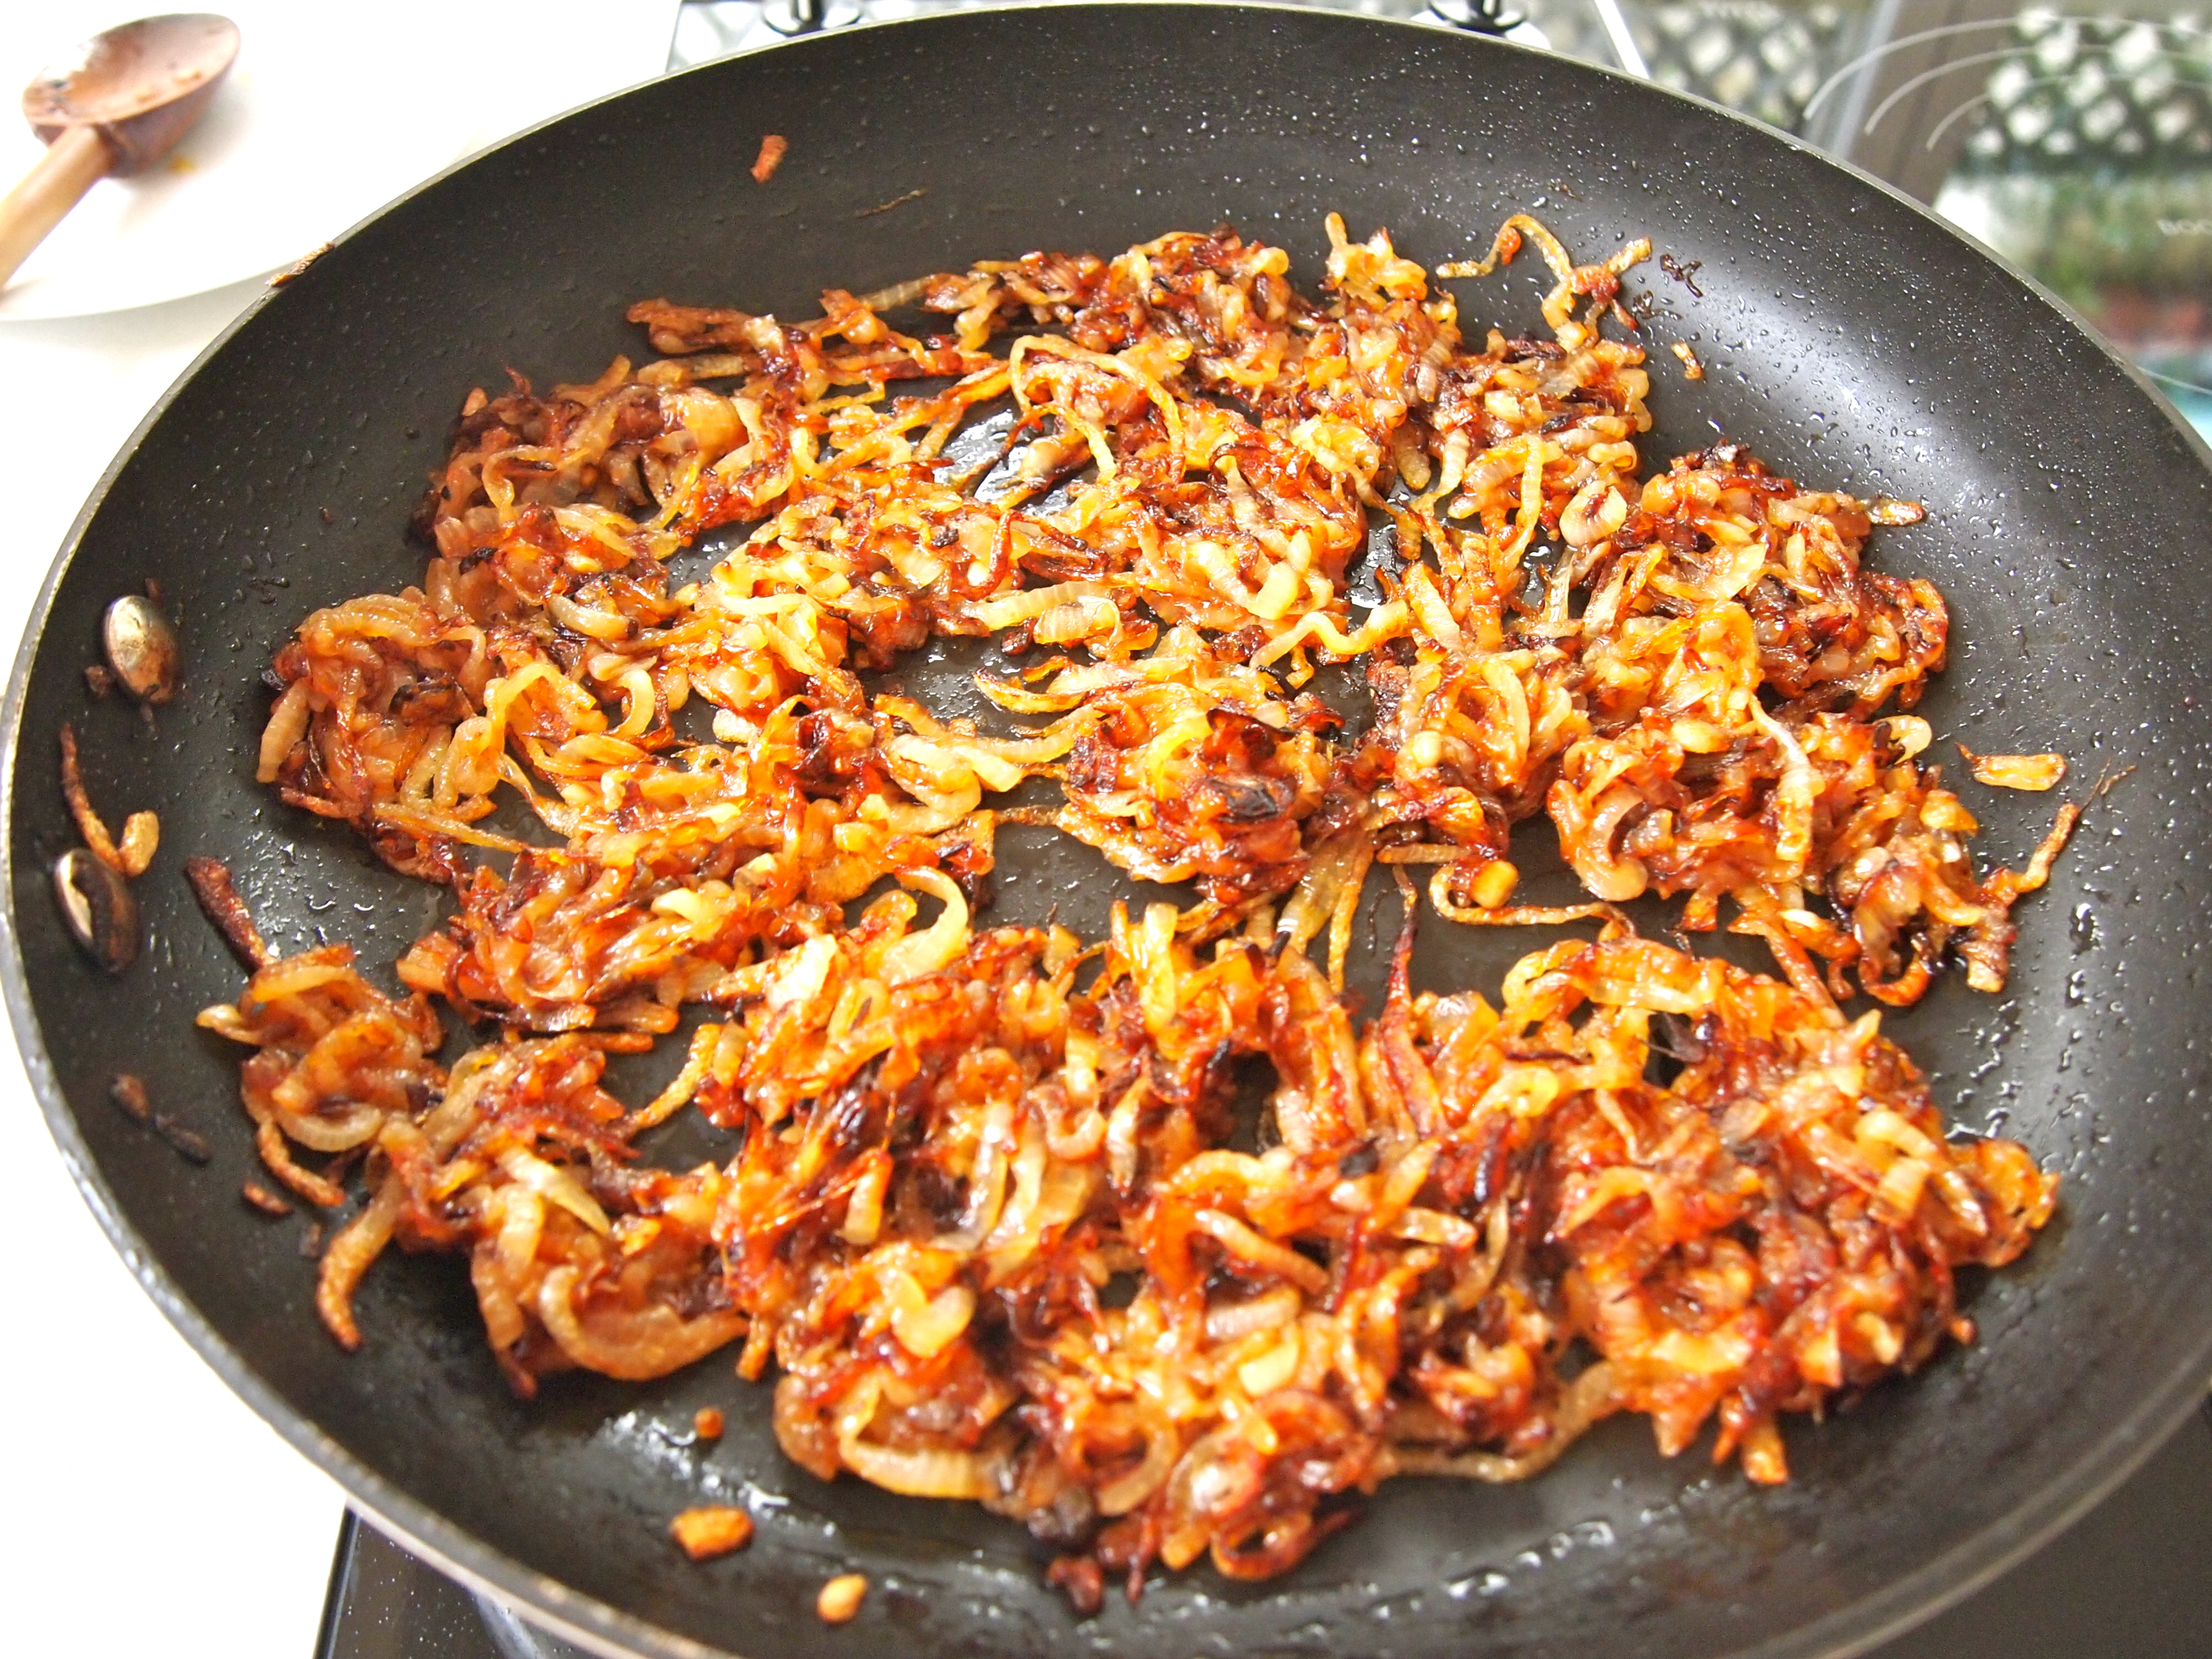
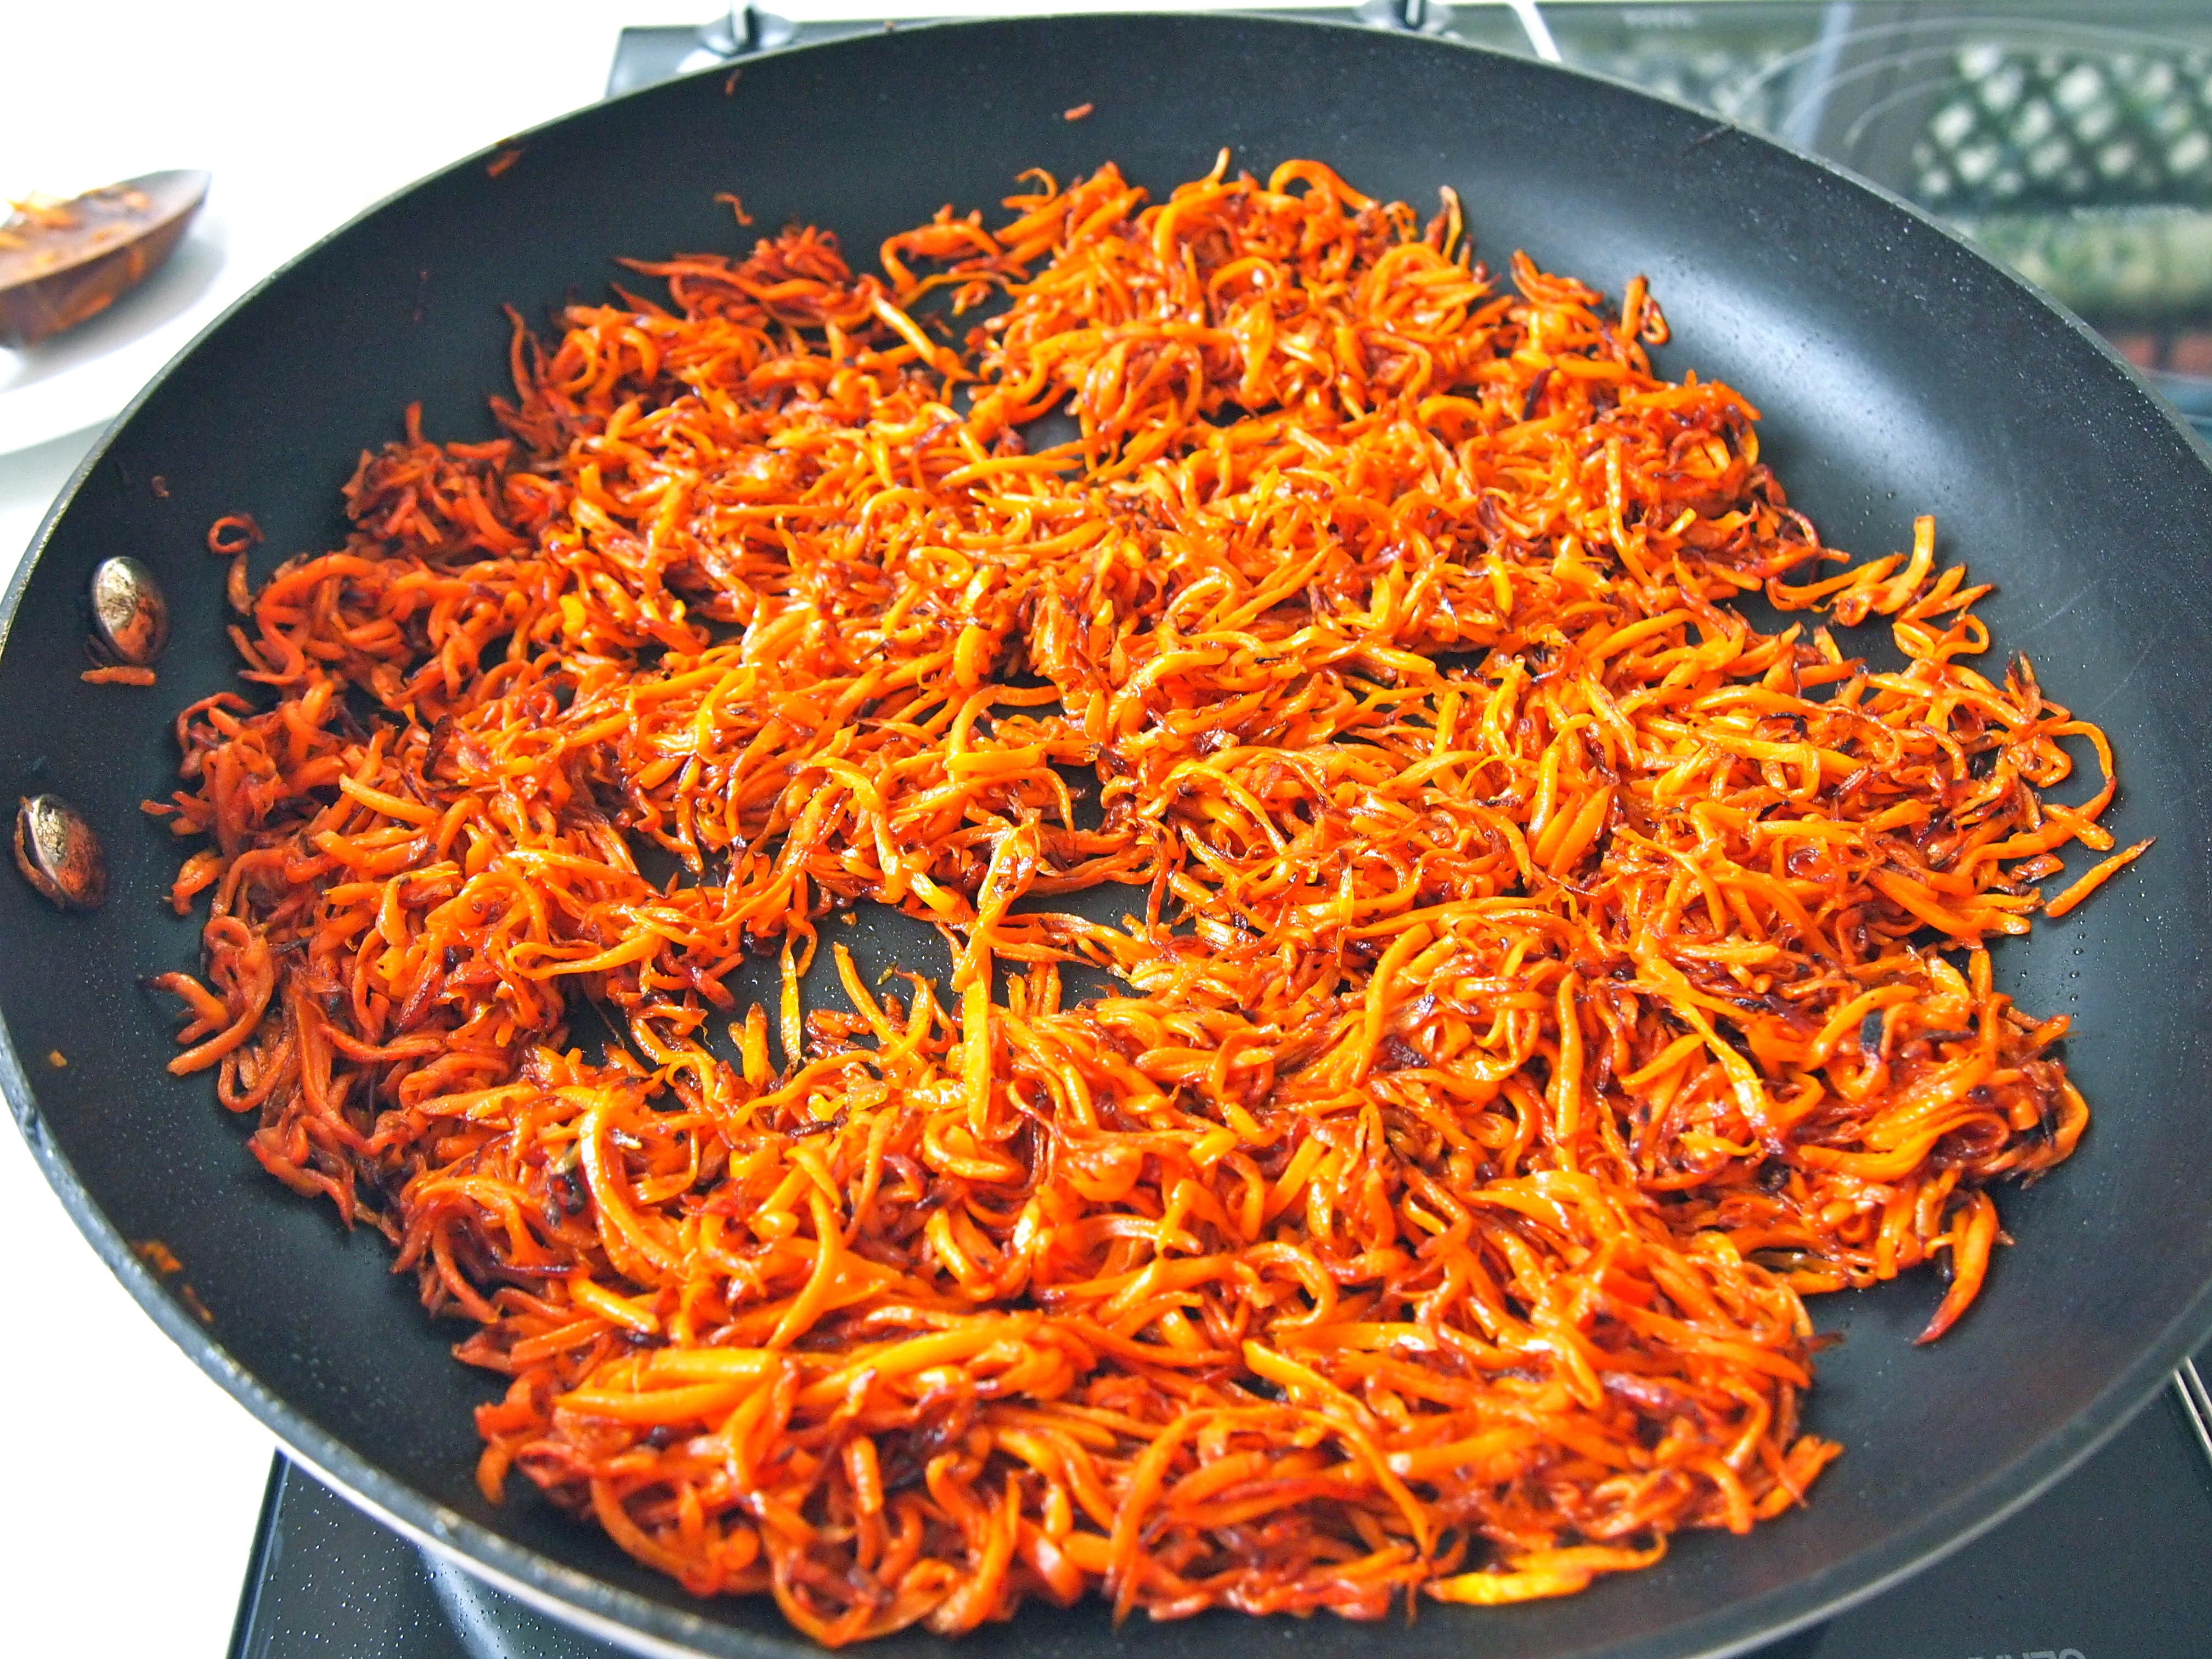
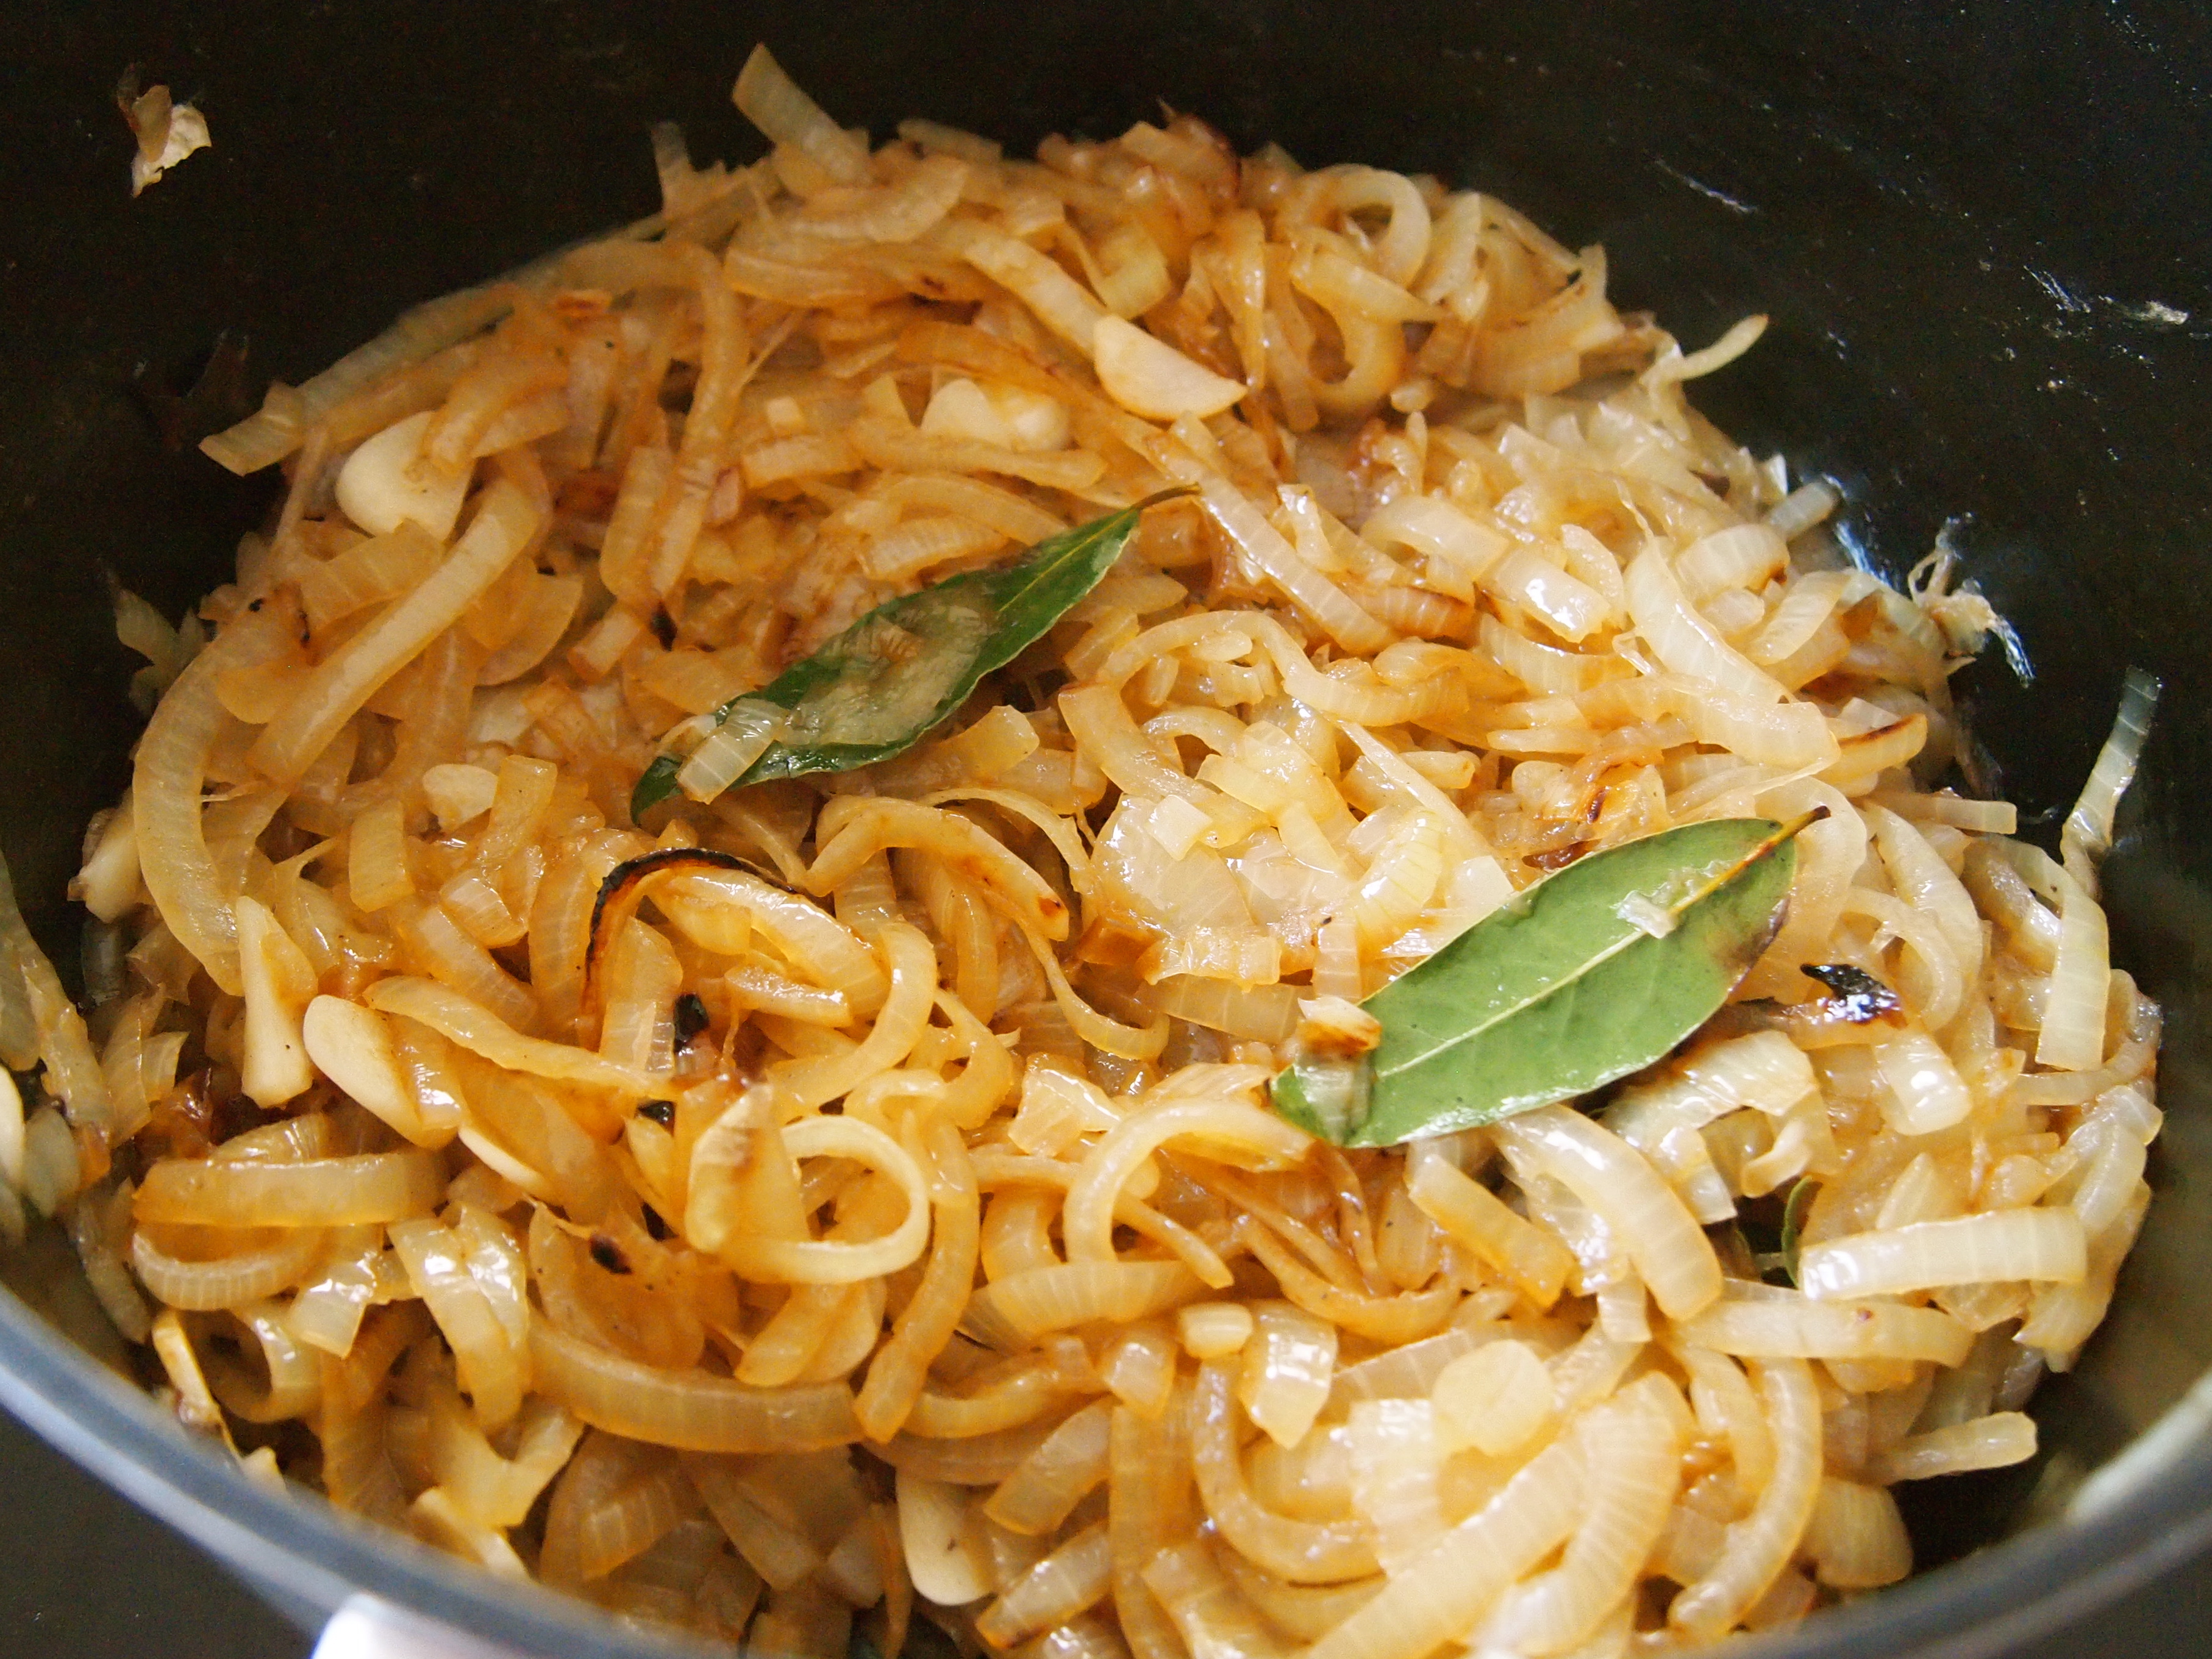
Place a generous amount of oil or ghee, at least ¼ of a cup, in a large non-stick frypan. Add the onions and fry over medium heat until they are a deep golden brown, adding more oil if the pan looks too dry. You’ll need to stand over them and stir them constantly especially towards the end when there’s a risk of them catching and burning. It should take a good 20-25 minutes to achieve the right colour. Remove and set aside. Repeat the above process using the carrots. I like to fry the carrots and onions a few days in advance and keep them refrigerated until the day I make the rice. You can also make them further in advance and freeze them.

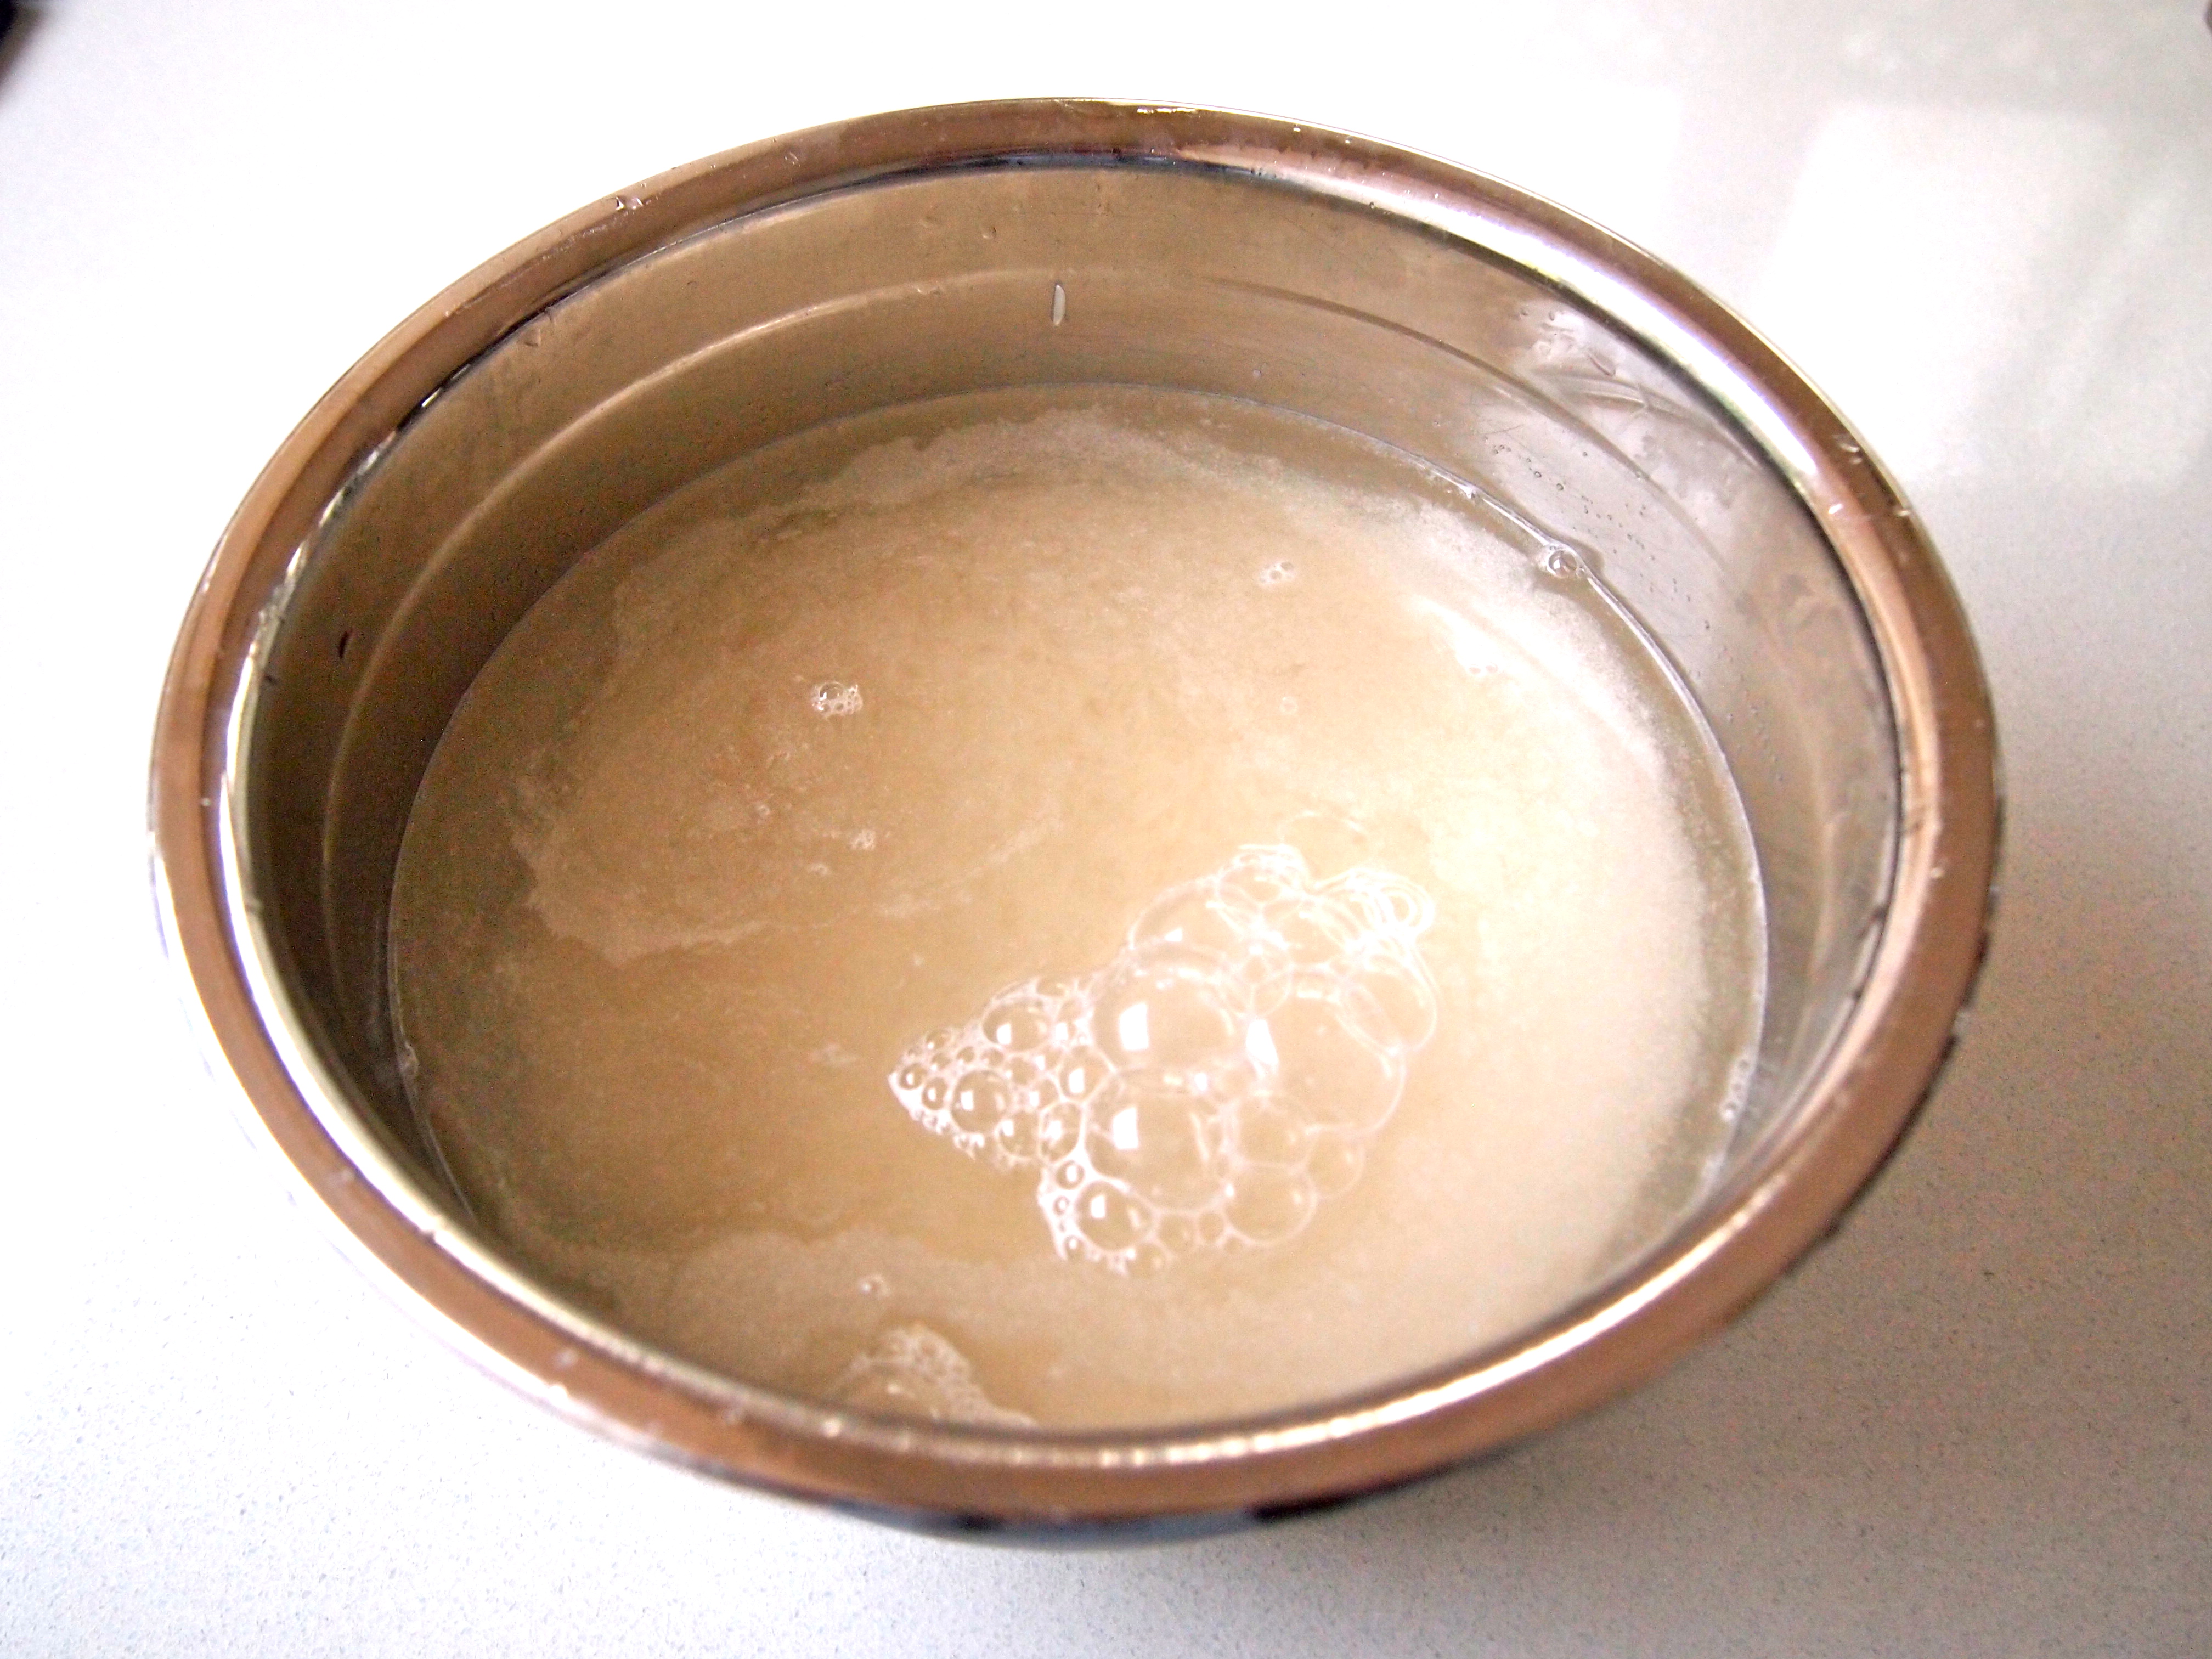
On the morning of the day you’re making the polow, place the rice in a large bowl and wash it well in several changes of cold water until the water from the rice runs clear. When the rice is clean, top it with enough cold water to come 1 inch above the rice. Add 2 heaped tablespoons of salt and mix it in. Cover and let the rice soak for about 4 hours. Whilst the rice is soaking place the butter in a small frypan and when melted add the barberries and sugar. Sauté over a low heat for a few minutes until the sugar has melted and the barberries are glistening and plump. Reserve a third of the barberries for decoration and set the remainder aside.

Shirin Polow - Caramelised Onions Shirin Polow - Caramelised Carrots

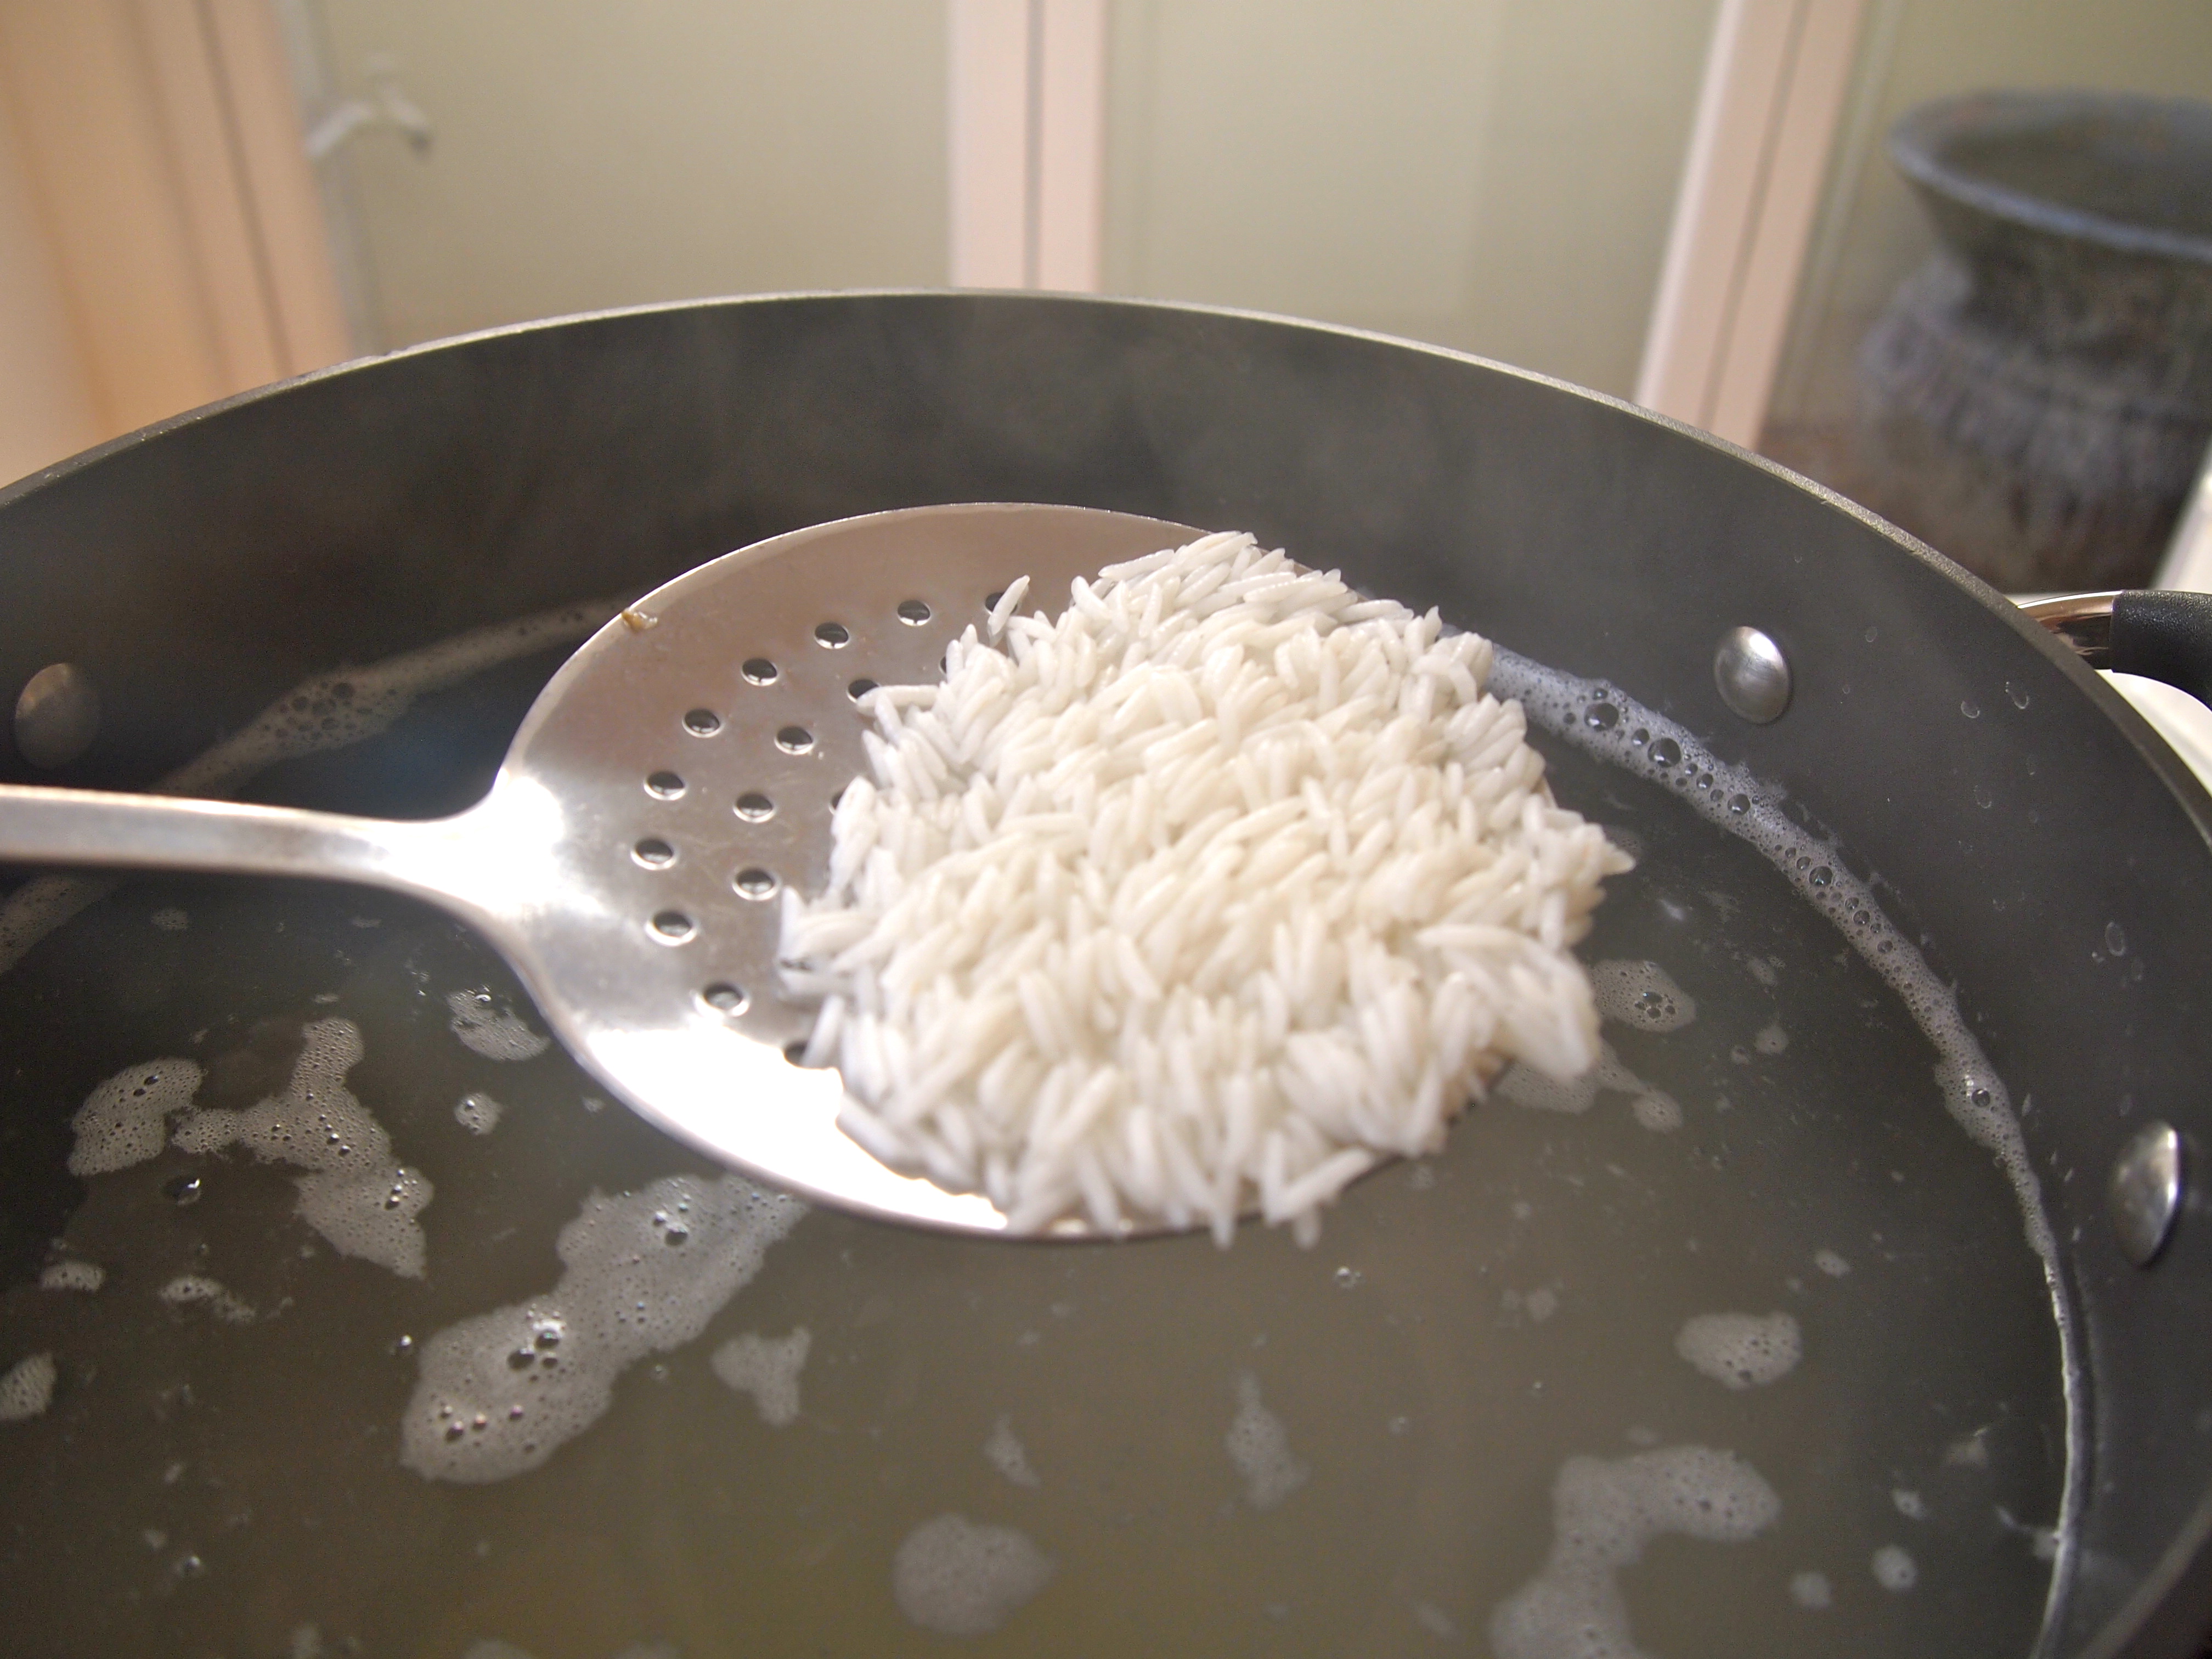
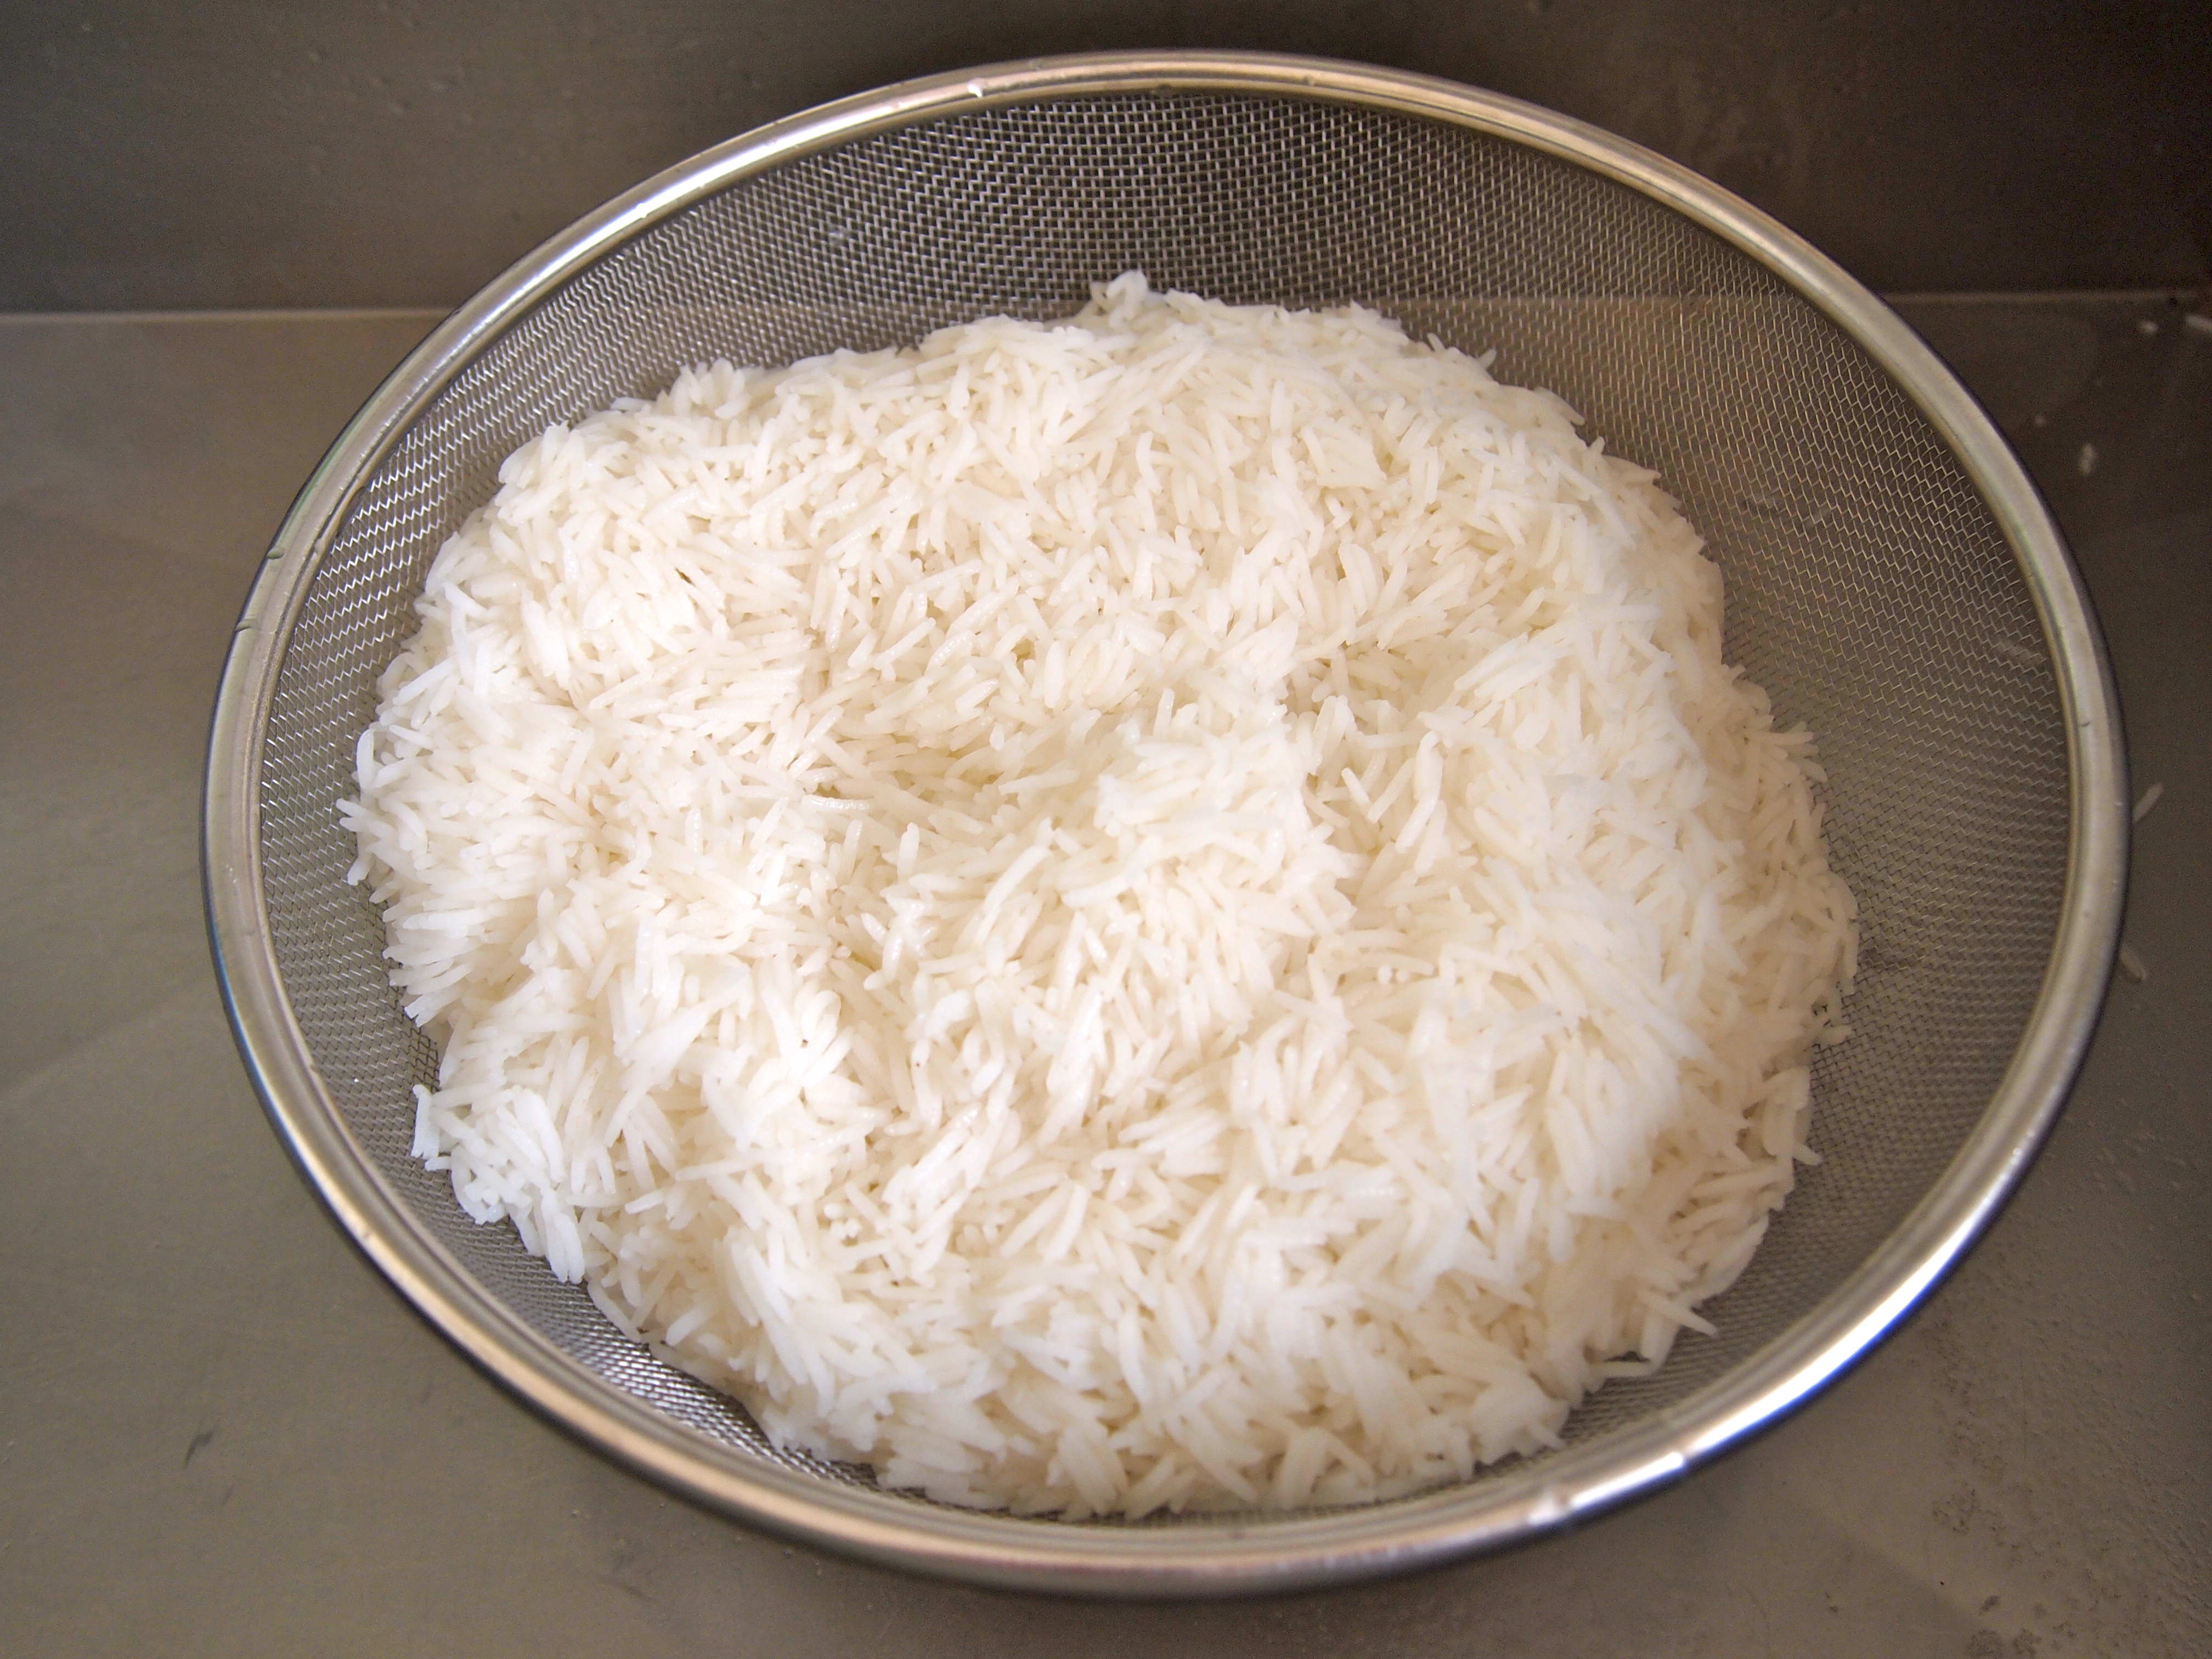
2 – 2½ hours before you’re ready to eat, bring a large pot of well salted water to the boil. Drain the rice and add it to the boiling water and gently stir it around with a large slotted spoon. Cook for about 10-12 minutes on a slow simmer or until the rice is half cooked, it should still have a white centre and slight bite. Carefully drain the rice in a large colander. At this stage the rice is very delicate so you need to handle it gently so the grains don’t break. Fill the pot the rice was cooked in with luke warm water and pour it over the rice – rinsing it twice in this way aids to get as much starch out of the rice as possible and results in very separate grains, the hallmark of well cooked Persian rice.

Shirin Polow

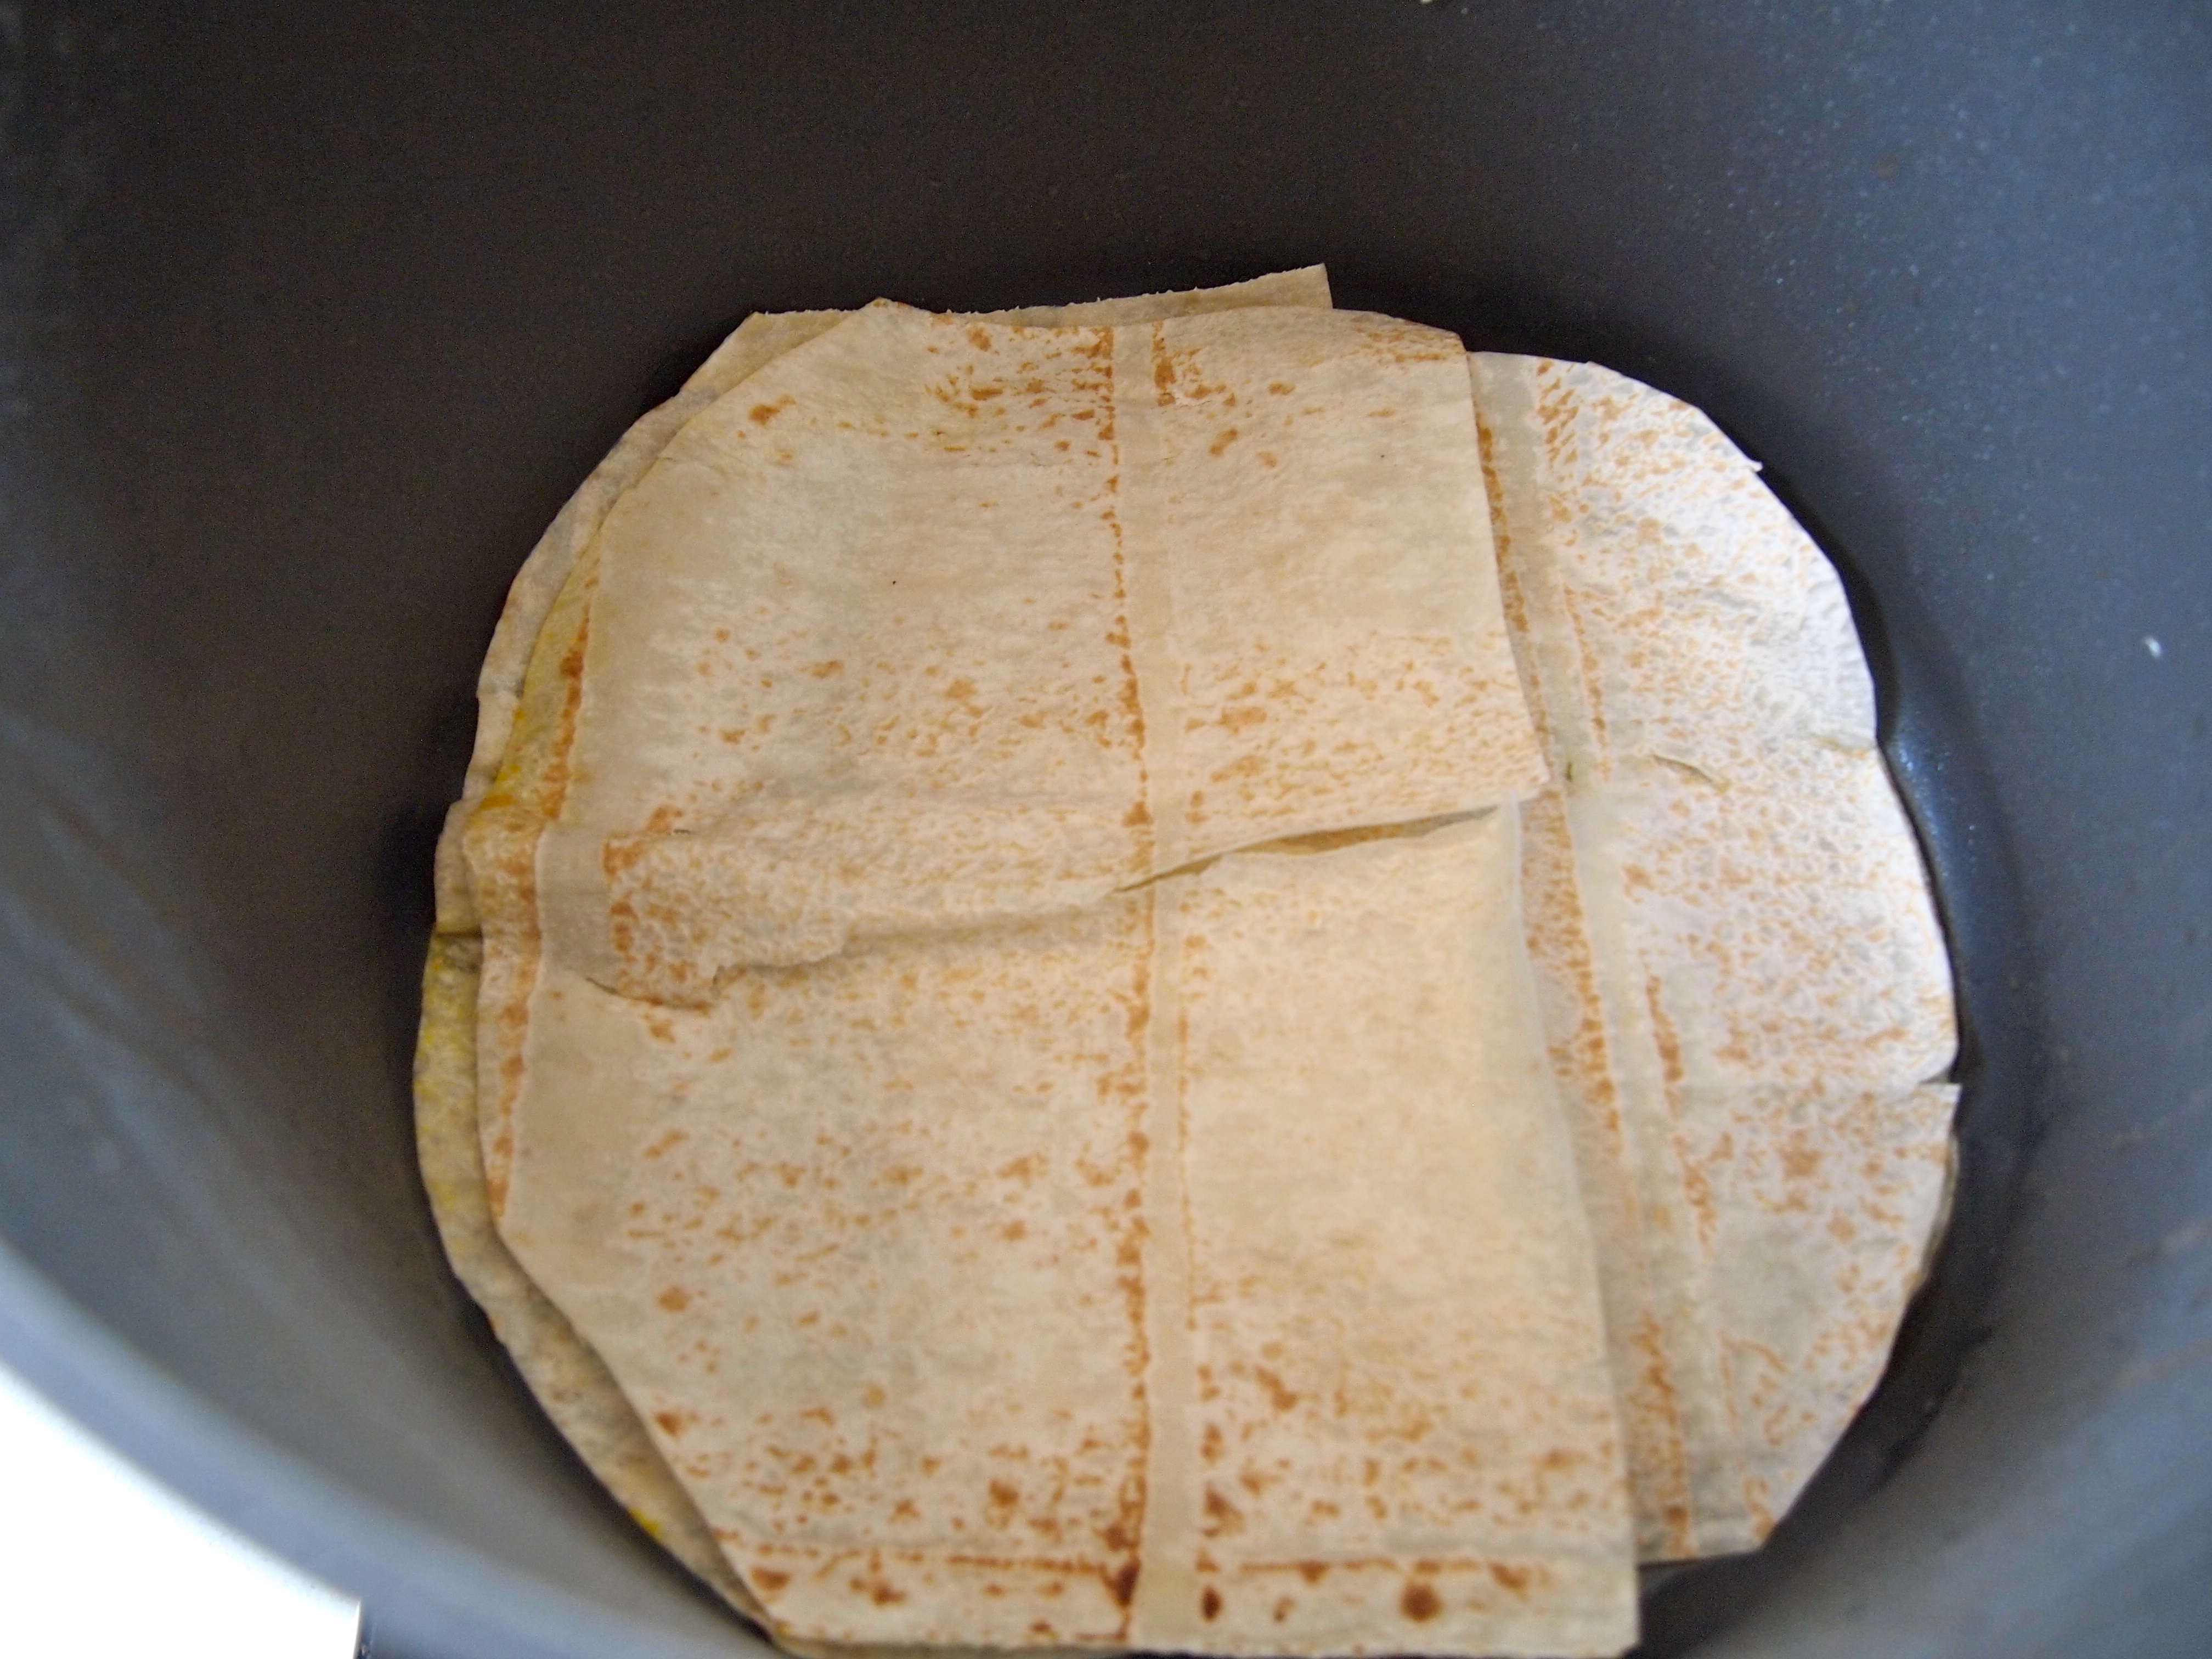
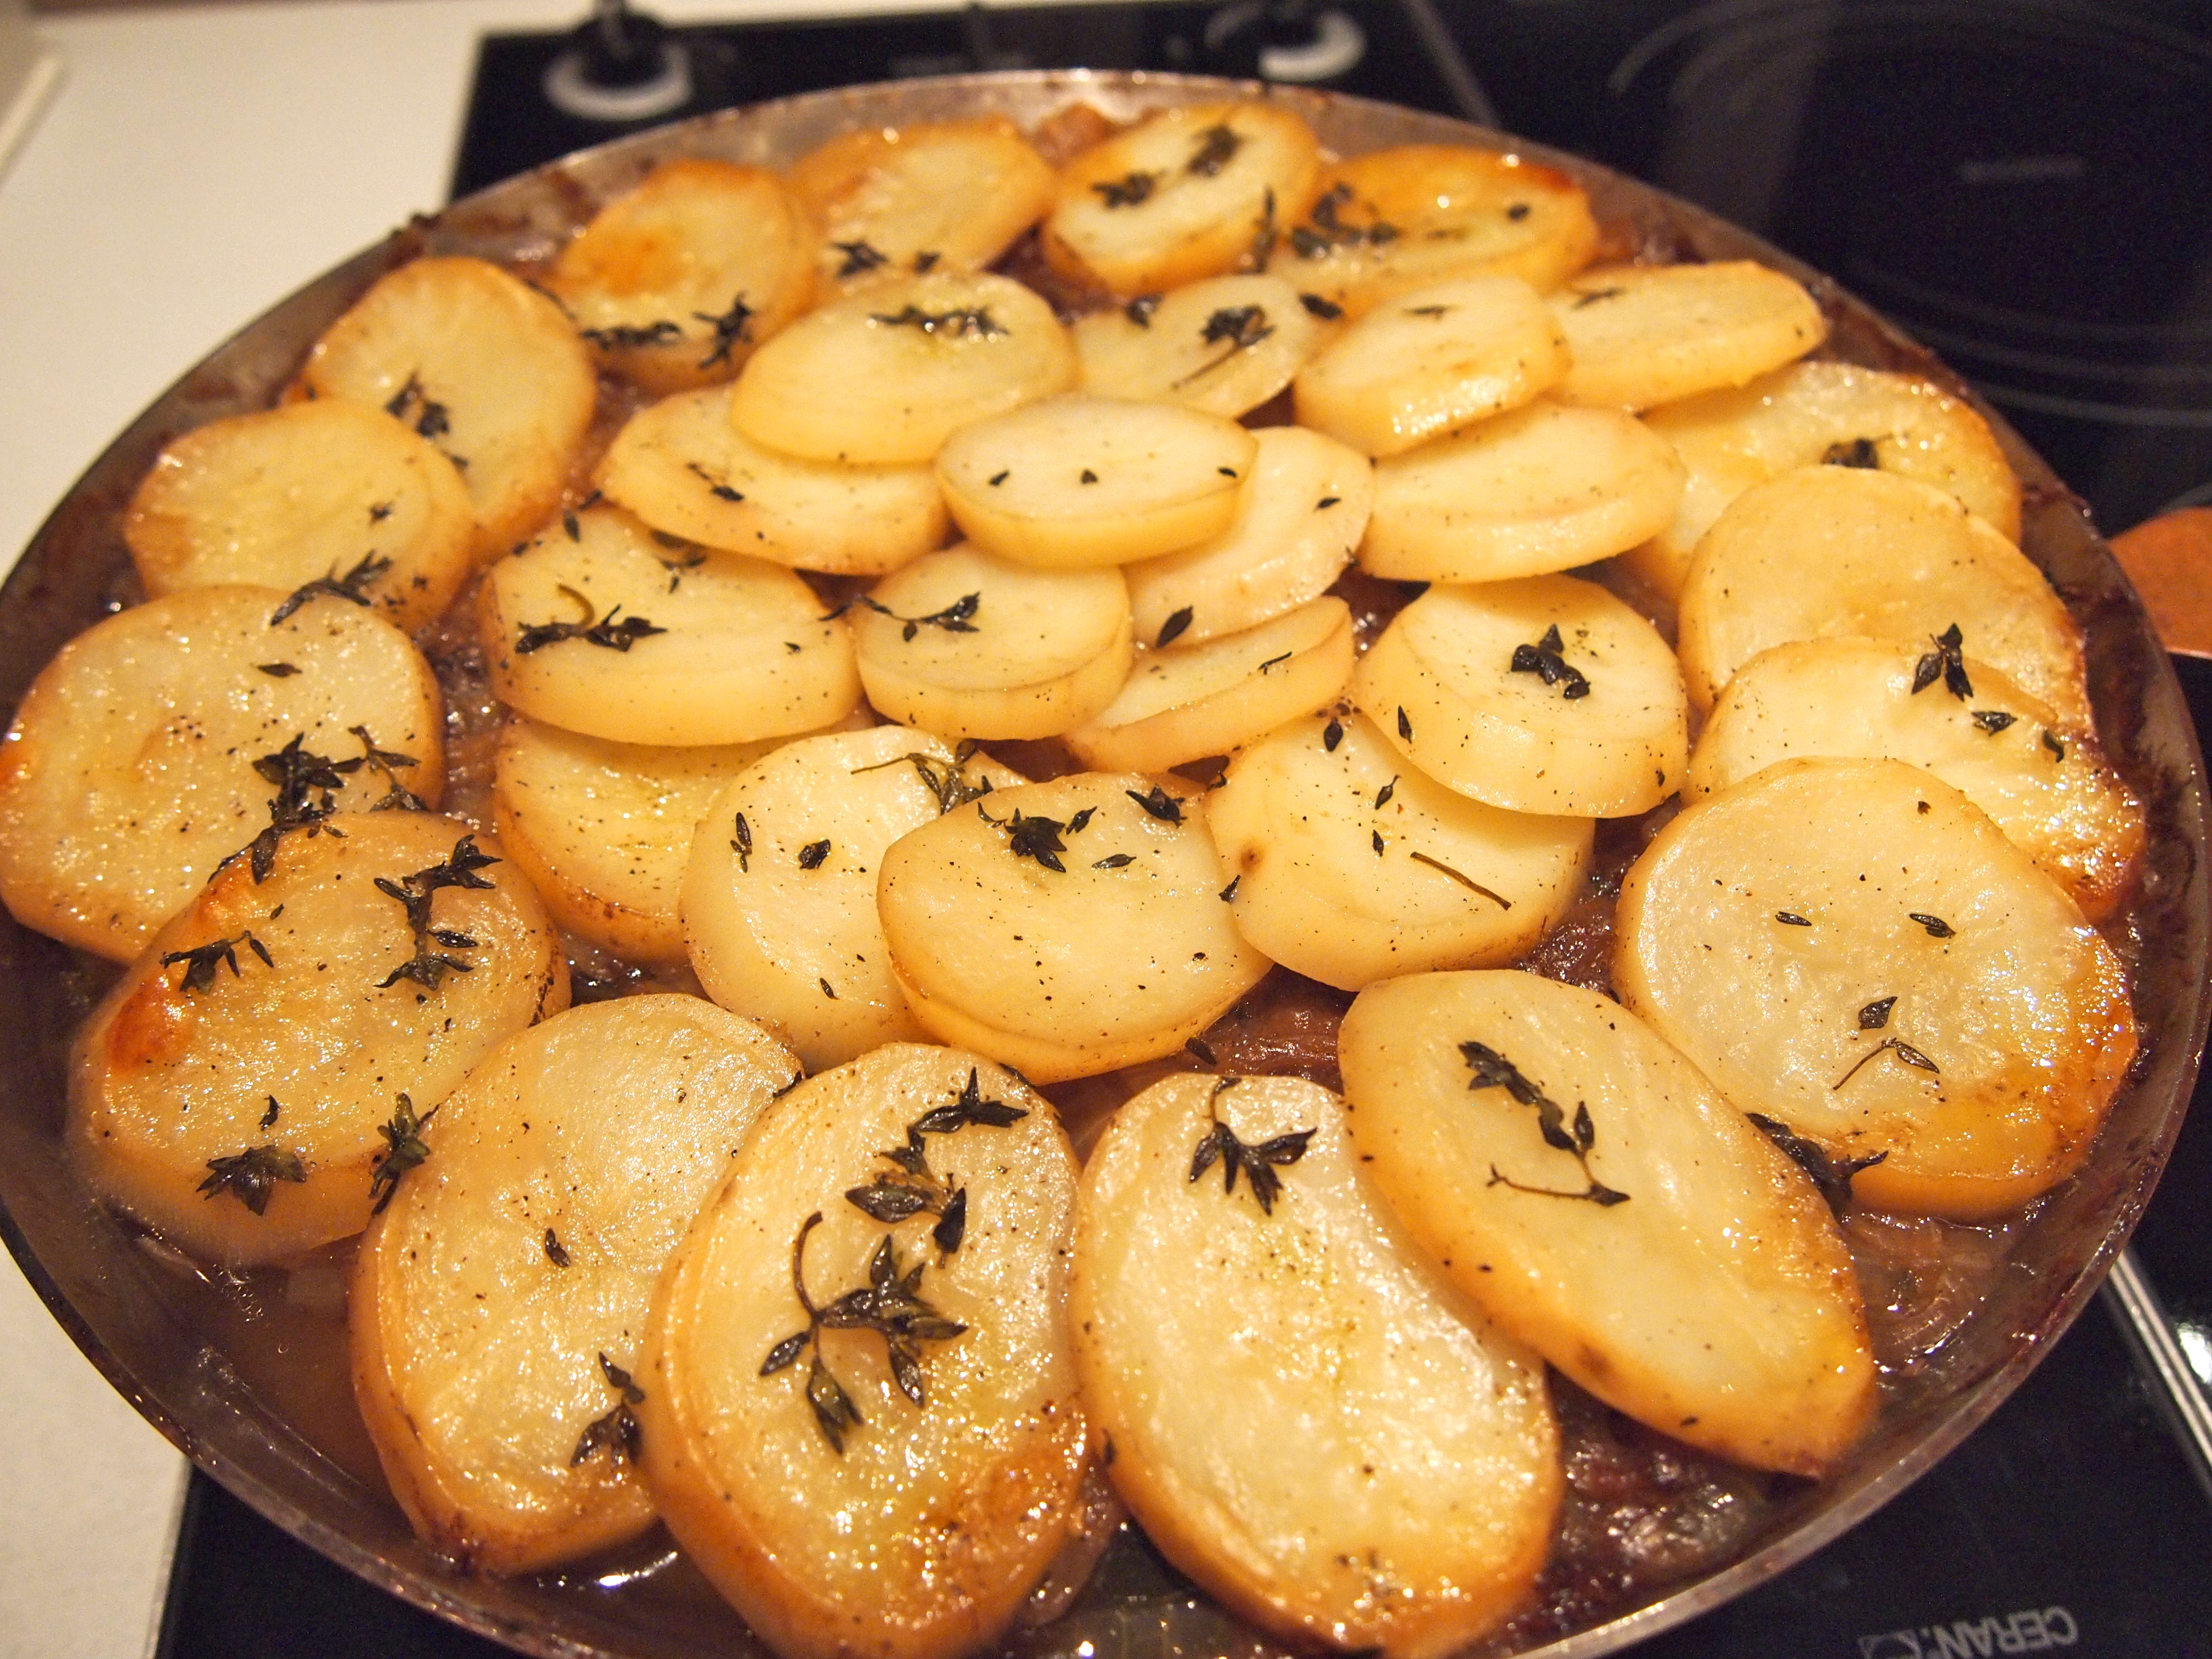
Have your caramelised onions, carrots, barberries and saffron infused water to hand. Place about ¼ cup of ghee or oil in the bottom of the pot – I use the same pot that the rice was boiled in and it’s a very good idea, in fact almost essential, to use a non-stick pot. Place it over medium heat and when the oil is starting to heat up add a couple of tablespoons of the saffron infused water. Then place the split halves of the Lebanese bread on the bottom of the pan to cover the base – depending on the size of your pot you may only need to use one of the split halves. Turn the heat to very low whilst you proceed with the preparation of the rice. I find it easiest to use a large bowl and place a third each of the rice, onions, carrots, barberries and a splash of saffron water and very gently stir them around with my hands or a large metal spoon until they are well combined. Again you need to be very gentle at this point. Place this rice mixture on top of the bread in the pot and repeat the above step two more times until all the rice is used up. Carefully bring the rice in the pot to a peak and using the end of a wooden spoon or a chopstick poke some holes in the rice to almost the bottom of the pan. This allows for steam to escape. If there is any remaining saffron water sprinkle it over the rice. Turn the heat up to medium and place on the lid. When the steam starts to build up in the pot take a clean teacloth and cover the lid with it and place it on the pot. This allows minimum steam to escape. Turn the heat to it lowest setting and let the rice cook, undisturbed, for 1½ hours. I like to occasionally move the pot around to ensure that the bottom crust (called tahdig and in this case made with bread instead of the usual potato slices) gets evenly browned. If you feel that the heat of your stove, even on a low setting, is too fierce then it’s best to use a simmer mat. After 1½ hours remove the lid and gently, using a large metal slotted spatula, scatter the rice onto a large platter being careful to not mush the rice up. Place the poached chicken pieces (recipe below) around the platter and serve sprinkled with the reserved barberries and the chicken juices. Alternatively you can serve portions on individual plates. The bread tahdig should be nice and golden brown, remove it from the pan and cut it into large pieces and serve on a separate plate. If the tahdig is still a little soft turn the heat on under then pan and let it cook on it’s own for 5 minutes or so to make it crunchy.

Saffron Poached Chicken
Trim any excess fat from the chicken and rinse well. Place the chicken in a large pan and add enough cold water to cover the chicken. It’s best to use a pan that has a large surface area rather than a narrow taller pot. Add the onion slices and place over medium heat. Slowly bring to the boil, skimming any scum that rises to the surface. When all the skum has been collected, lower the heat to a simmer and add 2 teaspoons of salt and the saffron.

Saffron Poached Chicken for Shirin Polow

Place the lid slightly ajar on the pot and adjust your heat so as the water in the pan in gently bubbling away. Cook until all but 1 cup of the water has evaporated. This should take abut 4 hours and the juice left in the pan will be very concentrated and flavourful. When the rice has been served place the chicken on top and pour over the reserved juices and barberries.
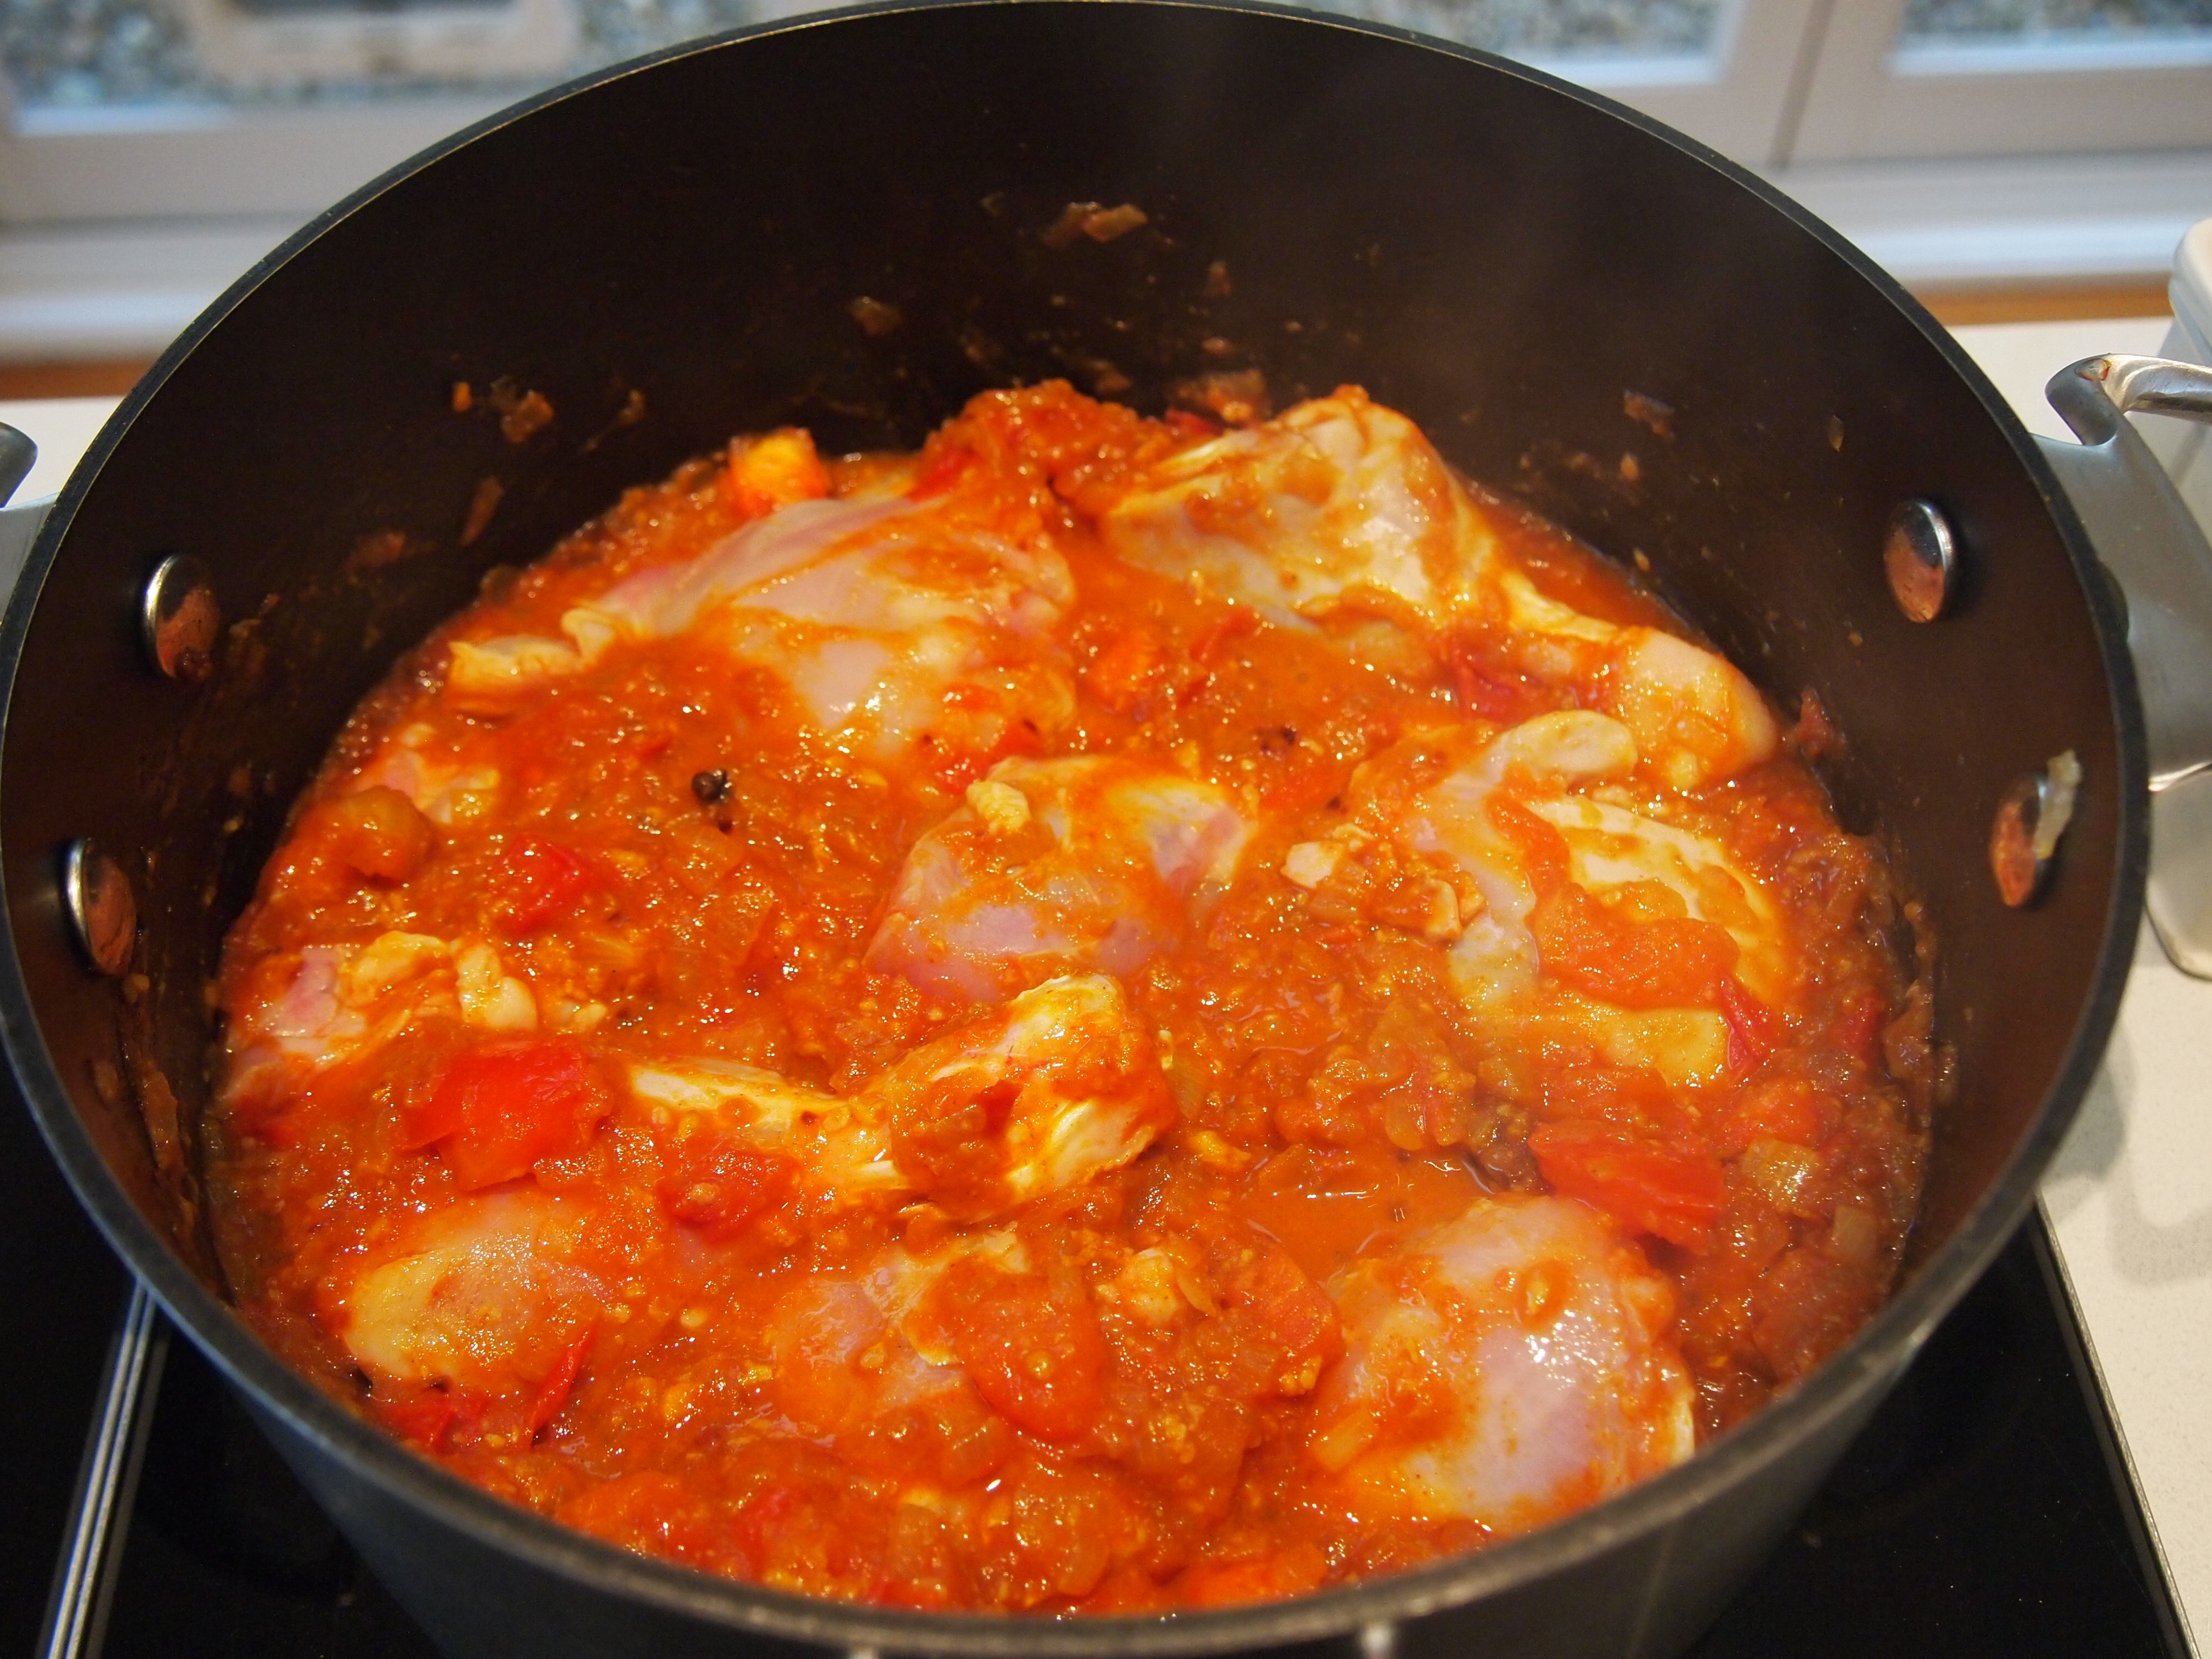
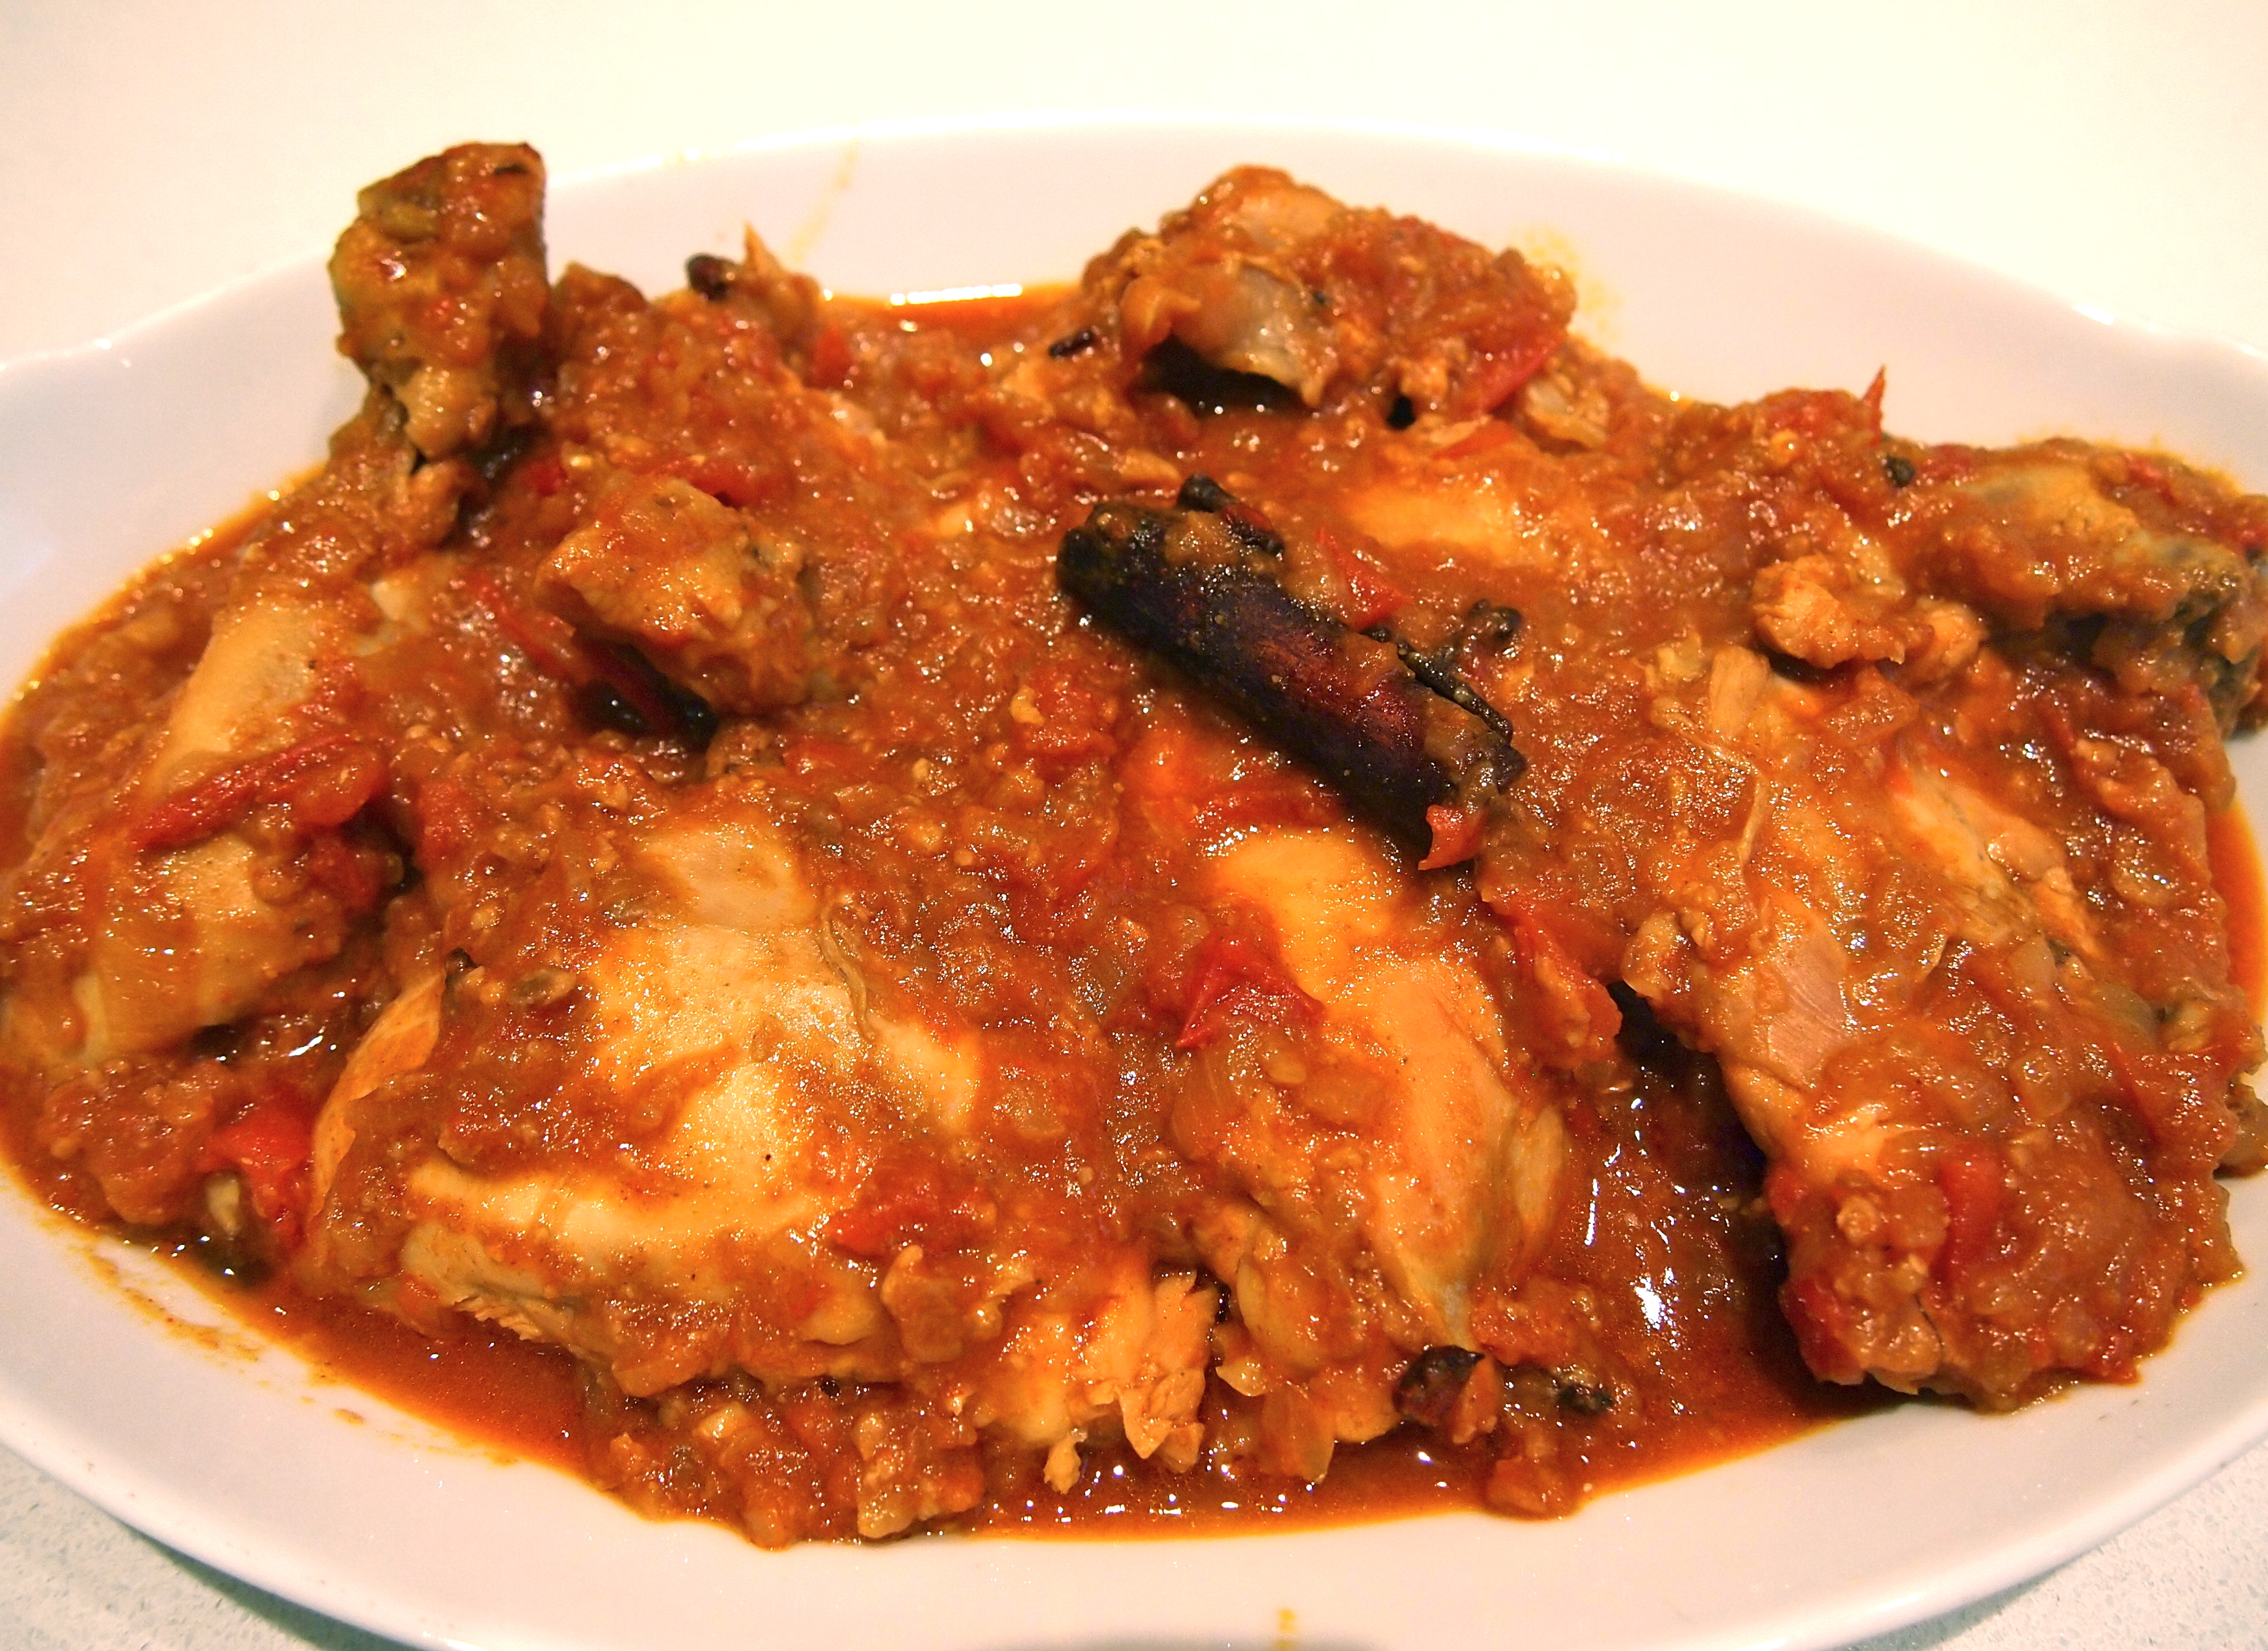
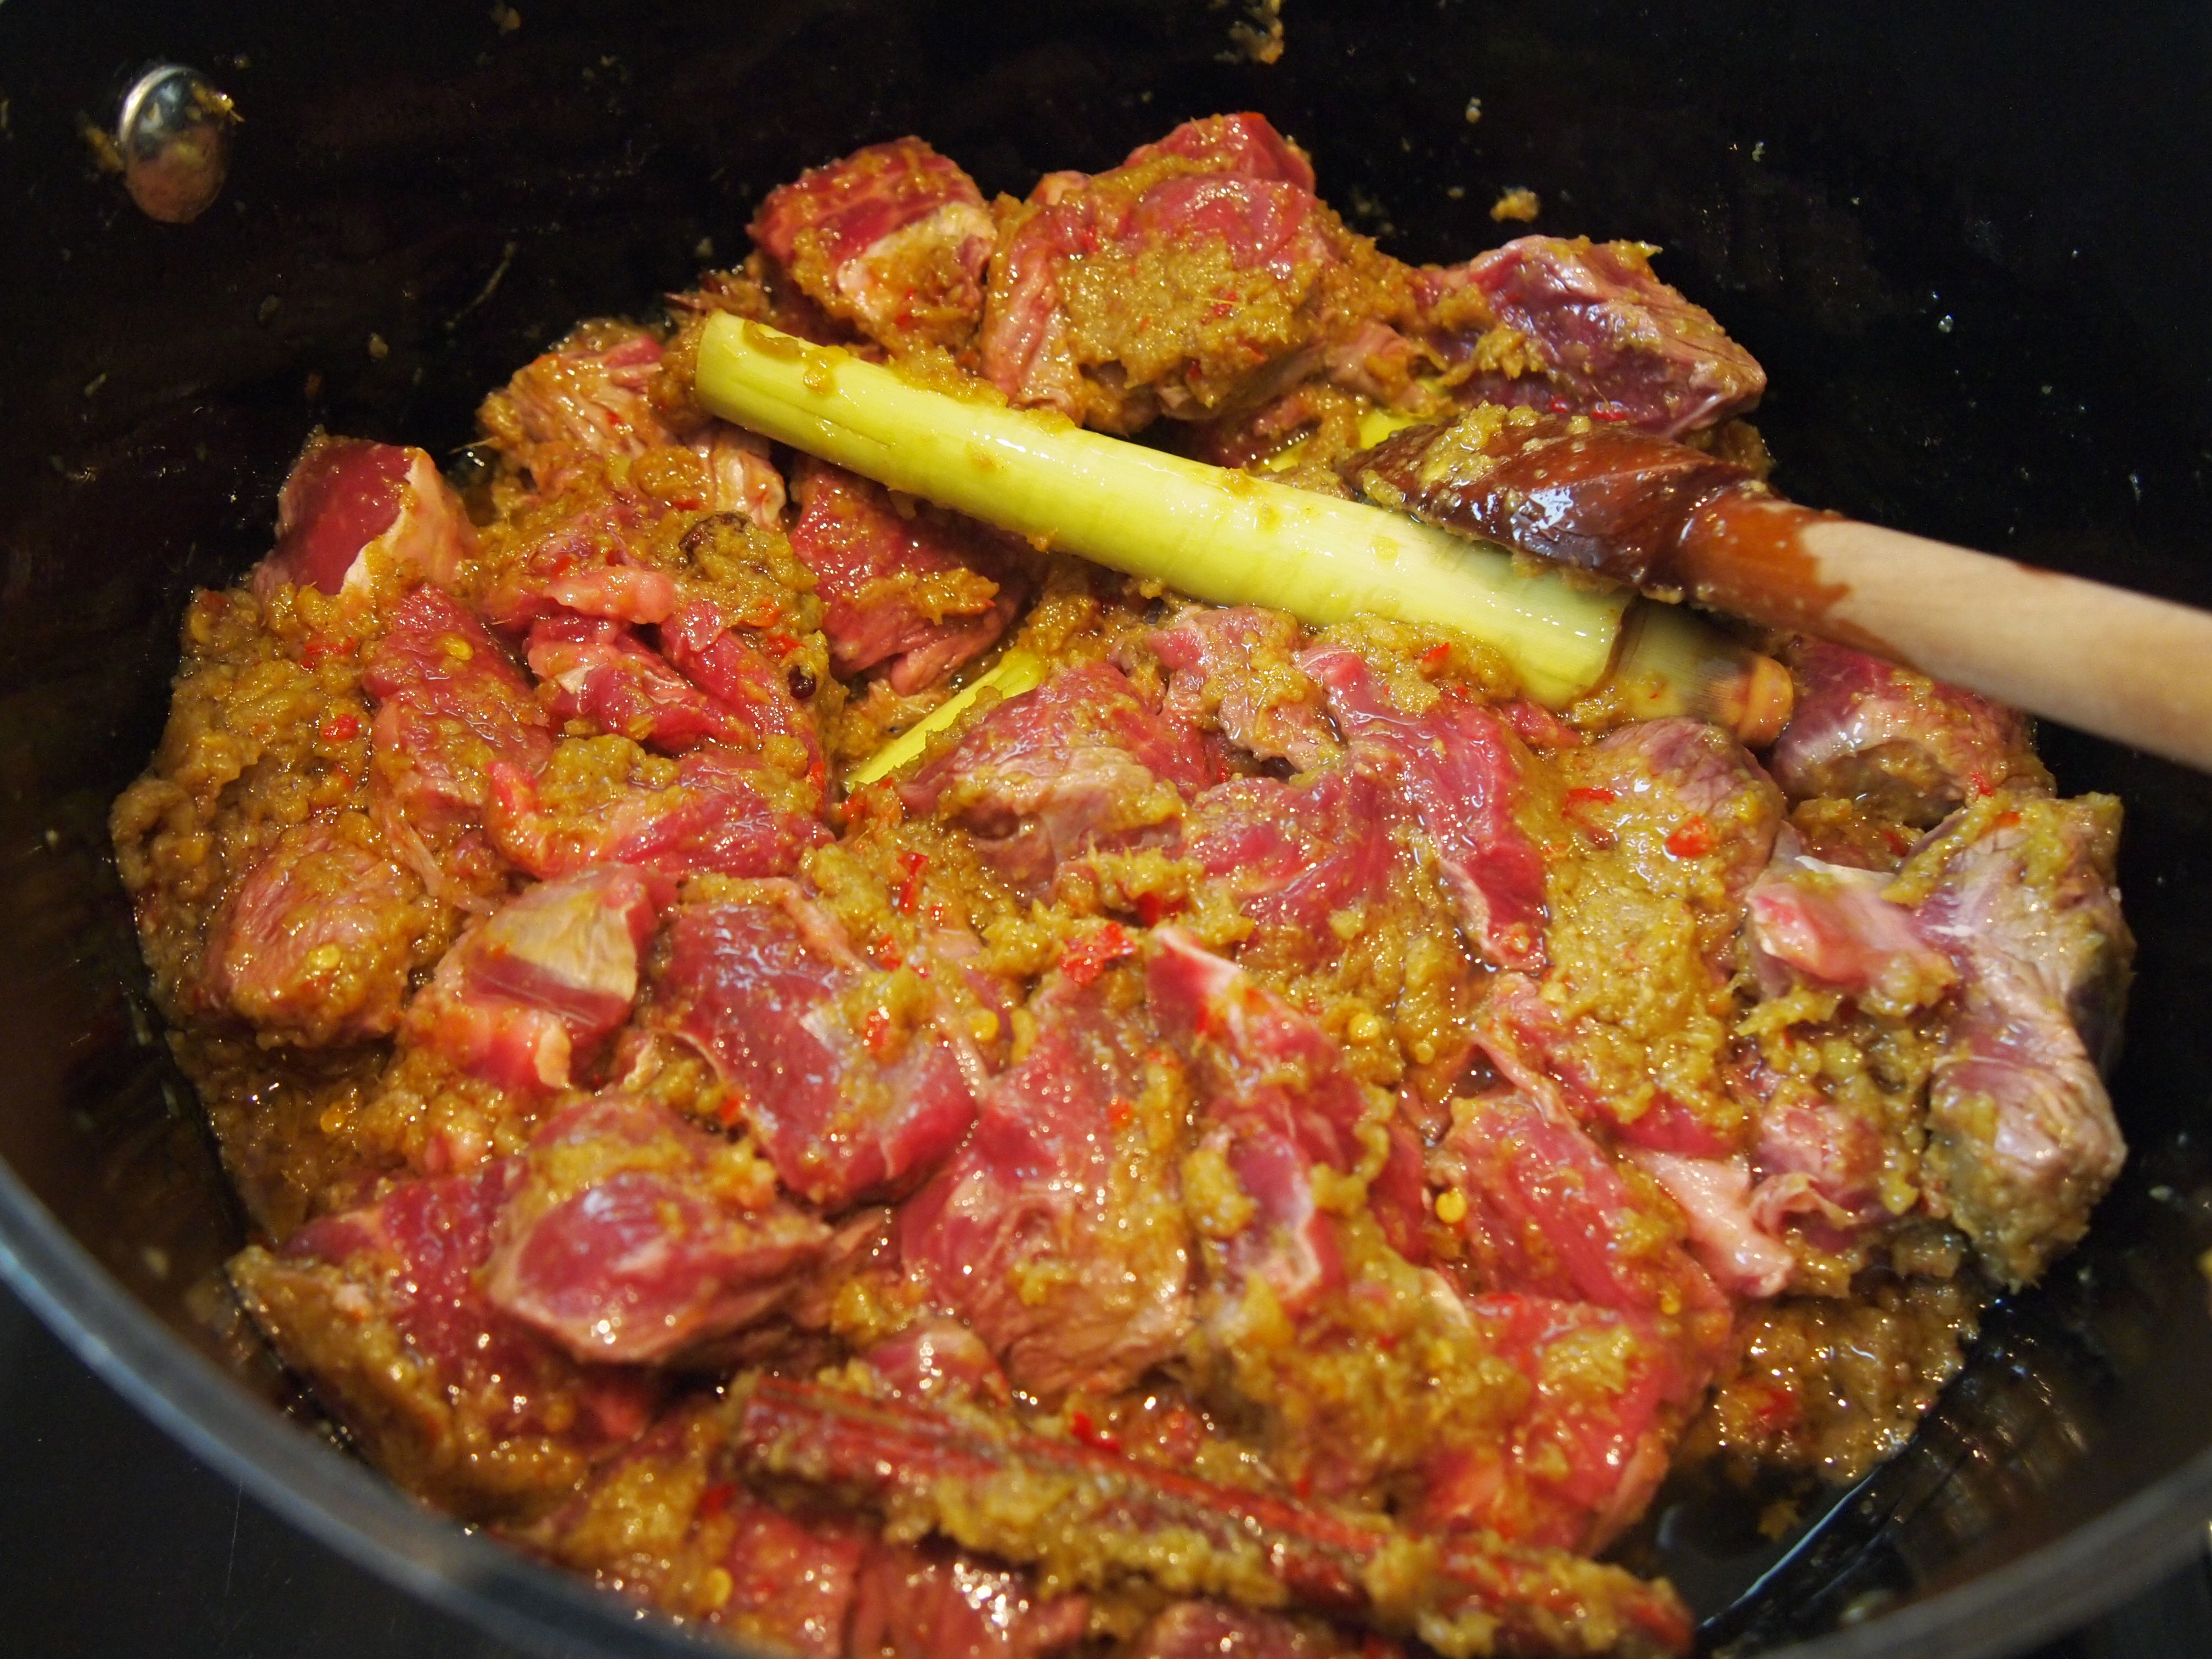
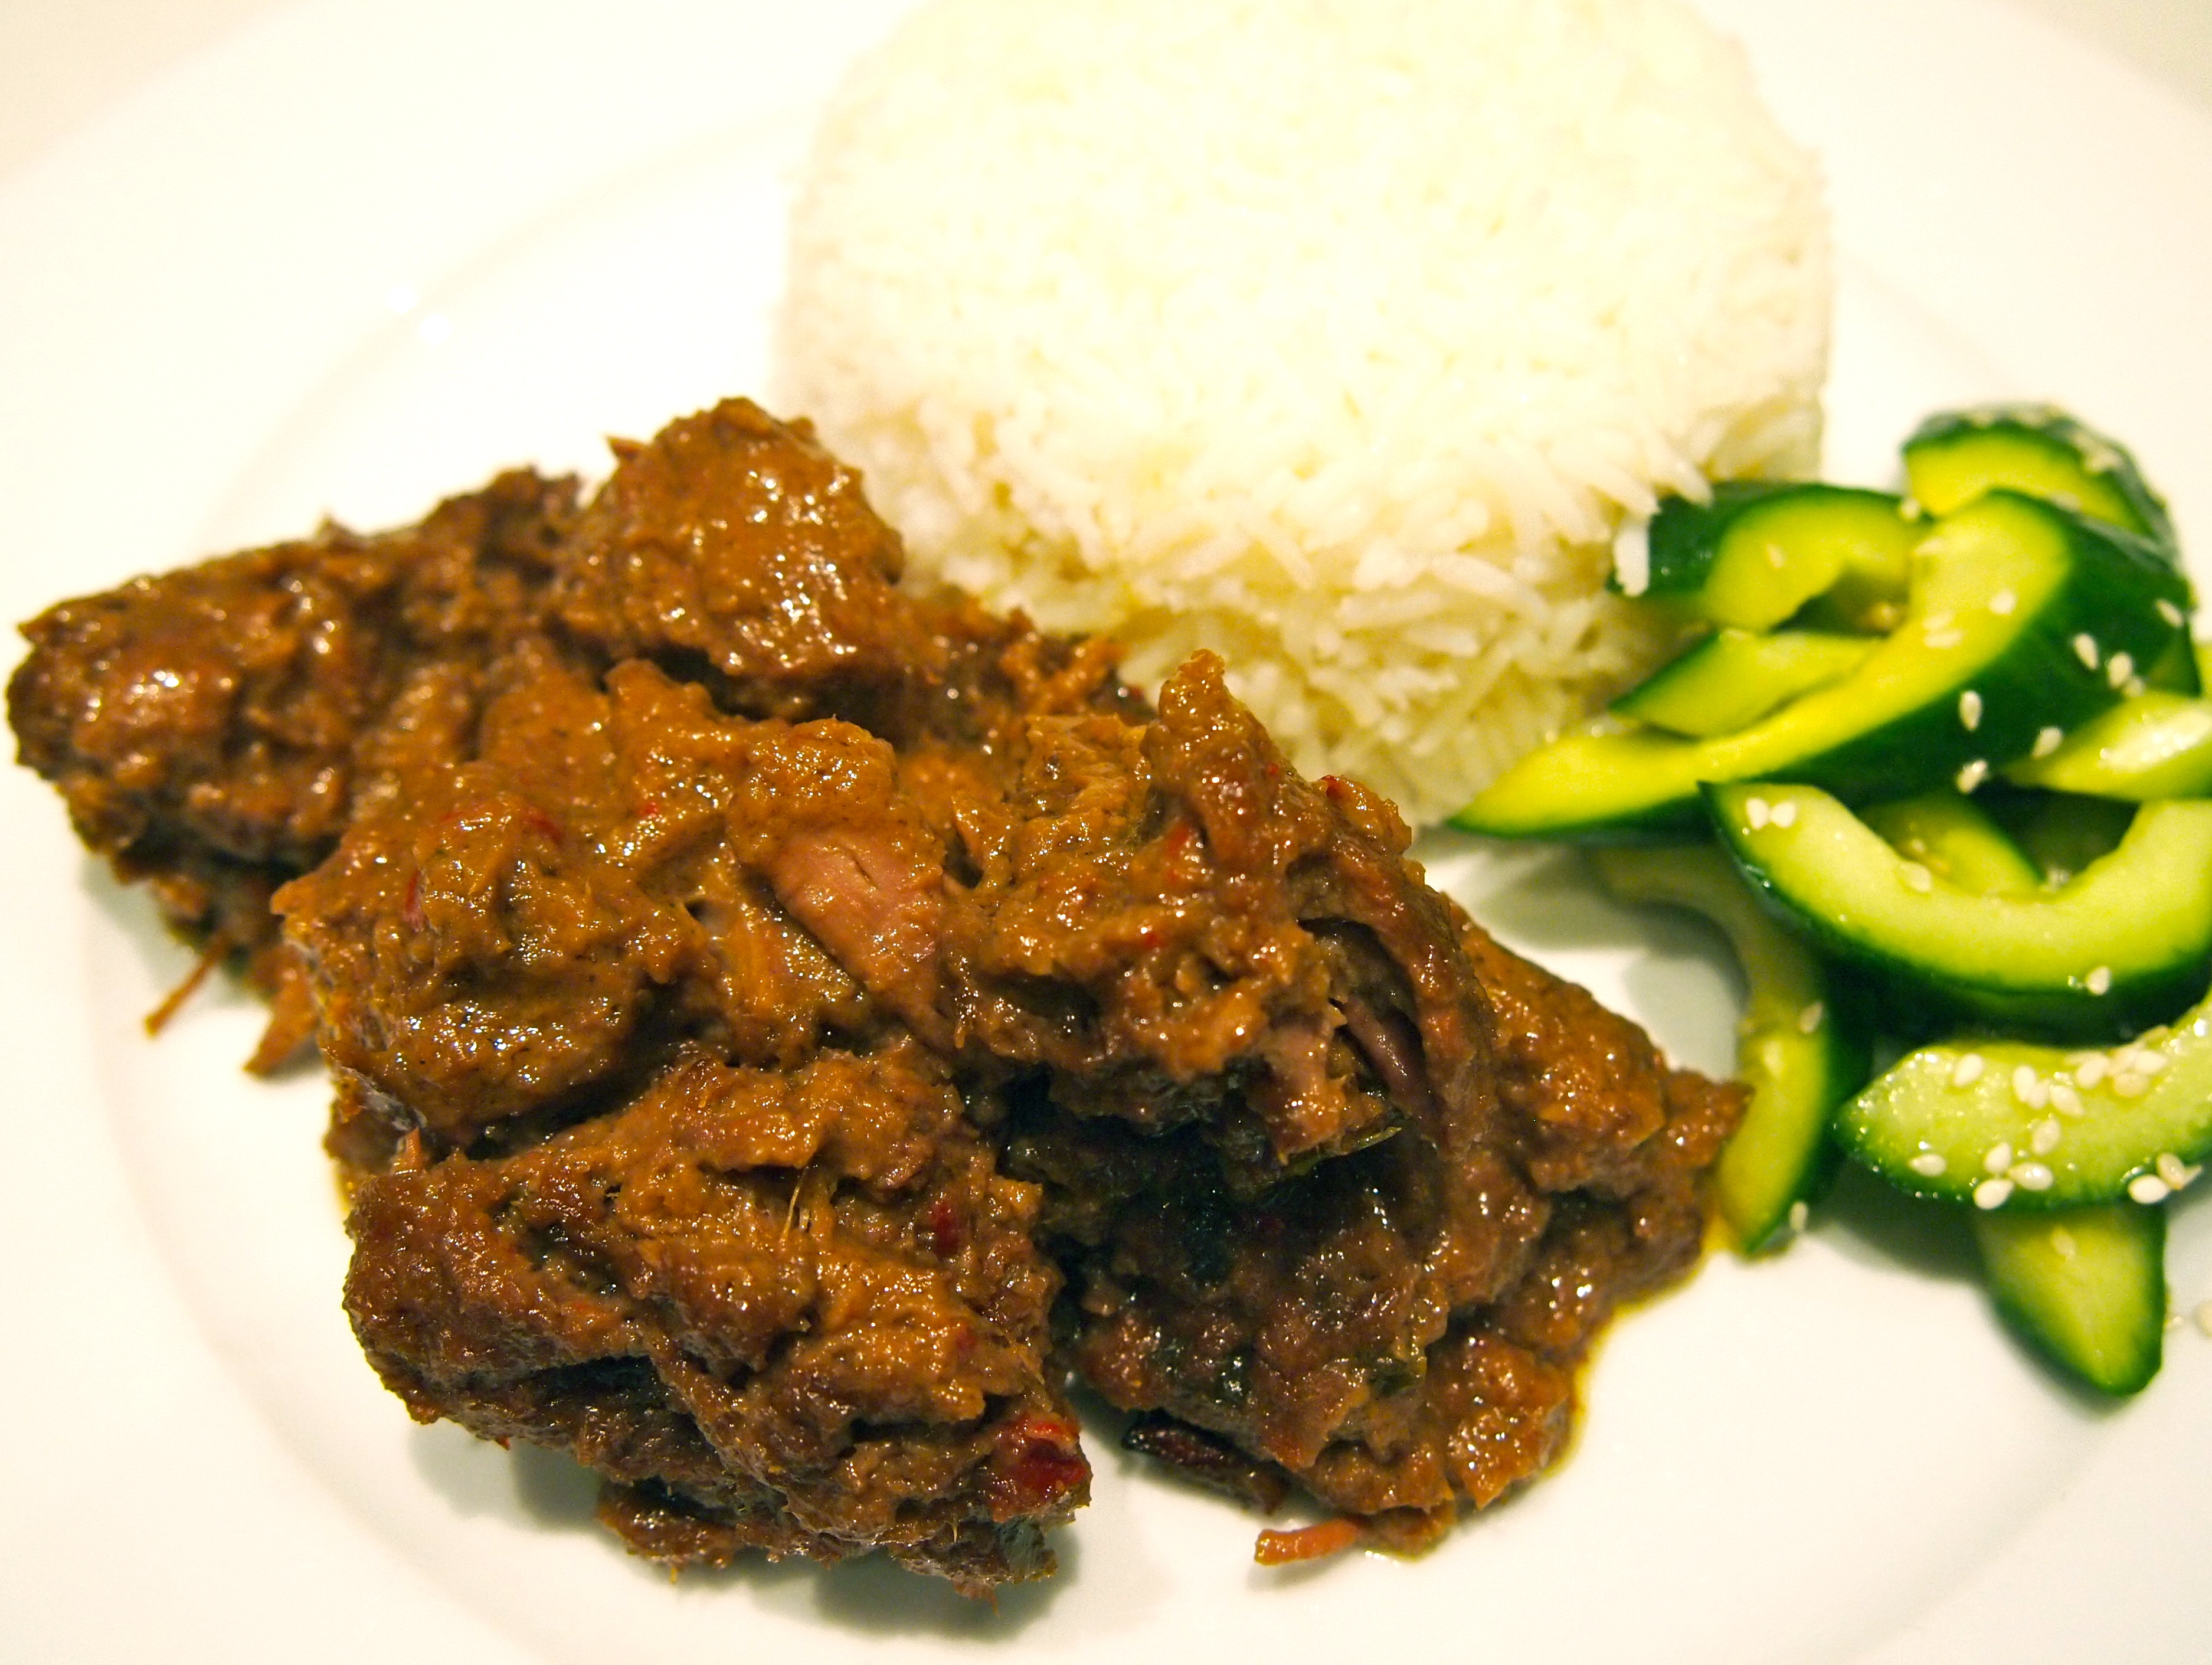
Shirin Polow - Persian Jewelled Rice with Saffron Poached Chicken

Jan 29, 2014
mustardwithmutton

no comments

Pork Braised in “Milk” with Sage & Polenta

Pork Braised in Milk with Sage & Polenta

Braising pork in milk is a traditional Italian method of cooking pork that results in meltingly tender meat. This recipe deviates a little from the classic version by using a combination of creme fraiche and stock instead of milk, hence the quotation marks in the title above. Using a mixture of creme fraiche and stock gives this dish a more robust flavour and when it’s reduced, a much more luxurious gravy. This would have to be one of the nicest braised pork dishes I’ve made, and given the simplicity of the recipe and ingredients, something I’ll be making frequently. The recipe comes courtesy of Food Wishes a fantastic blog where chef John gives informative step by step videos to accompany all his recipes. The pork can be served with mashed potatoes, crusty bread or even some rice or pasta but it’s particularly good paired with creamy parmesan spiked polenta.

Ingredients – Serves 4  Adapted from Food Wishes Blog

1 kg boneless pork shoulder, cut in 2-inch cubes
2 tablespoons olive oil
2 rashers bacon, cut into large dice
1 onion, diced
4 cloves garlic, sliced
1 ¼ cups best quality chicken stock
½ cup crème fraiche
2 tablespoons fresh chopped sage leaves (don’t chop them too finely)
12 whole sage leaves fried in a small amount of olive oil until crisp
Salt and pepper
Red chili flakes
Parmesan spiked creamy polenta for serving. – recipe can be found here

Method

Heat the olive oil in a large heavy bottomed pan with a lid – a shallow sided pan is best. Add the bacon and cook over low heat until the fat has rendered and the bacon is crispy. Remove with a slotted spoon leaving the fat in the pan. Season the pork pieces generously with salt and pepper and raise the heat to medium-high. Add the pork pieces and cook until nicely browned on both sides. This step is best done in batches to ensure the pan doesn’t get over crowded. Take your time frying the pork pieces – you want to achieve a nice caramelisation on each side. As the pork browns remove from the pan and set aside. Reduce heat to medium and add the onion along with a pinch of salt. Sauté for a few minutes until the onion is soft and slightly golden. Add the sliced garlic and cook, stirring for another minute. Add the chicken stock and creme fraiche and using a whisk stir until well combined, scraping the residue left at the bottom of the pan from the meat and onions. Add the bacon back to the pan along with the chopped sage and bring to a simmer.

Pork Braised in Milk - An Amazing Pork Stew

Return the pork pieces to the pan and reduce the heat to low. Once it’s at a low simmer place the lid on and cook for about an hour or until the meat is almost tender all the way through. You want to be able to break it with a spoon but it shouldn’t be falling apart. Increase the heat to medium-high and reduce the sauce uncovered until you’ve achieved and nice syrupy gravy, make sure that you keep coating the meat with the pan juices as you reduce it. This should take about 15-20 minutes and by the end of that time the pork will be very tender. Add a nice pinch of chilli flakes, and season with salt if required. To serve place a generous spoon of polenta on each plate, top with some pork pieces and sauce and finish with a few crispy sage leaves.

Italian Braised Pork in Milk with Sage & Polenta

Jan 22, 2014
mustardwithmutton

3 comments

Beef Rendang – Slow Cooked Beef Curry in Rich Coconut Sauce

Best Ever Beef Rendang

Beef rending would have to be one of my all time favourite South-East Asian dishes. It has a rich and complex flavour that is quite different to Indian and Thai curries. It’s Indonesian in origin but hugely popular in Malaysia as well. Beef rendang can be cooked to yield a very dry curry or a more liquid curry and I like mine to be somewhere between the two. The Indonesians in particular cook their rending until it’s very dry and dark. I’ve experimented a lot with different recipes and the one below is a combination of a few different methods and spice blends which hit all the right spots for me. Don’t be put off by the long list of ingredients as the method is actually very simple and whilst the cooking time is long, it needs very little attention once it’s underway. As this is quite a rich dish it doesn’t need much in the way of accompaniments, a generous amount of steamed rice is a must and the only other thing I like to serve alongside is a salad of sliced cucumbers. Rendang purists will note that I’ve left out one vital ingredient – turmeric leaf. If you can source it, adding a finely sliced leaf will make this truly authentic but even in Sydney where there are Asian grocers galore I’ve found this ingredient hard to come by.

Ingredients – Serves 4 

6 dried long chillies, soaked in hot water until soft (retain 2 tablespoons of the soaking liquid) – if you want less heat you can deseed the chillies
2 medium onions, roughly chopped
6 garlic cloves, chopped
1 inch piece of galangal, chopped
1 inch piece of ginger, chopped
2 lemongrass stalks, 1 finely chopped and the other cut in half and bruised with the back of a knife
1 cinnamon stick
1 cup desiccated coconut
¼ cup vegetable oil
6 kaffir lime leaves, rolled and thinly sliced
1 kg chuck steak, cut into 3 cm cubes – don’t be tempted to cut the meat any smaller as they will disintegrate too much after the long cooking time
1 cup coconut milk
1 heaped tablespoon brown sugar
2 tablespoons tamarind puree
4 tablespoons best quality mild curry powder – Malaysian meat curry powder is perfect
¾ cup water
2 tablespoons thick sweet soy sauce
Salt

Method

Process the chillies, onion, garlic, galangal, ginger, the thinly sliced lemongrass and the reserved 2 tablespoons of soaking liquid in a blender or food processor until it forms a paste. Heat a fry pan over low-medium heat, add the coconut and stir until it’s uniformly golden and toasted, being careful not to scorch it. Place the coconut in a mini food processor or mortar and pestle and blend until it’s broken down.

Heat the oil in a heavy-based saucepan and add the paste and the lime leaves (if you are using turmeric leaves you should add it now – see note above). Fry, stirring constantly until fragrant – about 5 minutes. Add the meat, the bruised lemongrass halves and cinnamon stick. Stir in the coconut milk, tamarind paste, 1 heaped teaspoon of salt and curry powder and mix until well combined. Add the water and toasted coconut and bring to a simmer.

Lower the heat to a very low simmer and cook uncovered for about 2 hours, or until the meat is very tender. Check the rending occasionally and if it is getting too dry add a little extra water. To finish, add the soy sauce and season to taste with extra salt if required. Serve with steamed rice.

Ultimate Beef Rendang

Jan 15, 2014
mustardwithmutton

no comments

Slow Braised Chickpeas with Cavolo Nero

Slow Braised Chickpeas with Cavolo NeroIt’s nice after all the excesses of the festive season to post a vegetarian dish that’s certainly hearty enough to have as a main meal but which I also love to serve as a side dish. It does contain a small amount of pancetta but it can easily be omitted and I must say this dish, topped with maybe a fried egg and a side of crusty bread, makes a very nice vegetarian supper. However if you’re searching for a starch to serve with some roast lamb, chicken or even sausages, and you want to avoid the usual potatoes, then you can’t do better. I sometimes add a touch of the Moroccan spice blend Ras al Hanout to give it a slightly Middle Eastern twist which goes especially well with this barbecued butterflied leg of lamb. Cavolo nero is an Italian variety of cabbage with long dark green leaves (I think it’s sometimes also referred to as black kale in America) and its becoming easier to find in Sydney but if you can’t source any it can be replaced with Swiss chard/silverbeet or kale. I do urge you to go through the effort of soaking and cooking the chickpeas and not using the canned variety – it makes an amazing amount of difference, to not just the flavour of the overall dish but the texture too.

Ingredients – Serves 4-6   Adapted from Gourmet Traveller Magazine

500 gm (2½ cups) dried chickpeas, soaked overnight in cold water, then drained
¼ cup extra-virgin olive oil
50 gm pancetta, diced
2 celery stalks, diced
1 onion, finely chopped
5 garlic cloves, minced or crushed in a garlic press
750 ml (3 cups) chicken stock
400 gm canned Italian whole peeled tomatoes, crushed
2 tablespoons finely chopped oregano
Pinch of chilli flakes
1 bunch cavolo nero, tough stems discarded and leaves coarsely chopped – see note above

Method

Combine chickpeas and enough cold water to cover generously in a saucepan (do not salt water), bring to the boil over medium heat, reduce heat to low and simmer until just tender (about 30-40 minutes). Drain and set aside. Meanwhile, preheat oven to 150C.

Heat half the oil in a casserole over medium heat, add pancetta, celery, onion and garlic and stir occasionally until just tender (20-30 minutes). Add chickpeas, stock, tomato, oregano and chilli, season well to taste, cover and braise in oven until chickpeas are tender (1 hour). Stir in cavolo nero and braise until cavolo nero is very tender (30 minutes). Remove from the oven and if the sauce is too thin place over a medium-high heat and cook until reduced to your liking. Serve hot drizzled with a little extra virgin olive oil.

Slow Braised Chickpeas with Cavolo Nero

Jan 7, 2014
mustardwithmutton

1 comment

Apple Crostata – The Simplest Apple Pie Ever

Apple Pie for Dummies - Apple CrostataA crostata is basically a free form pie or tart. By that I mean you don’t need go through the fuss and bother of lining your pastry into a pie dish or tart pan. You merely roll out your dough into a rough circle, dump your topping – in this case sliced apples, in a pile in the middle and bring up the edges of the dough to encase the filling. It really couldn’t be easier and this particular recipe from Ina Garten is made extra delicious by adding a generous sprinkling of buttery streusel on top of the apples. You can make crostatas with all sorts of fillings including berries and stone fruits and even savoury ones such as baked pumpkin and blue cheese, which I’ll try next. The only thing I would change from the original recipe is to slice the apples into finer pieces – the pie only bakes for 25 minutes and I like the fruit to be nice and soft and cooked through. This pie makes a great dessert served warm from the oven with a scoop of vanilla ice cream.

Ingredients  Adapted from Ina Garten

For the pastry
1 cup plain flour
2 tablespoons sugar
¼ teaspoon salt
125g very cold unsalted butter, diced
2 tablespoons ice water
For the filling
3 large or 4 medium apples – I used granny smith
¼ cup flour
¼ cup sugar
¼ teaspoon salt
½ teaspoon ground cinnamon
60g cold unsalted butter, diced

Method

For the pastry, place the flour, sugar, and salt in the bowl of a food processor fitted with a steel blade. Pulse a few times to combine. Add the butter and pulse a few more times until the butter is the size of peas. With the motor running, add the ice water all at once through the feed tube. Keep hitting the pulse button to combine, but stop the machine just before the dough becomes a solid mass. Turn the dough onto a well-floured board and form into a disk. Wrap with plastic and refrigerate for at least 1 hour.

Ina Garten's Apple Crostata

Preheat the oven to 220C. Flour a rolling pin and roll the pastry into an 11-inch circle on a piece of nonstick baking paper. Transfer the dough along with the paper to a baking sheet. For the filling, peel, core, and cut the apples into small pieces or thin slices (I cut mine a little too chunky and will slice them finer next time). Cover the tart dough with the apples, leaving a 1½ inch border. Combine the flour, sugar, salt and cinnamon, in the bowl of a food processor fitted with a steel blade. Add the butter and pulse until the mixture is crumbly. Pour into a bowl and rub it with your fingers until it starts holding together. Sprinkle evenly on the apples. Gently fold the border over the apples to enclose the dough, pleating it to make a circle. Bake the crostata for 20 to 25 minutes, until the crust is golden and the apples are tender. Allow to cool. Serve warm or at room temperature.

Apple Pie for Dummies - Ina Garten's Apple Crostata

Dec 28, 2013
mustardwithmutton

6 comments

Baked Mini Crab Cakes – The Perfect Way to Kick off New Years Eve

Perfect New Years Eve Appetiser - Baked Mini Crab Cakes

Crab cakes are delicious served large or small and these little mini ones make a lovely indulgent appetiser and I can’t think of a better way to kick off New Years Eve. Apart from being delicious, they are insanely easy to make with no frying involved. In fact, they can be made ahead of time and then given a quick blast on a baking sheet to crisp them back up just before serving. These crab cakes are a little different to the usual fried variety in that a panko bread crumb and herb mix is placed on the bottom of mini muffin moulds and then topped with a creamy crab mixture before being finished off with a scattering of more buttery bread crumbs. The result is a satisfying light crunch followed by creamy crab goodness. These don’t have the denseness of normal crab cakes, which in this instance I quite like, being lighter and better suited for hor d’oeuvres. A few of these crab cakes and a glass or three of Champagne and you know you’re going to be in for a great night.

Ingredients – Makes 24 mini crab cakes  Adapted from Bon Appetit

230g cream cheese, room temperature
1 cup Parmesan cheese, divided
1 large egg
¼ cup sour cream
1 teaspoon lemon zest
4 teaspoons plus 4 tablespoons chopped fresh chives, divided
½ teaspoon salt
Large pinch cayenne pepper
180g fresh crab meat, picked over, patted dry, coarsely shredded
1½ cups panko (Japanese breadcrumbs)
60g butter , melted plus more for greasing the pans

Method

Using an electric mixer, beat cream cheese in medium bowl until smooth. Add ¼ cup Parmesan and the egg; beat to blend. Beat in sour cream, lemon zest, 4 teaspoons chopped chives, salt, and cayenne pepper. Fold in crabmeat. Crab mixture can be made 1 day ahead and kept covered and chilled. Preheat oven to 180C. Generously butter 2 x 12 hole mini muffin pans. Toss panko, ¾ cup Parmesan, and 4 tablespoons chopped chives in small bowl. Drizzle the melted butter over, tossing with a fork until evenly moistened.

Baked Mini Crab Cakes

Baked Mini Crab Cakes Baked Mini Crab Cakes

Press 1 rounded tablespoon of the panko mixture into bottom of each muffin cup, pressing in with your thumb to form a crust. Spoon 1 generous tablespoon crab mixture into each cup. Sprinkle more of the panko mixture over each. Bake crab cakes until golden on top and set, about 20-25 minutes. Cool in pans for 5 minutes. Run knife around each cake and gently lift out of pan. They can be made up to two hours ahead – arrange on a  baking sheet; let stand at room temperature. Rewarm in 200C oven for 6-8 minutes.

New Years Eve Appetiser - Baked Mini Crab Cakes

Dec 22, 2013
mustardwithmutton

no comments

An Alternative to the Christmas Turkey – Roast Spatchcock with Mushroom & Sage Stuffing & Truffle Cream Sauce

Christmas Turkey Alternative - Roast Spatchcock with Mushroom & Sage Stuffing & Truffle Cream SauceIf you’re looking for an alternative to the usual roast turkey meal for Christmas then look no further. There are a lot of positives to making a meal like this for Christmas but the one that appeals to me the most is there’s no carving involved. If you’re anything like me and a somewhat clumsy carver than you’ll know that cooking a large bird is all very well and good but it’s the carving that really makes me nervous. No such worries here! A perfectly portioned, golden roasted and stuffed bird to adorn each plate, not to mention a do-ahead truffle sauce, makes this a very stress free meal. The spatcocks (or Cornish hens) can be stuffed and prepared the day before and the sauce, which takes no time at all, can be made a few hours in advance. So all you need to do on the day is bring the spatcocks to room temperature and roast them for a mere 50 minutes. A side of some roasted baby potatoes and green beans and you’ll end up with a very delicious and crowd pleasing meal. The recipe below is for two but can easily be multiplied – you can fit quite a few of these little birds on a roasting tray and they’re a lot easier to cook expertly than a very large turkey!

Ingredients – Serves 2   Adapted from Delicious Magazine

Olive oil
100g Swiss brown, chestnut or portobello mushrooms, finely chopped
½ a small onion, finely chopped
1 large garlic clove, finely chopped
1 good quality pork sausage, casing removed
3 sage leaves, finely chopped
2 tablespoons finely chopped flat leaf parsley
¼ cup macadamia nuts, chopped
⅔ cup fresh bread crumbs
2 x 500g spatchcocks or Cornish hens
2 thyme sprigs, leaves picked, plus extra to sprinkle
1 tablespoon best quality white truffle oil
1 shallot, finely chopped
1 cup best quality chicken stock
½ cup thin cream
Salt & freshly ground black pepper

Method

To make the stuffing, heat 1 tablespoon of olive oil in a large frypan over medium-high heat. Add the mushrooms and a pinch of salt, then cook, stirring until pale golden. Remove from the pan and allow to cool. Heat another tablespoon of oil in the pan over medium heat. Add the onion and garlic and cook, stirring, for 3 minutes or until soft. Increase heat to medium-high and add sausage meat, sage and parsley. Cook, breaking up the sausage meat with a wooden spoon for about 5 minutes or until the meat is lightly browned. Cool for 5 minutes, then add to the mushrooms with the nuts and breadcrumbs. Combine well and season.

Spatchcocks with Mushroom & Sage Stuffing

Preheat oven to 200C. Place the spatchcocks in a roasting pan, then spoon in the stuffing and tie the legs with kitchen twine. Drizzle with oil and rub into the skin. roast for 50-60 minutes or until golden and cooked through – the juices will run clear when the thigh is pierced with a skewer.

Truffle Cream Sauce

To make the truffle cream sauce heat a tablespoon of oil in a clean frypan. Add the shallot and stir over low heat and cook until very soft. Increase the heat and add the stock, cook until reduced by a third, then stir in cream and thyme. Cook for a further 5-10 minutes or until thickened. Season and add the truffle oil.

Serve a spatchcock on each plate with the truffle cream sauce on the side.

Christmas Turkey Alternative - Roast Spatchcocks with Mushroom & Sage Stuffing

Dec 17, 2013
mustardwithmutton

no comments

Lamb & Potato Hot Pot with Gremolata

Lamb Hot & Potato Hot Pot with GremolataI know this dish sounds like something you would only cook in the depths of winter, and it would certainly hit the spot if you did, but the flavours are actually very subtle and delicate, making it perfect for warmer weather too. I cook this dish regularly and it’s one of those meals that’s both impressive and comforting at the same time – great for entertaining but just as good as a simple meal for the family. Gremolata which is an Italian herb mixture of finely chopped parsley, garlic and lemon zest really perks up all the flavours and adds a lovely fresh finish, which again aids in making this a dish for all seasons. In winter we pair it with a nice glass of Cab Sav and some crusty bread but on warmer days a crisp white wine and a green salad transforms it to an even lighter meal. The lamb cut that is best suited for this recipe is lamb neck chops, which are incredibly inexpensive and like all secondary cuts need long slow braising, but boy is it worth it. Neck chops can sometimes be hard to come by and if I can’t source any I substitute bone in shoulder chops which also work well. Basically you need a cut that can stand up to a long braise, preferably with bones as this adds a lot of flavour and keeps the meat moist.

Ingredients – Serves 4  Adapted from Delicious Magazine

1.2kg lamb neck chops – see note above. If you’re substituting shoulder chops you won’t need as much as they are more meaty than neck chops.
1 cup plain flour
Olive oil
4 good sized onions, finely sliced
3 garlic cloves sliced
2 bay leaves
700g waxy potatoes (such as desiree) peeled and sliced into 1cm rounds
50g unsalted butter, melted
1 tablespoon thyme leaves
200ml chicken stick

Gremolata
1 cup flat leaf parsley, finely chopped
1 garlic clove, crushed in a garlic press or very finely minced
Grated zest of 1 lemon

Method

Preheat oven to 180C. Season the lamb well with salt and paper. Place the flour in a bowl or plastic bag, add the lamb chops and toss to evenly coat. Heat 3 tablespoons of oil in a large frypan over medium-high heat. Shake excess flour off the lamb, then cook in batches for 2-3 minutes per side until golden. Remove from the pan and set aside.

Wipe the pan clean with a paper towel and place over medium heat. Add another 4 tablespoons of oil and the onions, along with a large pinch of salt, and cook, stirring for about 15 minutes or until golden brown. Add the garlic and bay leaves and cook for a further 3 minutes. Place the lamb in a flameproof casserole then top with the onion mixture. Toss the potatoes with the melted butter and thyme and season with salt and pepper. Arrange potatoes over the top of the onions in a circular pattern, overlapping slightly.

Pour the stock in and around the potatoes then cover the casserole dish with a lid or some foil. Place the dish in the oven and bake for 30 minutes. Then reduce the oven temperature to 130C and cook for a further 2½ hours or until the potatoes and meat are tender and the sauce has thickened.

Lamb & Potato Hot Pot

Remove the lid/foil and switch the oven to the grill function. Grill on high heat for a few minutes or until the potatoes are golden. Remove the lamb from the oven and let it rest while you make the gremolata. For the gremolata, place all the ingredients in a bowl and stir to combine well. To serve, divide the hotpot among plates or bowls and sprinkle with the gremolata.

The Best  Lamb & Potato Hot Pot with Gremolata