Oct 1, 2013
mustardwithmutton

1 comment

Tetsuya’s Grilled Miso Marinated Salmon – Saikyo Yaki

Miso Marinated Grilled Salmon - Saikyo Yaki
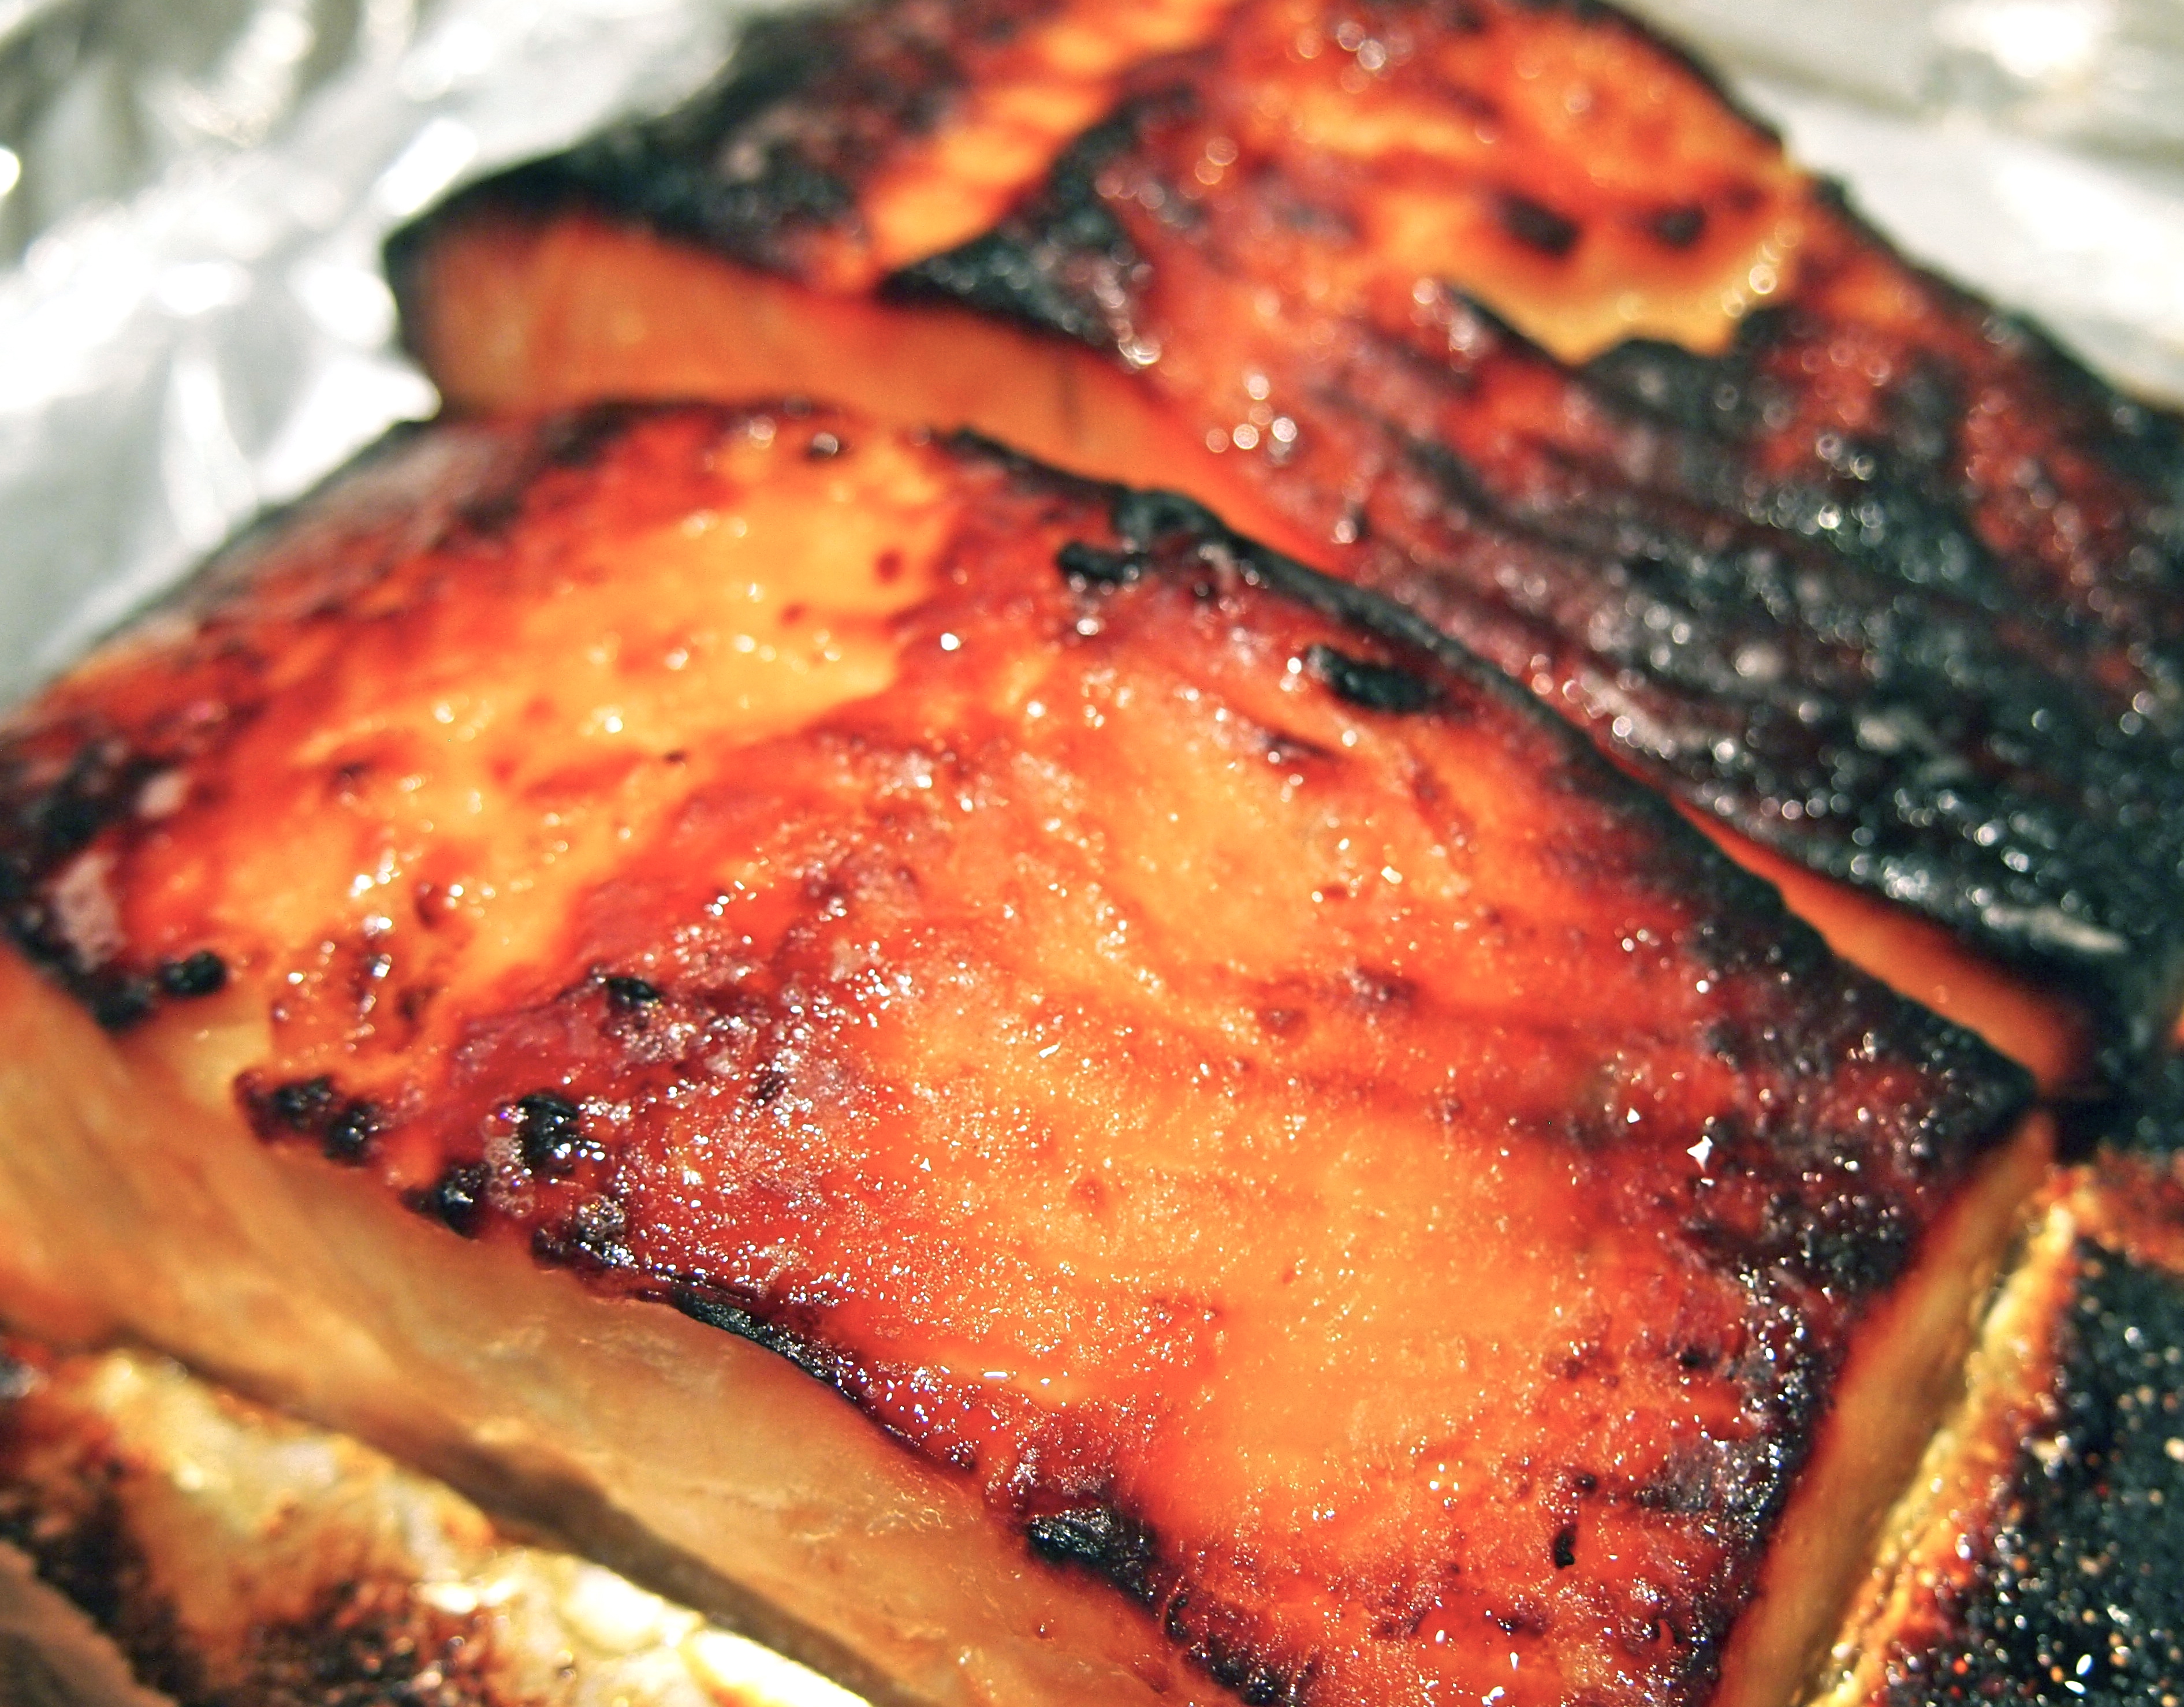
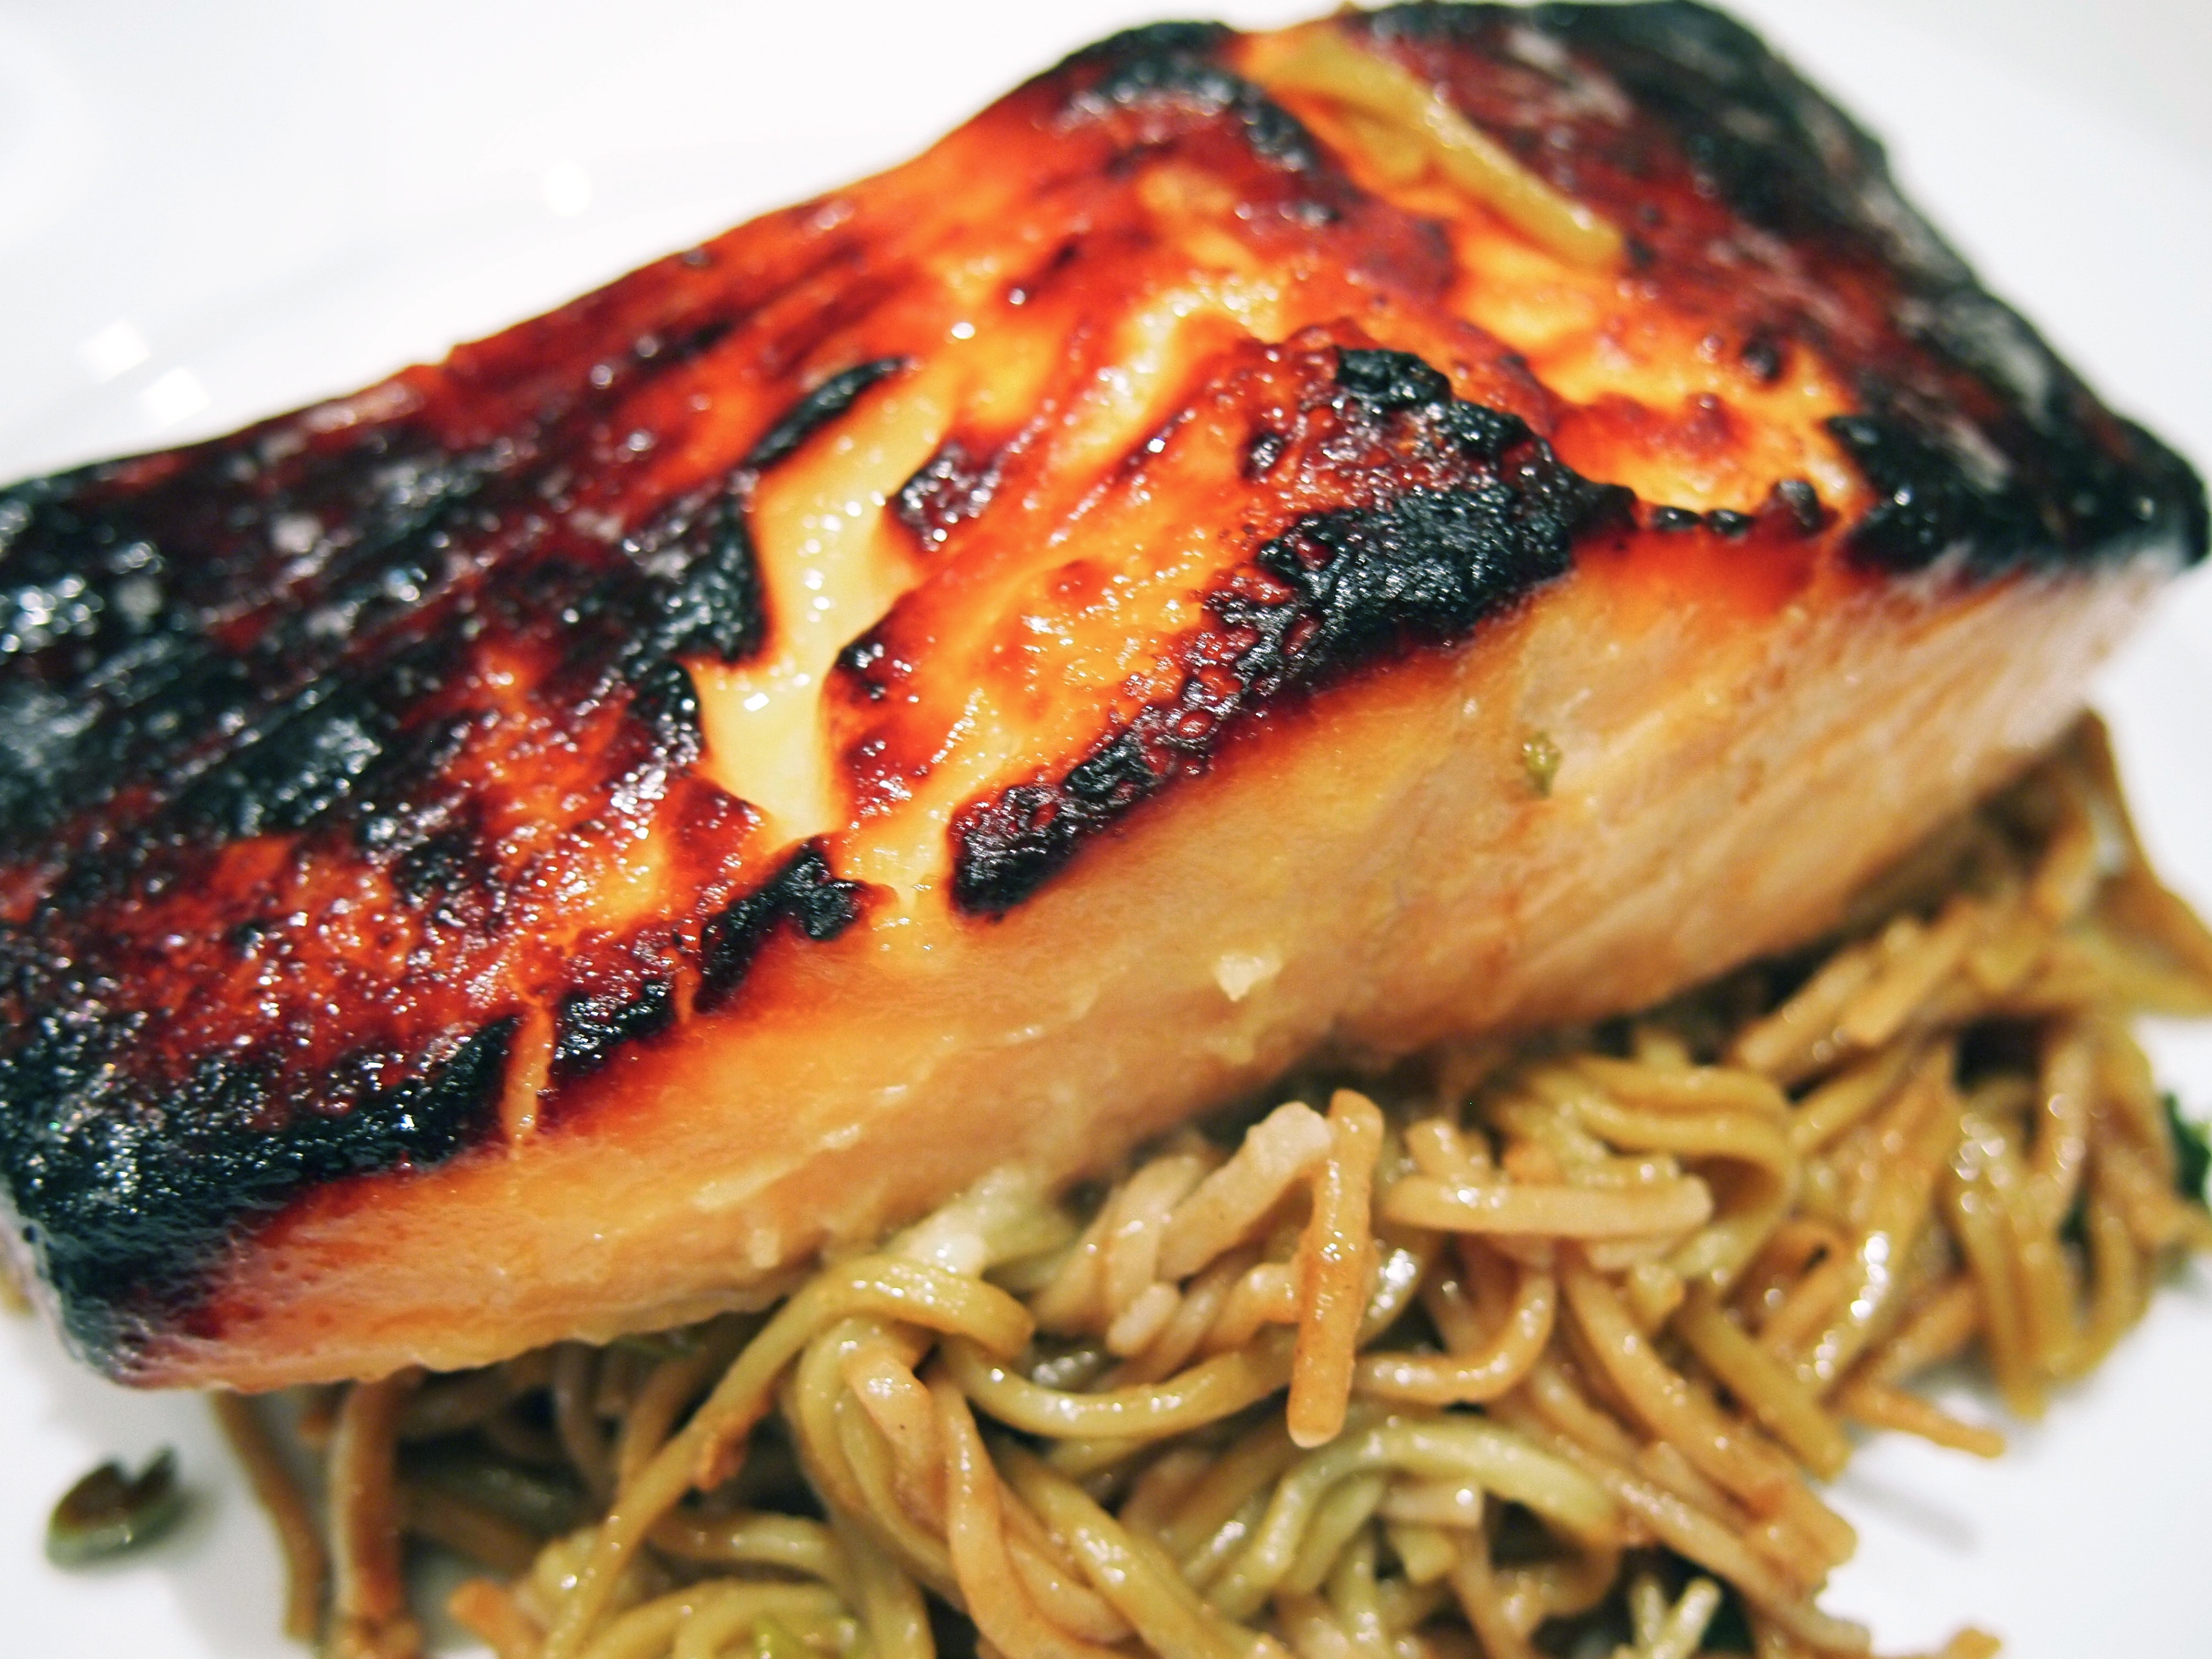
Tetsuya Wakuda, one of Australia’s most celebrated chefs, is quick to point out that this recipe for Saikyo Yaki  is not an invention of his but a dish that has been around for hundreds of years. Any firm fleshed fish can be used and in Japan it would be more traditionally made using white fish. If you’ve ever tried Nobu’s famous miso black cod it uses the same cooking technique. The basic preparation for saikyo yaki includes white miso (and quite a lot of it – don’t be tempted to make this with any other kind of miso as it just won’t work), mirin and sake. It’s incredibly simple but the overnight marinating is essential as it’s this process that allows the miso to soak into the fish, tenderise it and give it an amazing sweet flavour. I like to cook the salmon in a hot oven on a narrow sided baking tray and when almost cooked through put it under the grill to burnish the top. An even better way, is to cook the salmon in the oven and then blow torch the top of the salmon which gives the fish a wonderful smoky aroma. This dish is simple, elegant and very delicious and prefect for the family or for entertaining. One of those special dishes that never fails to please.

Ingredients – Serves 4  Adapted from Tetsuya Wakuda

4 centre cut skinless boneless salmon fillets, weighing about 200g each
250g white miso (shiro miso) – it’s important that it’s white miso and not red miso
100ml mirin
80ml sake
¼ cup sugar
50ml extra virgin olive oil
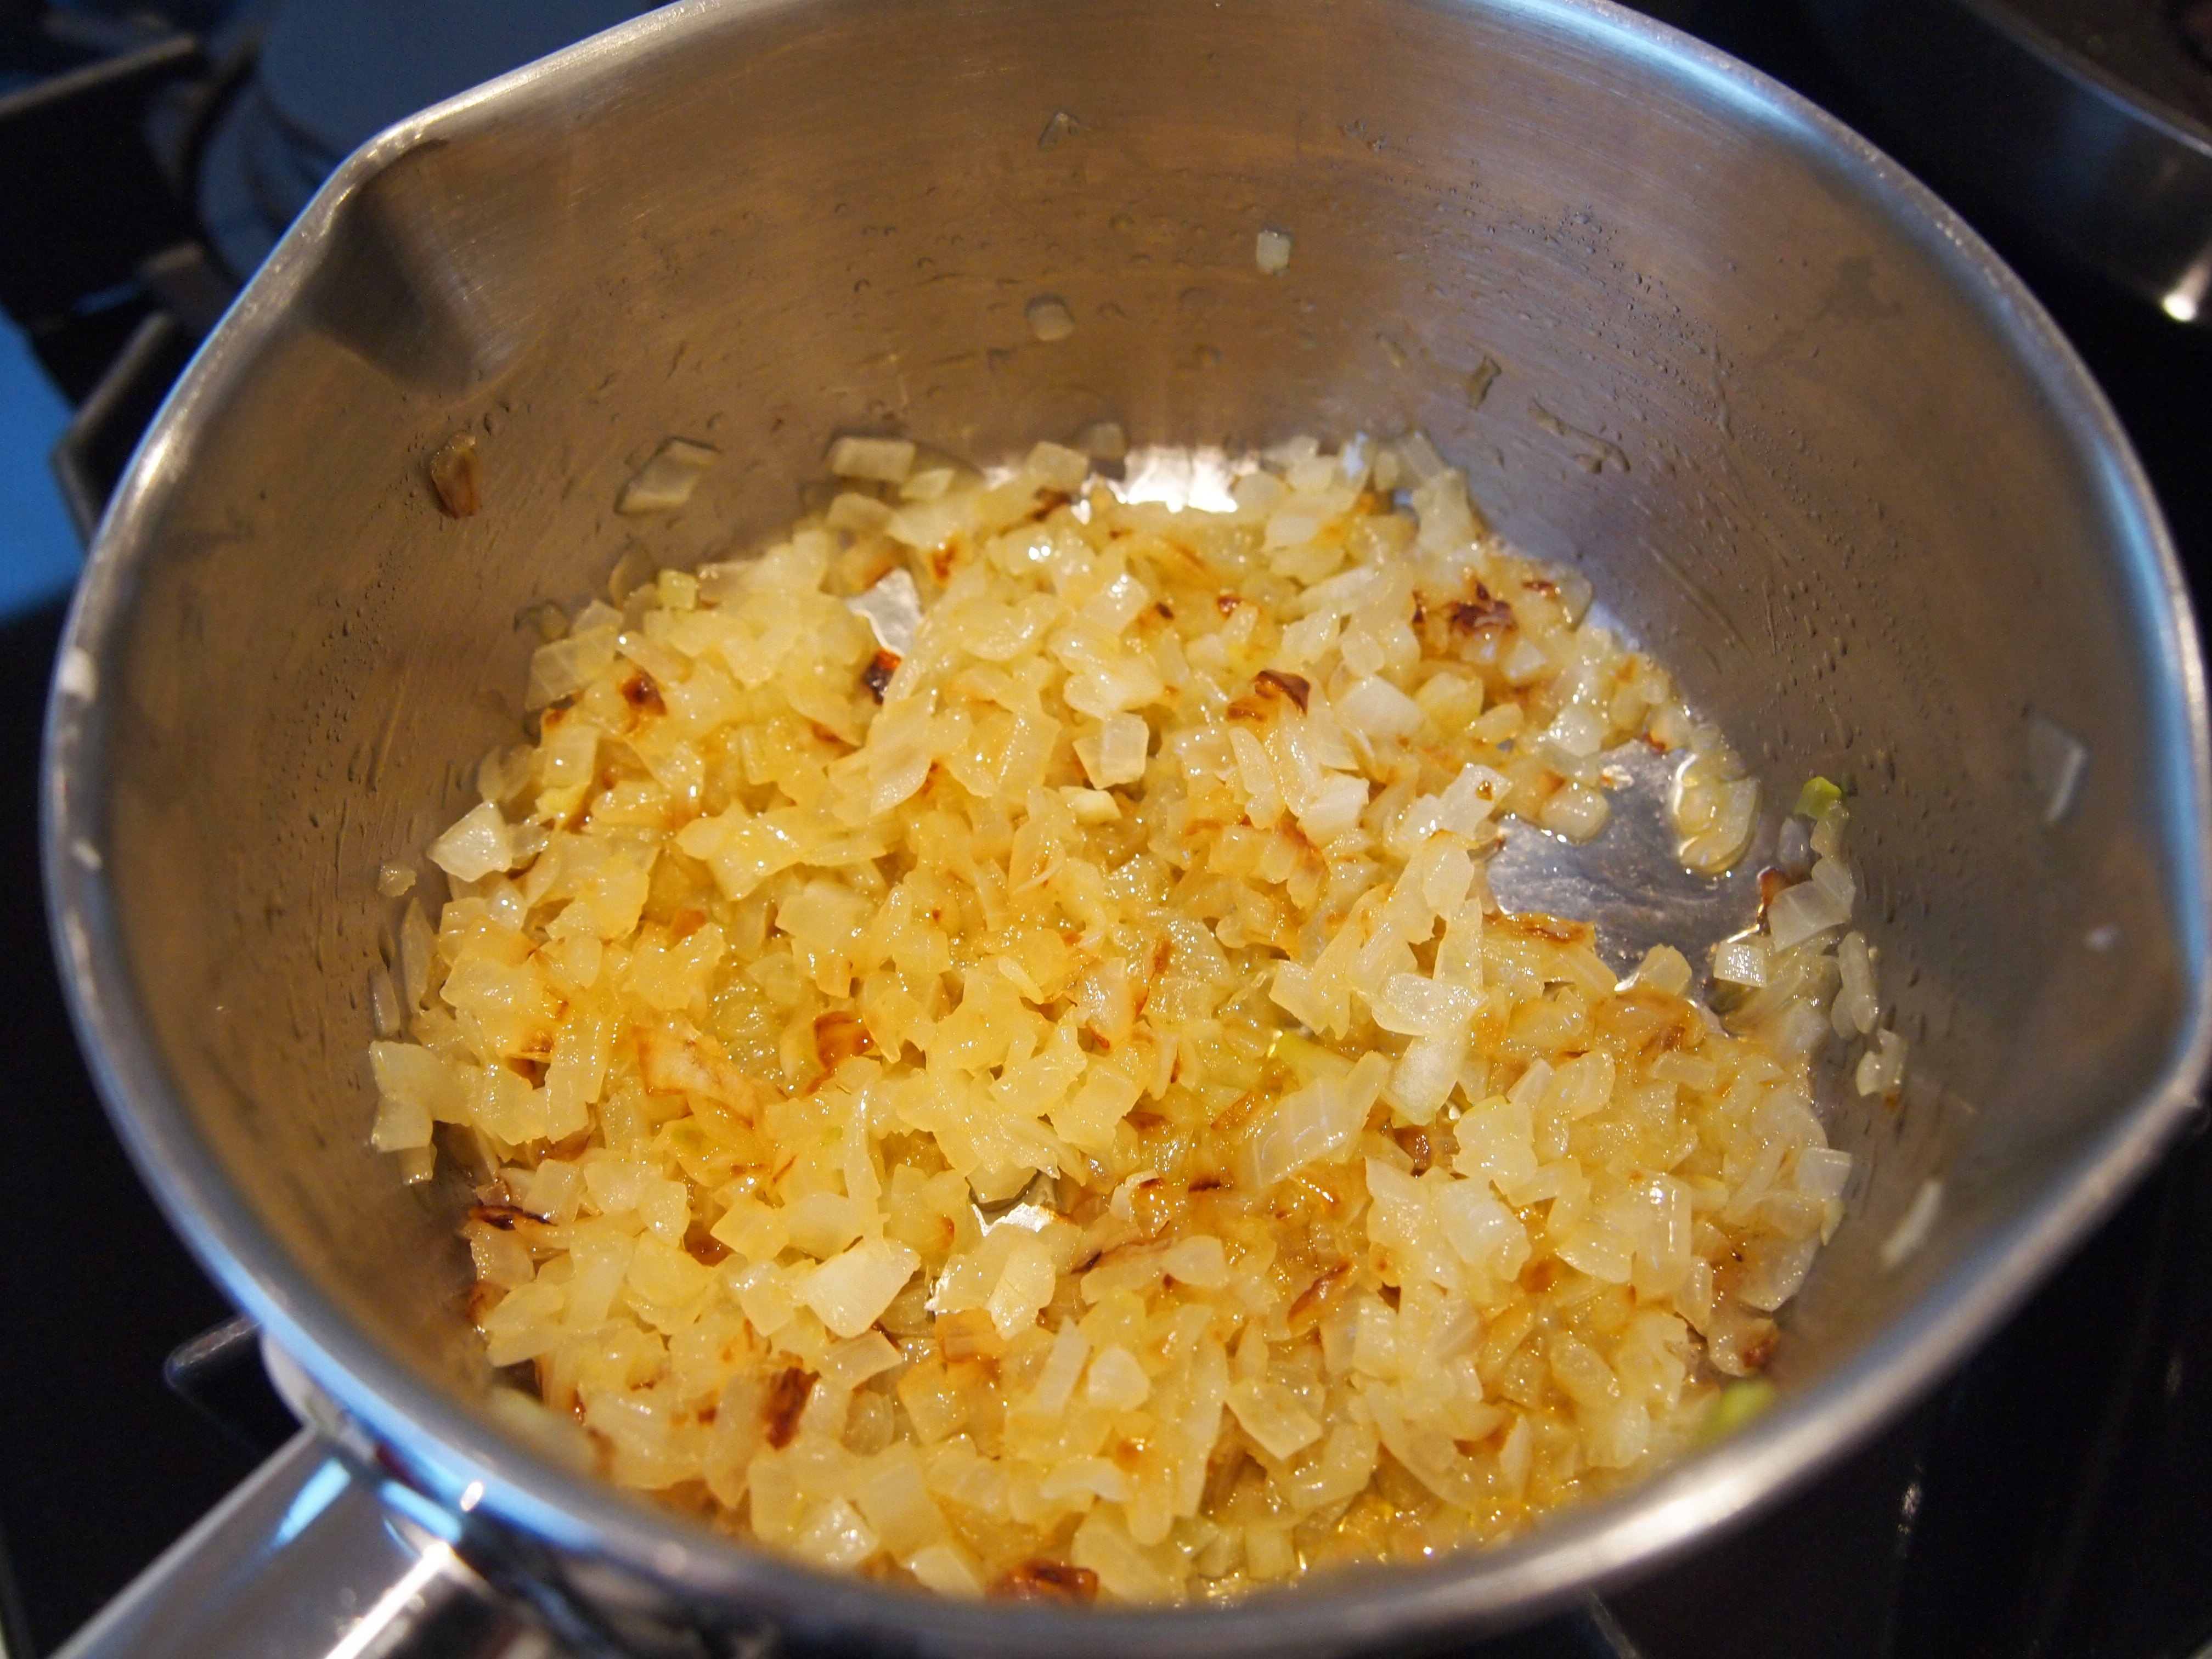
½ teaspoon grated garlic
2 teaspoons grated ginger

Method

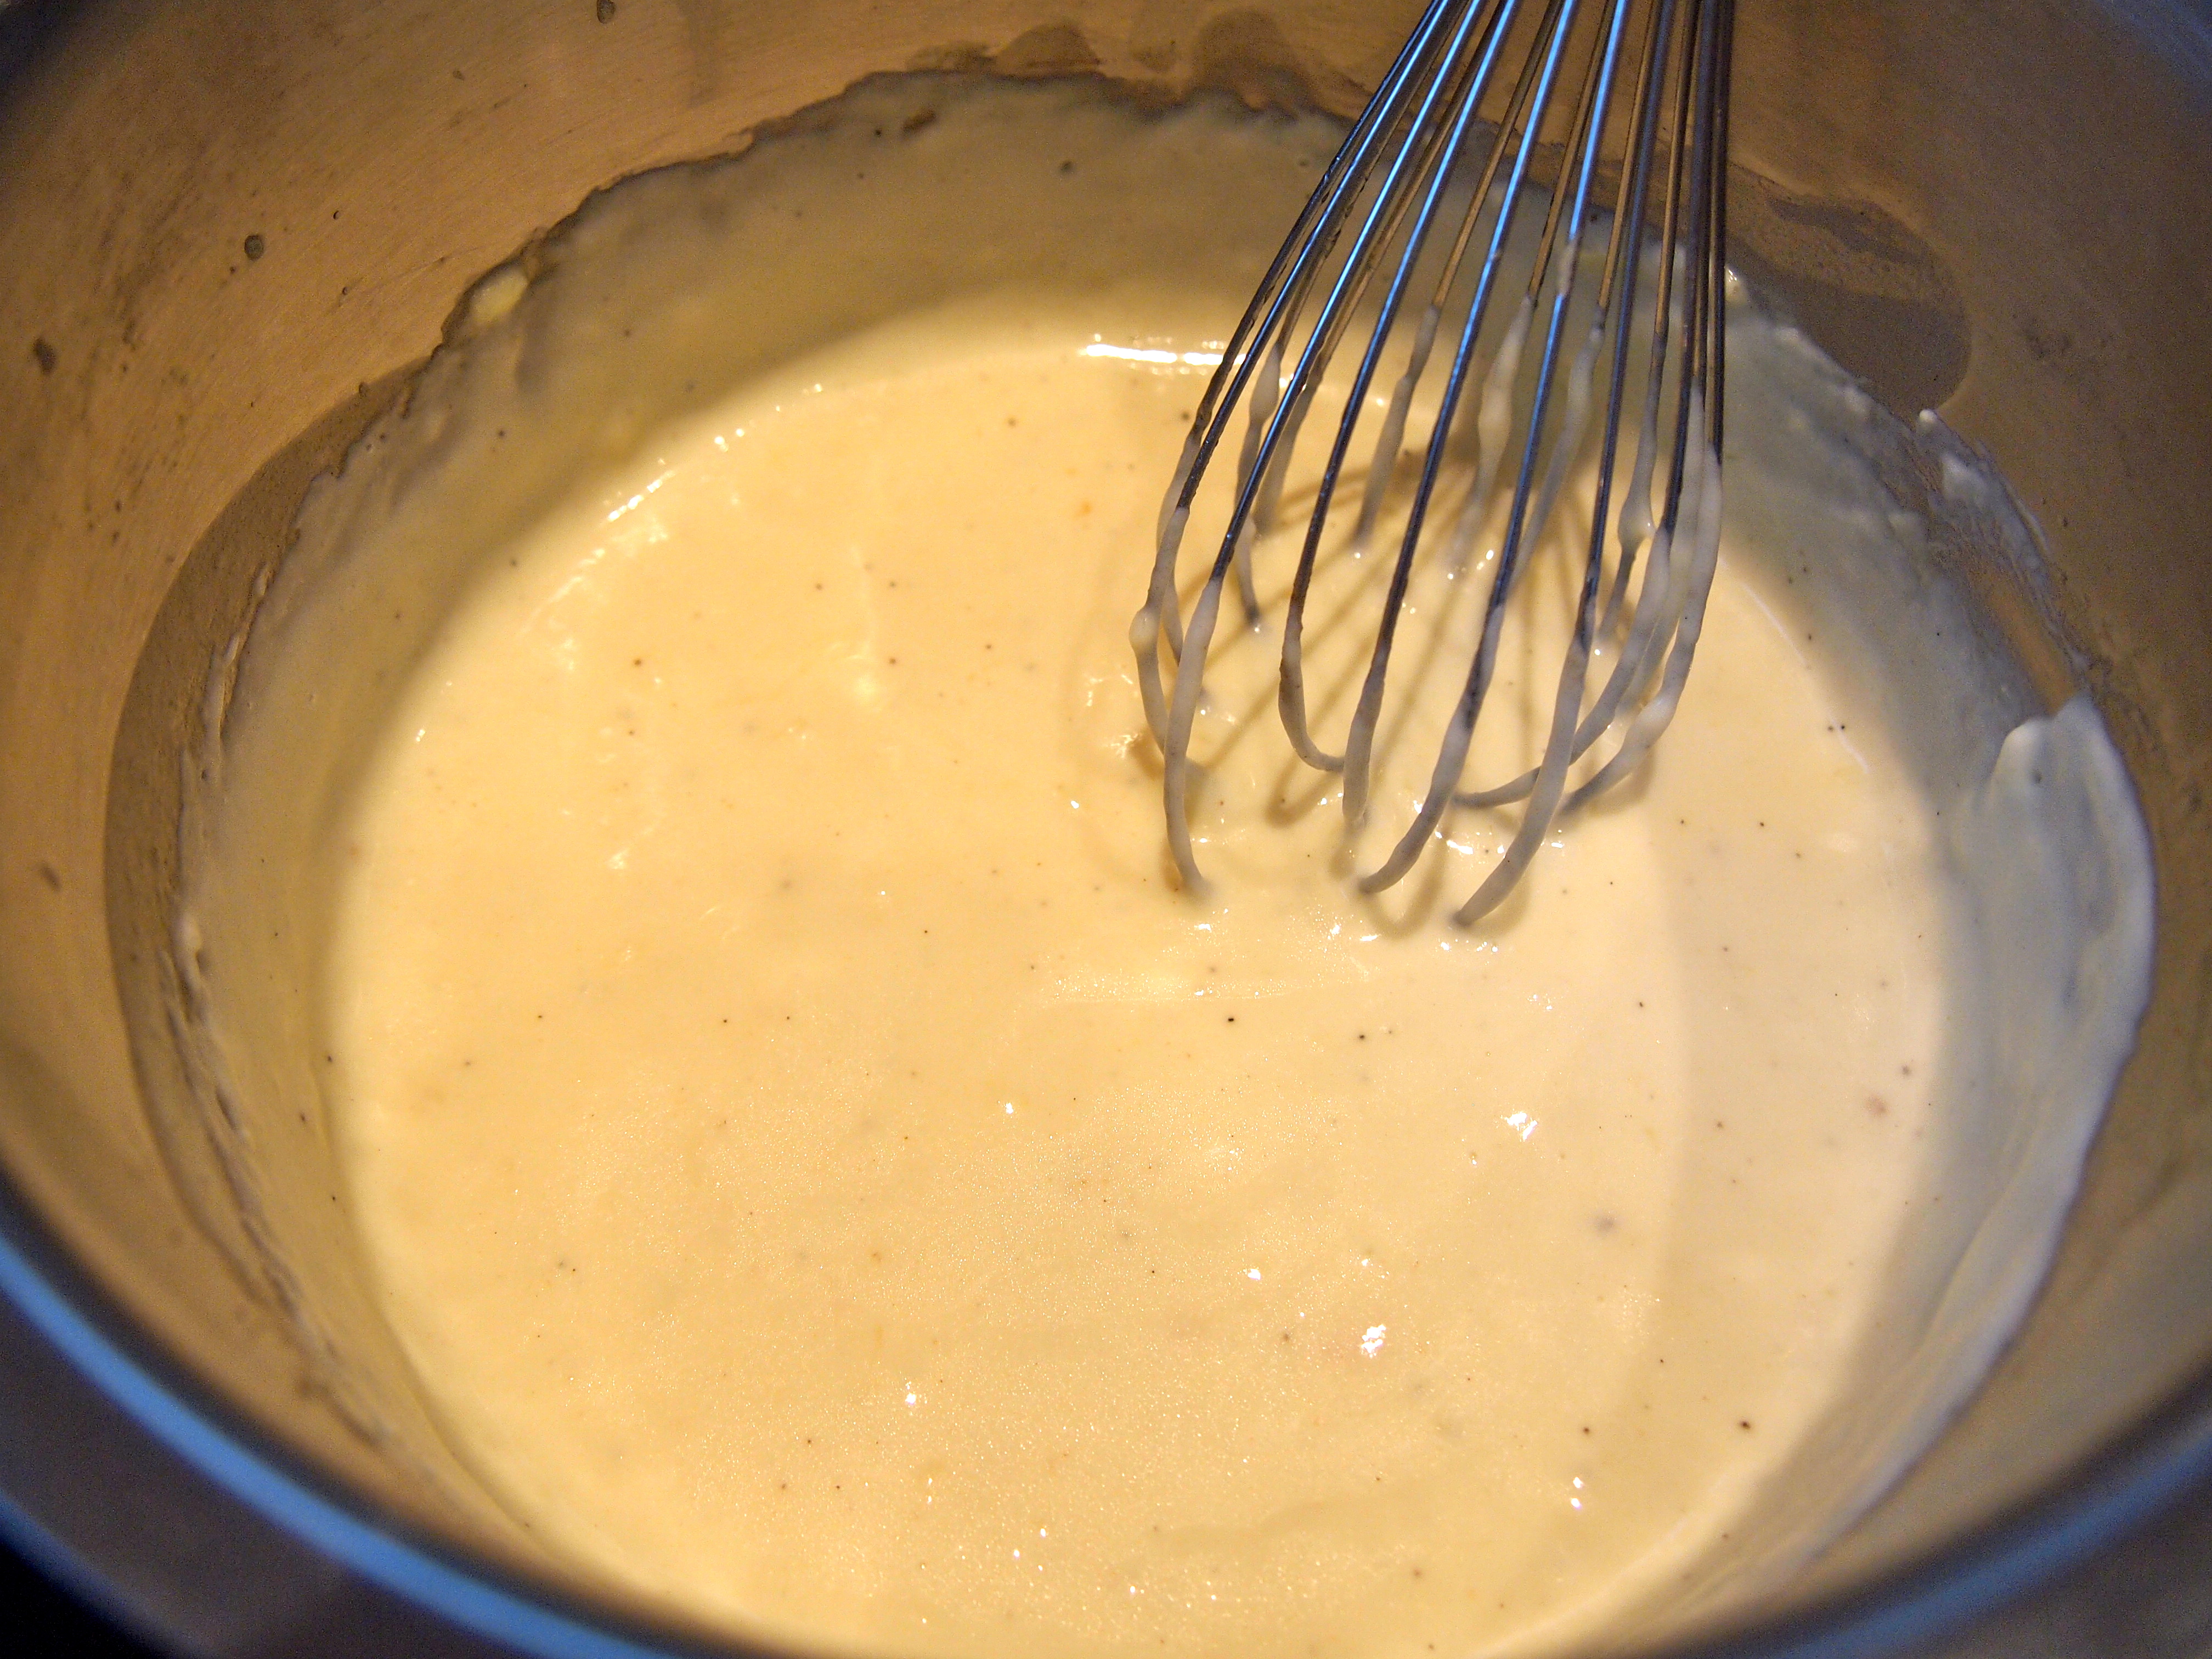
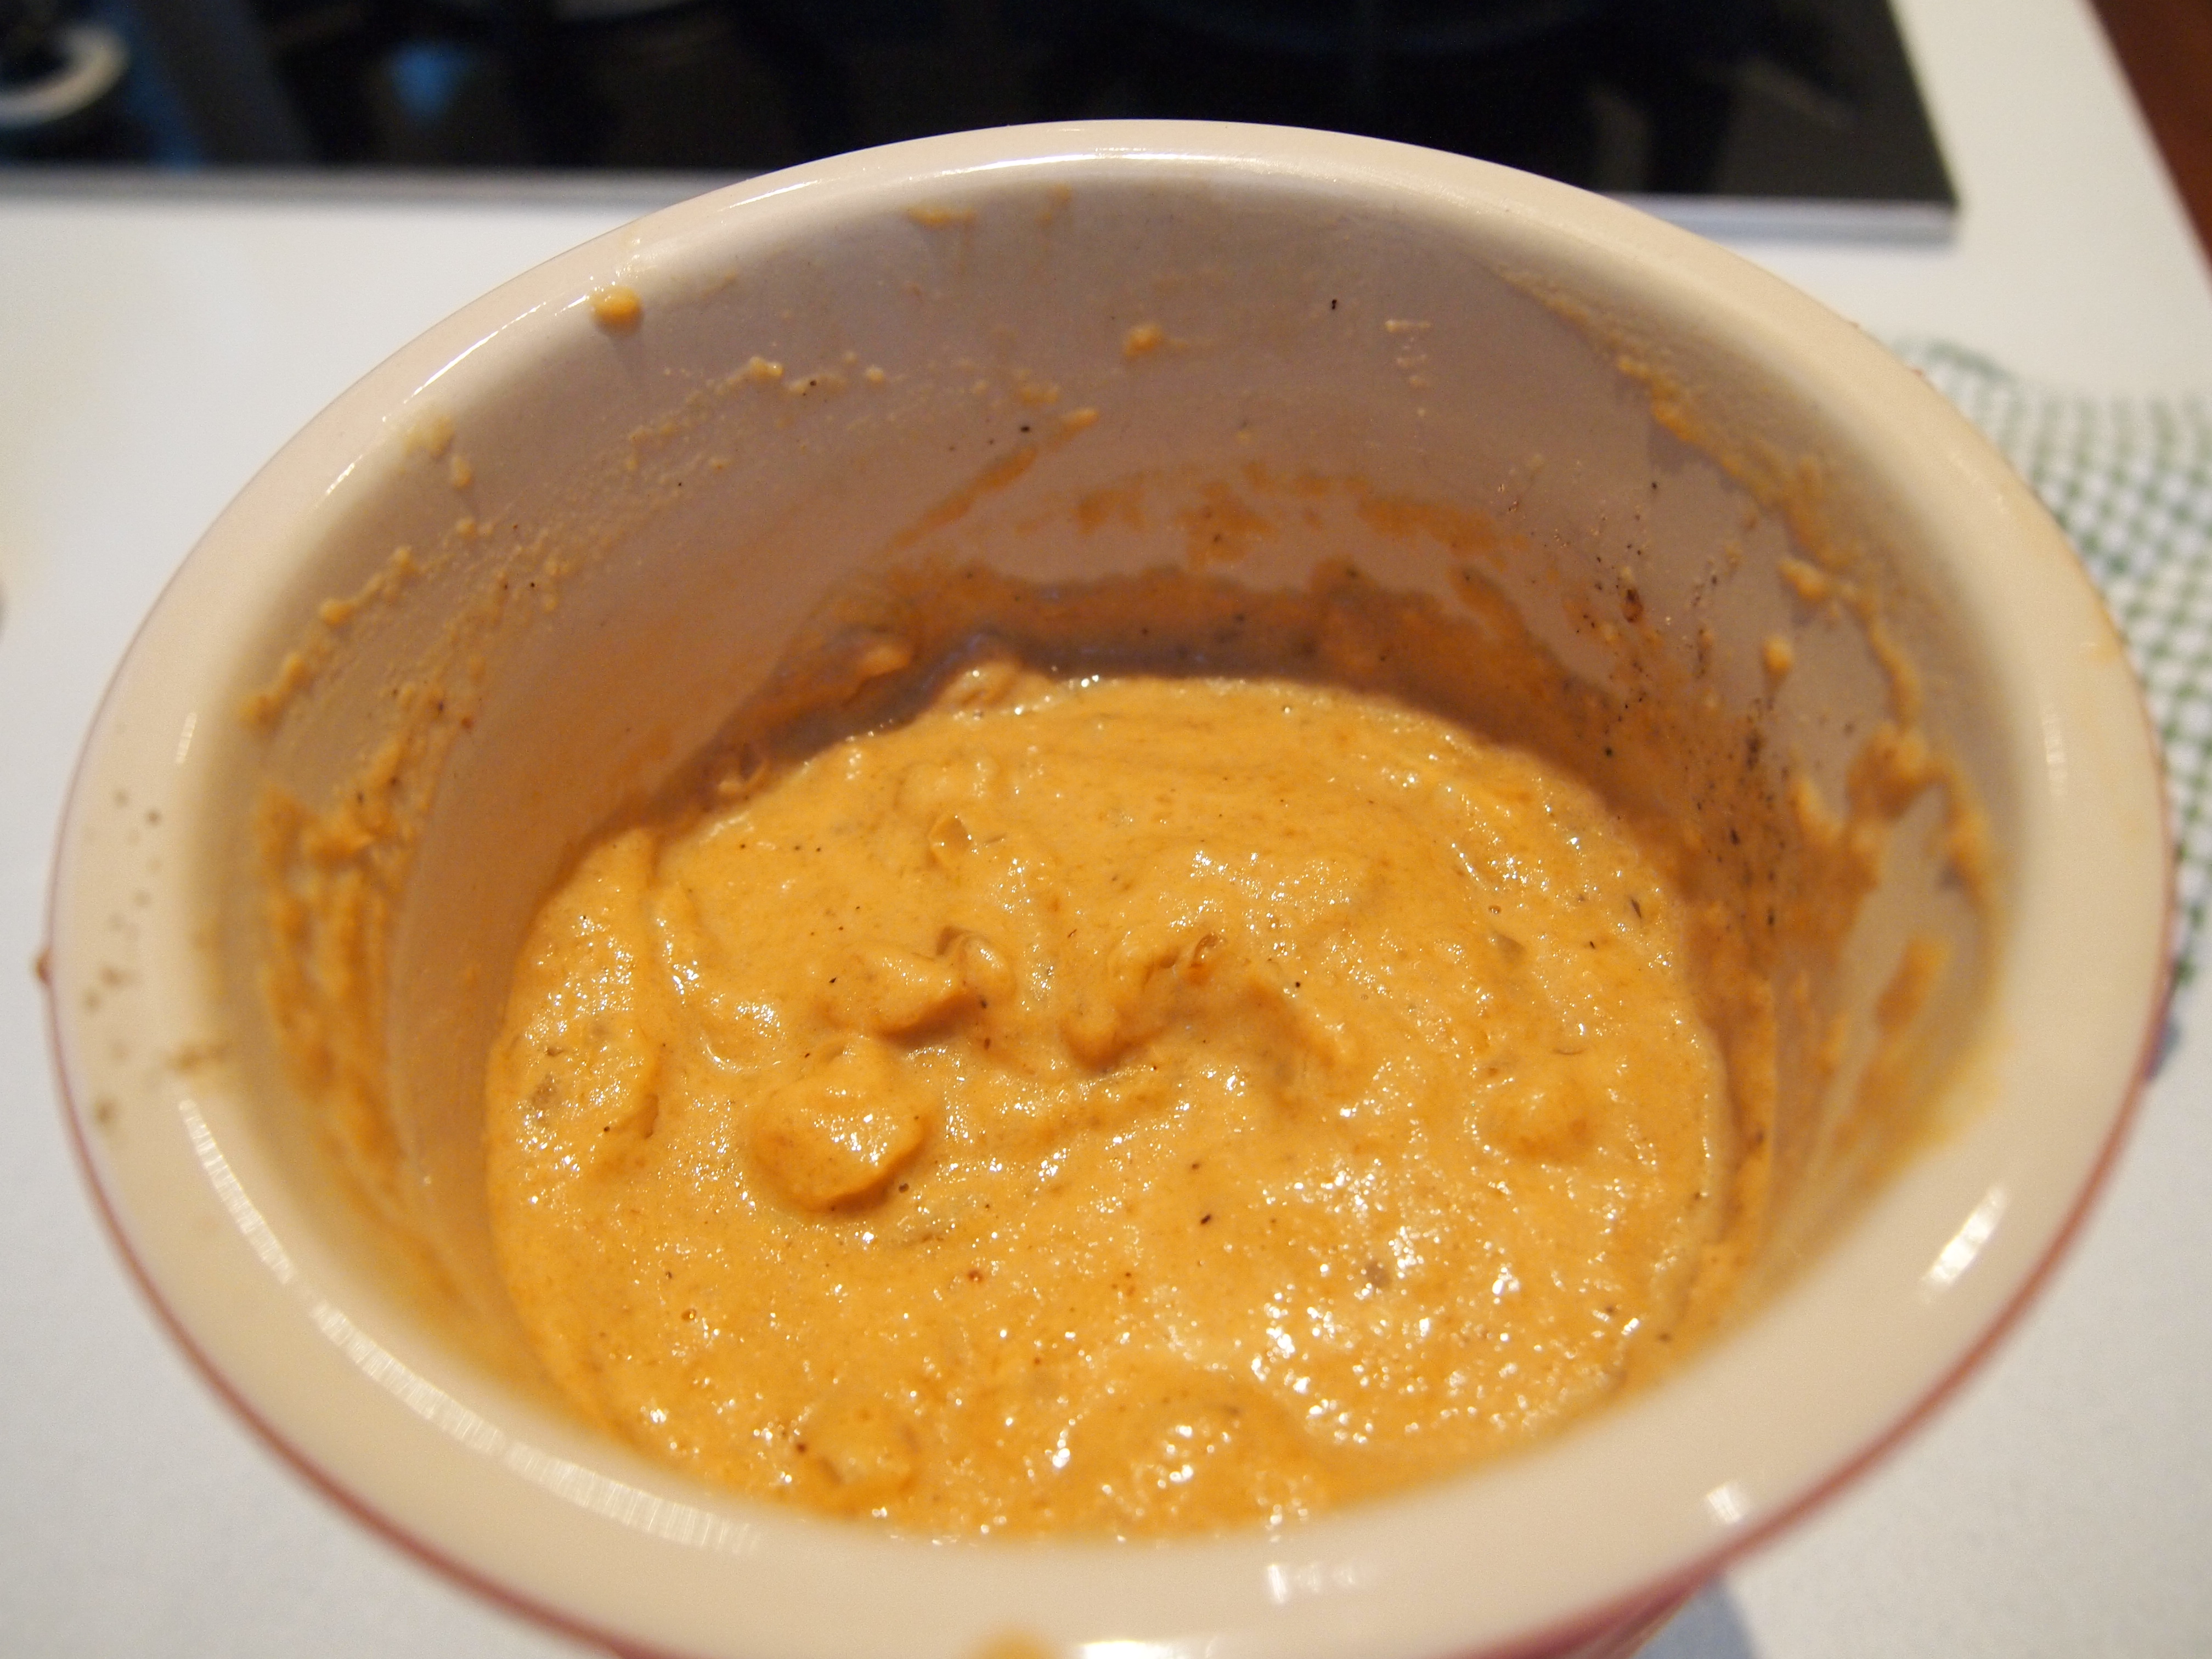
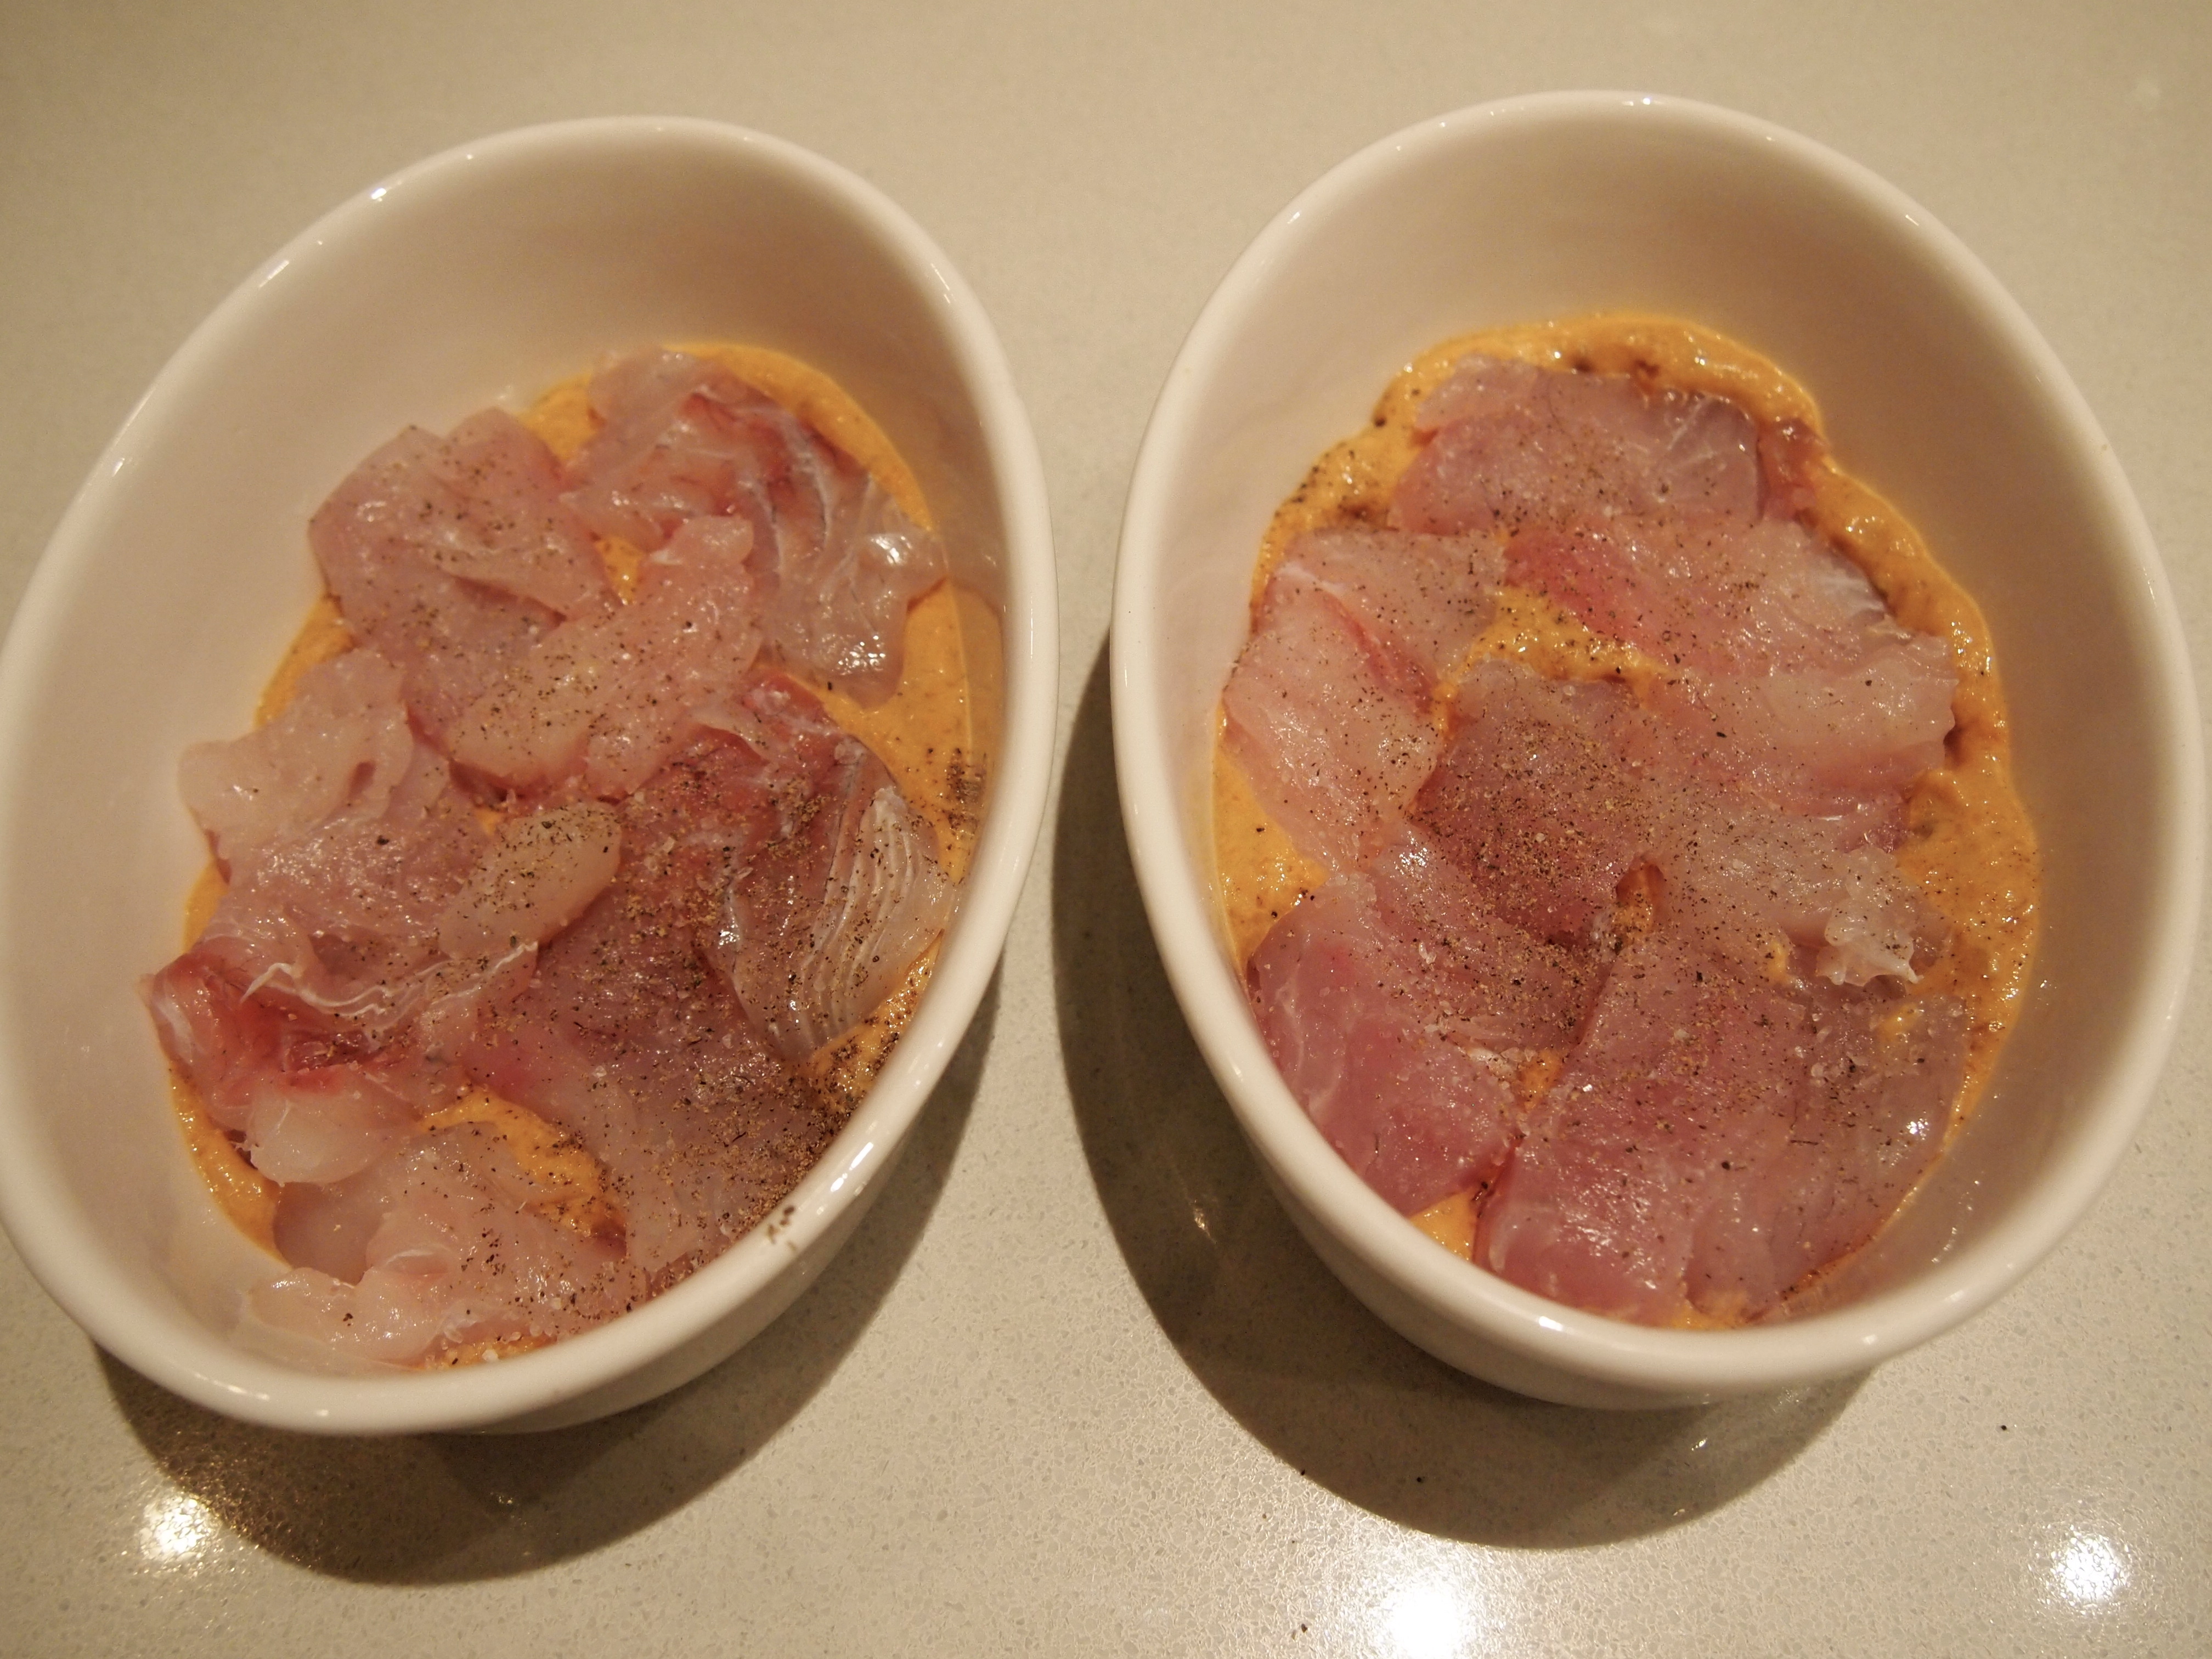
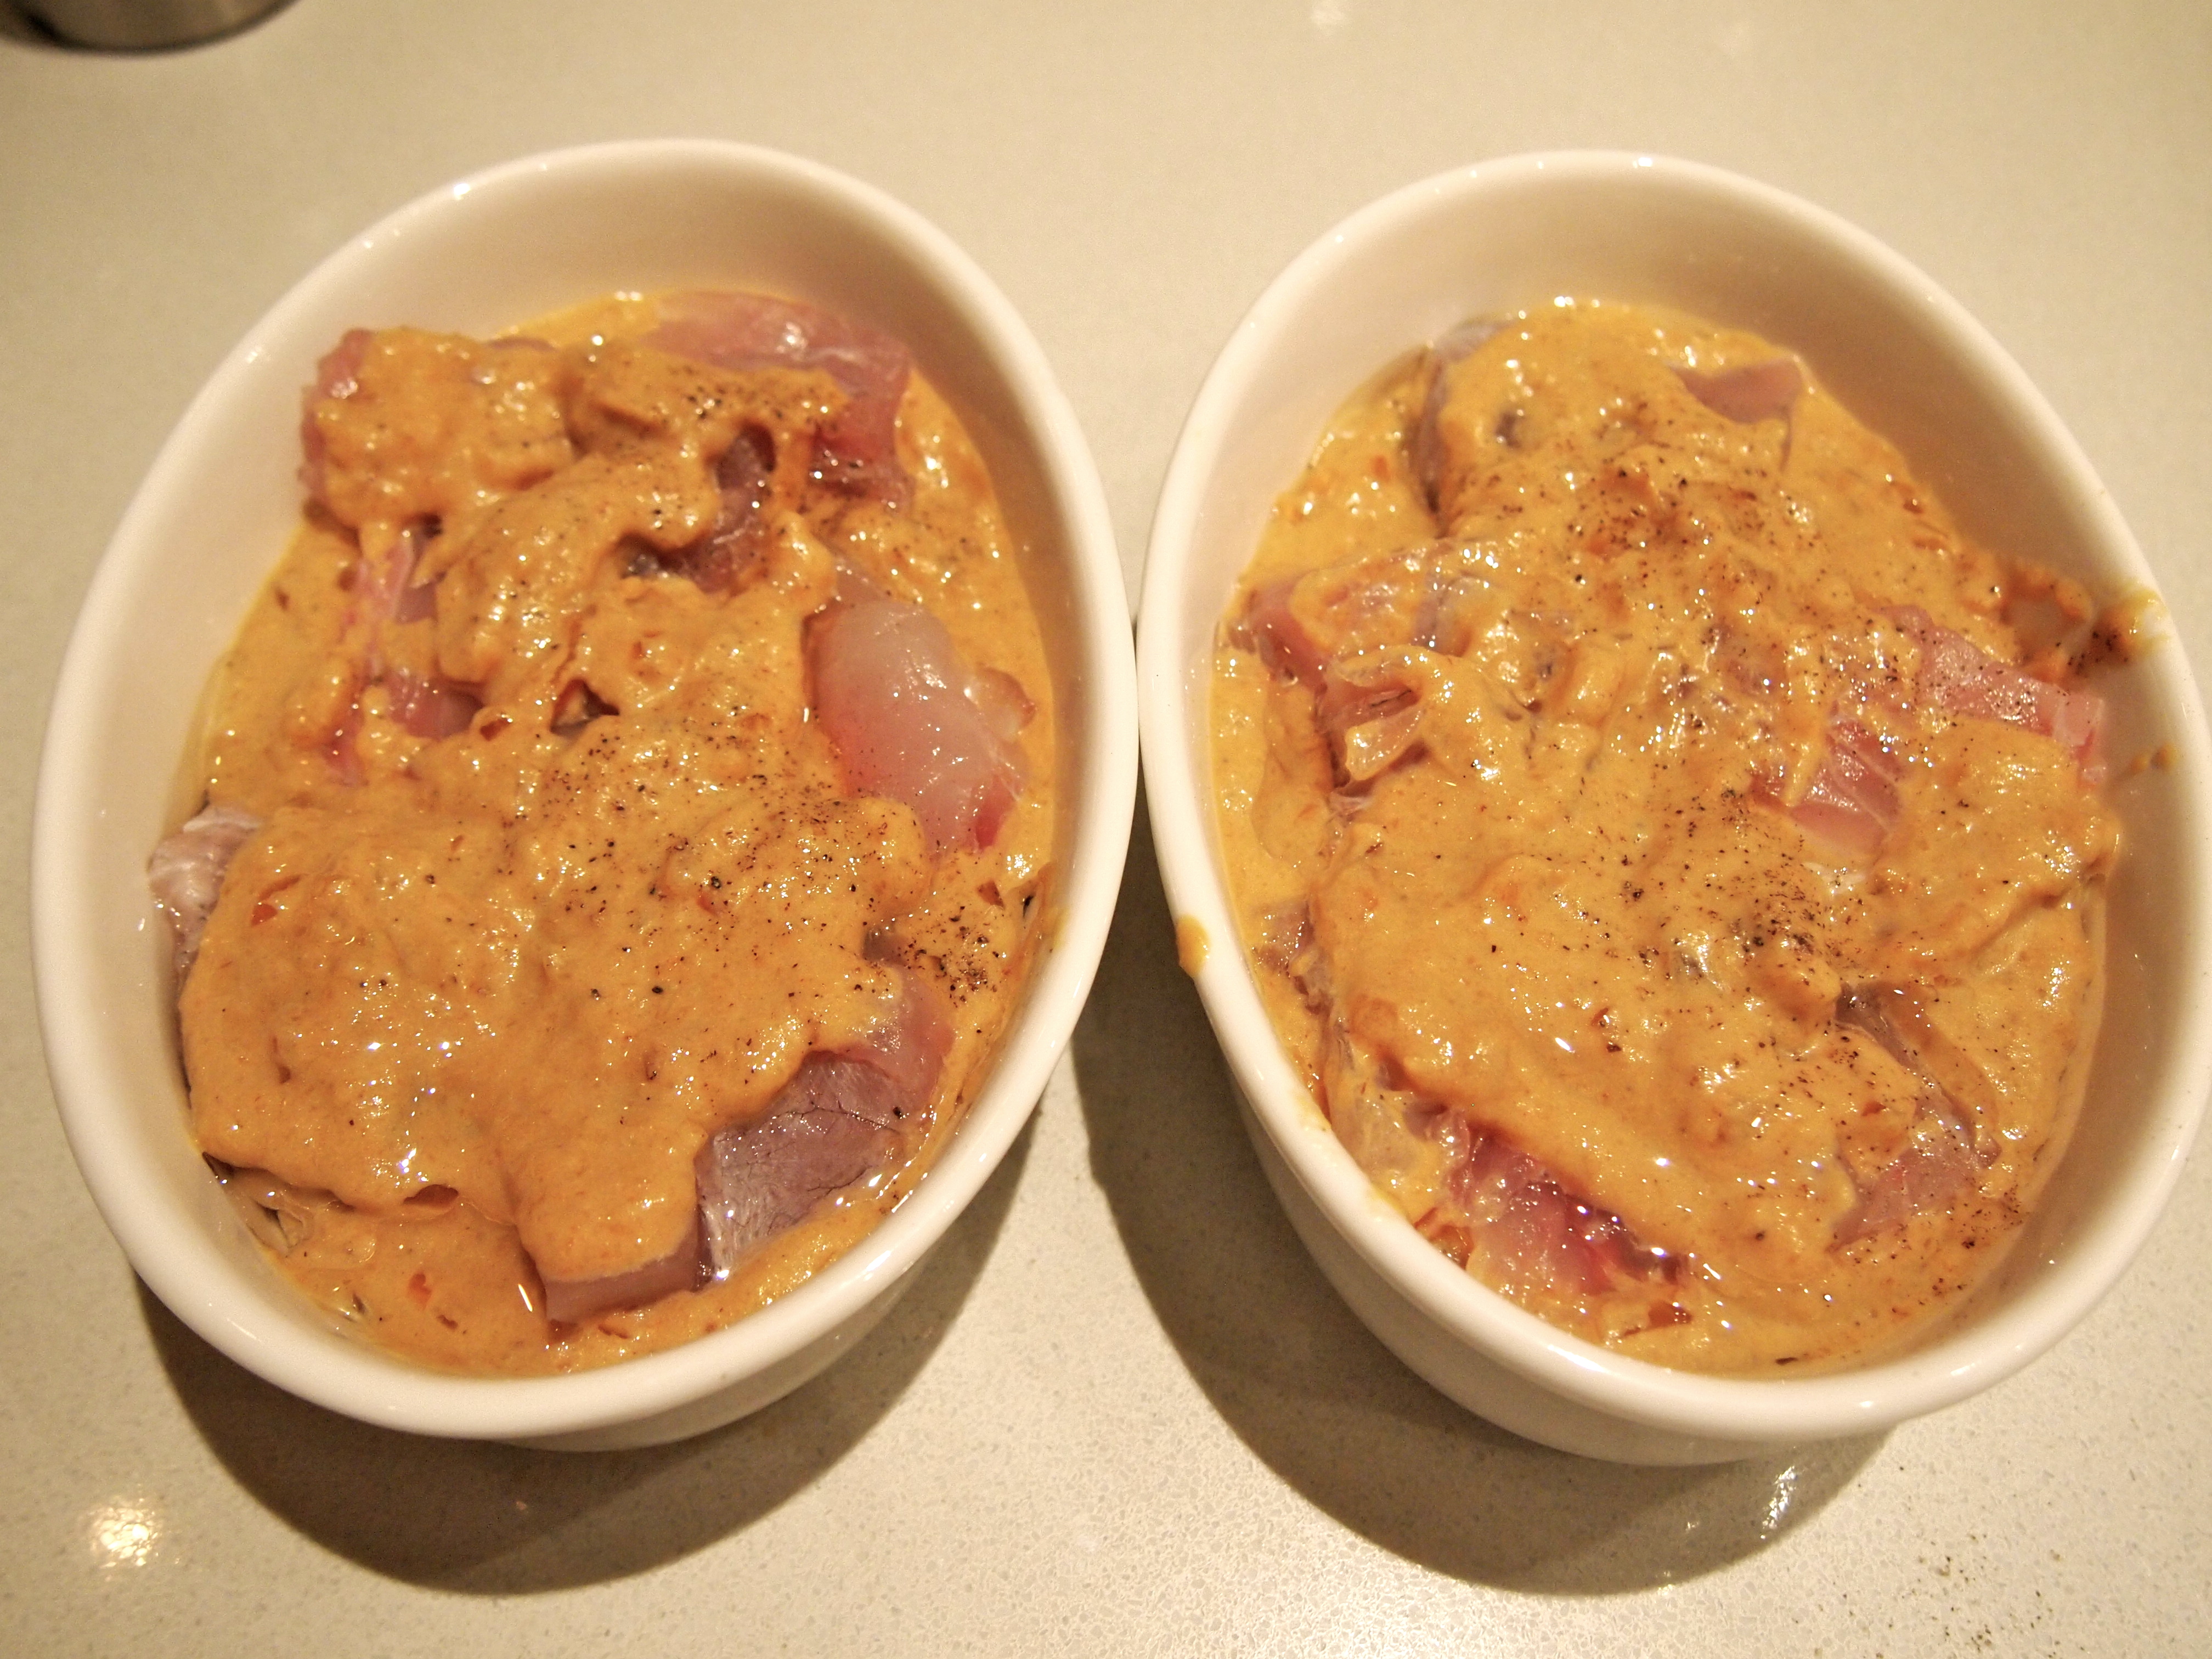
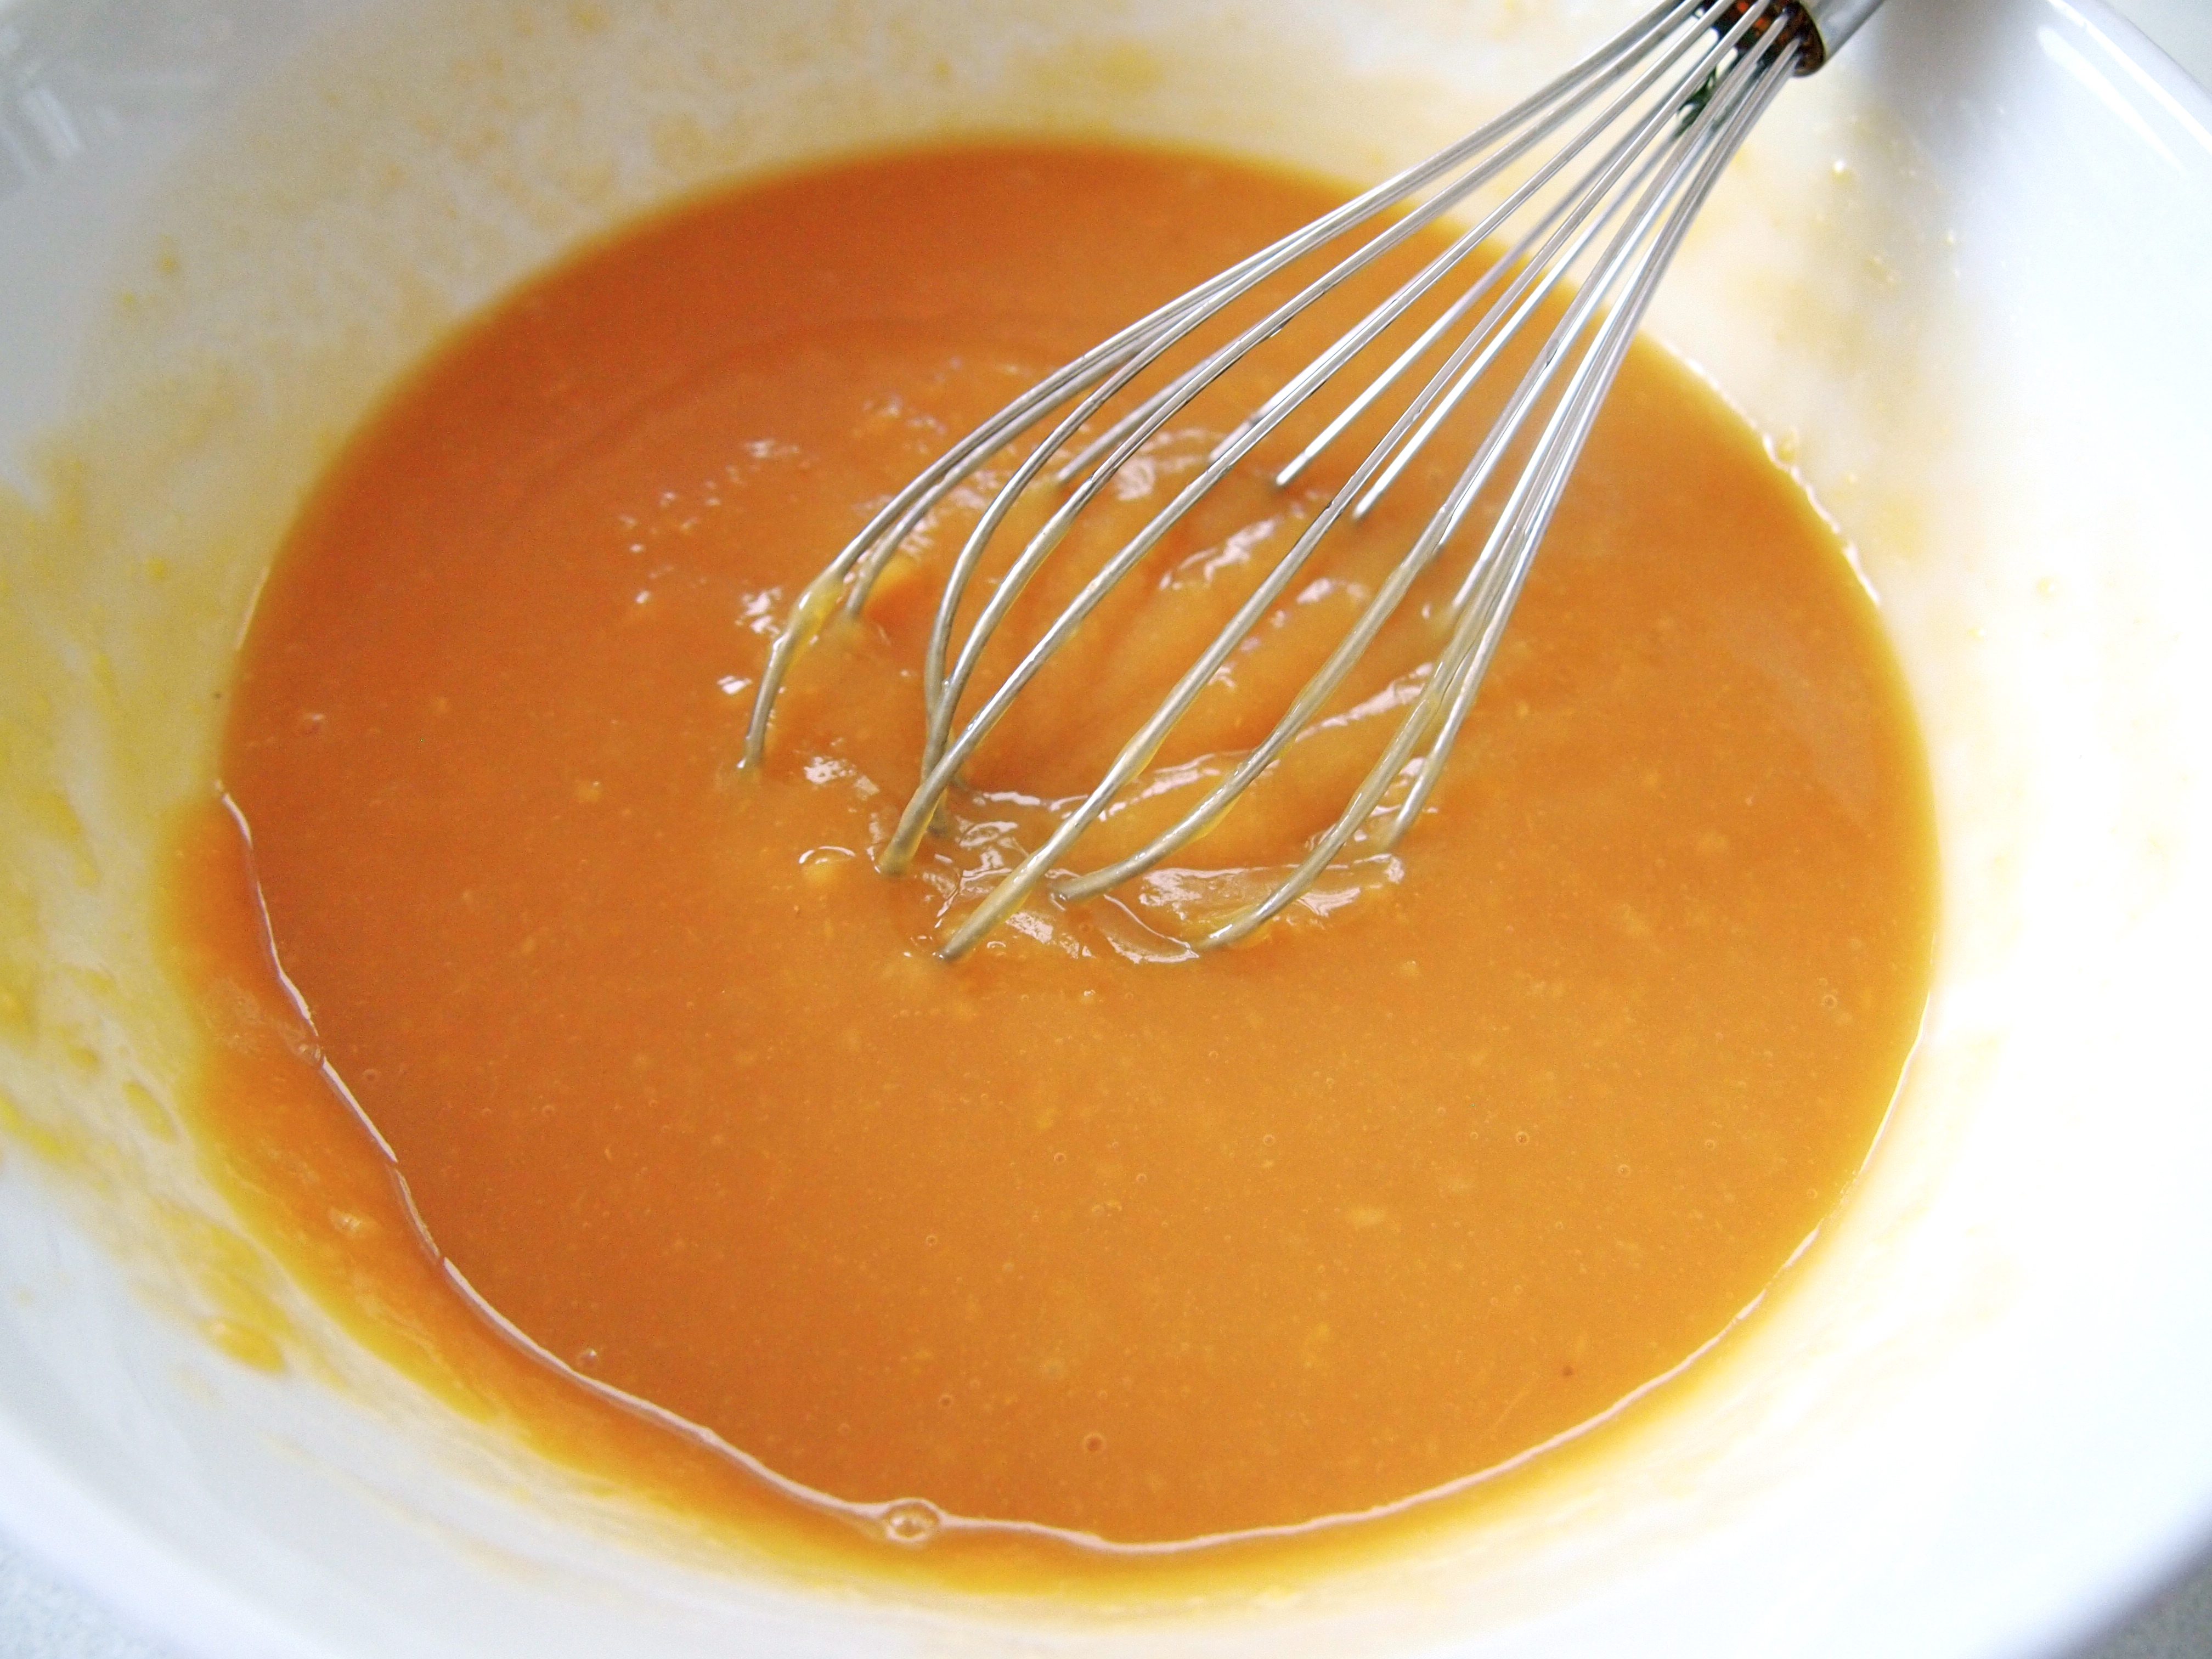
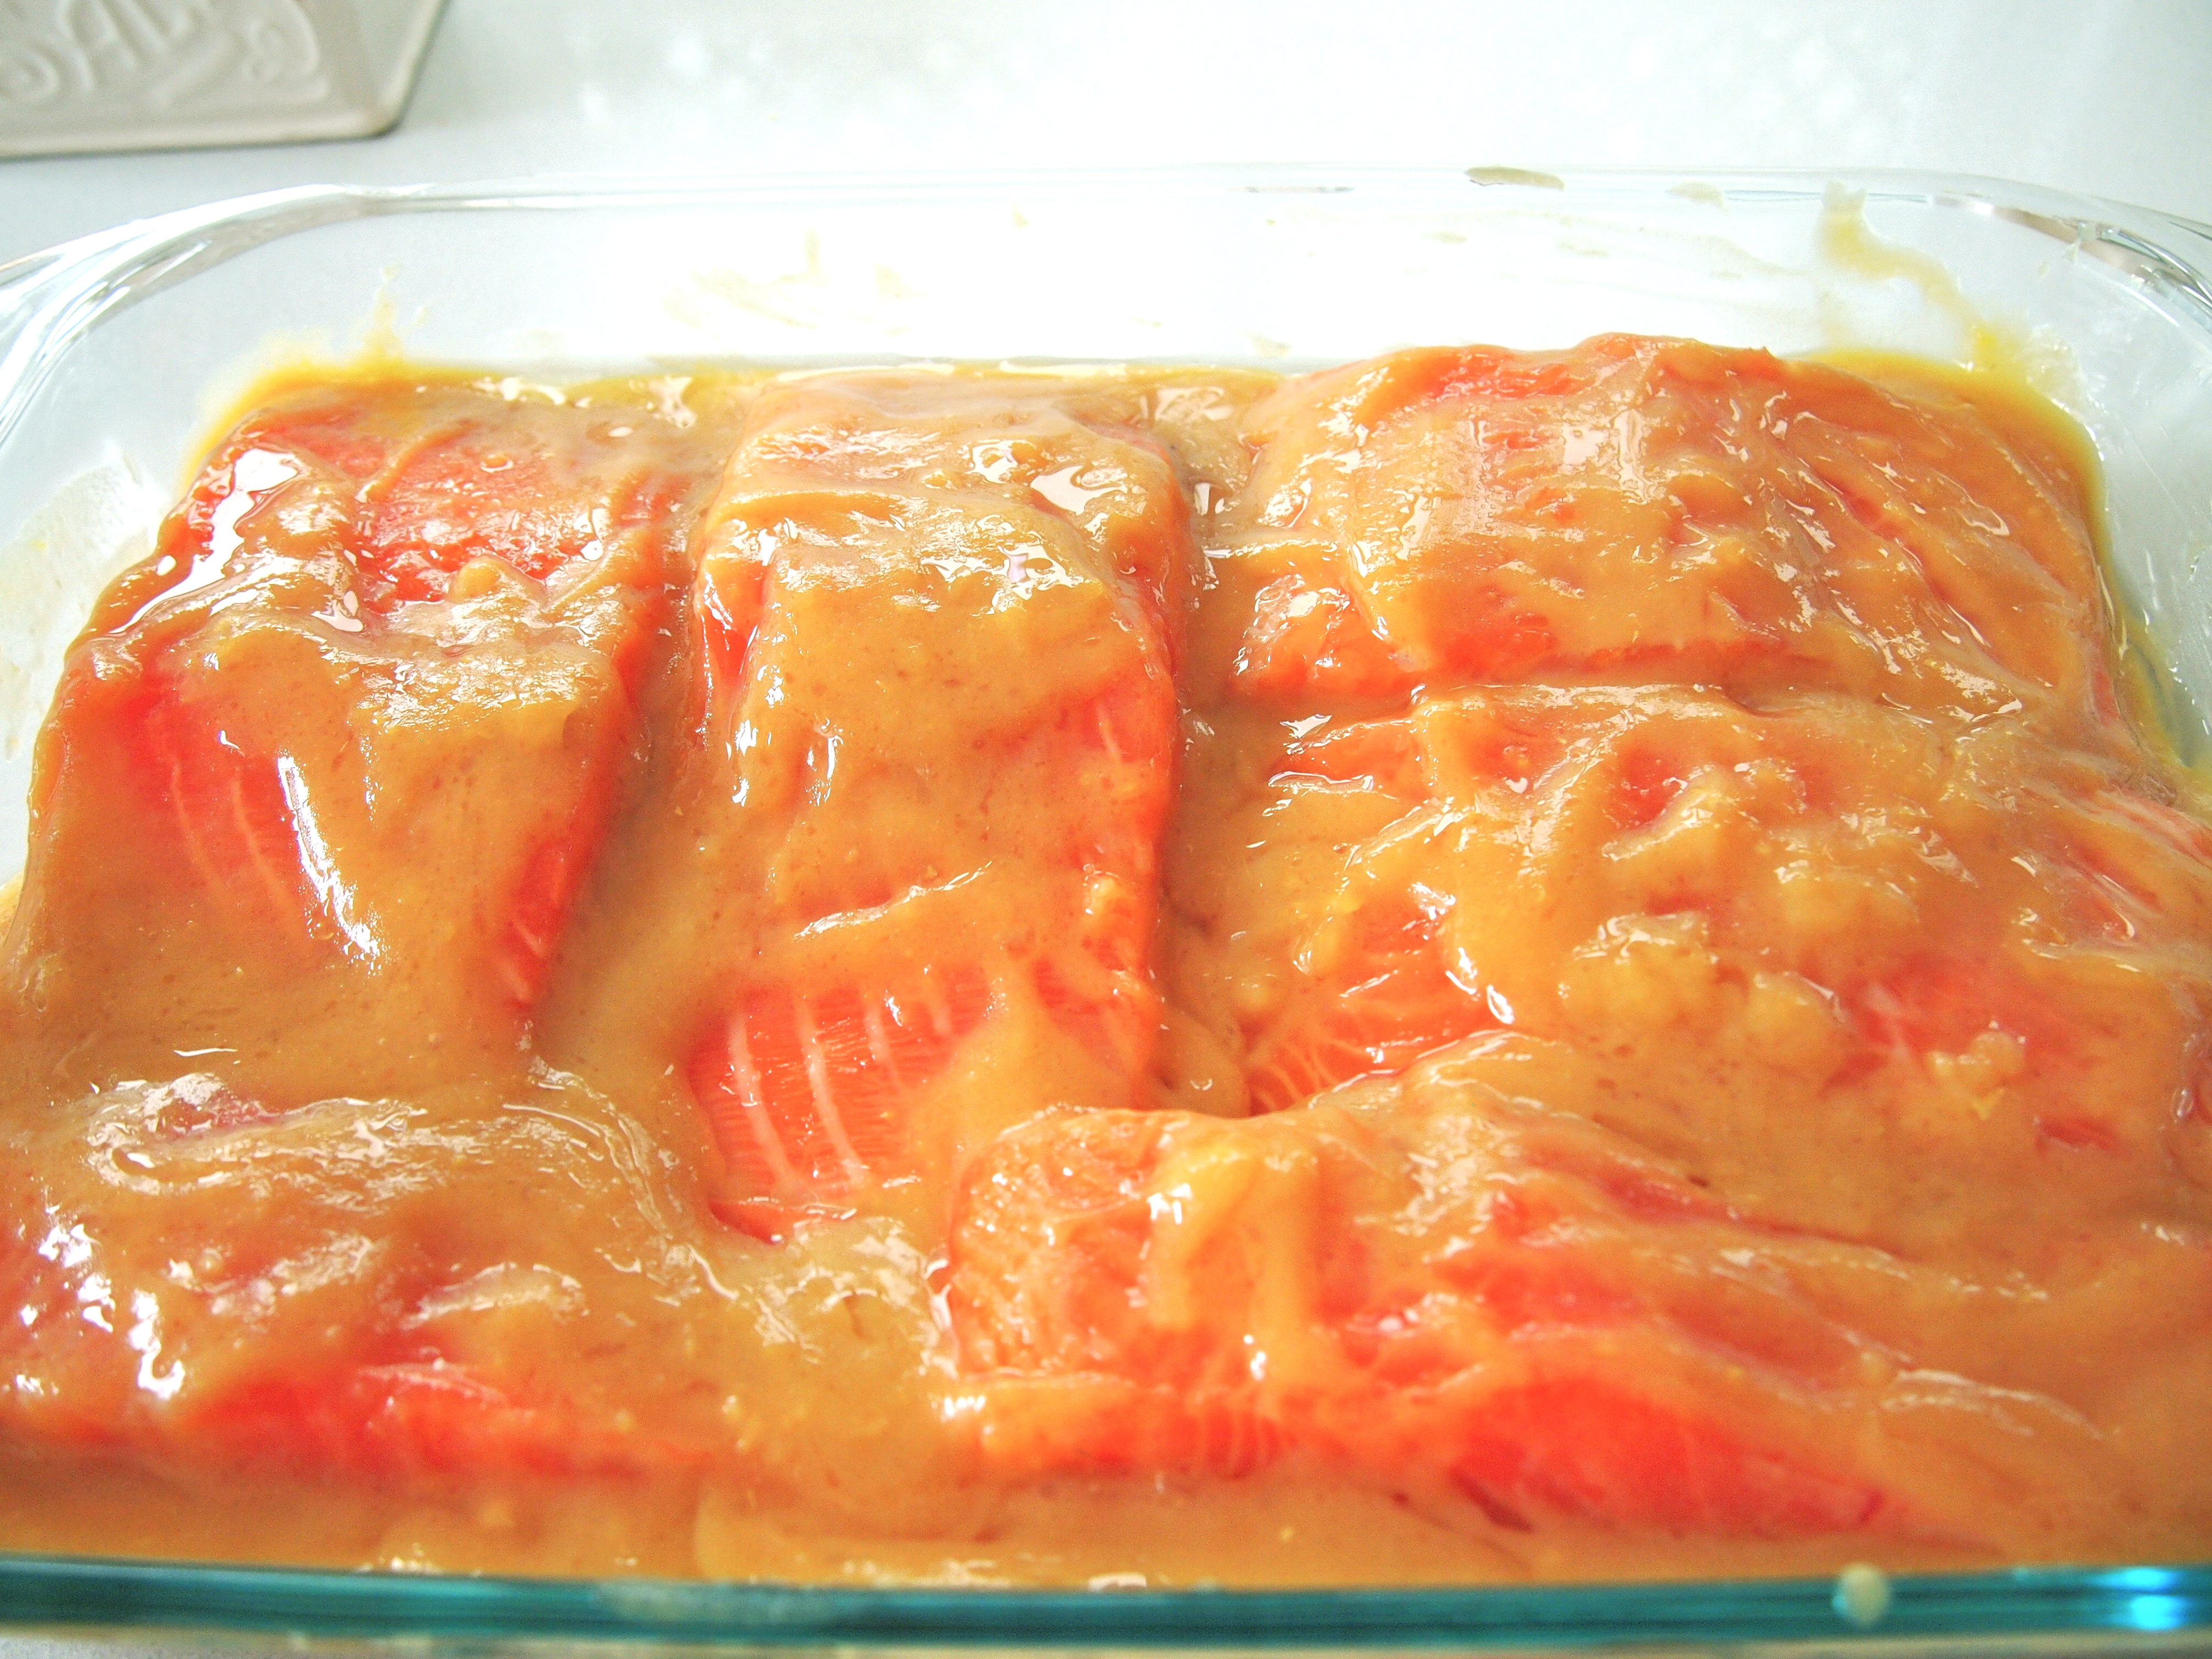
Place sake and mirin in a saucepan and bring to the boil. Hold for about 20-30 seconds until the alcohol is evaporated then remove from the stove. Add sugar and whisk until fully dissolved. Leave to cool to room temperature. Place the miso in a bowl and add the sake mirin mix, garlic, ginger and olive oil and mix well to combine. Spread a third of the miso mixture on the base of a ceramic or glass tray large enough to hold the salmon fillets in one layer. Place the fillets on top of the miso and then evenly cover the fillers with the remaining marinade, making sure that all of the salmon is covered. Cover tightly with cling film and refrigerate for 24 hours.

Pre-heat oven to 200C. Take excess miso off the salmon fillets and place them on a narrow sided, foil covered, baking tray and cook for 10-12 minutes or until the salmon is almost cooked through. At this point you can either place the salmon under a hot grill to char the top or you can use a kitchen blow torch to achieve the same result. You want the top of the salmon to be slightly blackened. This is great served with either plain rice or soba noodles tossed with a ginger and scallion dressing.

Grilled Miso Marinated Salmon - Saikyo Yaki

Sep 25, 2013
mustardwithmutton

3 comments

Thai Yellow Prawn Curry

Thai Yellow Prawn CurrySometimes it’s nice when girlfriends come over and to just get a take-away rather than cook an elaborate meal. We normally opt for Thai food and whilst getting a take-away is a hassle free way of entertaining, I usually find that I can’t help myself and end up cooking one of the dishes. We usually order a few appetisers, a stir fry and a vegetable but I like to make the curry and put on the rice. It’s still a very effortless way of entertaining. Thai curries are quite quick to make compared to Indian curries and this one is based on a curry that we used to love eating at Prasit’s, one of our favourite Thai restaurants in Surry Hills, which has sadly closed down. You can make this with any kind of seafood and it’s especially good with Balmain Bugs. Yellow curries have more of an Indian slant to them as they’re made with curry powder in conjunction with red curry paste. And unlike red or green curries which are quite soupy, the sauce here is thick, and clings to the prawns beautifully. Speaking of the prawns, try to get them as large as you can and butterfly them so the sauce can seep into the crevices.

Ingredients – Serves 4

12-16 large green prawns, peeled, deveined and butterflied – I like to keep the tails on
2 tablespoons vegetable oil
2 banana shallots, diced
1 lemongrass, tough outer leaves removed and soft white section finely diced
75g good quality red curry paste – I like Maesri or Mae Ploy brands
2 tablespoons good quality curry powder
1 star anise
½ teaspoon tumeric
1 x 400ml can coconut milk
½ cup chicken stock – you can substitute vegetable stock
2 tablespoons fish sauce
2 tablespoons palm sugar
Juice of half a lime
1 tablespoon oyster sauce
1 cup of snake beans cut into 2 inch lengths – you can also use normal green beans
10 kaffir lime leaves
Garnish
5 kaffir lime leaves very finely shredded
½ cup of fresh coriander leaves

Method

Heat the oil in a saucepan or deep sided fry pan over medium heat. Add the shallots and lemon grass and cook until soft. Add the curry paste, curry powder, turmeric and star anise and cook for about 5 minutes or until the oil starts to separate from the paste. If you need more oil add a little of the coconut milk and adjust your heat if you need to so as the spices don’t scorch. Add the coconut milk, chicken stock, fish sauce, palm sugar, lime juice and oyster sauce. Bring to a boil and let it simmer uncovered for about 10 minutes for the flavours to develop and the sauce to thicken. Taste and adjust the seasoning with more lime juice, fish sauce or palm sugar if you need to.

Add the snake beans and the kaffir lime leaves (crush the lime leaves in your hands before adding them to release their flavour) and the prawns. Cook for another 5-8 minutes or until the prawns are cooked through. If the sauce isn’t thick enough increase the heat so as it reduces to a nice thick consistency. Serve garnished with the finely shredded kaffir lime and coriander leaves along with steamed jasmine rice.

Thai Yellow Prawn Curry

Sep 18, 2013
mustardwithmutton

no comments

Kick-Ass Texas Style Beef Chili

Texas-Style Beef ChiliI used to think that chili was, well, just chili – some mince, a couple of spices and a can of beans. Oh how wrong I was. There’s a whole world of different chili’s out there, all with their own set of methods and rules.  Yes, rules. Fierce debate around beans or no beans, mince or beef chunks and the spicing is always raging. From what I can tell Texas chili is made with beef chunks rather than mince and has no beans. I love the idea of the meat chunks but I can’t do without the beans which is why I titled this post “Texas-Style” Chili because I have indeed included beans and no doubt broken a hundred other chili laws. I’ll probably never be allowed to enter the state of Texas again!

This chili is not a quick meal to make. It does take a little time but don’t be put off by that or the long list of ingredients because the effort is well worth it. The flavours are deep and complex and the meat fork tender after the long braising time. This dish has some kick to it but it won’t blow your head off. I’d say it’s only medium-hot and next time I’ll make it slightly spicier because once it’s served with the sides of avocado and sour cream some of the heat becomes beautifully mellowed. Speaking of sides please don’t skip the pickled red onions. It cuts through the richness of the chili so well and it’s vinegary crunch is a great textural contrast to the soft meat.

Ingredients – serves 4-6

2 tablespoons vegetable oil
4 medium or 2 large sausages – uncooked chorizo or spicy Italian are both good but anything with lots of flavour
1kg beef shin cut into bite size pieces
2 red onions, diced
8 cloves of garlic, minced
1 long red chilli, diced – use smaller hotter chilli’s if you want more heat
1 teaspoon cumin
1 teaspoon dried oregano
1 teaspoon paprika
1 teaspoon mexican chili powder
½ teaspoon chipotle powder
1 heaped tablespoon of chipotle peppers in adobo sauce
½ teaspoon cayenne pepper
½ teaspoon smoked paprika
2 heaped tablespoons brown sugar
¼ cup cider vinegar
1 cup beef stock
1 400g tin black beans, reserve the juice
1 bottle of beer
2 teaspoons unsweetened cocoa powder
Salt

Pickled Red Onions
2 red onions, finely sliced
23 cup cider vinegar
2 teaspoons salt
2 teaspoons sugar

Method

Heat the oil in a large saucepan or dutch oven. Crumble the sausages from their casings and add to the pan. Cook stirring frequently until golden brown. Remove and set aside. Add beef to the pan and fry until seared. Season with a generous pinch of salt and remove. Add onions to the pan along with another pinch of salt and cook until soft and starting to brown, add more oil to the pan if you need to. Add the garlic, the fresh chilli and a splash of water and fry for a few more minutes scraping the bottom of the pan.

Add the cumin, oregano, paprika, chilli powder, chipotle powder and peppers, cayenne pepper and smoked paprika. Stir well and cook for a couple of minutes. Add the vinegar and brown sugar and stir again. Add the meat and sausages back to the pan along with the beef stock, beer and the juice from the can of black beans. Bring to a simmer. Cover the pan and let it simmer over a low heat for 2 hours.

Ultimate Texas Style Beef Chili Pickled Red Onions

Whilst the chill is cooking make the pickled onions by mixing all the ingredients together and placing them in a shallow bowl so the onions are mostly covered by the liquid. Leave to sit for at least an hour and give them a mix every know and then to make sure all the onions are sitting in the vinegar. After the chili has simmered for 2 hours add the black beans and cook uncovered for 30 minutes. Add the cocoa powder and check the seasoning, adding more salt if required and cook for a further 10-15 minutes. Increase your heat at this stage if there’s too much liquid – you just want enough sauce to coat the meat. Serve hot with sides of sour cream. avocado, corn chips and the pickled red onions.

Ultimate Texas-Style Beef Chili

Sep 11, 2013
mustardwithmutton

1 comment

Heston Blumenthal’s Macaroni & Cheese

Heston Blumenthal's Macaroni & CheeseI recently watched a few episodes of How to Cook Like Heston where Heston Blumenthal takes one ingredient every week and showcases it in a number of recipes. I viewed the episodes on eggs, chocolate and the one this recipe is from, cheese. They were all fantastic programmes with lots of interesting information and tips, and for once, all the recipes he made were very accessible to the home cook.

Now we all have our tried and tested favourite recipe for mac & cheese but after seeing Heston’s take it on it I knew I had to try it and sure enough every other mac & cheese I’ve made pales in comparison. It’s quite an unconventional method, for instance the pasta isn’t boiled and drained but rather cooked in a small amount of water until the pasta has absorbed all the water and is perfectly al dente; the starchy residue on the pasta helping to thicken the sauce. It get’s even better – the white sauce has no flour, butter, cream or milk. Intrigued? Well read on and be prepared for a revolutionary way to a make this old classic.

Ingredients – Serves 4   Adapted from Heston Blumenthal

200g macaroni
½ tsp salt
1 tablespoon very good quality truffle oil
300ml dry white wine
300ml best quality chicken stock – use vegetable stock if you want it to be vegetarian friendly
A piece of parmesan rind
80g mature cheddar cheese, finely grated
10g cornflour
80g soft cream cheese
Black pepper
15g goat’s cheese, diced

Topping  (Heston only used grated parmesan for his topping but I like a crunchier finish)
½ cup finely grated parmesan
2 tablespoons finely chopped fresh parsley
½ cup panko breadcrumbs
2 tablespoons olive oil

Method

Pre-heat oven to 180C. Place 400ml of water, the pasta and the salt in a pan over medium-high heat. Cook, stirring every now and then, until the pasta is done and all of the water has disappeared. If the water has evaporated and your pasta is still undercooked add a little more water and continue cooking until al dente.

In a saucepan, reduce the white wine over a high heat to 30ml. Add the chicken stock and the parmesan rind to the reduced wine. Turn off the heat and let it infuse for 20 minutes. Mix the grated cheese with the cornflour, making sure that all the cheese has been coated with the flour. Bring the pan of stock back to a low simmer and add the cheese to the pan. It’s important that the liquid isn’t boiling vigorously or too hot, you just want it warm. Stir until the cheese has just been incorporated into the sauce. At this point stop stirring straight away otherwise the cheese will clump together. Add the softened cream cheese to the sauce and again stir until it has melted through.

Heston Blumenthal Mac & Cheese Heston Blumenthal Mac & Cheese

Add the cheese sauce to the pasta and stir it through. Add the diced goats cheese, the truffle oil and season with freshly ground black pepper. Give it another good stir and place it in a baking dish. To make the topping, mix all the ingredients in a small bowl. Sprinkle evenly over the pasta and place the dish in the oven and cook for 20-25 minutes or until the top is golden brown. Serve immediately.

Heston Blumenthal Mac & Cheese

Sep 4, 2013
mustardwithmutton

no comments

Braised Borlotti Beans with Sausages & Poached Eggs

Braised Borlotti Beans with Sausages & Poached EggsThis recipe, which was featured in a recent Donna Hay magazine, is utterly delicious and as we ate it for dinner on a cold winter evening we both thought what an awesome brunch dish this would make, paired perhaps with some spicy Bloody Marys. It’s quite quick to throw together with the only tricky element being the poached eggs. I have a hard time poaching eggs. I’ve tried every method imaginable, but the perfect poached egg still eluded me. Until I recently came across Poachies by Wiltshire at the supermarket. These ingenious little bags make poaching eggs a breeze. They turn out perfectly every time and are especially useful if you’re trying to poach a large number of eggs. If you manage to find these egg poaching bags you can omit the vinegar in the recipe below and just cook the eggs according to the packet instructions. Whether you decide to make this for dinner or brunch make sure you have some crusty bread on hand to soak up all the delicious sauce.

Ingredients  – Serves 4   Adapted from Donna Hay Magazine

2 tablespoons olive oil
120g speck (or slab bacon), chopped into large chunky dice
1 large onion, diced
3 cloves of garlic, finely minced
Salt & freshly ground black pepper
600g fresh borlotti beans, shelled
2 tablespoons tomato paste
1 litre best quality chicken stock, preferably organic
2 tablespoons thyme leaves
4 good quality beef or pork sausages
4 rashers bacon, rind removed
¼ cup white vinegar
4 eggs

Method

Heat the oil in a large heavy based saucepan over high heat. Add the speck and cook for about 5 minutes or until golden. Remove and set aside. Reduce heat to medium, add the onion, garlic, a generous pinch of salt and pepper and cook, stirring occasionally, until softened. Return speck to pan with the beans, tomato paste, stock and thyme. Bring to the boil and cook for about 40 minutes or until the beans are tender. Check seasoning and adjust if necessary.

Preheat oven to 220C. Wrap each sausage and a rosemary sprig together with a rasher of bacon and place on a lightly greased baking tray. Cook for 20-25 minutes or until golden and cooked through.

Heat a large saucepan of water over low heat until just simmering. Add the vinegar and use a spoon to create a gentle whirlpool. Crack each egg into a small bowl and gently tip into the water. Poach the eggs for 3-4 minutes or until the egg white is cooked and the yolk is still runny. Remove with a slotted spoon. Alternatively if you can find the Wiltshire Poachie bags at your supermarket (see note in introduction) you can make life a lot easier and just use those and follow the package instructions.

To serve, divide the beans between plates, top with the sausages and poached eggs and serve immediately with some crusty bread.

Braised Borlotti Beans with Sausages & Poached Eggs

Aug 28, 2013
mustardwithmutton

no comments

Chicken Matzo Ball Soup

Best Ever Chicken Matzo Ball SoupThere’s a reason why chicken soups are sometimes referred to as Jewish Penicillin; you can literally feel it’s restorative powers with every mouthful. And chicken matzo ball soup is the daddy of all Jewish soups. The key to a great chicken soup is of course the broth and no skimping and purchasing of even the best quality pre-made stock will suffice. It has to be made from scratch, no ifs or buts. You can’t be cheap either with the amount of chicken pieces. chicken bones or carcasses you use – the more, the better the taste of your broth. The vegetables used also play an important part. I like to use carrots, onions, parsnips, celery and a head of garlic, with some herbs thrown in for good measure. A word on the matzo balls. I like them to be walnut size but you can of course make them larger. Some recipes call for the matzo balls to be cooked in the soup but I prefer to boil them separately and then add them to the broth just to heat through. This way I can cook a large match of matzo balls and then just heat as much of the soup and matzo balls I require without constantly reheating the matzo balls which wouldn’t yield great results. This dish is not only something that’s wonderful to eat, it’s also very satisfying to make. There’s something about a big batch of broth simmering on the stove, filling your house with the smell of goodness that’s very comforting.

Ingredients – Feeds at least 6-8 & broth freezes well

1 small whole chicken, preferably organic or free range, cut into quarters
1.5 kg chicken bones or carcasses – again, organic or free range is preferable
1 large leek, cut into 3-4 sections
2 brown onions, quartered, skin can be left on
2 parsnips, cut into chunks
2 carrots, cut into chunks
1 head of garlic, cut in half horizontally
2 sticks celery, cut into chunks
2 bay leaves
6 sprigs parsley
6 sprigs dill
2 teaspoons salt
1 teaspoon whole black peppercorns

Matzo Balls   Adapted from Smitten Kitchen
½ cup matzo meal
2 eggs, lightly beaten
2 tablespoons reserved chicken fat or vegetable oil
1 teaspoon salt
¼ teaspoon black pepper
2 tablespoons chicken stock 

To Finish the Soup
2 carrots, peeled and cut into thin half moons
2-3 tablespoons fresh chopped dill

Method

Wash the chicken and carcasses/bones in cold water and place them into a large stock pot. Add the rest of the ingredients and cover with as much cold water as required to just cover the chicken and vegetables. How much water you need will depend on the depth and width of your pot but it should be around 3 litres. Place the pot over medium heat and bring it slowly to the boil, skimming any skum as it rises to the surface. When it comes to the boil, lower the heat to a gentle simmer and cover with a lid. Cook for 2-3 hours checking every now and then and skimming if required. At this point I like to turn the heat off and leave the pot undisturbed for a good 30 minutes before straining the broth from the vegetables. Discard the solids and strain as much fat as possible from your broth – reserving some of it to use in the matzo balls.

To make the matzo balls, mix all matzo ball ingredients in a bowl. Cover and place in the refrigerator for 30 minutes. Bring about 2 litres  of well-salted water to a brisk boil in a medium sized pot. Reduce the flame. Run your hands under water so they are thoroughly wet. Form matzo balls by dropping spoonfuls of matzo ball batter, about the size of a walnut, into the palm of your wet hands and rolling them into balls. Drop them into the simmering salt water one at a time. Cover the pot and cook them for 30 to 40 minutes. Remove the matzo balls and set aside.

OLYMPUS DIGITAL CAMERA

To finish, place the broth into a saucepan and bring to a simmer. Place the cooked matzo balls into the broth along with the carrots and cook for about 5 minutes or until the matzo balls have heated through and the carrots are just tender. To serve, place some broth and matzo balls into soup bowls and scatter each serving with some chopped dill.

Ultimate Matzo Ball Soup from Scratch

Aug 20, 2013
mustardwithmutton

no comments

Thai-Style Prawn, Chicken & Corn Cakes

Thai-Style Prawn, Chicken & Corn CakesThese delicious little morsels are perfect to serve with drinks or as a starter to an Asian dinner. I prefer them to Thai fish cakes as they don’t have that spongy texture that Thai fish cakes are known for – these fritters are meatier and have a satisfying crunch. The batter can be prepared ahead and they can be shaped and kept in the fridge until you’re ready to shallow fry them. You can make these as big or as small as you like. As a canapé I like to make them bite size but as a first course I make them larger and serve 2 or 3 per person with the dipping sauce draped over them. For me these gorgeous savoury cakes have all the hallmarks of a great appetiser – flavour packed yet simple and fast to prepare!

Ingredients – Serves 4     Adapted from Ainsley Harriott

1 skinless chicken breast fillet – use 2 if they are small
250g raw prawns, peeled and deveined
1 egg white
1 garlic clove, crushed
1–3 tablespoons Thai red curry paste  – depending on how much spice you like. I used 2 tablespoons
50g fresh breadcrumbs
1 x 200g tin sweetcorn, drained
2 tablespoons chopped fresh coriander
4 spring onions, sliced
3 tablespoons vegetable oil

Dipping Sauce
6 tablespoons sweet chilli sauce
2 teaspoons soy sauce
2 teaspoons Thai fish sauce
1/2  a Lebanese cucumber, peeled, seeded and very finely diced

To serve
Lime wedges

Method

Roughly chop the chicken breasts and place in the bowl of a food-processor. Add the prawns, egg white, garlic and curry paste. Process until finely chopped. Tip into a bowl, add the breadcrumbs, sweetcorn, coriander and spring onions, and mix until well combined. Using wet hands, shape the mixture into patties.

To make the sweet chilli sauce, mix the three sauces together, add the cucumber and set aside. Heat the oil in a large frying pan. Cook the patties in batches, over medium-high heat for about 2-3 minutes on each side, until golden brown. Drain on kitchen paper and serve with lime wedges and the dipping sauce.

Thai-Style Prawn, Chicken & Corn Cakes

Aug 13, 2013
mustardwithmutton

no comments

Banana Cake with Caramel Icing

Banana Cake with Caramel IcingWe’ve all had banana cake and most of us have had a go at making it too. Whilst it’s delicious and moist it does’t really hold too many surprises, and as far as cakes go it’s normally relegated to being a mid morning or afternoon snack. But this version turns up the volume and transforms the humble banana cake into something dessert worthy. By simply placing the batter into a bundt tin it suddenly looks far more glamourous and when topped with a warm caramel sauce it’s elevated into a sophisticated after dinner treat.

Ingredients   Adapted from Donna Hay Magazine

150g unsalted butter, softened
1 cup caster sugar
½ cup brown sugar
3 eggs
2 cups plain flour, sifted
2 teaspoons baking powder, sifted
1 teaspoon ground cinnamon
¾ cup sour cream
1½ cups mashed banana

Caramel Icing
100g unsalted butter
¾ cup brown sugar
½ cup golden syrup
1 cup single cream

Method

Preheat oven to 180C. Place the butter, caster sugar and brown sugar in an electric mixer and beat for 8-10 minutes or until pale and creamy. Add the eggs one at a time and beat well after each addition. Fold in the flour, baking powder and cinnamon. Add the sour cream and banana and stir to combine. Spoon the mixture into a well greased 24½ cm fluted bundt tin and bake for 45-50 minutes or until cooked when tested with a skewer. Allow to cool for 10 minutes before turning out onto a wire rack.

To make the icing, place the butter, brown sugar and golden syrup and cream into a saucepan over medium heat and cook, stirring until the sugar is dissolved. Bring to the boil and cook for 10 minutes or until thickened. Allow to cool to room temperature. Pour over the cake to serve.

Banana Cake with Caramel Icing

Aug 6, 2013
mustardwithmutton

no comments

Beef Cheek & Taleggio Cannelloni

Beef Cheek & Taleggio CannelloniThis is a spectacular baked pasta dish and whilst it’s not something you might whip up on a weeknight, it’s definitely worth the effort for a special meal or if you’re entertaining on the weekend. For me this meal started out in two phases and I think when it’s tackled this way it’s much easier. I was recently given a copy of the new Guillaume Brahimi cook book, Food for Friends. Guillaume is the chef owner of Guillaume at Bennelong restaurant at the Opera House in Sydney and his new cook book is visually spectacular. The recipe that immediately grabbed me was his Wagyu beef daube, made using beef cheeks. I had some friends coming over that weekend so duly ordered the Wagyu beef cheeks and went about the business of braising them which is not at all difficult, just time intensive. The result was beautifully tender meat in a rich and complex sauce. I took all the prep photos (which you can see below) but in the flurry of plating and serving, forgot to take a picture of the finished dish, darn! Luckily I’d made more beef cheeks than I required and whilst looking through a recent addition of  Donna Hay Magazine this beef cheek and taleggio cannelloni caught my eye. The timing was perfect – I had the beef cheeks already braised so all that was really required was a white sauce and an assembly job. Never have leftovers been put to such good use!

Ingredients – Serves 4

Braised Beef Cheeks   Adapted from Guillaume Brahimi’s, Food for Friends
(Serves 4 as a main course with enough leftovers for the cannelloni )

2 tablespoons olive oil
4 x 350g Wagyu beef cheeks, sinew removed
2 onions, chopped
2 carrots, chopped
2 sticks celery, chopped
1 head of garlic, skin left on and cut in half
6 sprigs thyme
2 bay leaves
4 cups red wine
2 cups best quality beef stock
50ml brandy

Cannelloni & Taleggio Sauce- Serves 4   Adapted from Donna Hay Magazine
250g store bought fresh cannelloni sheets
60g unsalted butter
1/4 cup plain flour
2 cups milk
180g taleggio with no rind, chopped
1 cup finely grated parmesan
1 cup of reserved sauce from the braised beef cheeks

Method

To make the beef cheeks, heat the oil in a saucepan over high heat. When hot add the beef cheeks and seal for a few minutes on each side until brown all over. Transfer to a casserole dish or dutch oven and add all the vegetables and herbs.

Bring the wine to a boil in a large saucepan, then pour into the casserole over the beef cheeks and vegetables. Add as much beef stock as required to cover the beef and vegetables. Leave to cool. Cover the casserole and place in the fridge to marinate overnight.

The next day, preheat the oven to 160C. Place the casserole on the stove and bring the contents to a simmer. Season with salt and pepper and cover with some dampened baking paper and the lid; place in the oven and cook the beef cheeks for 3 hours. Add the brandy and cook for a further 1-2 hours or until the beef cheeks are very soft. Carefully remove the beef cheeks and set aside. Strain the sauce and discard the vegetables and herbs. If the sauce is too thick add a little more beef stock or boiling water and if it’s too thin place it one the stove and simmer it briskly until it’s reduced. At this stage I served the beef cheeks with mashed potatoes with some sauce poured over the top, as a main meal for four. I then had enough left overs to proceed with the cannelloni recipe below. You could however make the beef cheeks just for the cannelloni and make 2 batches.

To make the taleggio sauce, melt the butter in a saucepan over medium heat. When melted add the flour and whisk for a couple of minutes until a paste forms.. Gradually add the milk and whisk to combine. Bring to the boil and cook, whisking constantly for 2 minutes or until the mixture is thick and smooth. Remove from the heat and add the taleggio, 1/2 cup of parmesan, salt and pepper and stir to combine. Cover and set aside.

Preheat the oven to 200C. Using two forks shred the beef. Spread some of the beef filling in the centre of each cannelloni sheet and roll to enclose. Pour half the reserved sauce into a baking dish that will hold the cannelloni snugly in a single layer.

Top with the cannelloni and pour over the remaining cooking sauce. Spoon over the rest of the taleggio sauce and sprinkle with the remaining parmesan. Bake for 20-25 minutes or until melted and golden.

Beef Cannelloni with Taleggio Sauce

Jul 30, 2013
mustardwithmutton

33 comments

The Boathouse’s Fish Pie with Snapper and Truffle Oil

The Boathouse's Snapper Pie with Truffle OilThe Boathouse is a restaurant in Glebe, Sydney whose signature dish is this snapper pie. Their pie is so famous and so delicious that I’ve never ordered anything else when I’ve dined there, nor has anyone else I know. If I were them I would simplify life and just take everything else off the menu, apart perhaps from their freshly shucked oysters. It’s one of those genius recipes that combine a few ingredients and turns them into something magical. The fish in the pie is cooked in a simple sauce soubise which is a classical French sauce made from onions.  Now one wouldn’t normally think of pairing fish with a sauce soubise but it works incredibly well and topped with some truffle oil and buttery, flaky pastry it’s fish pie nirvana. The Boathouse serves their pie with a side of mash and a smoked whole tomato (another unusual pairing which again works a treat) but for ease, I prefer to serve it at home with some steamed green beans and home made crusty garlic bread to dip into the pie once the pastry has gone.

Ingredients – makes 4 individual pies

Fish Pie
600g snapper, skinned, de-boned and cut into 4 cm pieces
3 tablespoons best quality white truffle oil
1 onion, finely diced
1 packet of all pre-rolled, all butter puff pastry
1 egg, lightly beaten

Soubise Sauce
2 tablespoons butter
2 tablespoon olive oil
750g onions, thinly sliced
150ml fish stock, if you can’t find very good quality fish stock use chicken stock instead
400ml cream
Salt & freshly ground black pepper

Method
For the soubise sauce , heat the butter and 1 tablespoon of the oil in a large heavy based saucepan. Add sliced onions and 1 teaspoon sea salt and cook, stirring occasionally, over medium-low heat for 30 minutes or until onions are very soft and golden, you want to achieve a nice deep colour on the onions without scorching them. Add the stock and simmer until reduced by half . Add cream and simmer until reduced by half, then remove from heat and cool.

For the fish pie, preheat oven to 220C. Heat the remaining olive oil in a small saucepan and cook the finely chopped onion, stirring occasionally over medium heat for 10 minutes or until soft. Process cream mixture in a food processor until smooth, then transfer sauce to a bowl. Stir in chopped onions and season to taste with sea salt and freshly ground black pepper. Spoon 2-3 tablespoons of soubise sauce into the base of 4 ovenproof dishes and add a layer of snapper pieces.

Drizzle with some truffle oil and repeat layers to fill each dish 2cm from top. Place the pastry on a lightly floured surface and cut out pieces that are 3cm larger than your dishes. Cover pies with pastry, pressing pastry to side of dish and brush with beaten egg. Bake for 20 minutes or until pastry is golden and puffed. Stand pies for 5 minutes before serving.

Boathouse Snapper Pie with Truffle Oil