Aug 7, 2018
mustardwithmutton

2 comments

Blueberry Crostata – An Easy Free Form Blueberry Pie

Blueberry Crostata

I made this crostata, which is really just a free form pie, a few months ago during a small window in summer when berry prices here in Sydney were relatively inexpensive. Right now of course, being the depths of winter, it’s not going to be an ideal time to cook this and unfortunately frozen blueberries won’t really work. But I’m posting this for all you lucky people living in countries where it’s the height of summer and summer fruits and berries are in abundance. I’m actually not really fond of blueberries in their raw state but I love them when they are cooked and there is no better way to show off their flavour than in a pie. This pie is incredibly easy because it’s a free-form base that doesn’t need fitting into a pie dish, no upper crust to roll out and crimp on top and no blind baking. You could make it even easier by buying good store-bought all butter short crust pastry. One tip when making any fruit pie is to make sure to put some cornflour into the fruit mixture to soak up any excess liquid and I also dust the pastry with a small amount of cornflour too. This makes for a nice crisp crust as it protects the pastry from getting soggy from any juices that escape from the fruit. I like to make this in advance so as the fruit and pastry have time to settle before being cut – I usually make it a few hours earlier and serve it at room temperature but you could rest it for as little as 20 minutes if you prefer to serve the pie warm. If you try to slice it straight from the oven it will ooze a lot of juice. You can serve this plain but its even better with a scoop of vanilla ice cream.

Ingredients – Serves 6-8

For the Pastry: (You can also use all butter store-bought sweet crust pastry)
1 cup plain flour
1 tablespoon caster sugar
Pinch of salt
90g cold butter, diced
Ice water (about 2 tablespoons)

For the Filling:
2 cups fresh blueberries (about 3-4 punnets)
1/4 cup caster sugar
2 tablespoons plus 1 teaspoon cornflour divided
Juice of half a lemon
1/2 teaspoon ground cinnamon (optional)
1 egg beaten
1/4 cup demerara sugar

Method

Pre-heat oven to 200C. To make the pastry, put the flour, sugar and salt in a food processor fitted with a steel blade; pulse to combine. Add the butter and pulse until it is in small pieces and distributed throughout the flour. With the machine running, add the ice water 1 tablespoon at a time until the dough comes together in a ball. Turn out onto a floured surface and gently form into a disc. Wrap in plastic wrap and refrigerate for 20 minutes. Once rested, place a large piece of baking paper onto your kitchen counter and roll the pastry out to 10 inch circle. Lift the paper and pastry and place on a baking sheet and refrigerate for another 20 minutes. Meanwhile place the blueberries into a bowl and add 2 tablespoons of cornflour, the caster sugar, lemon juice and cinnamon and gently stir to combine. When the pastry has finished resting sprinkle the centre of the pastry lightly with the remaining cornflour. Place the blueberries in a pile in the centre of the pastry leaving a 2 inch border. Gently fold in the edges of crust all along the circle. Brush the outside of the crust with the beaten egg and sprinkle on the demerara sugar.


Free Form Blueberry Pie Blueberry Crostata

Bake in the oven for 20-25 minutes. You want the fruit to be bubbling and the crust golden. If the fruit is not bubbling leave it in until it is as the cornflour will not activate and thicken until the fruit and juices are bubbling. Remove from the oven and leave to settle for at least 20 minutes (I like to leave it for at an hour, or more) before slicing and serving.

Easy free form Blueberry pie

Jun 5, 2018
mustardwithmutton

no comments

Suzzane Goin’s Farro with Pumpkin & Slow Cooked Cavolo Nero

Suzzane Goin's Farro with pumpkin & Slow Cooked Cavolo Nero

Have you ever purchased a cook book and loved the sound of every recipe it contains only to get home and look properly through all the methods and realise there’s very slim chance you’re going to make any of them, despite how amazing they sound? Well that’s what happened to me years ago when I bought Suzzane Goin’s Sunday Suppers at Lucques cook book. I had every intention of not being put off by the complicated and fiddly prep involved in most of the recipes because I knew the effort would surely lead to amazing results, but alas I never did. Until now, when I saw this recipe online and realised hey, this one doesn’t sound too laborious and gave it a whirl. I’m really glad I did because it was sensational. We pared it with a simple roast chicken but kept returning to the farro and pumpkin for more spoonfuls and it eclipsed the chicken so much that we probably could have done without it. There this recipe lay, lurking on my bookshelf, all these years and it took a search for farro side dishes on google for me to discover it! Now, when I say this recipe isn’t too laborious that’s only relative to other “normal” side dish recipes. There are a few extra steps here and you’ll go through a few more dishes than you think is necessary but trust me you’ll smile when you eat it and think to hell with the extra dishes and work, I’m going to make this again next week, which is exactly what I did. I’m going to dust off my copy of Sunday Suppers at Lucques to make sure I’m not missing out on any other gems, which I’m pretty sure I am – I’ll keep you posted.

Ingredients Serves 4 as a side dish   Adapted from Suzanne Goin’s Sunday Suppers at Lucques

300-400g squad or pumpkin, diced (I used butternut pumpkin and peeled it as well as dicing)
180ml olive oil
1 tablespoon plus 2 teaspoons thyme leaves
450g cavolo nero leaves, cleaned, centre ribs removed and chopped (I used 1 bunch but I should have used more and weighed it properly
½ a sprig of rosemary
2 chiles de arbol, crumbled (i used a couple of pinches of chilli flakes)
2 onions, sliced plus ½ an onion cut into three wedges, with the root still attached
2 cloves garlic, thinly sliced
1 small carrot, peeled and cut into three pieces
1 stalk of celery, cut into three pieces
300g farro (spelt)
60ml sherry
30g unsalted butter (use olive oil if you want it to be vegan)
Salt and freshly ground black pepper

Method

Preheat the oven to 220C. bring a large pot of salted water to the boil.

Toss the squash with 30ml olive oil, 1 teaspoon thyme, ¾ teaspoon salt and a healthy pinch of pepper; spread out on a baking tray and roast for 20-25 minutes until the squash is tender.

Blanch the cavolo nero in the rapidly boiling water for 2 minutes, drain, let it cool and squeeze out excess water with your hands.

Heat a large pan over a medium heat for 2 minutes. pour in 60ml olive oil and add the rosemary spring and half the chilli. let them sizzle for a minute then turn the heat down to medium-low and add the sliced onion. season with ½ a teaspoon of salt and a pinch of freshly ground black pepper. cook for 2 minutes and stir in the sliced garlic. continue cooking for another 5-7 minutes, stirring regularly, until the onion is soft and beginning to colour.

Add the cavolo nero and 30ml extra olive oil, stirring to coat the greens. season with a ¼ teaspoon of salt and cook the greens slowly over a low heat for around 30 minutes until they turn a dark, almost black, colour and get slightly crispy on the edges. turn off the heat and set aside, removing the rosemary and chilli (if using a whole dried chilli).

While the cavolo nero is cooking, heat a large pan over a medium heat for 2 minutes. pour in the remaining 60ml oil and add the onion wedges, carrots, celery remaining chile and bay leaf. cook for about 5 minutes until they have begun to soften and turn golden. add the farro, 1 tablespoon of thyme and 2 teaspoons of salt to the pan, stirring to coat the farro with the oil. add the sherry and 1 ½ litres of water, bring to a boil, lower the heat then simmer for about 30 minutes until the farro is tender. drain the farro and spread out on a baking sheet to cool. discard the vegetables.

Heat a large frying pan over high heat for 2 minutes. swirl in the butter and when it foams add the farro and sauté, stirring continuously, for another 3-4 minutes, until it’s slightly crispy. add the squash and greens and stir well to combine. taste for seasoning and serve when it is all warmed through.

Suzanne Goin's Farro with pumpkin & Slow Cooked Cavolo Nero

Apr 13, 2018
mustardwithmutton

no comments

Polish Plum Cake – An Elegant & Delicious Old World Cake

The best cake ever to feed a large crowd

Wow, this is one amazing cake. I needed a cake to feed at least 12 people for a birthday morning tea, no simple feat. Well this cake did the job and it could have fed quite a few more as well. It’s the perfect coffee cake – moist and with a nice tang from the plums. I love the coffee and cake culture that exits in Europe. We were in Vienna last year and the cakes that we tried, almost on a daily basis, were just wonderful. This Polish plum cake is right up there with the best that we sampled. I think it would even translate well as a dessert. You do need to have a crowd to feed though as it requires a 30cm cake tin. As I mentioned, we had a quarter of cake left after feeding 12 hungry people, although the cake did keep well and we enjoyed it over the next few days -lets face it, left over cake is no great hardship. As I write this I suddenly remembered Mothers Day is only a few weeks away and this would be a great cake to serve after lunch and with plums still in season this is going on our menu.

Ingredients – Makes a 30cm cake which will feed 12-15  Adapted from Monday Morning Cooking Club

225 g plain flour (8 oz) (all purpose)
225 g self-raising flour (8 oz) (self-rising)
250 g Butter unsalted, chopped
230 g caster sugar (8 oz) (superfine)
3 whole egg yolks
150 g Sour Cream (5 1/3 oz)
12 – 16 whole plums (blood) washed, halved, stones removed (less if your plums are large)
1/4 cup Cinnamon Sugar for sprinkling
For the Crumble
300 g plain flour (10 1/2 oz) (all purpose)
345 g caster sugar (12 oz) (superfine)
190 g Butter chopped

Method

To make the dough, put the flours and butter in a bowl and use your fingertips to mix them together, until the butter is evenly dispersed and the mixture forms crumbs. Add the sugar, egg yolks and sour cream and mix together using your hands or a wooden spoon. When a soft, sticky ball of dough is formed, wrap in plastic and refrigerate for at least 1 hour or overnight.

To make the crumble, use your fingertips or a food processor to combine the flour, sugar and butter until crumbs form. Refrigerate until needed.


Remove the dough from the fridge 30 minutes before using. Preheat the oven to 180C (350 F). Grease a 28 – 30 cm springform cake tin. On a well-floured surface, roll out the dough thickly, to fit the base and halfway up the side of the tin. Line the base and side of the tin with the dough, then place the plums on top, arranging them very close together.

Best Ever Coffee Cake - Polish Plum Cake

With your hands, squeeze the crumble mixture together, then break it up over the top of the plums. Sprinkle with the cinnamon sugar. Bake for 90 minutes, or until the cake is golden on top and cooked through. Serve warm or at room temperature with cream or ice cream.

Monday Morning Cooking Club - Polish Plum Cake

Jan 25, 2018
mustardwithmutton

4 comments

Soy Braised Mushroom Noodles

Stir Fried Mushrooms & Noodles

This is a big bowl of comforting goodness. I love mushrooms in any shape or form but when they’re braised in a sticky soy-rich sauce and paired with soft noodles they really become a thing of beauty. This is an easy dish to prepare and substantial enough to stand on its own as a main dish or you could serve it as a part of a multi-course Asian meal. I used Hokkien noodles from the supermarket but this recipe deserves a trip to the local Asian grocer for a bag of fresh Chinese wheat noodles which will make it even better, but at a pinch good quality Hokkien noodles from the super market will still be very good. You can make this dish vegan by using mushroom flavoured dark soy sauce.

Ingredients – Serves 4-6 (reheats well)   Adapted from Woks of Life

6 large dried shiitake mushrooms
240g oyster mushrooms, wiped clean and toes into bite size strips
240g shimeji mushrooms (or any other type of mushroom), wiped clean and sliced
3 tablespoons oil
4 shallots, finely chopped
3 spring onions, with the white parts chopped and the green parts julienned
1½ tablespoons dark soy sauce (use mushroom flavoured soy to make this dish vegan)
3 tablespoons light soy sauce
1 tablespoon sugar
The dried mushroom-soaking water, plus enough water to yield 2½ cups of liquid
1½ pounds fresh wheat noodles or other noodles of your choice
½ teaspoon sesame oil
Salt, to taste

Method

Place the dried shiitake mushrooms in a bowl and cover with 2 cups of hot water for at least 30 minutes or until they are completely re-hydrated. Squeeze the water out of the rehydrated Shiitakes, then slice them thinly. Remember to save the mushroom soaking liquid.

Heat the oil in a wok or thick-bottomed pot over medium heat. Add the chopped shallots and white parts of the spring onions. Cook for a minute or two until the shallots turn translucent. Turn up the heat to high and add in all of the mushrooms, and spread them evenly across the wok.

Turn up the heat and let cook for a couple of minutes before stirring. Keep a steady heat to cook off any water in the mushrooms. Only stir when one side is browned slightly, and repeat the searing process until all of the mushrooms are browned and any liquid in the pan has been cooked off.

Turn the heat down to medium, and add the dark soy sauce, light soy sauce, the sugar, and 2½ cups of liquid––the mushroom water and fresh water combined. Cover partially and simmer for 20 minutes. In the meantime cook the noodles according to package directions and drain well.


After the mushrooms have been braising for 20 minutes (there should still be a good amount of sauce in the pan), add the cooked noodles, the sesame oil, and the julienned green parts of the scallions. Toss everything together so the noodles get fully coated in the mushroom sauce. Salt to taste and serve with chili oil or your choice of spicy condiment on the side.

Stir Fried Mushrooms with Noodles

Dec 18, 2017
mustardwithmutton

no comments

Easy Christmas Trifle with Peaches & Strawberries

Best Trifle for Christmas

If you need an easy Christmas dessert that’s delicious and a total crowd pleaser then a trifle might be just what you’re looking for. Now you can go all high-brow with trifles and make every element from scratch and there’s no problem with that at all, if you have the time and inclination, but a trifle is one of the rare instances where I’m not sure the extra work results in a better end result. At the end of the day a trifle is a mish-mash of flavours and textures – a kind of sweet mushy mess, so spending an afternoon making your own sponge or Swiss roll is probably a wasted effort. In this trifle everything is pretty much store-bought and hence it’s merely an assembly job. The only time-consuming element is waiting for the jelly to set and for the trifle to sit in the fridge for all the layers and flavours to meld. The only caveat to this being a great trifle is you need to buy really good quality store-bought ingredients. Look for the best ready-made custard with real vanilla seeds (no packet powered custard) and a sponge from a nice bakery – you get the picture. I’ve used fresh peaches and strawberries but you can sub it with any fruit you like and even use canned fruit in a pinch. I’ve kept this trifle booze free so as the kiddies can dig in too but of course feel free to douse it with your favourite tipple if you want to. Once you’ve stocked up on the ingredients it’s a breeze and you’ll end up with a dessert that looks impressive and will feed 8-10 greedy people.

Ingredients – Makes One Large Trifle, serves 8-10

2 packets of raspberry jelly
600ml of thickened cream
395g tin of condensed milk.
500g plain sponge cake or jam swiss roll
1 punnet of strawberries cut into large slices
4 peaches, pitted and cut into wedges
500ml of best quality store-bought vanilla custard
large handful of flaked almonds – toasted

Method

Make the jelly as per the packet instructions and pour it into a large container (so as there is a thinnish level of jelly in the dish) and place into the fridge to set. Cut the sponge cake into large dice or slice the jam swiss roll into 1cm pieces. Place the cream and condensed milk into the bowl of an electric mixer and beat until soft peaks form. Set aside until needed.

Arrange half of the sponge over the base of a 3 litre serving bowl and top with half of the custard, half the strawberries and peach slices, half of the jelly and half of the cream. Repeat in the same order until your serving bowl is filled and a layer of cream is on top.

Place your trifle into the fridge for a minimum of 4 hours, or overnight if possible. Sprinkle the toasted flaked almonds over the top of your trifle just before serving.

Best Trifle for Christmas

Nov 16, 2017
mustardwithmutton

2 comments

Turkish Eggplant & Mince Kebabs – Tepside Paltican Kebab

Tepside Patlıcan Kebabı

Turkish people love their kebabs, almost as much as Persians, but the variety of kebabs available in Turkish cuisine is far more than any other country. Grilled, baked, chicken, lamb, seafood, mince, the list goes on and the variety of vegetables and spices incorporated into their kebabs are a thing of beauty. This oven baked kebab is perfect for those times when you want all the taste sensation of a good kebab but don’t want to bother firing up the grill. It can be made with minced lamb or beef but my preference is for good quality lamb mince that’s not too lean – the sort of fat to lean ratio you would use for a burger. The taste of the juicy lamb kebabs combined with tomatoes and eggplant is fabulous. Make sure you serve this with plenty of rice to soak up all the cooking juices, as well as some garlic spiked yogurt.

Ingredients – Serves 4 generously

For the Kebabs:
700g minced lamb (or beef), not too lean – see above
1 medium white onion, grated and excess juice extracted through a sieve
1 teaspoon ground turmeric
2 teaspoons salt
1 teaspoon pepper
1 teaspoon Turkish chilli flakes – optional. Turkish chilli flakes are very mild, if you can’t access some, leave it out.

To Garnish – Long continental green capsicum/pepper, sliced (optional)

For the Tomato Sauce:
Olive oil or vegetable oil
1 large white onion finely diced
3 cloves of garlic finely minced
1 teaspoon ground turmeric
2 tablespoons Turkish mild red pepper paste, you can substitute with tomato paste
1 x 400ml can of crushed tomatoes or diced tomatoes
2 teaspoons sugar
Salt & black pepper

For the Eggplants:
2-3 eggplants – long and narrow ones are best that are roughly the same width all the way
Light olive oil or Vegetable oil
Salt

Method

Place all the ingredients for the kebabs in a bowl and knead well until the mixture becomes tacky and sticky. Alternatively you can place the ingredients into a food processor and process for a few minutes to achieve the same result. Cover the mixture and place in the fridge for 30 minutes. Using wet hands shape the meat into small round patties that are roughly the same width as your eggplant (maybe slightly larger as they’ll shrink a little) and about 1.5cm thick. Heat a non stick fry pan over medium heat and cook the patties for a couple of minutes on each side until lightly seared. They won’t be cooked all the way through. Reserve any pan juices. Note: I didn’t pan sear my kebabs first and just layered them raw with the eggplant to cook in the oven. I think frying them first will lead to a much tastier end dish.

To make the tomato sauce. Heat a generous splash of oil into a small saucepan and add the onion along with a pinch of salt and cook over a gentle heat for about 15 minutes or until onion is completely soft. Add the garlic and turmeric and cook for another couple of minutes. Add the red pepper paste or tomato paste and cook it off for a minute or two. Add the crushed tomatoes and about 150ml of water and any reserved pan juices from cooking the kebabs and bring to a simmer. Add the sugar and season with some salt and pepper. Simmer gently for 30 minutes. Taste again and adjust seasoning if necessary.

Baked Turkish Kebabs with Eggplant & Mince

Prepare the eggplant by slicing them into 1.5 cm rounds. Place them into a colander and sprinkle generously with salt and leave them to drain for 30 minutes. Place a large non stick fry pan over medium-high heat and add enough oil to come 1cm up the side of the pan. When the oil is up to temperature dry the eggplant slices with kitchen towels and add enough pieces to cover the pan in one layer. Cook until one side is lightly golden then turn and cook the other side. Repeat until all the eggplant is cooked, adding more oil as necessary. You will want to drain the eggplant on paper towels once cooked.

Once all the elements are prepared heat the oven to 180C. Take an oven proof round baking dish that is roughly 30cm and cover the base with a generous amount of the tomato sauce. Then layer the eggplants and meat patties in concentric circles to fill the pan. Spoon a bit more of the tomato sauce over the top and top with some slices of green capsicum/pepper if using. Cover tightly with baking paper lined foil and bake for 50 minutes. Remove the foil and continue cooking for a further 10 minutes uncovered. Remove from he oven and leave to rest for a few minutes before serving with rice or flat bread.

Sep 25, 2017
mustardwithmutton

1 comment

Amazing Seaweed Butter for Steak

Compound Butter for steak - Japanese Seaweed Butter

For me the best way to finish off a great steak is to slather it with a delicious compound butter as soon as it comes off the grill. A good piece of meat needs nothing more done to it and whilst I’m partial to a Bernaise sauce as an accompaniment, I don’t like to mess around too much with sauces and marinades for steaks. However, a flavourful compound butter really enhances not only the taste of the meat but the tenderness and juiciness too. The other butters we like to use for steaks are this porcini butter and one I haven’t posted yet, Cafe de Paris butter. These three butters can be used on all manner of meats but they really shine when they are added to a hot steak whilst it’s resting. The Japanese seaweed paste in the recipe is crucial and can’t really be substituted with anything else. It can be found in good Asian supermarkets and if you live in Sydney there’s a terrific Japanese grocer in the Northbridge shopping centre. The seaweed paste is a rather unattractive black paste made from kelp but it packs a big umami hit of flavour to anything it touches and I find myself reaching for it more and more for all manner of savoury dishes.

Ingredients – makes 1 large log which can be frozen and used as needed    Adapted from Yoshoku by Jane Lawson

200g unsalted butter, softened
6 teaspoons, prepared seaweed paste – or to taste, I like to add slightly more (picture of brand I use below)
2 tablespoons nori flakes
2 cloves of garlic crushed in a garlic press
Salt & freshly ground black pepper

Method

Combine the softened butter with the seaweed paste, nori flakes and garlic and mix well. Season with salt and pepper. Place a sheet of plastic wrap on the counter and add the butter mixture in the centre.  Start rolling the plastic to form a log and then twist the ends tight to get a nice uniform shape. Refrigerate for 30 minutes or until firm before using, or it can be placed straight into the freezer for use later on. When ready to use slice into 1 cm rounds, re-wrap the used end of the remaining log and replace in the freezer.

Best Ever Sauce for Steaks

Aug 15, 2017
mustardwithmutton

1 comment

Donna Hay Coffee & Brown Sugar Tray Cake

Donna Hay One Bowl Tray Cake

Another cracker of a recipe from Donna Hay. Easy, delicious and the perfect sweet treat to have in your cake tin for those days when you need something to accompany your morning or afternoon cuppa. If you want to make this for the family and are worried about the coffee just use decaf coffee or leave it out altogether and add a little more cinnamon, it will still taste great. Did I mention this cake was easy? A true one bowl cake that needs nothing more than a whisk to bring it together. The best thing is all the ingredients are ones that most people have on hand so it’s a great recipe to use when you need to bake something quickly. You can get at least 12 slices from this tray cake so keep it in mind if you need to bake a cake for the school fete or a cake stall (nut free too). You can store the cake in an airtight container for a good 5 days.

Ingredients  Adapted from Donna Hay Magazine
1 cup (175g) brown sugar
2 teaspoons ground cinnamon
2½ cups (375g) self raising flour, sifted
1½ cups (330g) caster sugar
4 eggs
1½ cups (275ml) milk
250g unsalted butter melted
2 teaspoons vanilla extract
1 tablespoon instant coffee granules
60g unsalted butter extra, melted

Method
Preheat oven to 160°C. Place the brown sugar and cinnamon in a small bowl and  mix to combine. Set aside.  Place the flour, sugar, eggs, milk, butter and vanilla in a  large bowl and whisk until smooth. Pour half the mixture into a lightly greased 20cm x 30cm metal slice tin lined with non-stick baking paper.

Sprinkle the coffee and half  the brown sugar mixture over the cake. Pour over the remaining cake mixture and spread evenly. Sprinkle with the remaining brown sugar mixture and spoon over extra melted butter. Cook for 50–55 minutes or until cooked when tested with a skewer and slice to serve.


Jul 5, 2017
mustardwithmutton

17 comments

Cardamom, Rose Water & Pistachio Cake

Middle Easter Dessert - Cardamom, Rose Water & Pistachio Cake

The title of this cake includes three of my favourite ingredients so I knew it was going to be right up my alley, and I was right. This cake is just a lovely combination of flavours – warmth and earthiness from the cardamom, beautiful aroma from the rose water and wonderful nuttiness and moistness from the pistachio. It also has just the right amount of sweetness and with its colourful presentation it would be just as nice for a tea time treat or as a dinner party dessert paired with some creme fraiche. I often have Middle Eastern themed dinners, be it Persian food or recipes inspired from Ottolenghi’s many books and this cake makes a great finale for these cuisines. As usual when you’re baking make sure your ingredients are all at room temperature and if possible do try to make this in a bundt tin as it adds to the visual appeal.

Ingredients    Adapted from The Foodies Wardrobe

1½ cups plain flour
¾ cup almond meal
¾ cup roughly ground pistachios (plus extra for garnish)
2 teaspoons ground cardamom
½ teaspoon baking soda
1 teaspoon baking powder
½ teaspoon salt
¾ cup plain yoghurt
1 teaspoon vanilla bean paste or vanilla extract
170 g unsalted butter, softened
1½ cups sugar
3 large eggs
Dried edible rose petals for decoration – optional

For the glaze:
⅔ cups icing sugar, sifted
½ teaspoon ground cardamom
½ teaspoon vanilla paste or extract
1 teaspoon lemon juice
1 teaspoon rosewater
water – enought to make a paste

Method
Preheat oven to 170C. Grease a bundt tin with oil or butter and then dust with almond meal to create a good non-stick layer.

Mix the first 7 dry ingredients together in a bowl and set aside. Cream the butter and sugar together until light and fluffy. Add in the eggs, one at a time, and blend until smooth. Mix the yoghurt and vanilla paste together in a bowl or measuring cup. Add the dry ingredients alternately with the wet to the butter and sugar.  Begin and end with the dry ingredients, beating just until blended with each addition.


Turn the batter into the greased tin. Bake for about 55 minutes in the centre of the oven. Test to check it is cooked by inserting a toothpick or skewer into the thickest part of the cake. It should come out clean. The cake should be risen and slightly golden on the top.


Cool in the tin, then invert when completely cold onto a plate. To make the glaze, mix all ingredients together in a bowl. The glaze should be thick like liquid honey, but still be able to run slowly off a spoon. If the glaze is too thin, you will find that it just runs completely off the side of the cake – you can add more icing sugar to thicken it if this is the case. Glaze the cake when it is completely cool.  Dust with crushed pistachio nuts and dried flowers while the icing is still wet.

Best Middle Eastern Dessert

May 23, 2017
mustardwithmutton

1 comment

Annabel Langbein’s Caramelised Asian Pork Belly

Caramelised Asian Pork Belly

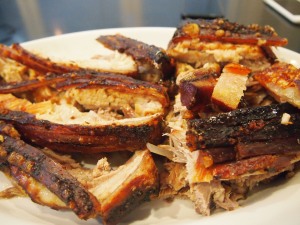
Pork belly would have to be one of my favourite cuts of meat and it’s also one of the easiest to cook – all those layers of meat interspersed with fat means it’s hard to overcook or dry it out. I’ve posted quite a few recipes for pork belly and I didn’t really think I would be in need of any more but this recipe from Annabel Langbein’s newest book Through the Seasons caught my eye and I just had to try it. Pork belly seems to lend itself really well to strong flavours, especially Asian flavours, and this recipe creates a lovely mixture of moist meat, crispy crackling and a delicious Asian sauce, all made in the one pan. It’s great for an Asian theme dinner as all it really needs to accompany it is rice and a salad or green vegetable. I served this with a Thai green papaya salad which created a nice balance against the richness of the meat.

Ingredients – Serves 4-6    Adapted from Annabel Langbein’s Through the Seasons

2 shallots, chopped
4 cloves of garlic, chopped
2 tablespoons brown sugar
¼ cup fish sauce
¼ cup oyster sauce
2 kg Pork belly, skin on and scored
Juice of 1 lemon
Salt
1 cup coconut milk

Method

Place shallots, garlic, brown sugar, fish sauce and oyster sauce into a baking dish and mix well to combine. Add the pork belly, skin side up and leave to marinade for 4 hours. Preheat oven to 220C. Rub the skin of the pork belly with lemon juice and salt. Add 1 cup of water around the pork (being careful to not get any on the skin) and roast for 45 minutes.

Annabel Langbein - CaramelisedAsian Pork Belly Annabel Langbein - Caramelised Asian Pork Belly

Turn the oven to 150C and add the coconut milk and another cup of water around the pork, again being careful to not get any on the skin. Roast for a further 2 hours. If at the end of the cooking time your crackling is not crisp enough remove the pork to another baking tray and crank the oven to as high as it will go and roast for a further 10-15 minutes, checking often to ensure it doesn’t burn. Carve the pork belly into slices. Skim the fat from the sauce in the pan and serve it over the pork and any extra sauce on the side.

Caramelised Crispy Asian Pork Belly