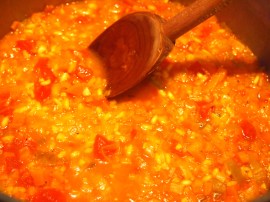
 Tomatoes and saffron are a match made in heaven and in this recipe the combination of the two is further enhanced with the addition of honey which really brings out the sweetness in the tomatoes. This Moroccan stew or tagine is from one of my favourite cook books, You Say Tomato by Joanne Weir. Every recipe in the book showcases the tomato and I’ve yet to try a dish that hasn’t been delicious. It’s a cook book with no photographs and therefore probably slipped under most peoples radar. I purchased it at least 8 years ago and shortly after never saw it on the shelves again, such a shame as it’s one cookbook I go back to repeatedly. If you ever come across it I highly recommend snapping it up. This recipe is comforting and simple enough for a mid-week family meal but elegant enough for company too. It can be made a day or two in advance for convenience and tastes even better reheated. Serve with cous cous or rice.
Ingredients – Serves 6 -8 and freezes well Adapted from You Say Tomato by Joanne Weir
2 tablespoons butter
1 tablespoon olive oil
1 inch piece of ginger, grated
2 large onions, finely diced
4 cloves of garlic, finely minced
1 heaped tablespoon tomato paste
1 teaspoon ground cumin
½ teaspoon saffron threads
2 kgs chicken thigh fillets
5 large red ripe tomatoes, peeled and chopped
1 cup chicken stock
Salt & freshly ground black pepper
2 tablespoons honey
½ teaspoon ground cinnamon
¼ cup sliced almonds toasted
Method
Heat the butter and oil in a large casserole over medium heat. Add the onions, ginger and garlic and cook, stirring for about 5-8 minutes or until softened and golden brown. Add the tomato paste, cumin and saffron and fry for a few more minutes. Add the tomatoes and chicken and stir until all the chicken pieces are coated in the spices and onions. Add the chicken stock, 1 teaspoon salt and ½ teaspoon pepper and bring to the boil. Cover and reduce the heat to a simmer and cook for 45 minutes. Add a little water as needed if the pot gets too dry.


Remove the chicken from the pan and keep warm. Add the honey and cinnamon to the pot and simmer, uncovered, over medium heat, stirring frequently until the sauce is thick about 8-12 minutes. Add the chicken and simmer until the chicken is hot again, 3- 4 minutes. Season the sauce to taste with salt and pepper. To serve, place the chicken on a platter, pour the sauce over it and garnish with the almonds.

 This is such a festive looking dessert and perfect for a celebratory meal such as New Years Eve. There are lots of recipes out there for cheesecake but this is the best one I’ve come across. It not only has great flavour but a wonderful texture too without a hint of claggy cream cheese overload that’s the hallmark of so many cheesecakes. This dessert does take a while to make, not in actual hands on time, just in the baking and cooling process but it’s so worth it. The good news is though that it can be made a few days before you need it and in fact tastes better the longer it sits. The most important tip is to make sure that all your ingredients are at room temperature, especially the cream cheese – it really needs to be left out overnight. The mixed berry topping makes this a real show stopper and I recommend that once the melted recurrent jelly has been added to the berries that you refrigerate them so they can set a little until you’re ready to top the cake. Enjoy and happy New Year everyone!


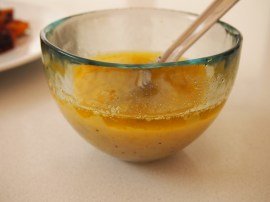
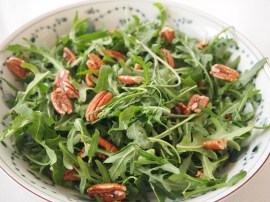
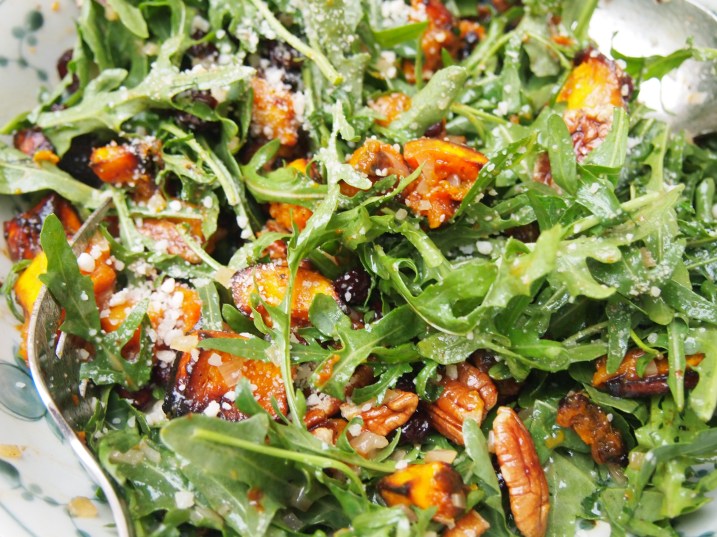
 If you’re still trying to come up with one more side dish for Christmas day then I highly recommend this recipe from Ina Garten. It’s Christmas on a plate; roasted pumpkin, cranberries, pecans and a wonderful warm cider dressing. It would pair perfectly with turkey or ham and if you’re in Australia, barbecued meats and seafood! The other nice thing is that whilst it can be served warm or at room temperature it’s not a heavy side dish so if you have a lot of heavy sides accompanying your meal then this will lighten and balance things out. The other handy thing for this time of year is that all the elements can be made ahead of time and assembled just before serving. If you’re not in the States and wondering how to lay your hands on cider (this is not referring to Australian or British cider which is fermented alcoholic apple juice) then just buy unstrained unpastuerised apple juice, organic brands normally have this. Wishing you all a wonderful Christmas filled with love, joy and great food!
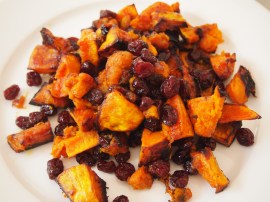
 My husband is a big fan of chicken salad and considers himself a bit of a connoisseur on the subject, given that whenever he’s in the States and chicken salad is on the menu he orders it and proceeds to give a rating out of ten. Deli style chicken salads aren’t as much an institution here in Australia so he often gets cravings for an honest to goodness deli chicken salad, complete with kosher dill pickle and potato chips. It was his birthday recently so for lunch I made up a batch of chicken salad and I’m pleased to say it passed muster. I like to roast the chicken breast, which I buy on the bone and with the skin on, in the oven. Roasting rather than poaching the chicken produces a much moister breast with great flavour, especially if it’s been cooked on the bone. Once the chicken has cooled I remove the bones and skin and cut the chicken into large dice. This is such a delicious salad and something that’s great to have in the fridge for this time of year when unexpected people pop by or you need a quick snack/lunch. It’s good on it’s own but makes awesome sandwiches too.


 What’s not to love about flavour packed meatballs bathed in rich tomato sauce, poured over spaghetti and topped with mounds of parmesan cheese – comfort food just doesn’t get any better which is why this pasta dish is loved by young and old alike. I was a little shocked the first time I had spaghetti and meatballs in the States. What faced me on the plate were two of the most ginormous meatballs I’d ever seen, each one easily the size of a tennis ball! I’ve since found out that large mammoth meatballs are the norm in the States but I have to say this isn’t the way I like them. I prefer small walnut size meatballs, maybe even a tad smaller. They seem to carry the flavour better and meld with the sauce and the spaghetti in a much nicer way. But hey, if you’re a big meatball fan then by all means go for it and shape them balls as big as you like. I like to flour the meatballs and fry them before adding them to the sauce. I find the texture of the meatballs better when they are fried and the flour helps thicken the sauce. Once fried, the meatballs can be cooked in the sauce for a nice long time without the risk of them falling apart, it’s an extra step but I think it’s worth the effort.


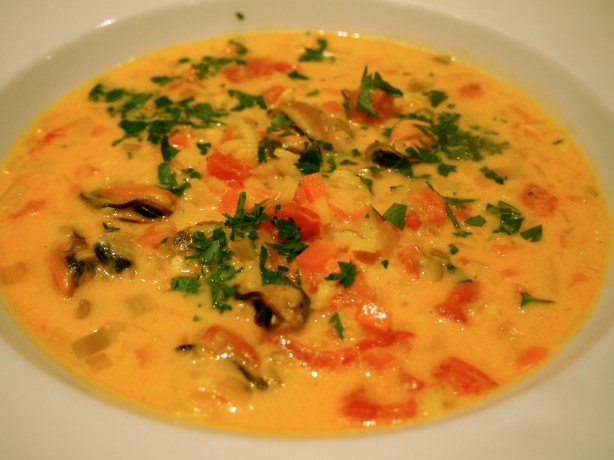
 Traditional French bisques, especially seafood ones, can be a complicated affair. But Ina Garten has created a wonderful rich French style bisque that is brimming with flavour but you won’t need to spend the whole day in the kitchen to make it. Using mussels and retaining the briny juices released as they cook gives the bisque wonderful flavour and the addition of saffron and a touch of cream give it depth and body. It’s important to take the time to really let the vegetables sweat down, rushing this step will detract from the overall flavour of the bisque. The ingredients as listed below will feed 4 people as a starter but I cooked this amount for the 2 of us as a main meal. I sometimes also add a handful of arborio rice to the stock, not traditional I know but it’s delicious and does stretch the meal out. A couple of slices of lightly toasted baguette rubbed with some olive oil and a clove of garlic is all you need to accompany it.

 This cake looks so pretty when it’s unmolded. It’s easy yet impressive and perfect for both dessert or morning/afternoon tea. The sponge has a lovely crumb, moist from the buttermilk with a nice density from the almond meal and the slight sour bite of the raspberries stops it from becoming overly sweet. When I saw the amount of time the cake needed to bake for (90 minutes) I was a little hesitant but I discovered something in the process of making this cake which probably everyone else on the planet has already figured out – don’t use the fan force setting on your oven for every situation. I tend to put my oven on the one setting, fan force intensive, which is fine for roasting but for more delicate items such as cakes it’s too harsh. Simple enough, I know, and why I just figured it out is beyond me. So I turned the dial to one of the other 12 settings available (!!) and used a top and bottom heat setting, plain old normal oven baking and the cook times were spot on. If you have a scale always weigh your items instead of using the cup measurements. Have all your ingredients at room temperature and at the point that you add the flour be careful to just mix until combined, over beating at this point results in a heavy cake. I also recommend you don’t use a springform tin as the juices from the berries are likely to escape and make a mess of your oven. This cake is lovely served with a dollop of whipped cream or creme fraiche.


 This is a very quick but utterly delicious appetiser. Basically salami, Sopressa if possible, is layered onto a sheet of puff pastry that has been bushed with dijon mustard. Grated gruyere cheese is then piled on and a second layer of puff pastry is placed on top and the whole thing is baked until golden. Cut up into squares these little bites disappear quickly. I recommend that you have the delicatessen slice the salami thinly, but not paper thin. You can make all sorts of variations with this – replace the salami with ham or change the cheese to fontina. A mushroom and taleggio variation would also be delicious. With Christmas and New Year around the corner this would make a great nibblie to serve with a glass of Champagne.


