Dec 3, 2012
mustardwithmutton

no comments

Chicken with Pancetta, Sage & White Beans

Chicken with Pancetta, Sage & White BeansCrispy sage, tender chicken, salty pancetta and creamy white beans come together to make a delectable meal and the beans are the star of the show. A little while ago I cooked a batch of dried cannellini beans for a side dish and made sure to make extra beans for this recipe. You could certainly make this with canned beans, which I’ve done on occasion and it’s still delicious but it tastes so much better with soaked and cooked dried beans. If you have the time, going through the process of making your own beans will definitely pay off but either way the beans add a wonderful creaminess to the sauce and produce a meal that’s comforting, simple and lip smacking delicious.

Ingredients – Serves 4    Adapted from Delicious Magazine

¼ cup olive oil
150g pancetta or speck, chopped into chunky dice
1 large onion, diced
6-8 chicken thighs on the bone with the skin on
1 tablespoon flour
200ml white wine
300ml chicken stock, heated
1½ cups cooked cannellini beans or 400g canned beans, rinsed and drained
2 tablespoons cream
Small bunch of sage leaves
Salt & freshly ground black pepper

Method

Heat 1 tablespoon of oil in a casserole or deep frypan over medium heat. Add the pancetta and cook for 5-6 minutes until crisp.  Use a slotted spoon to transfer to a bowl. Add the onion and cook stirring for 5 minutes until soft, then set aside. Season the chicken well with salt and pepper and dust with flour.  Add 1 tablespoon of oil to the pan and increase the heat to medium high. Brown the chicken in batches until golden brown.  Return all the chicken thighs to the pan and add the onion, pancetta and wine to the pan and simmer for 6 minutes.  Pour in the hot stock, bring to the boil, then cover and simmer over medium low heat for 30 minutes.


Add the cannellini beans and for a further 15-20 minutes until the chicken is very tender and sauce has reduced slightly, then stir in the cream. Meanwhile, heat the remaining oil in a small pan over medium heat.  Fry the sage leaves for 2 minutes until crisp, then drain on paper towel.  When ready to serve divide the chicken and bean mixture among plates, then top with a few crispy sage leaves.

Chicken with Pancetta, Sage & White Beans

Nov 30, 2012
mustardwithmutton

6 comments

Whole Roast Eye Fillet of Beef with Killer Red Wine Sauce

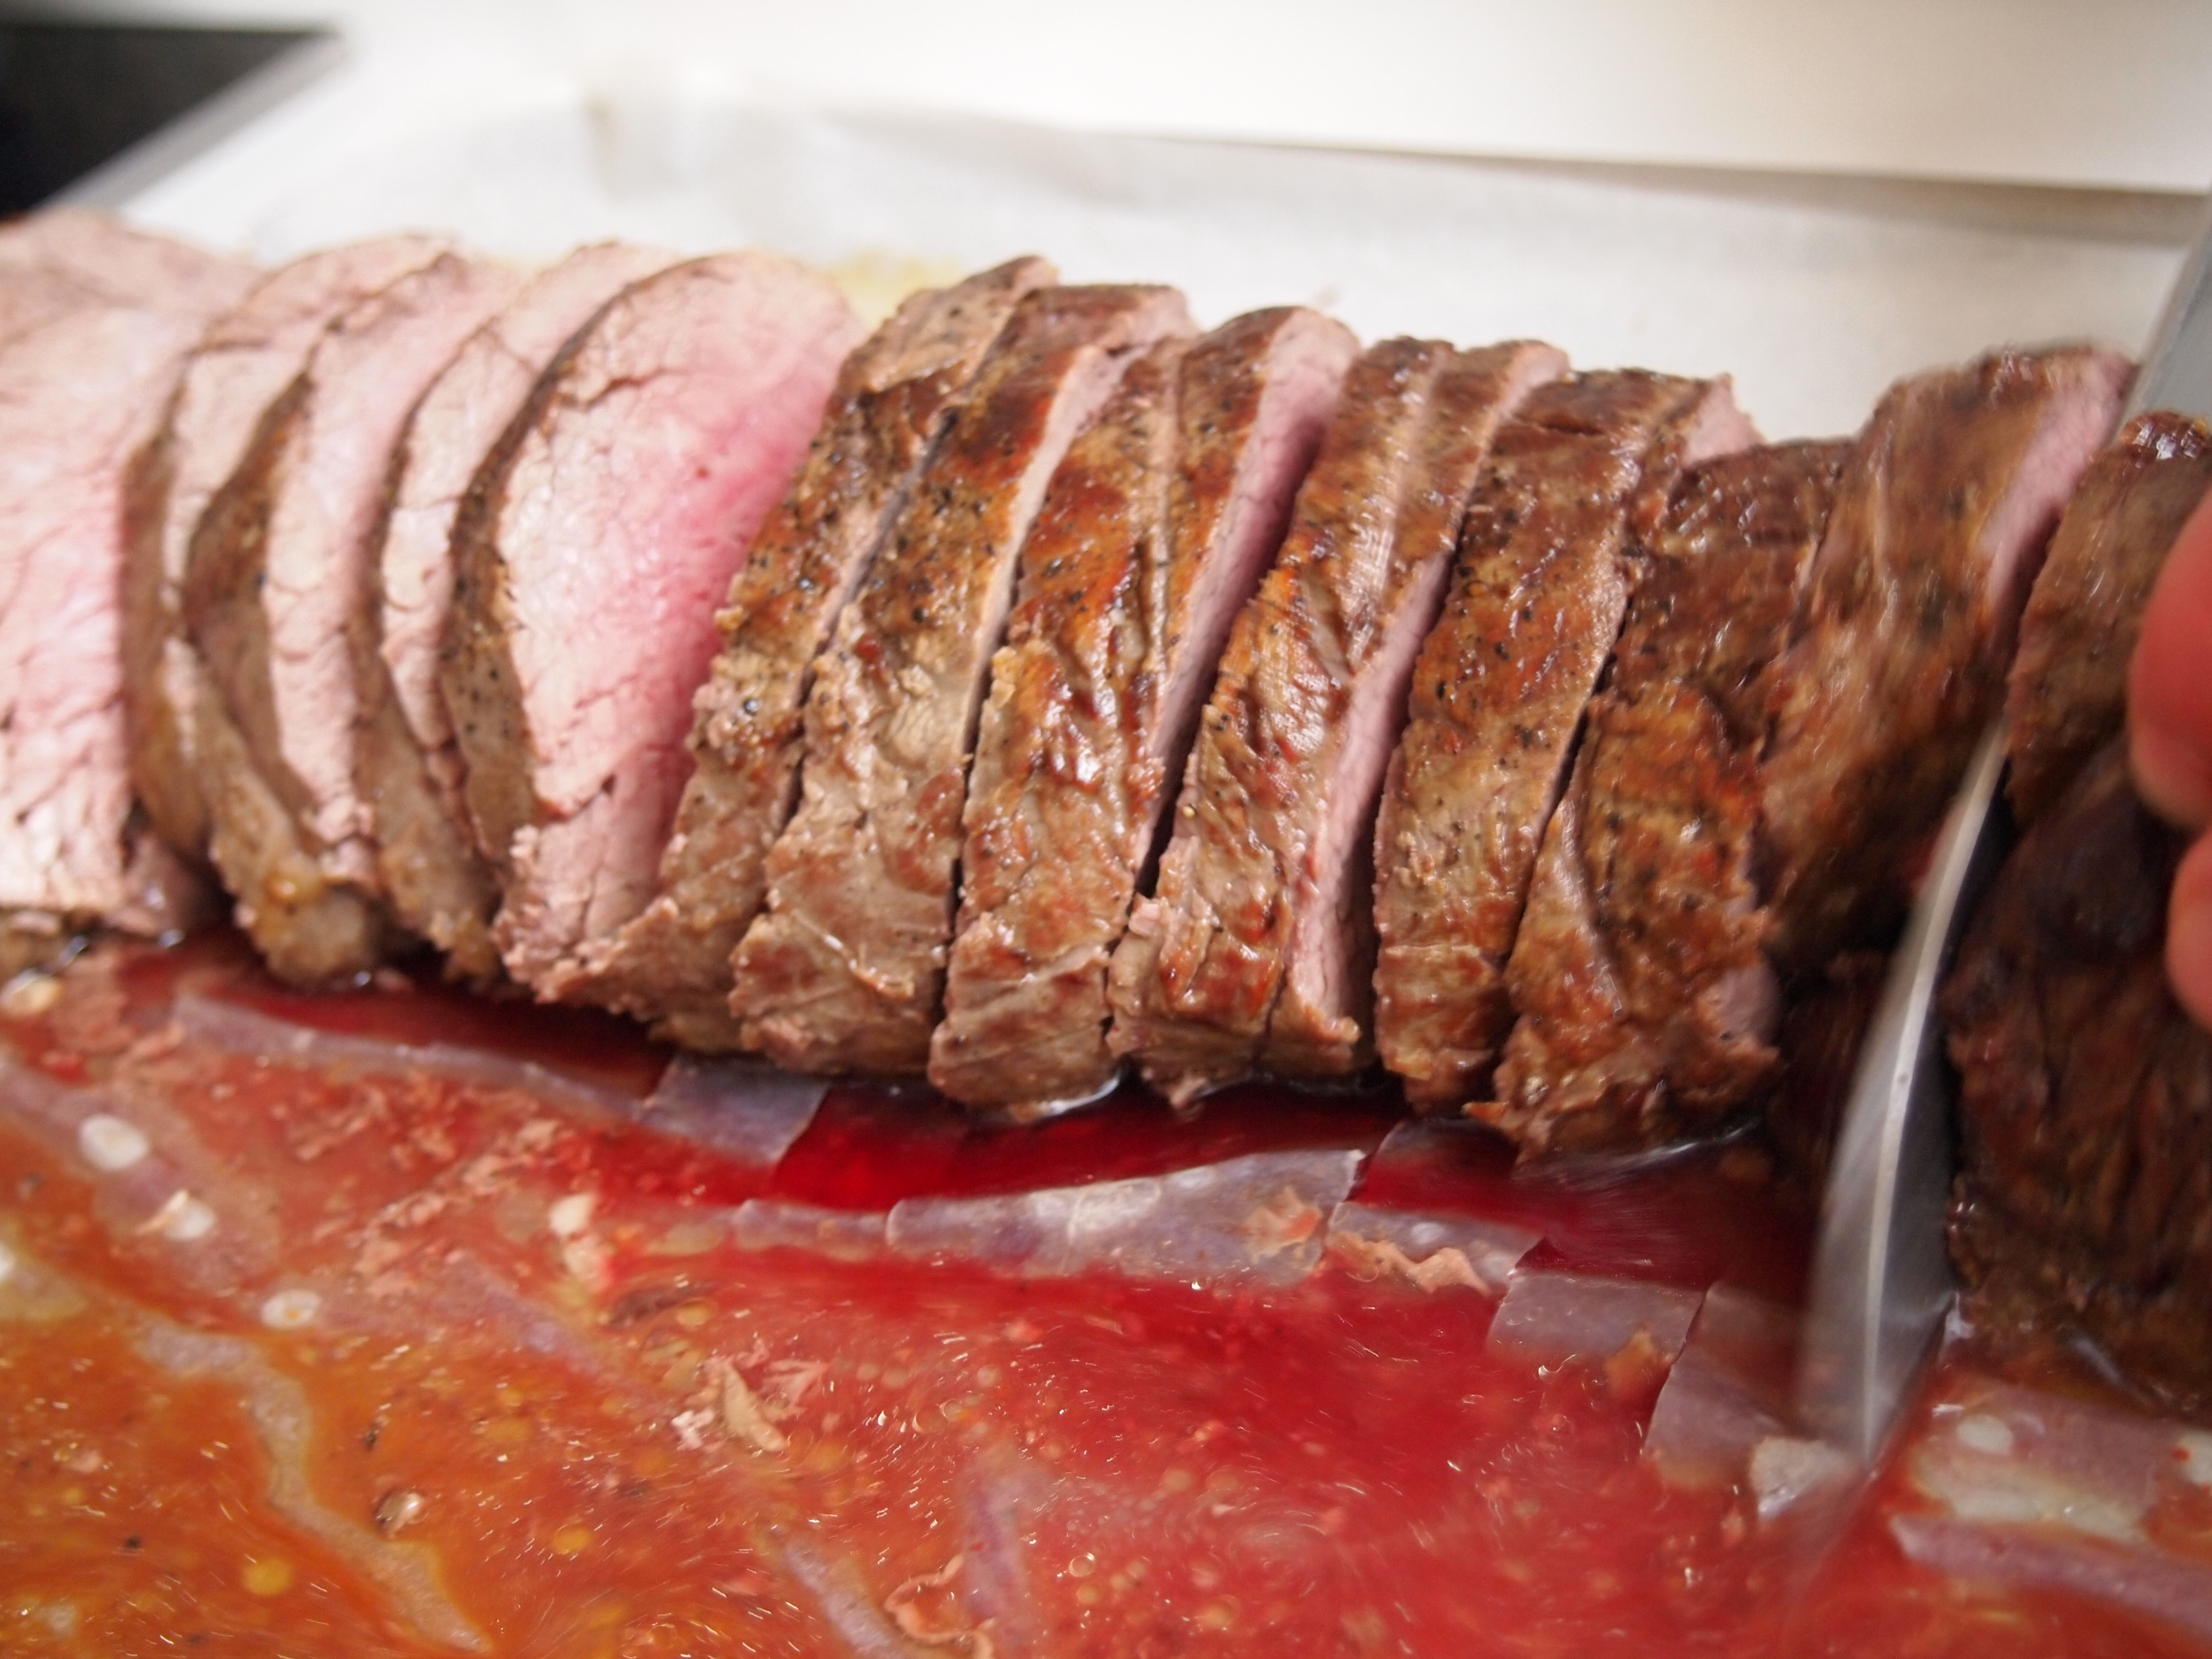
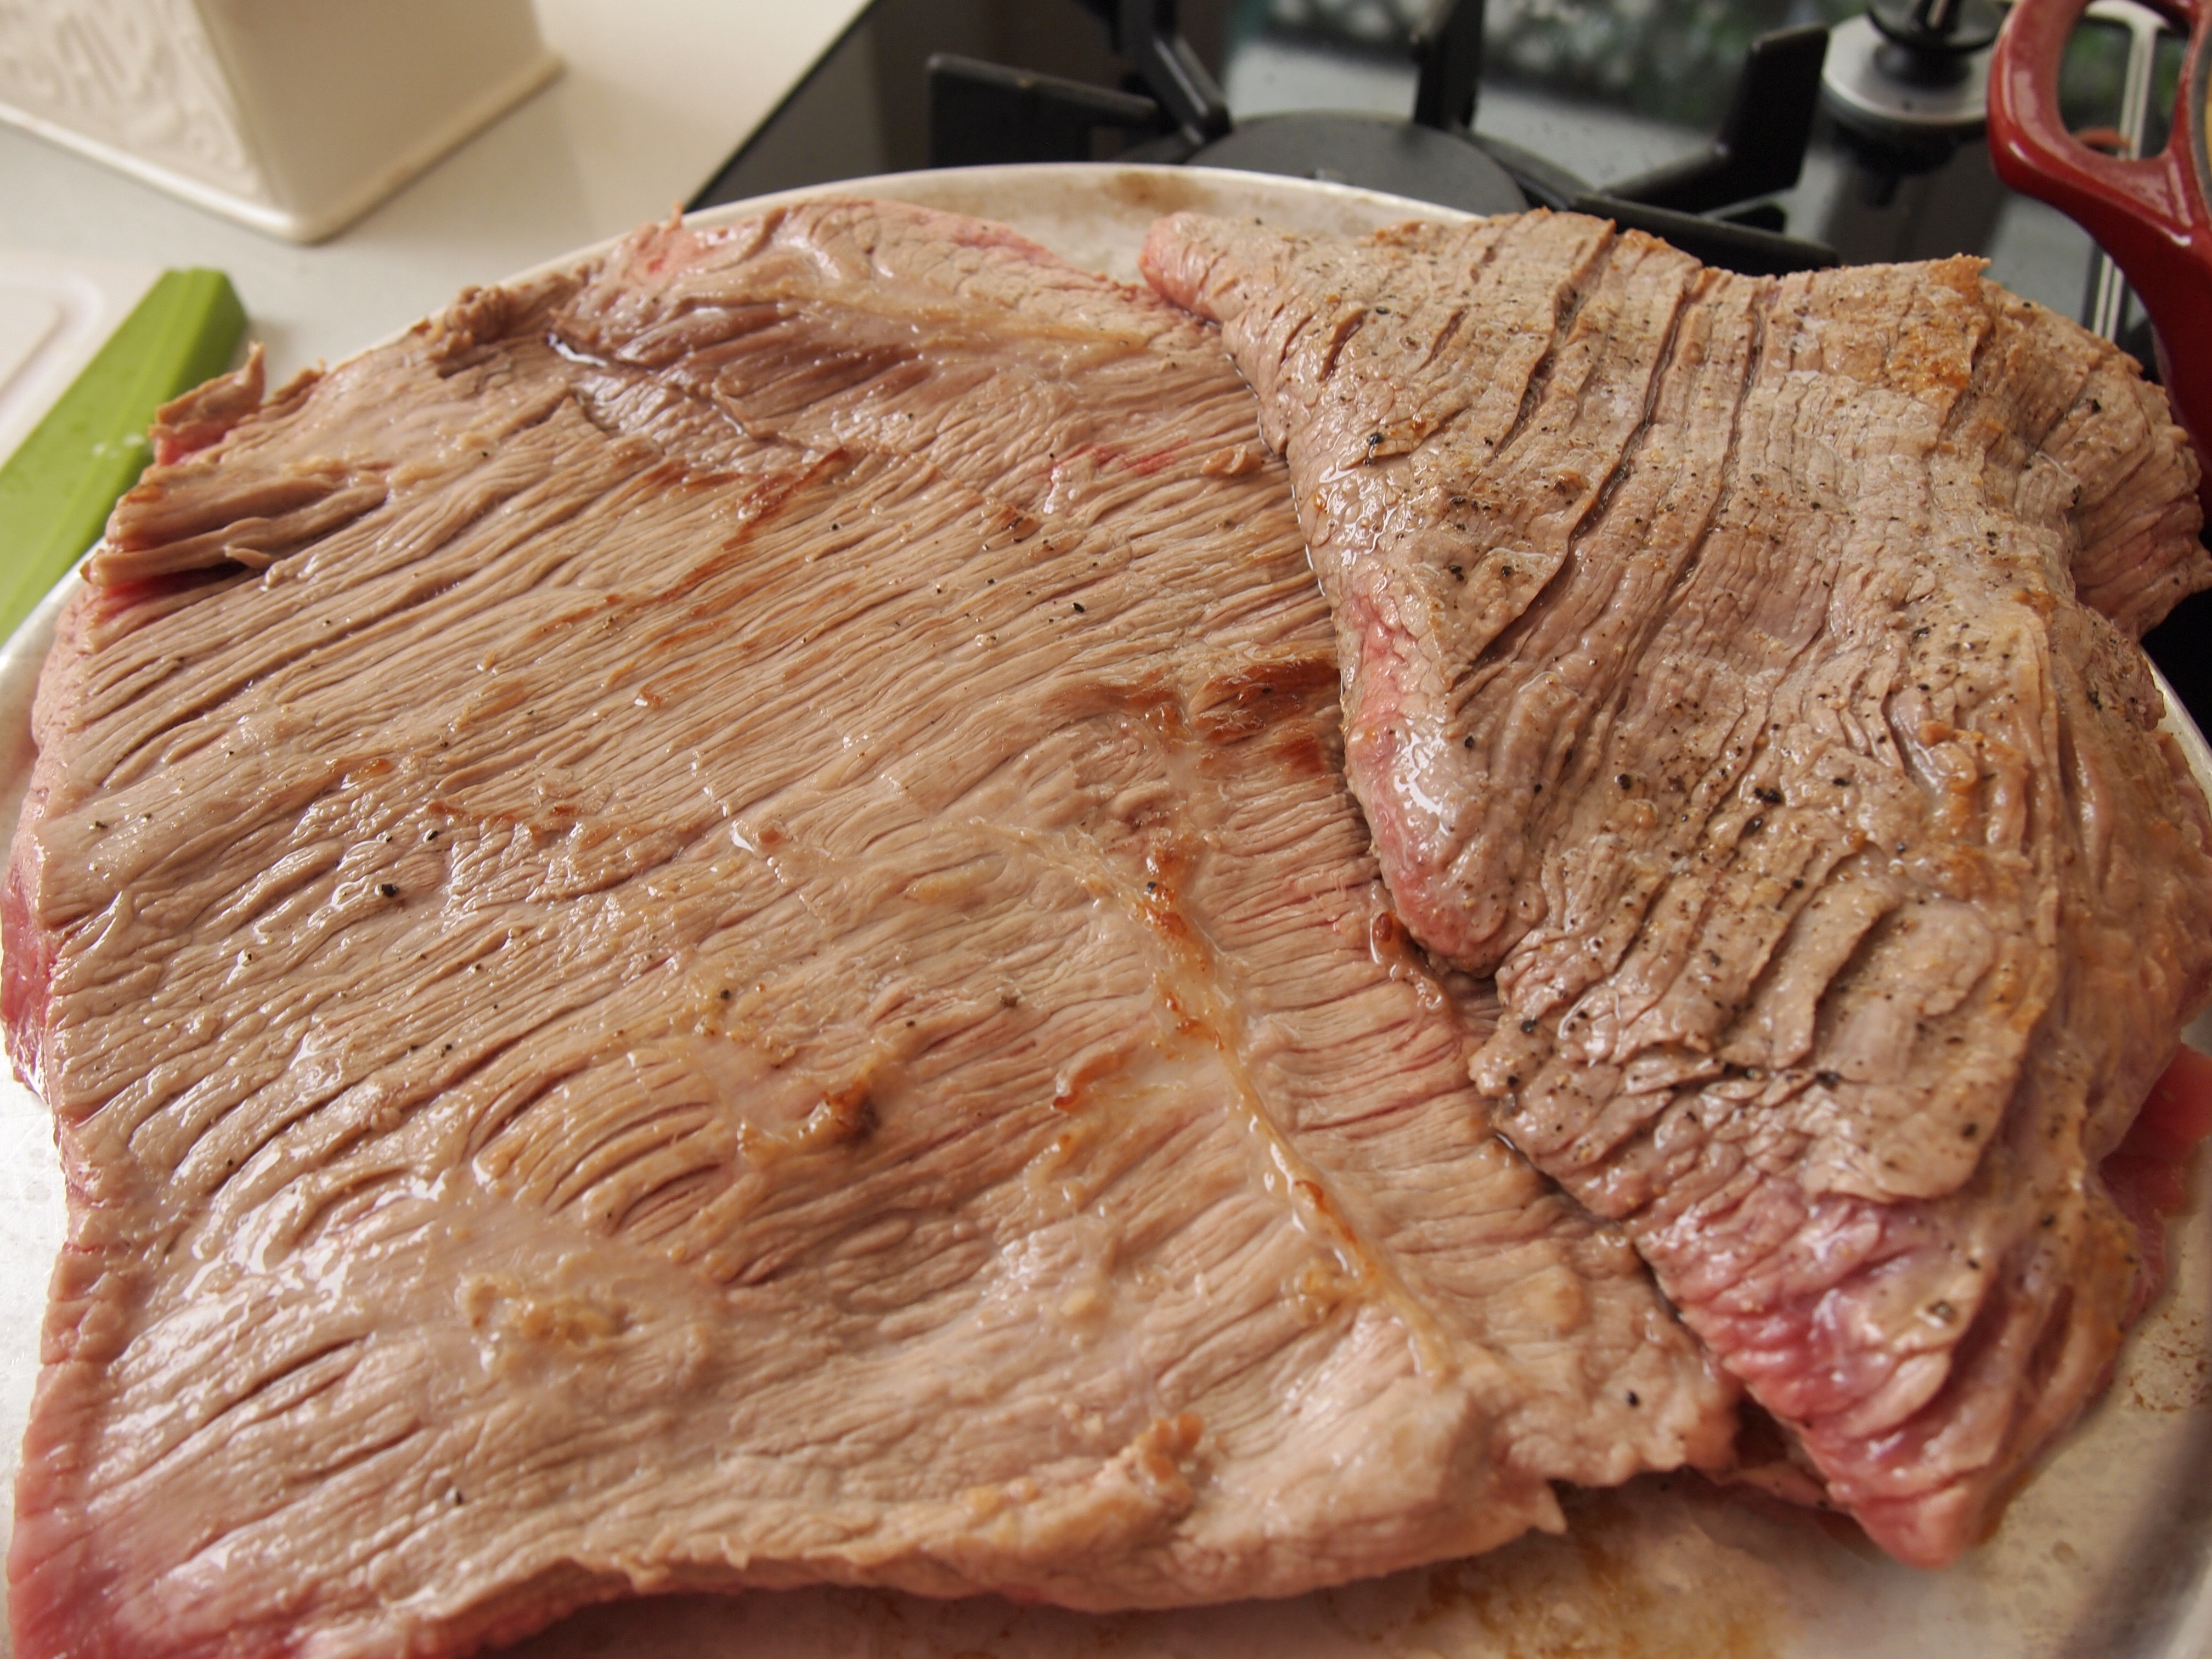
Feeding a large number of people when you only have one small oven and four burners can be a bit of a challenge. As our family gatherings normally mean dinner for ten I’m constantly trying to think of meals and recipes that can feed that amount of people without too much stress or pandemonium in my small kitchen, which by the way is right by the dining table so there’s no hiding any mess! This recipe fits the bill perfectly.  The red wine sauce is fantastic and it’s the only part of the dish that takes any amount of time, but I normally make this the day before, you could even make it a week before and freeze it.  The beef fillet, or tenderloin as it’s referred to in the States, is completely hassle free.  Most of my family like their meat well done so to the chagrin of my husband the beef fillet was in the oven for about 35 minutes and came out just on the border of well done.  Any other cut would’ve resulted in tough meat but luckily beef fillet is very forgiving and it was still moist and tender.  If I was cooking for ourselves I would cut the cooking time to 25 minutes for a nice medium-rare. The sauce takes the dish to another level and I like to spread some of it on the platter and then place the thickly sliced beef fillet on top and then pour over a little more sauce to just coat the meat a little.  A whole eye fillet with a couple of side dishes fed all of us and the kitchen remained in tact!

Ingredients – Serves 10

Whole eye fillet of beef (tenderloin) – weighing about 1.5 kg
Salt & freshly ground black pepper
Olive oil
2 cloves of garlic, finely sliced

Red Wine Sauce
5 tablespoons (70g) butter
1 large onion, chopped
1 carrot, peeled and chopped
1 stalk celery,chopped
10 button mushrooms, quartered
2 cloves garlic, minced
1 teaspoon dried rosemary leaves
1 teaspoon dried sage leaves
1 bay leaf
1 teaspoon black peppercorns
2 tablespoons tomato paste
1 bottle (3 cups) dry red wine
2 cups best quality beef stock
2 tablespoons red current jelly
Salt & freshly ground black pepper

Method

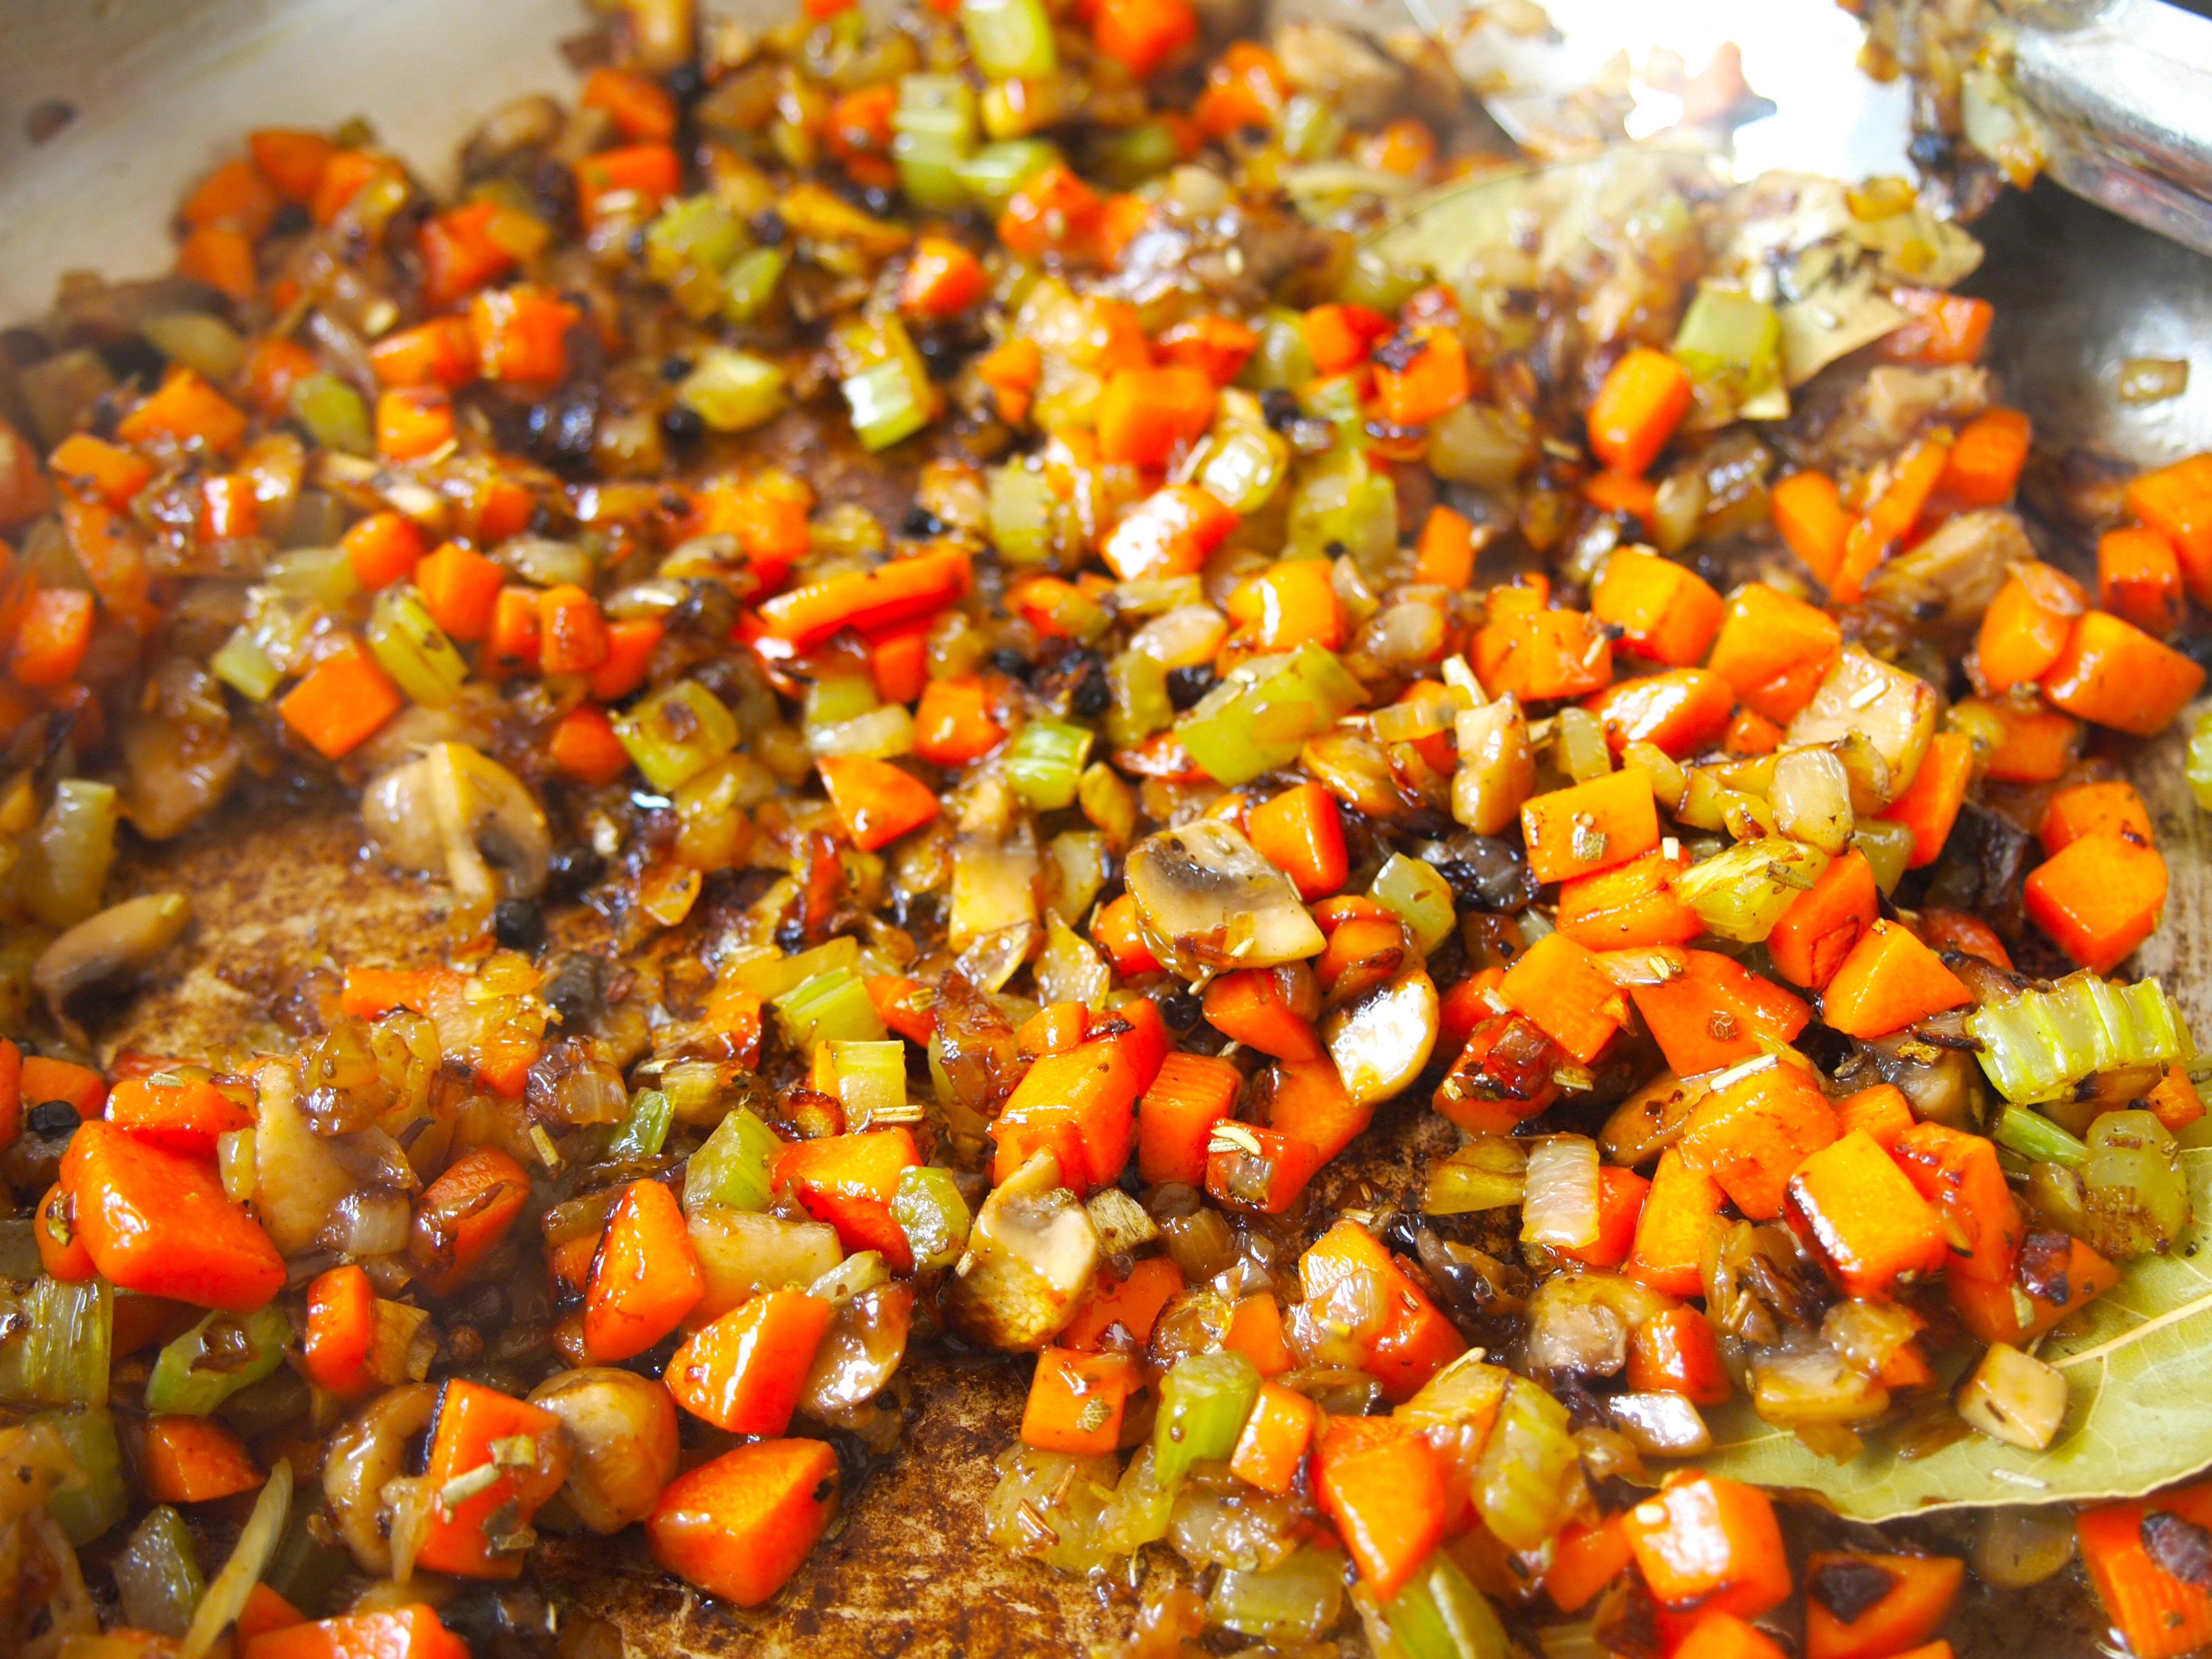
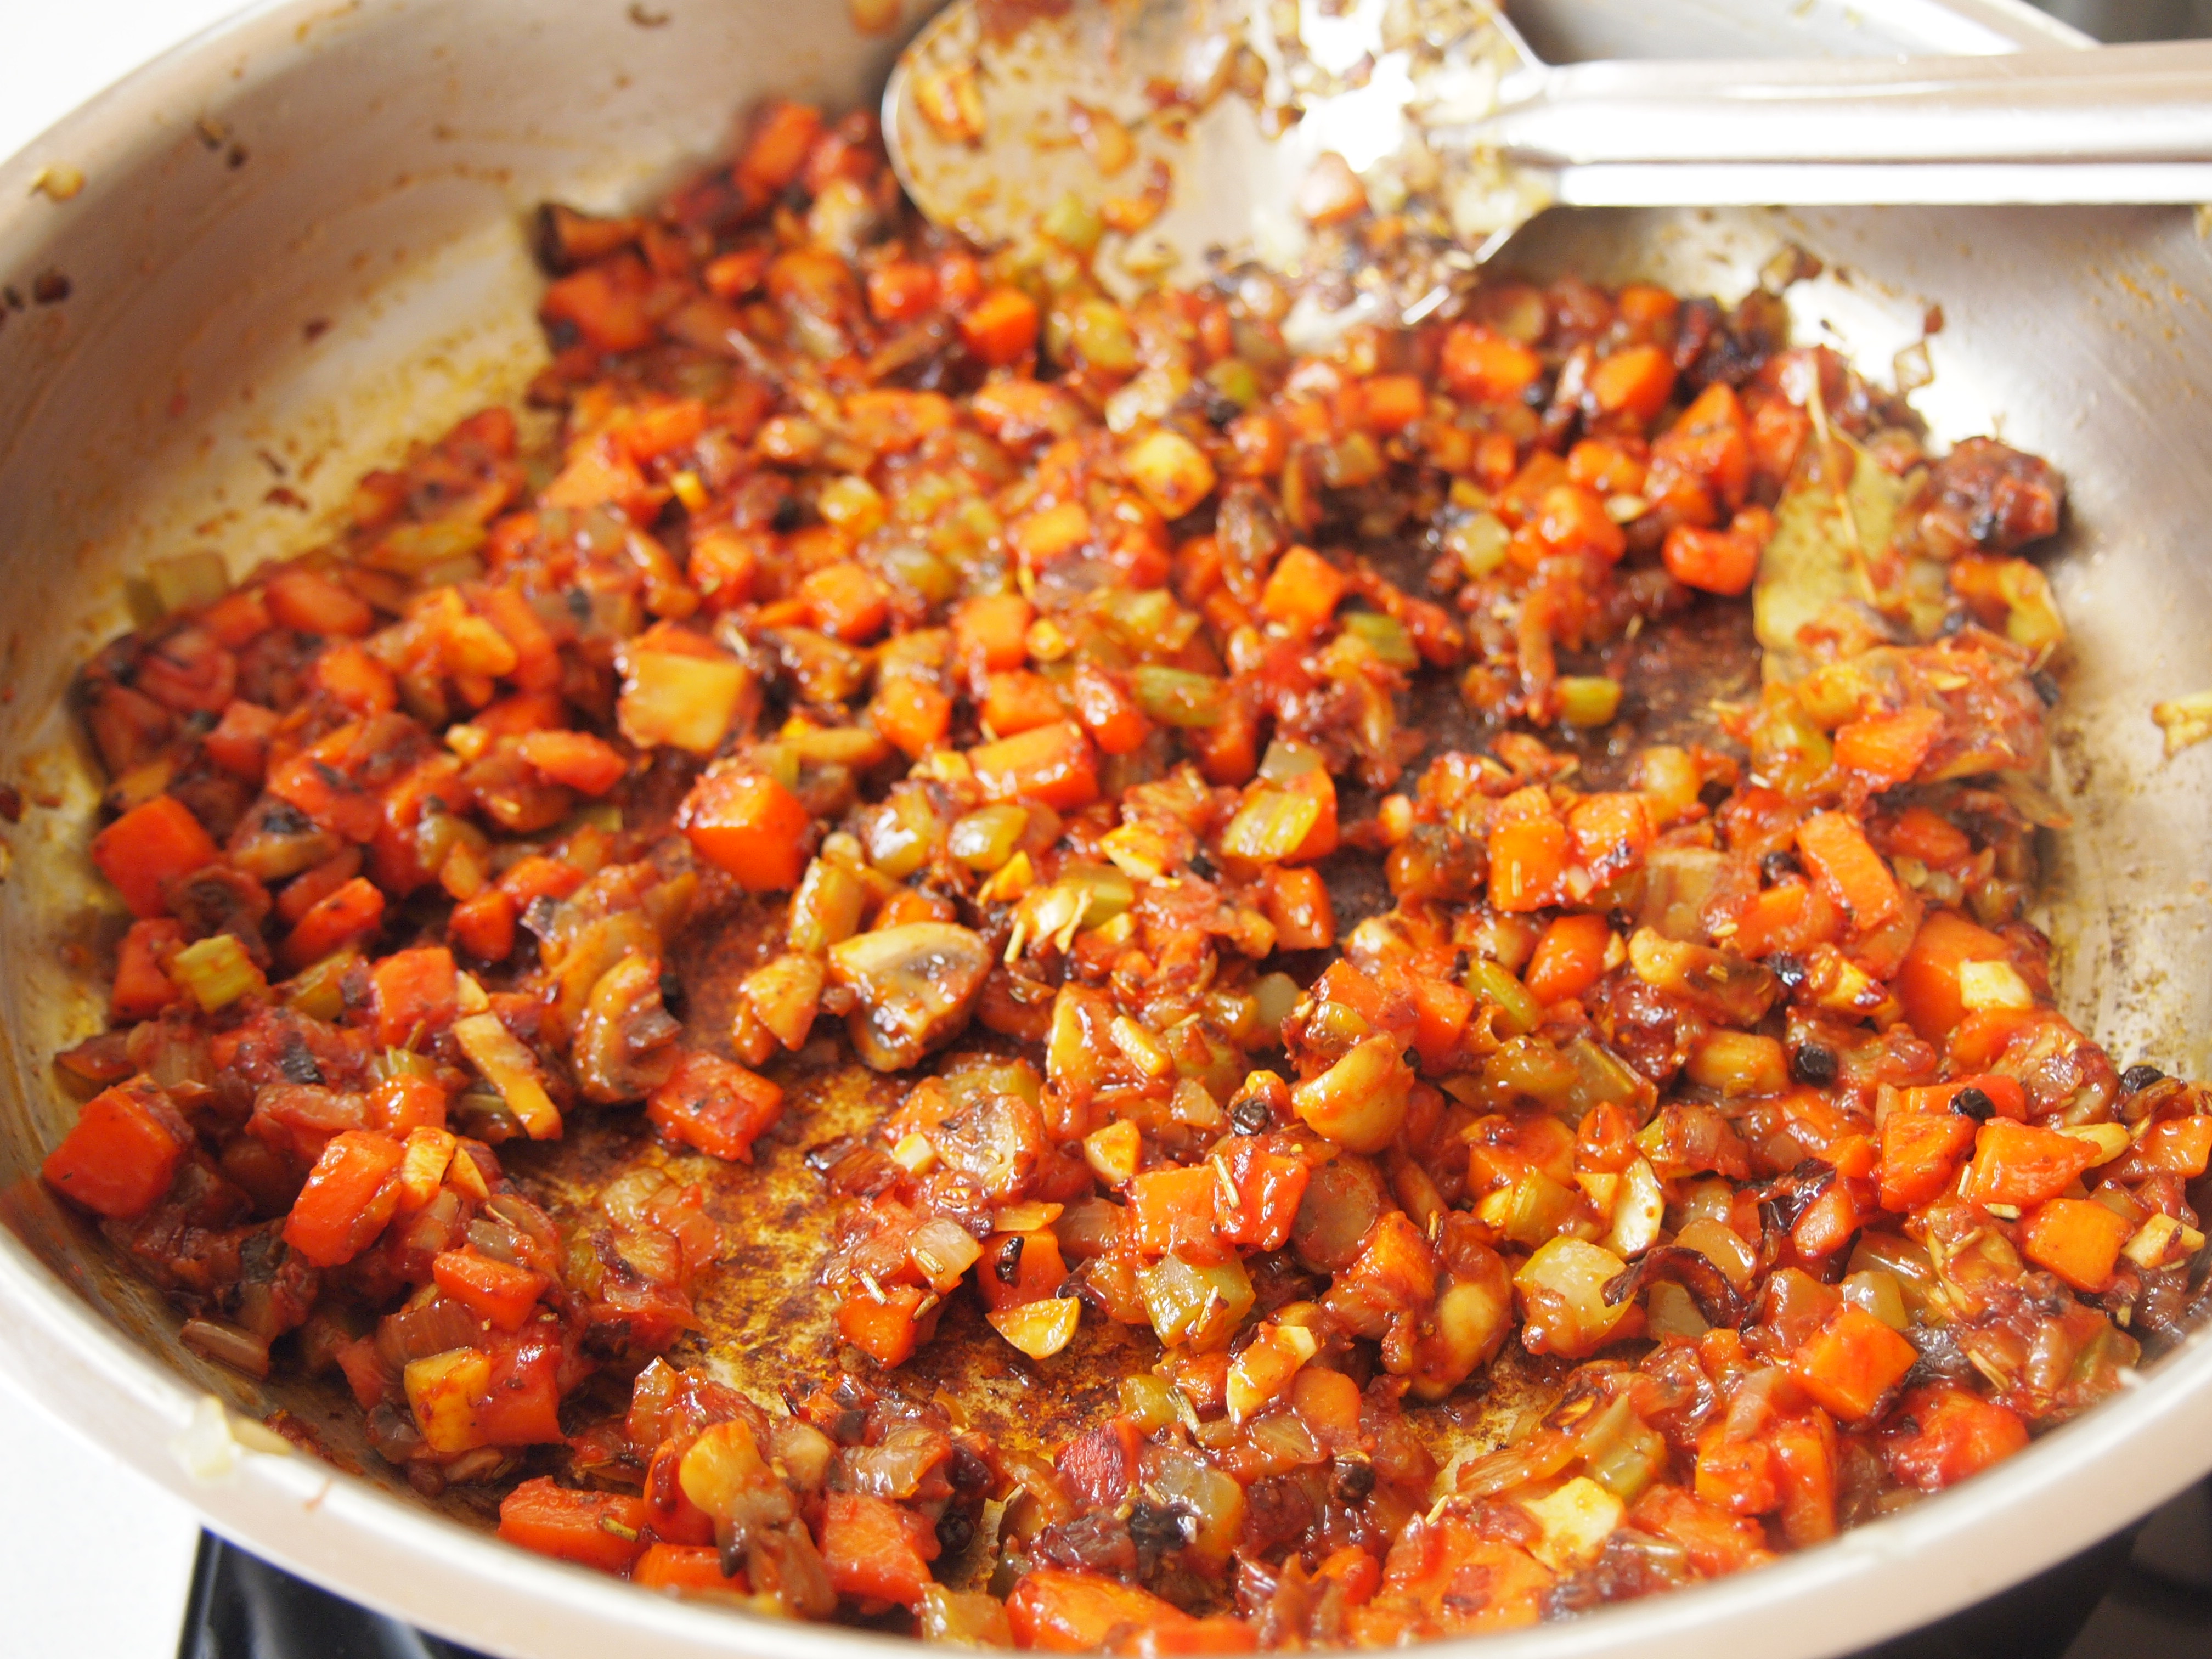
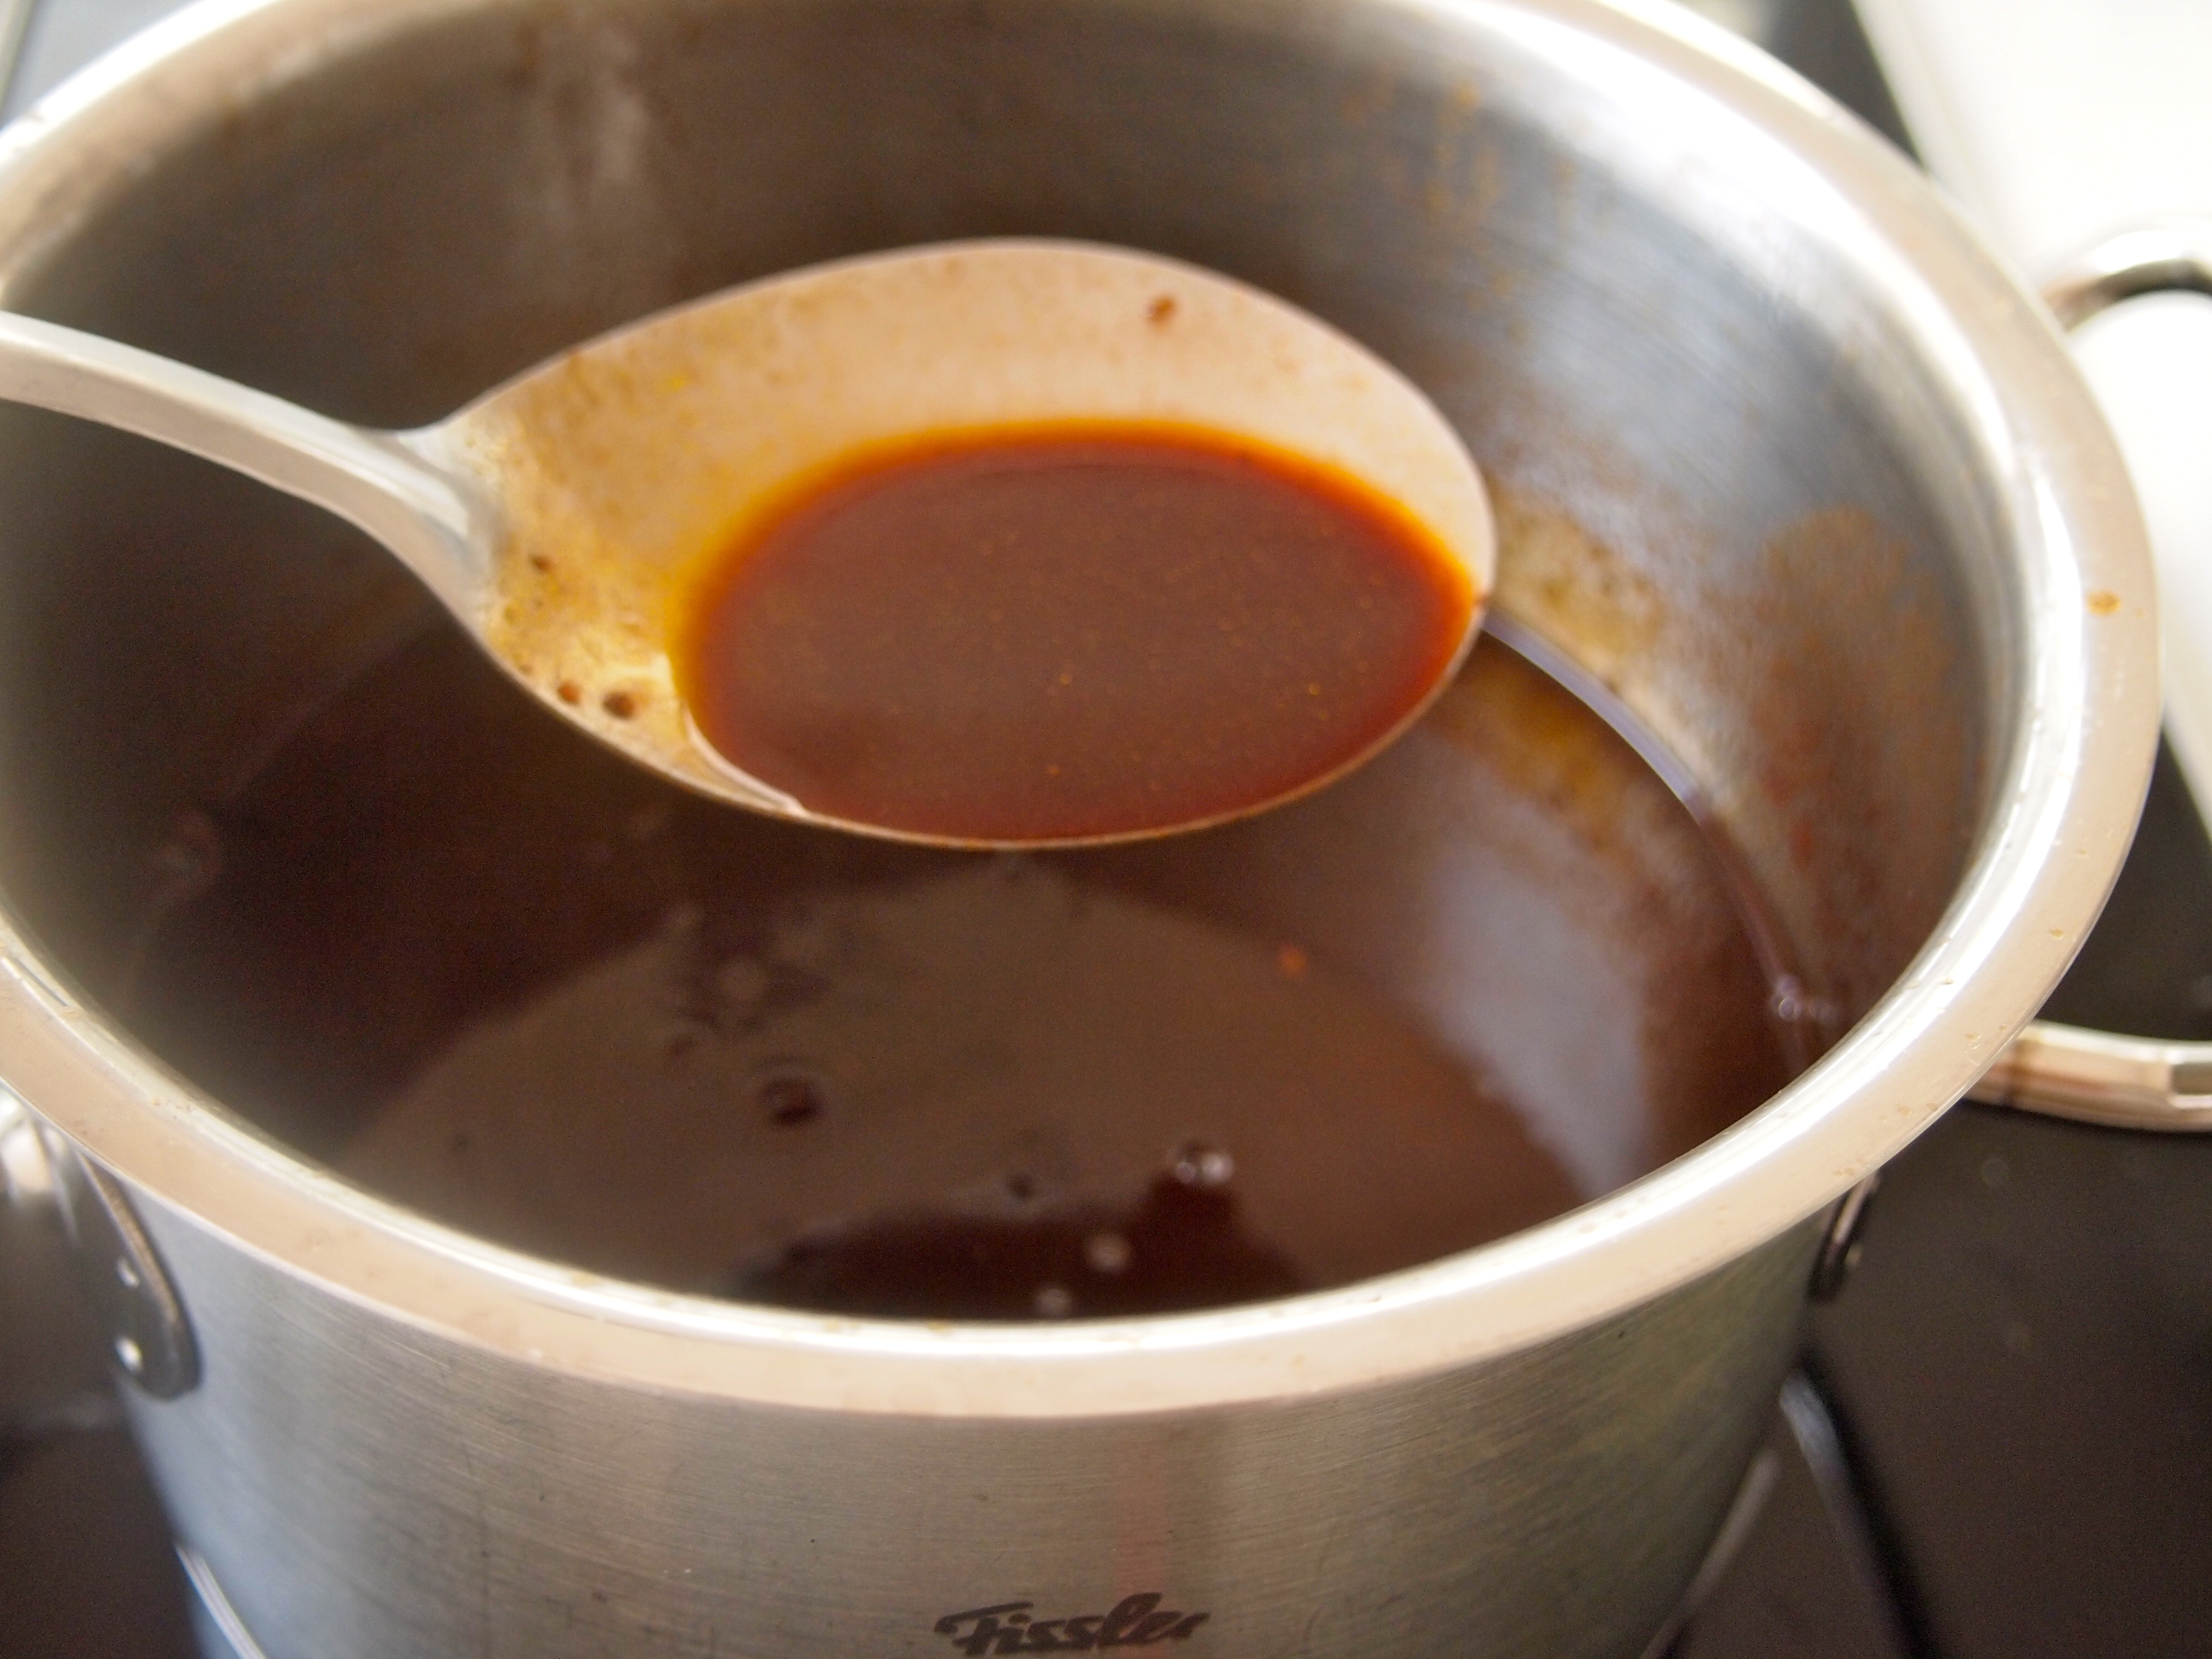
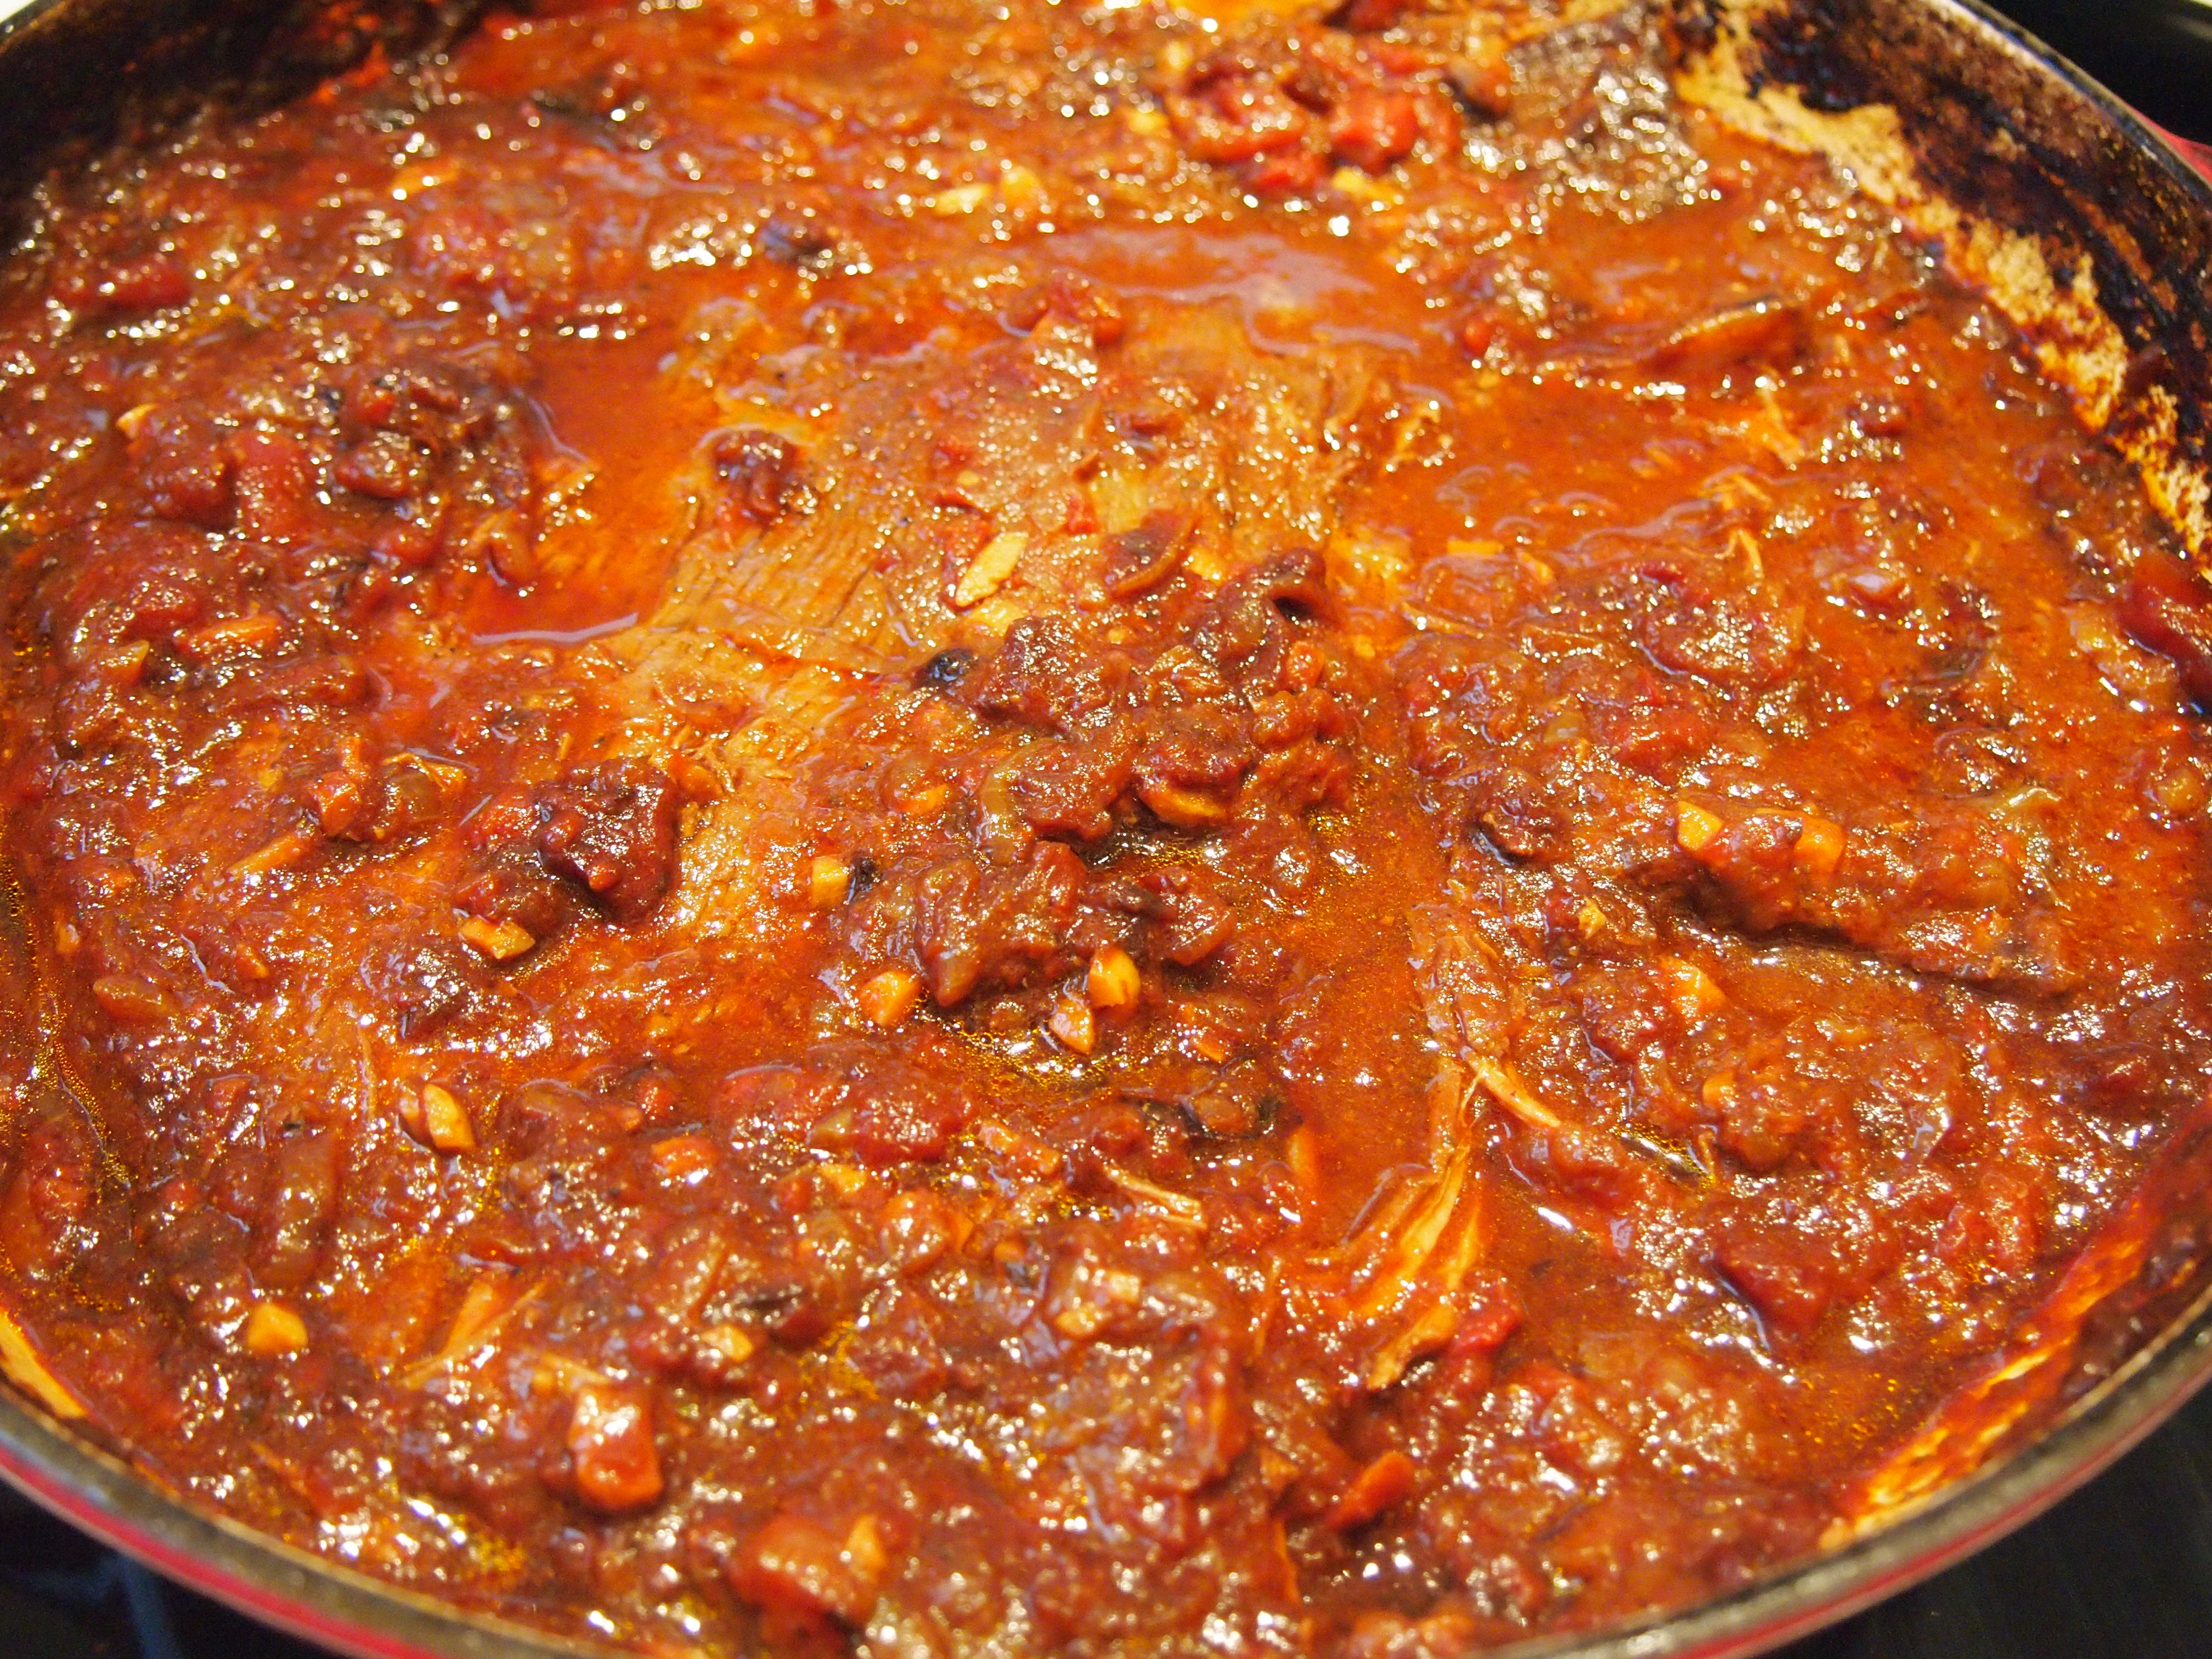
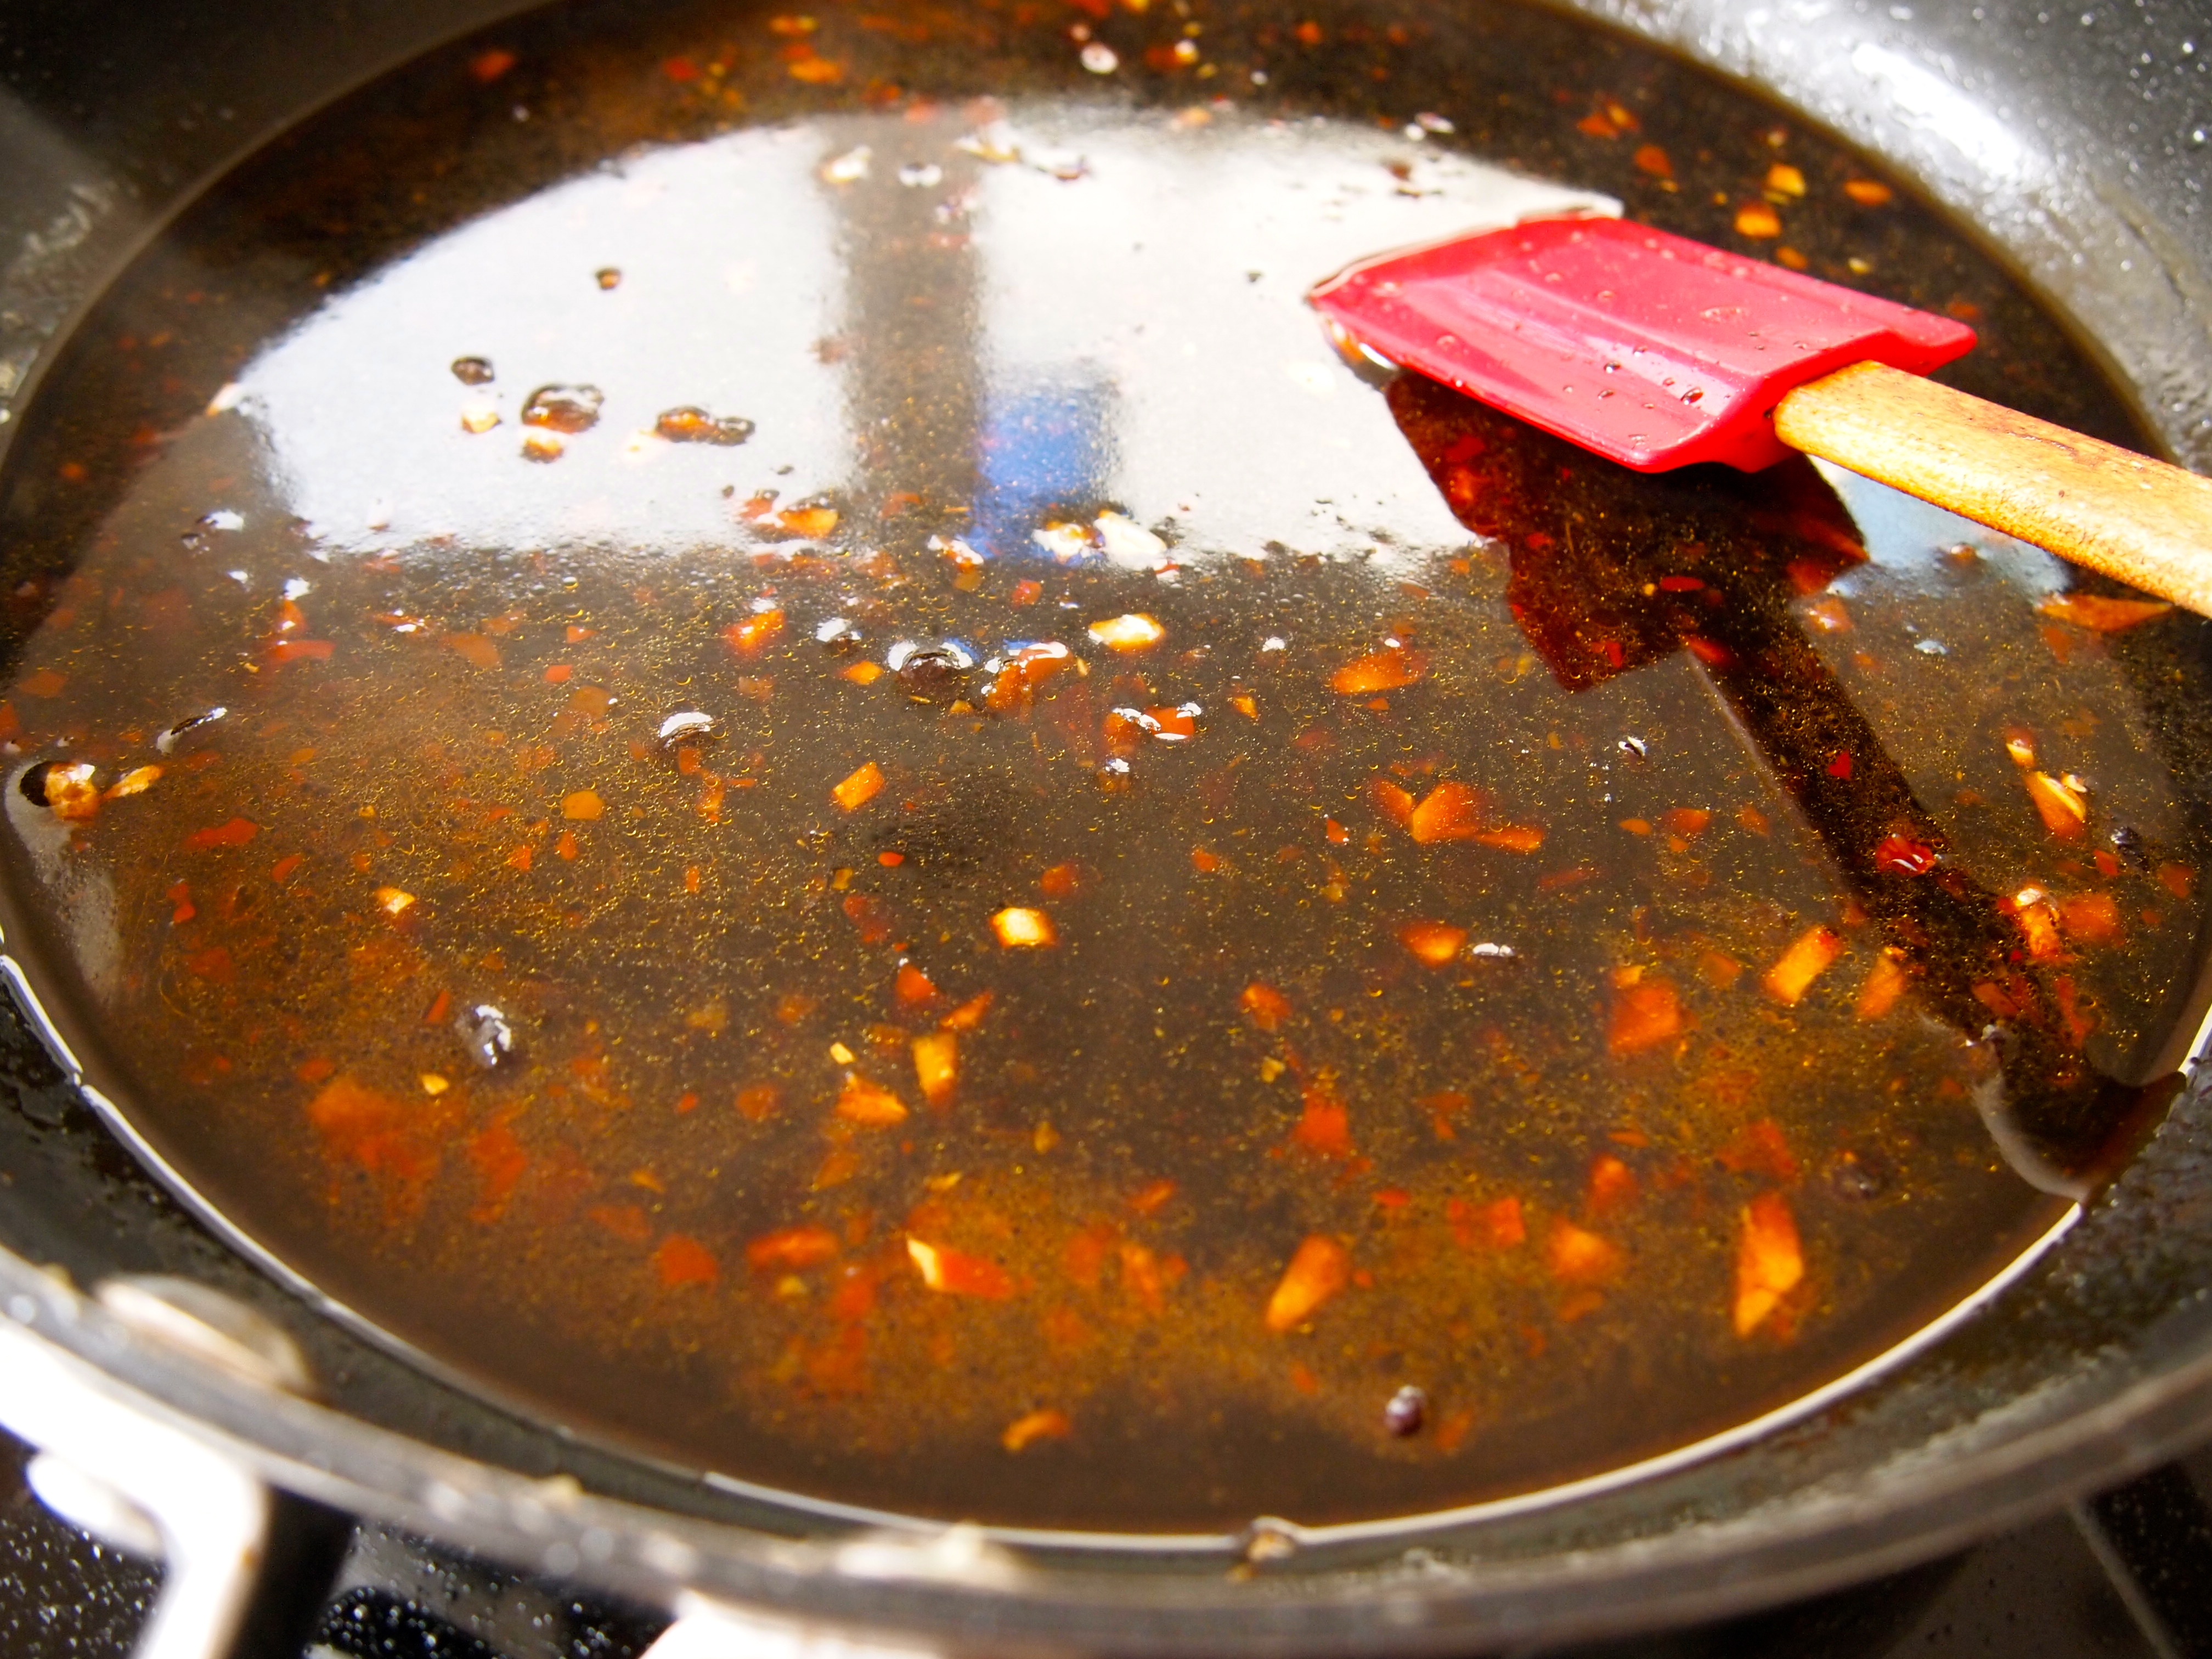
To make the red wine sauce melt 3 of the 5 tablespoons of the butter in a large frying pan and add the onion, carrot, celery, mushrooms, rosemary, sage, bay leaf, and peppercorns. Cook over medium-high heat, stirring occasionally, for about 20 minutes or until the onions and other vegetables are browned and caramelised. Add the garlic and cook for another 2 minutes. Add the tomato paste and cook for about 3 minutes, until it begins to darken. Add the wine and the beef stock, scraping the bottom of the pan to release any residue from the vegetables. Boil for 30 minutes. Pour everything through a strainer into a saucepan, and squeeze the juices through the strainer with a ladle. Boil over high heat until it is reduced to about 1½ cups.  If you like you can reduce it further to 1 cup for a more concentrated sauce. Add the redcurrant jelly and stir until it is thoroughly dissolved. Turn off the heat, taste and season with salt and pepper if necessary. You can make the sauce to this stage a day ahead or even earlier and refrigerate or freeze it. When you need the sauce, warm it and add the remaining 2 tablespoons of butter.  Swirl the butter around in the sauce with a spoon (don’t whisk it) until it’s thoroughly melted.


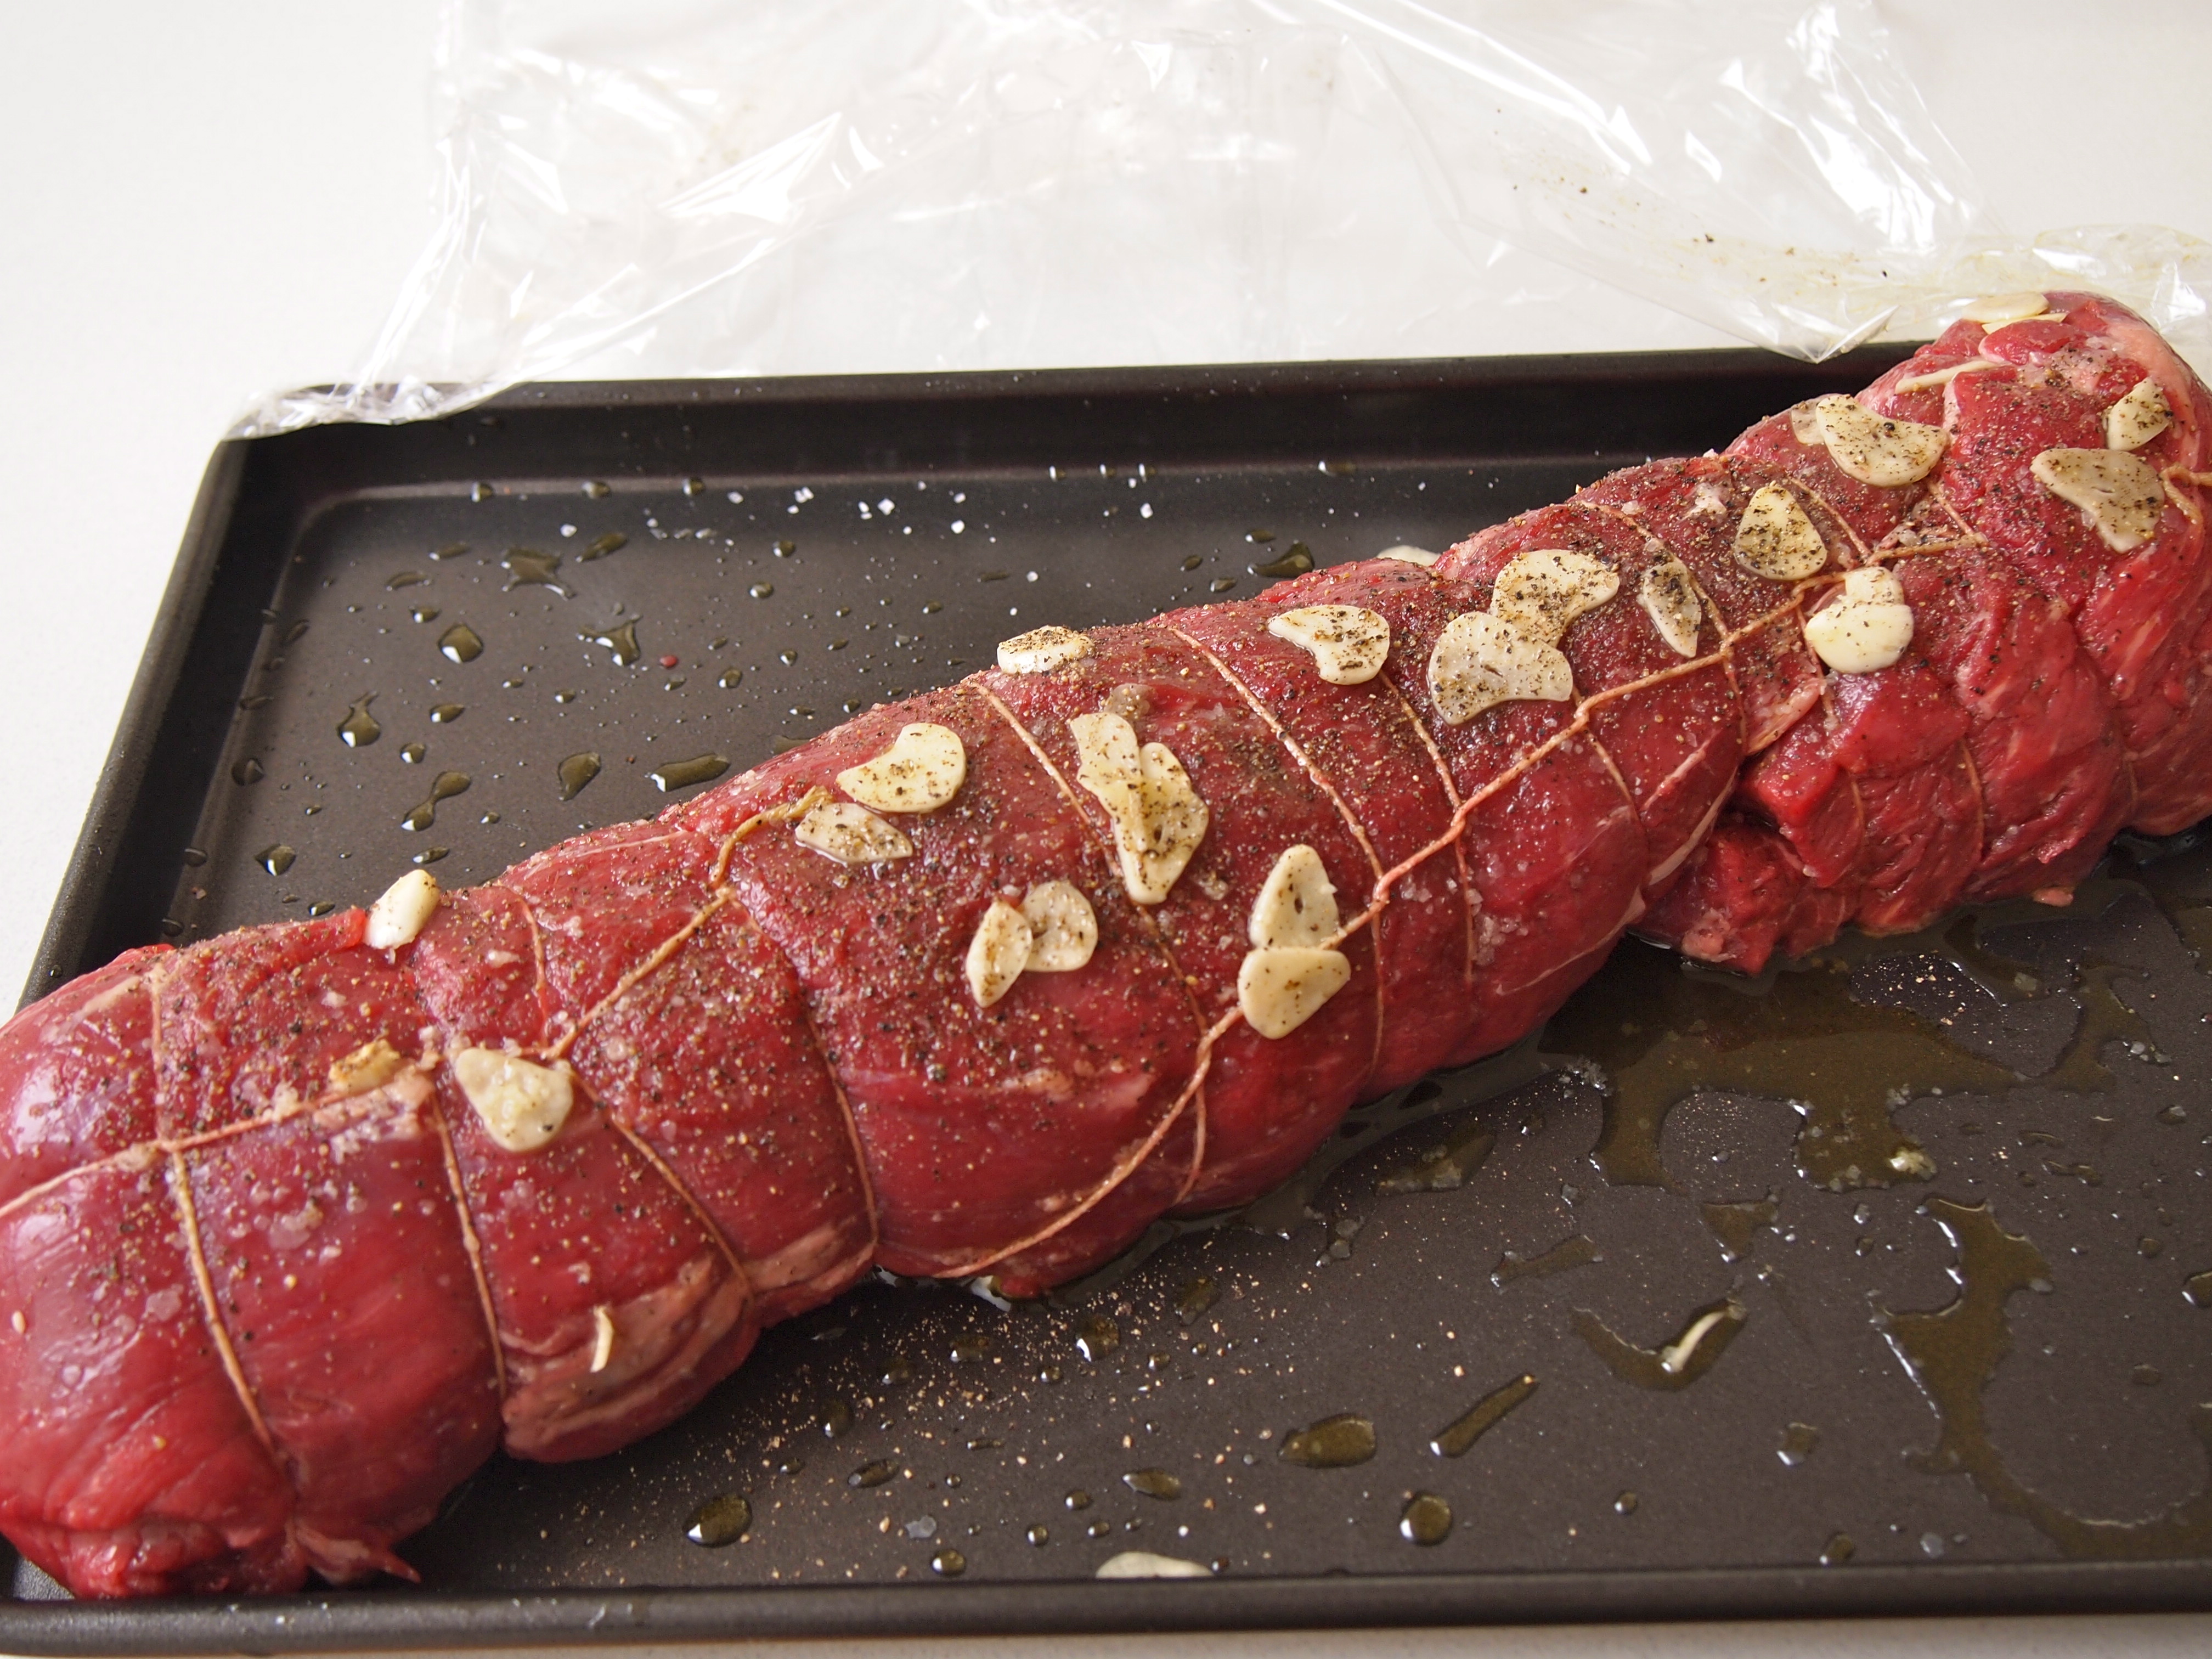
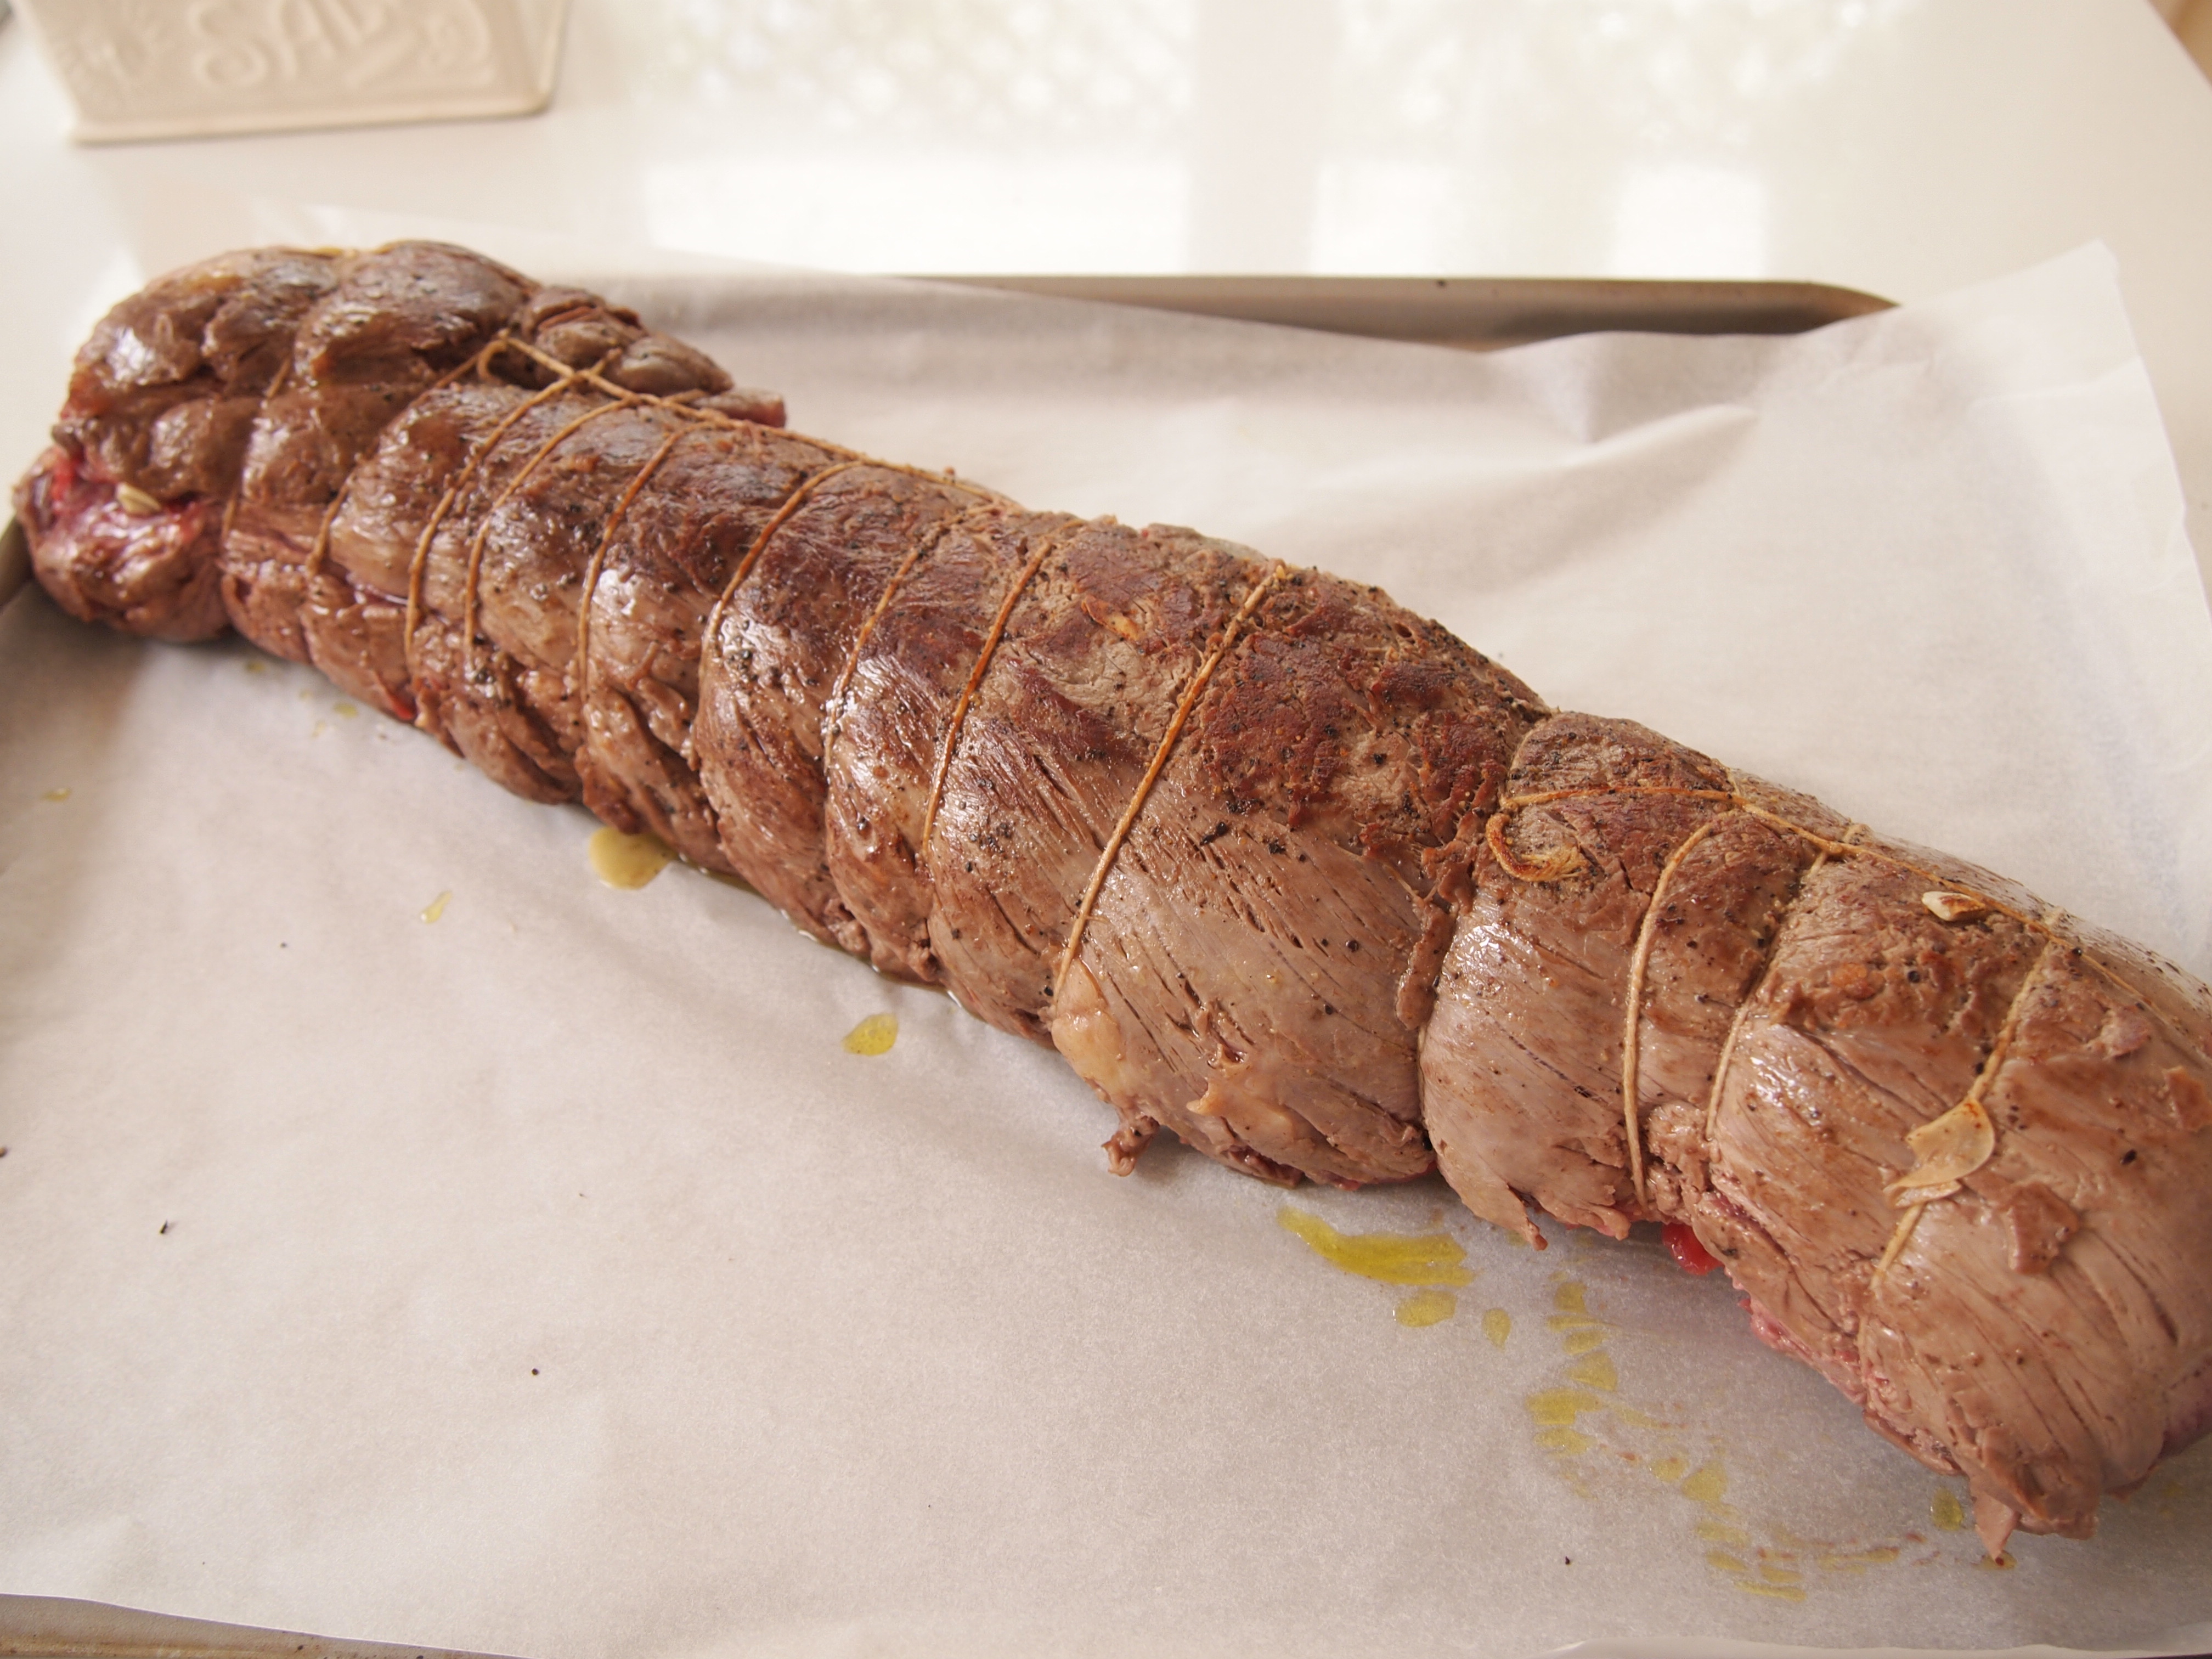
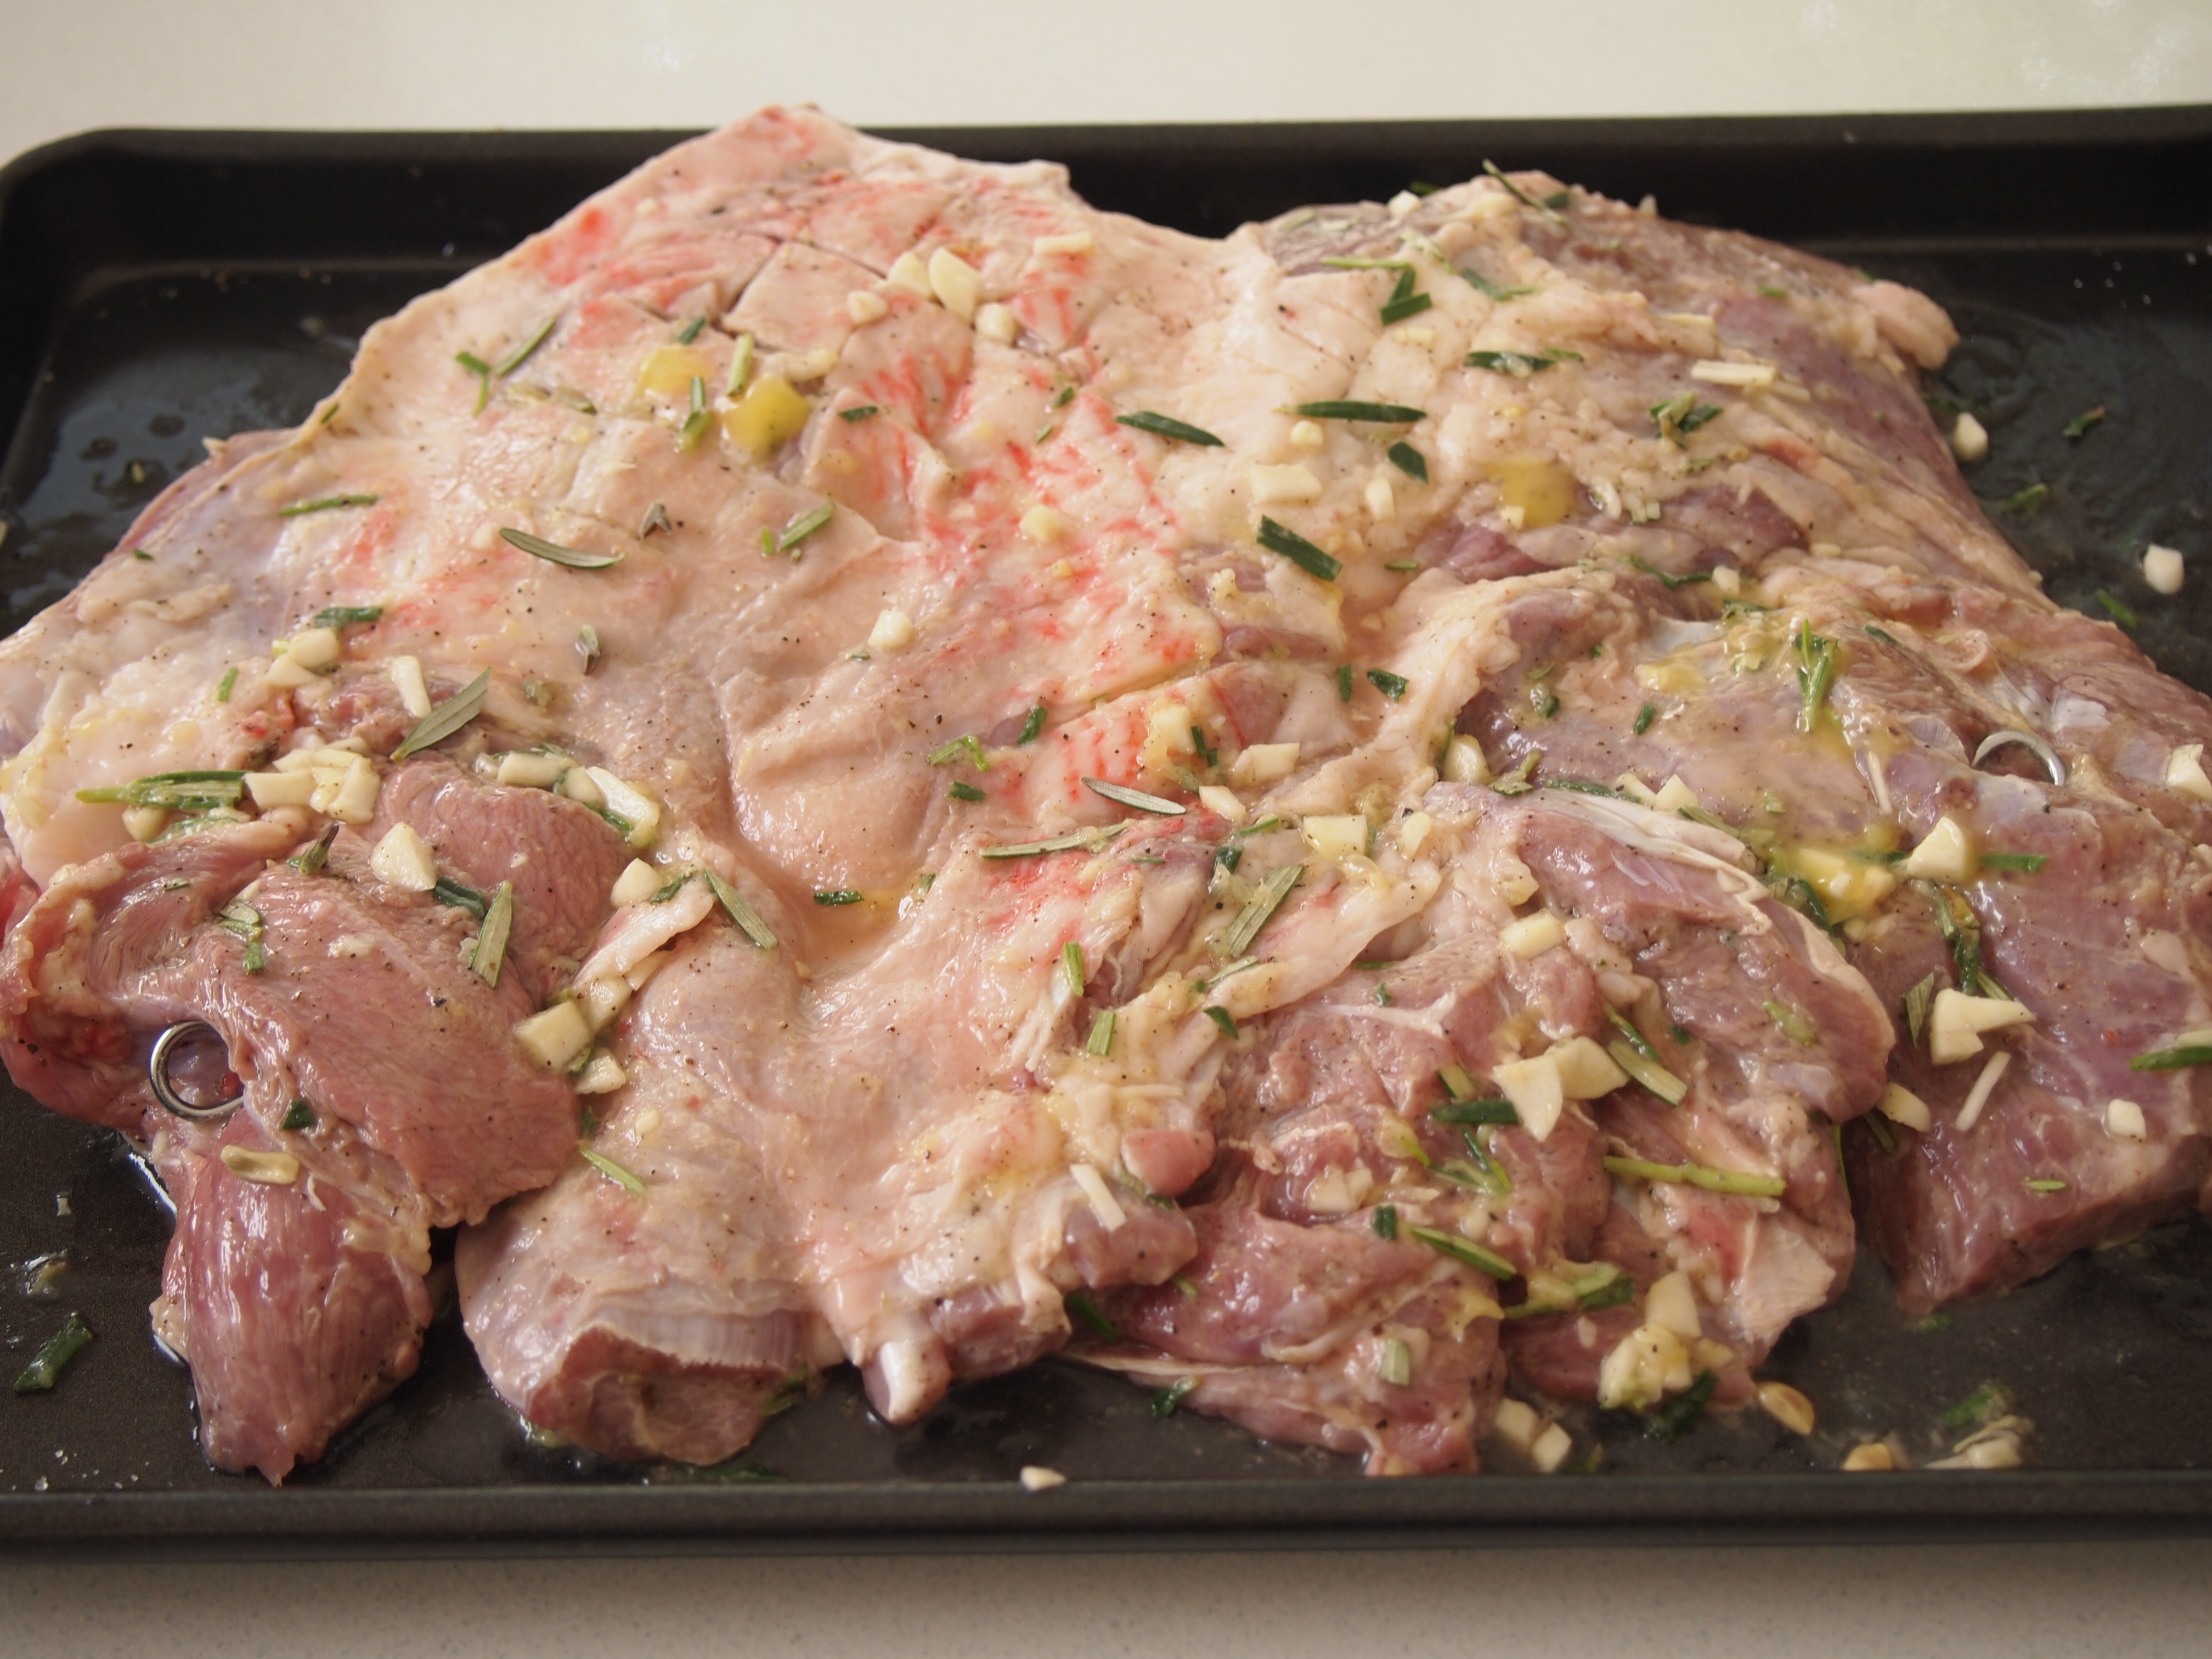
To make the beef, trim the fillet of the long strip of silverside, if it hasn’t already been removed.  To gain a uniform shape and assist in the meat cooking evenly tie the  fillet at 2 cm intervals with kitchen string, tucking in the narrow end section under the beef to create a uniform log shape. Season the meat very well on all sides with salt and pepper.  Rub with some olive oil and massage the garlic into the meat.  Leave to rest in the fridge for a few hours, or overnight if possible.  Preheat the oven to 200C. Bring the beef to room temperature and heat a large frying pan over high heat.  When hot add the beef fillet and sear it on all sides until  browned all over.  If you don’t have a pan large enough to fry the meat you can also sear it on the barbecue. Place the beef on a narrow sided baking tray and place in the oven.  Immediately turn the heat down to 180C.  Cook for 25 minutes for medium rare, 30 minutes for medium and 35-40 minutes for well done.  If you have a meat thermometer the temperatures you’re looking to achieve are: For rare meat 55-57C. For medium rare, 60-62C. For medium, 68-70C. For well done 75C or above. As oven temperatures vary so much it’s a good idea to check the temperature of your meat after 20 minutes of cooking time and then every 5- 10 minutes after that. Remove the meat from the oven and let it rest, covered in foil for at least 10 minutes.  Once the meat has rested, remove the string and carve into thick slices.


To serve,  place some of the sauce onto a large platter and spread to cover the base.  Layer the beef slices on top of the sauce, slightly overlapping.  Pour more of the sauce over the beef and serve the rest of the sauce separately at the table.
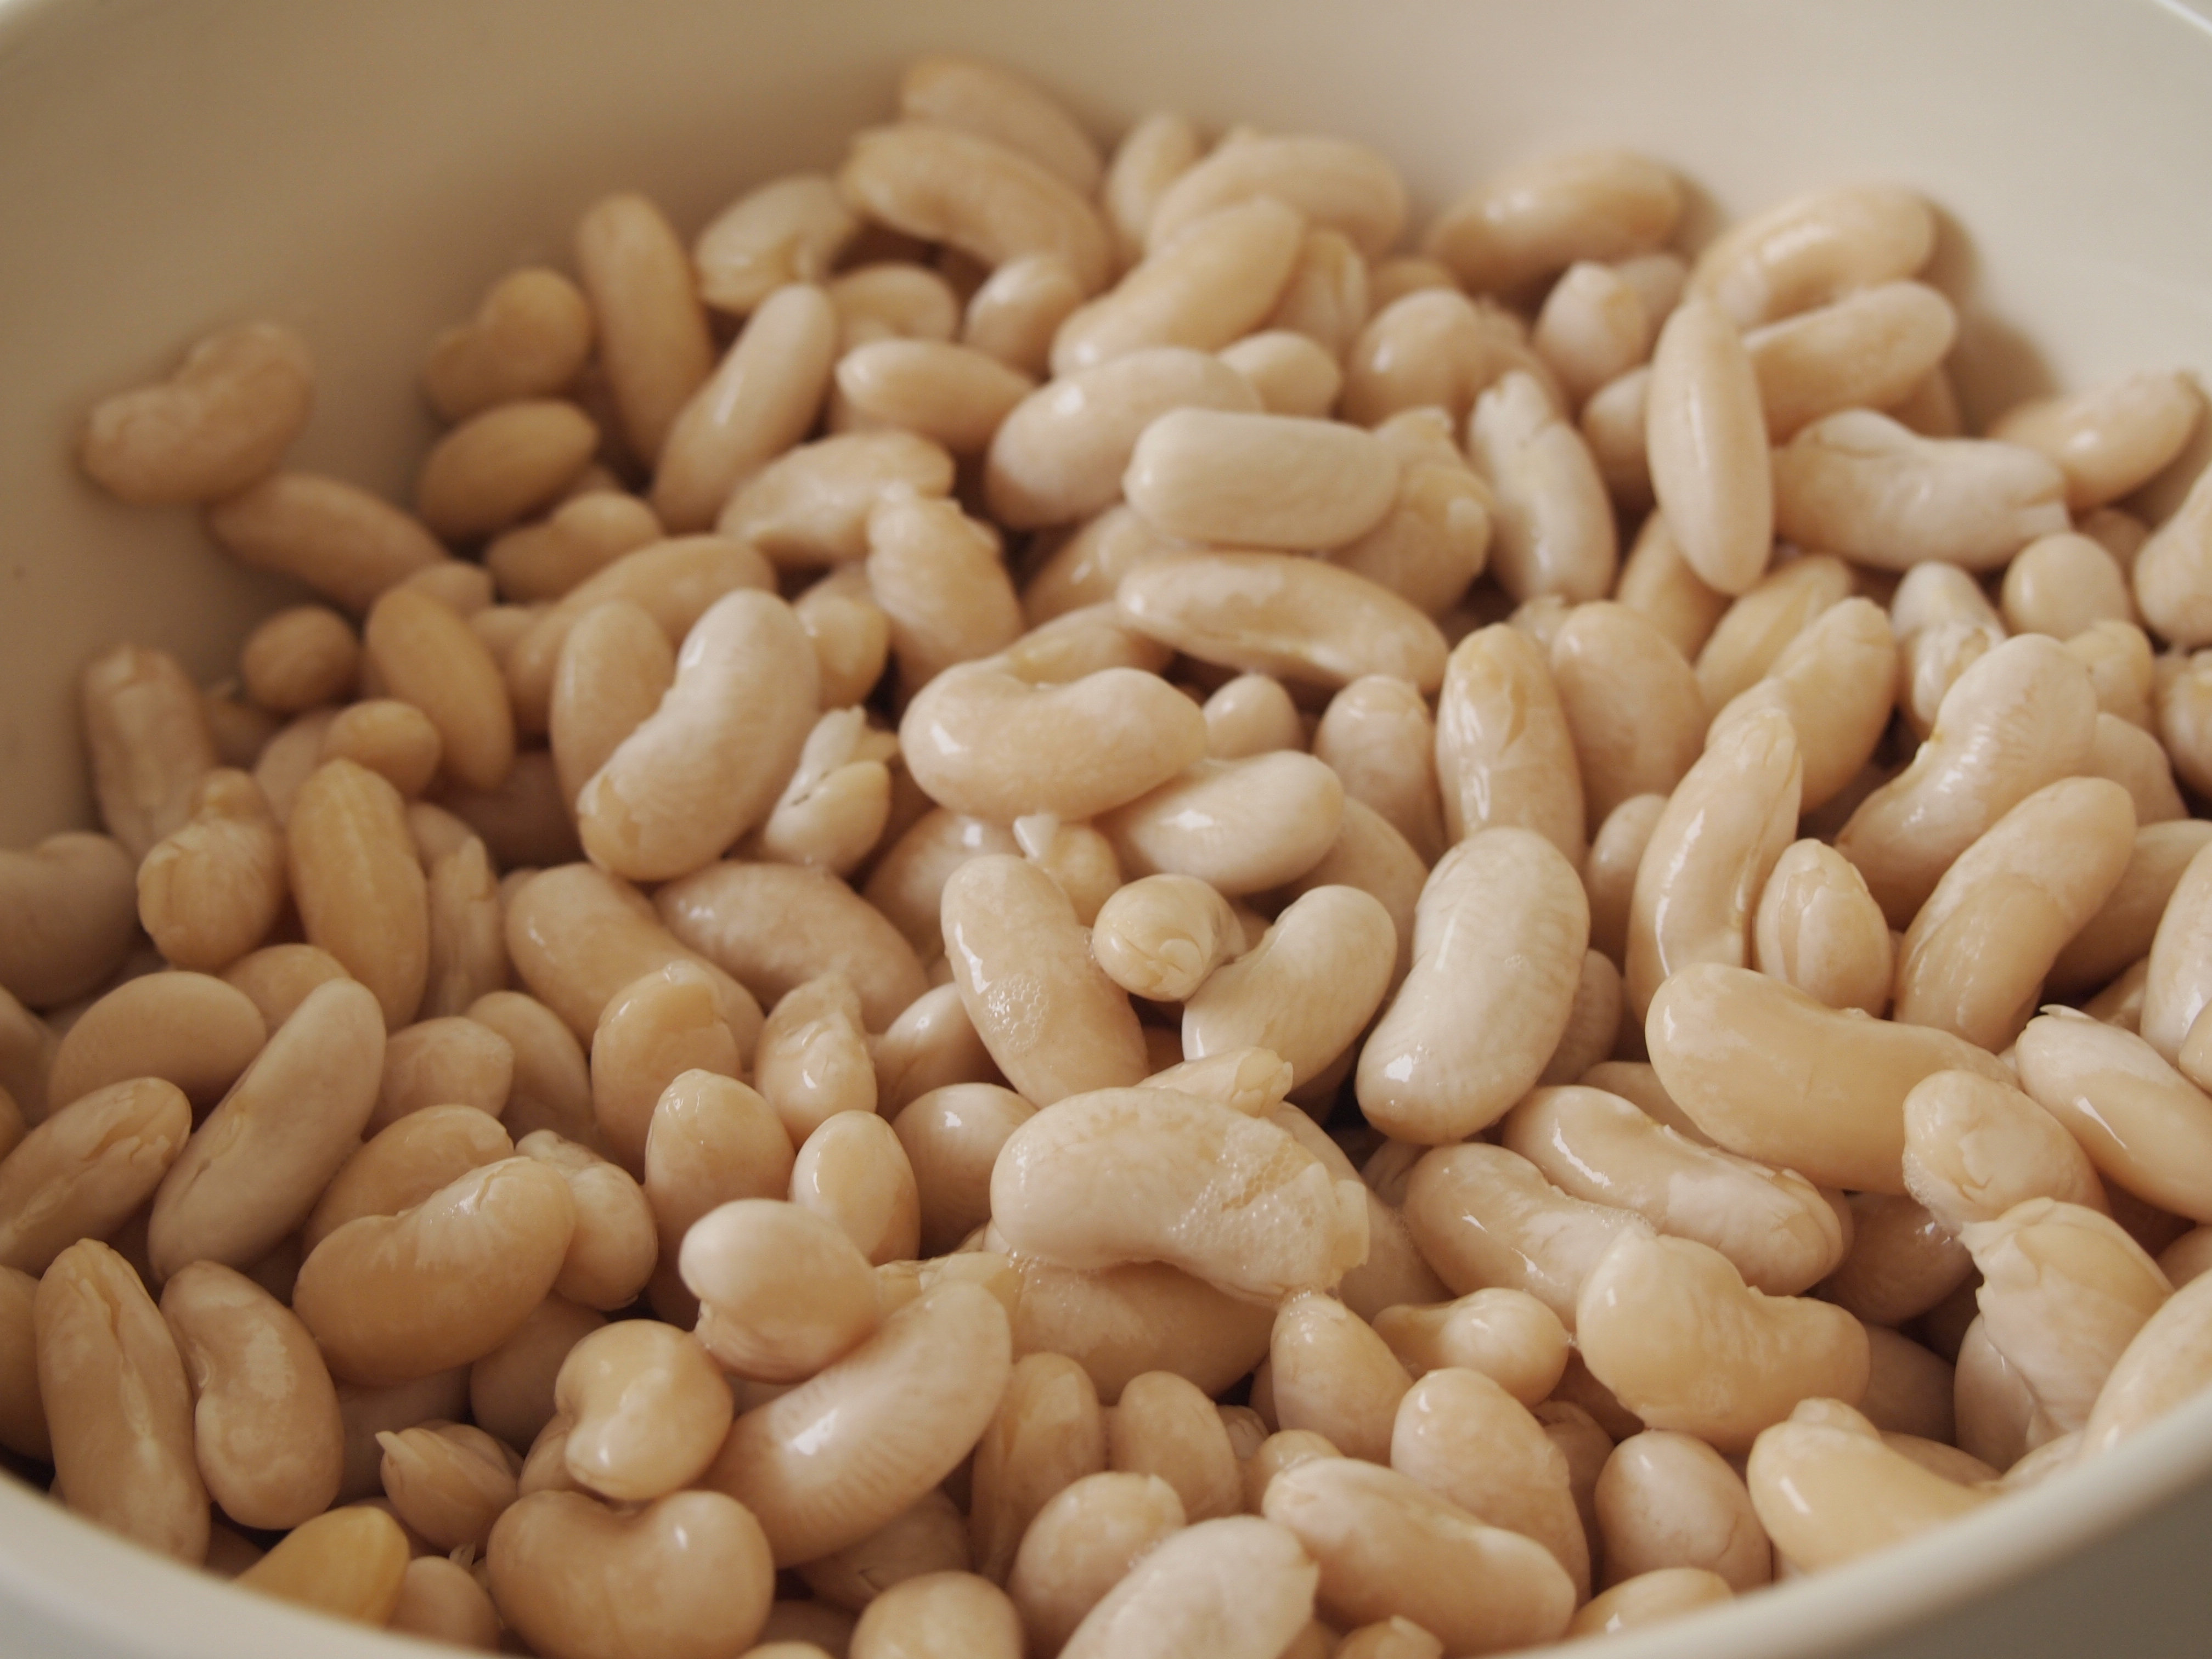
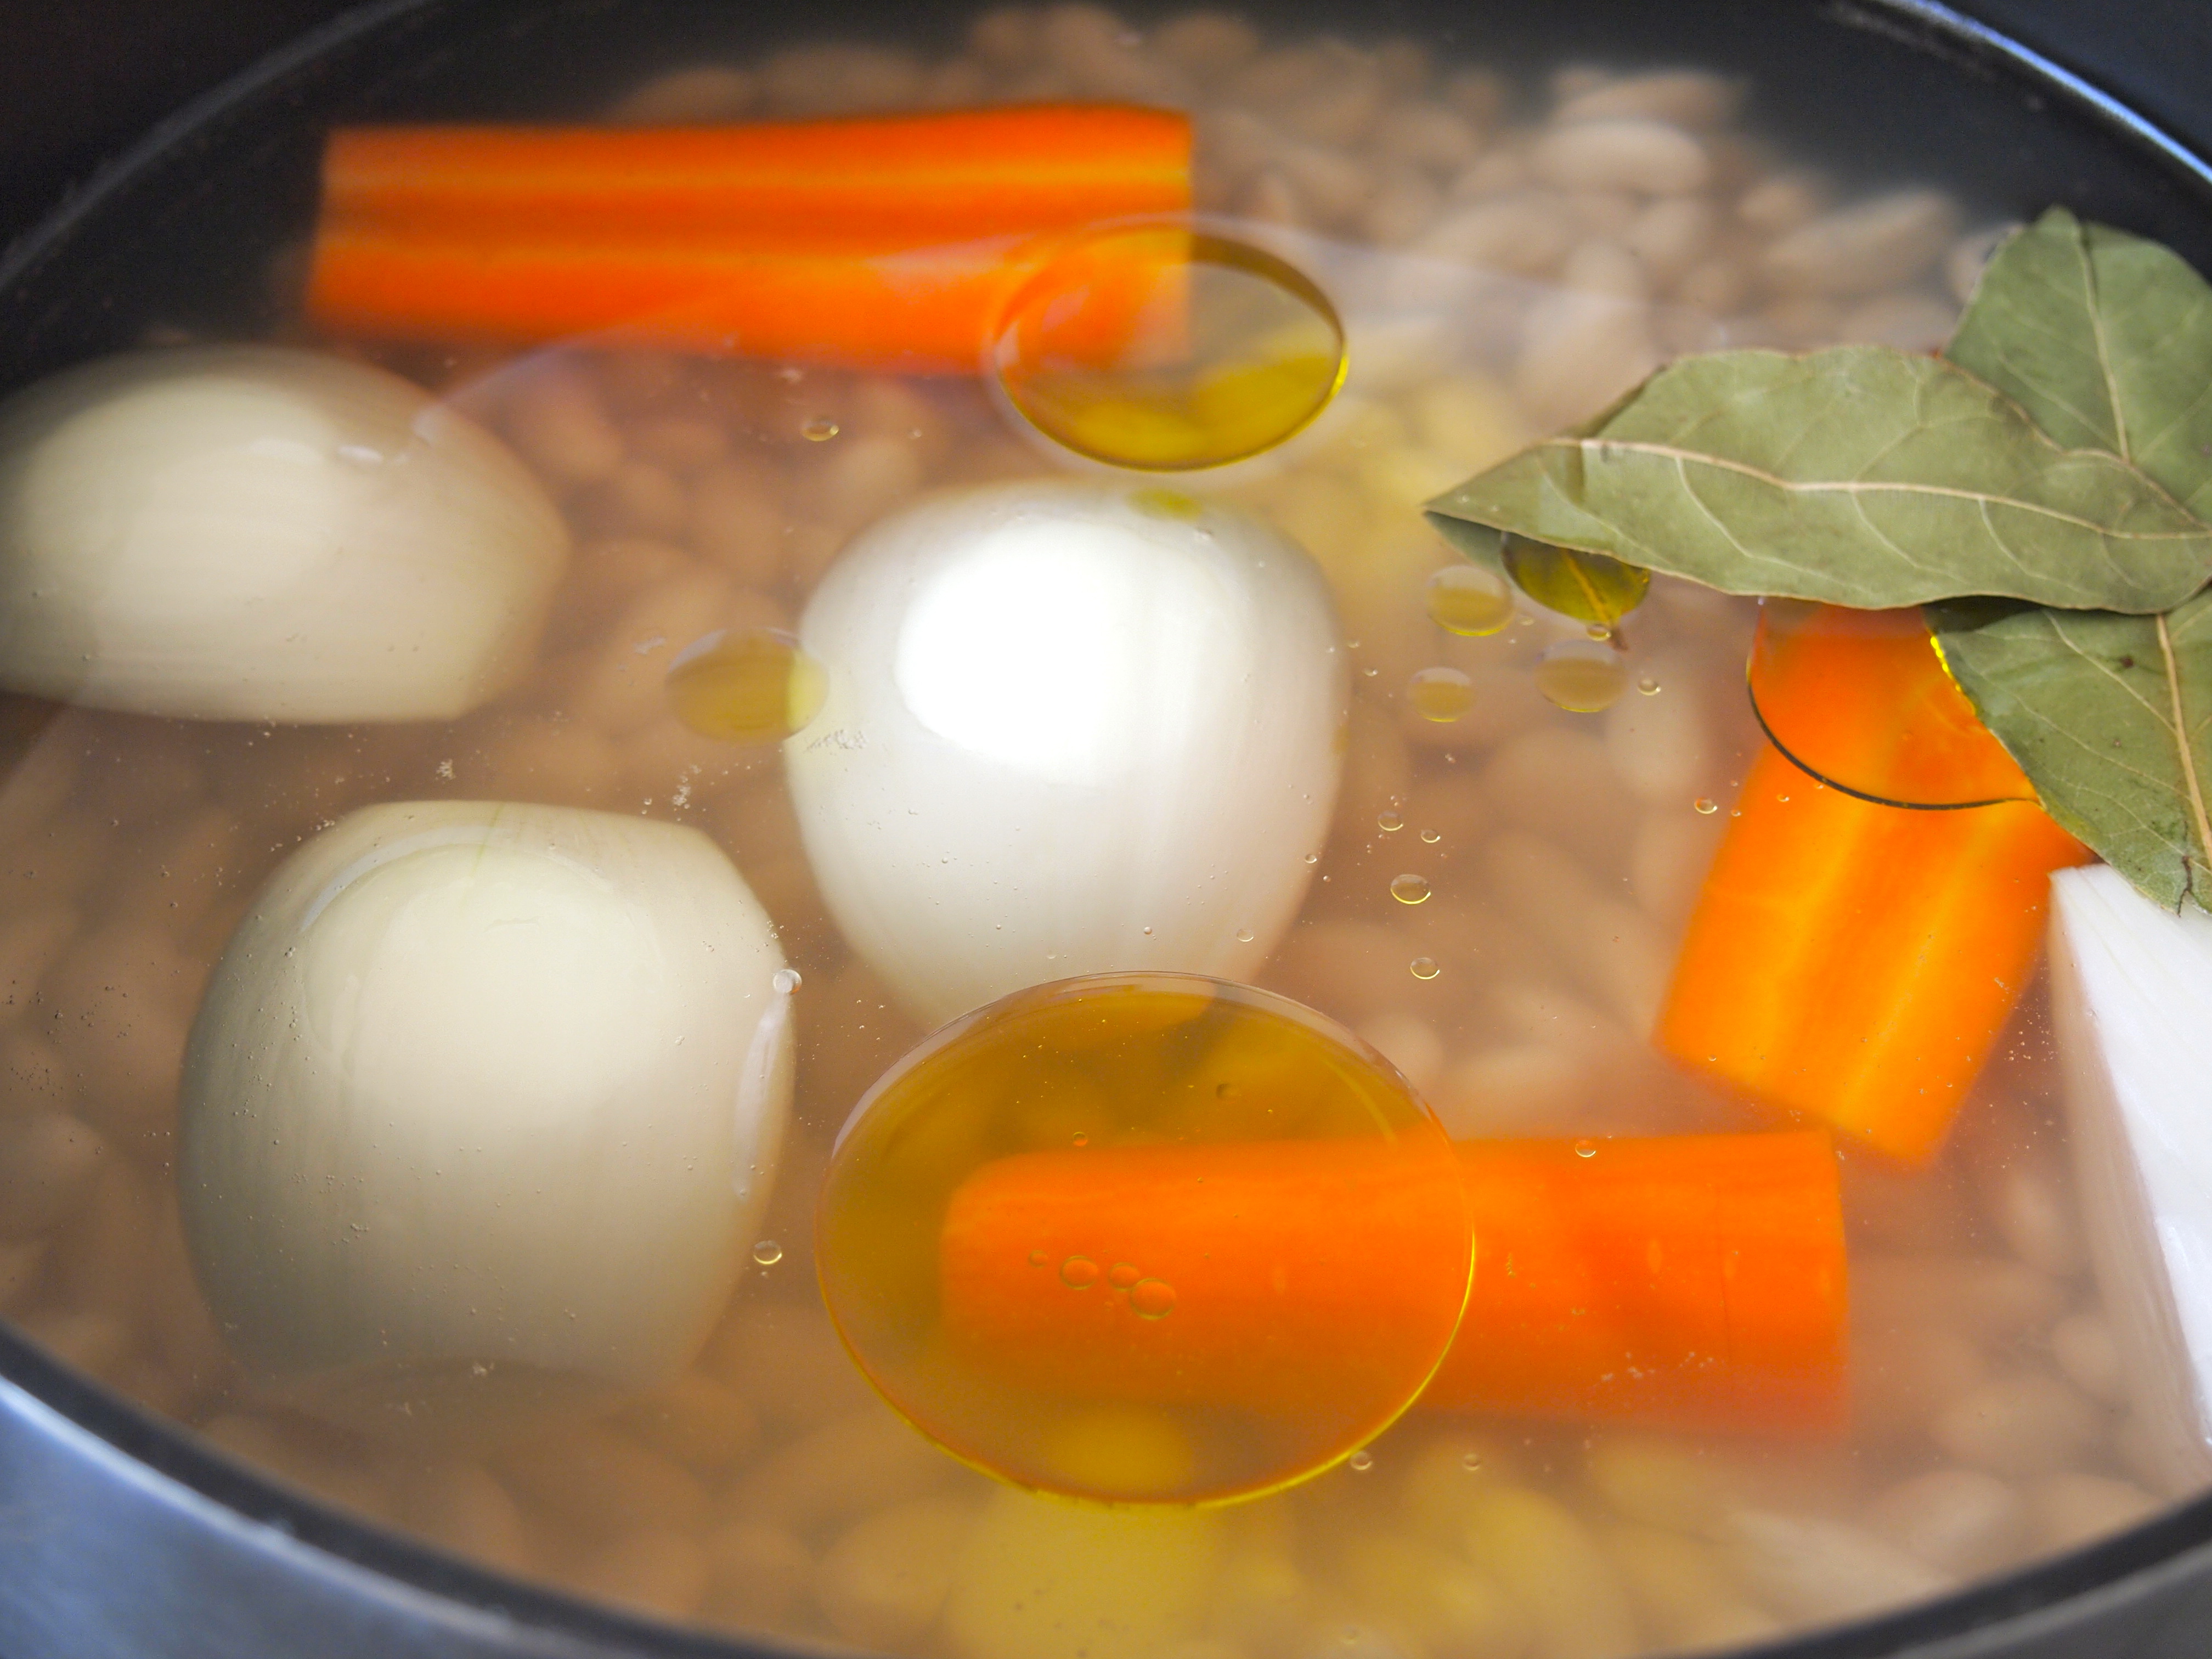
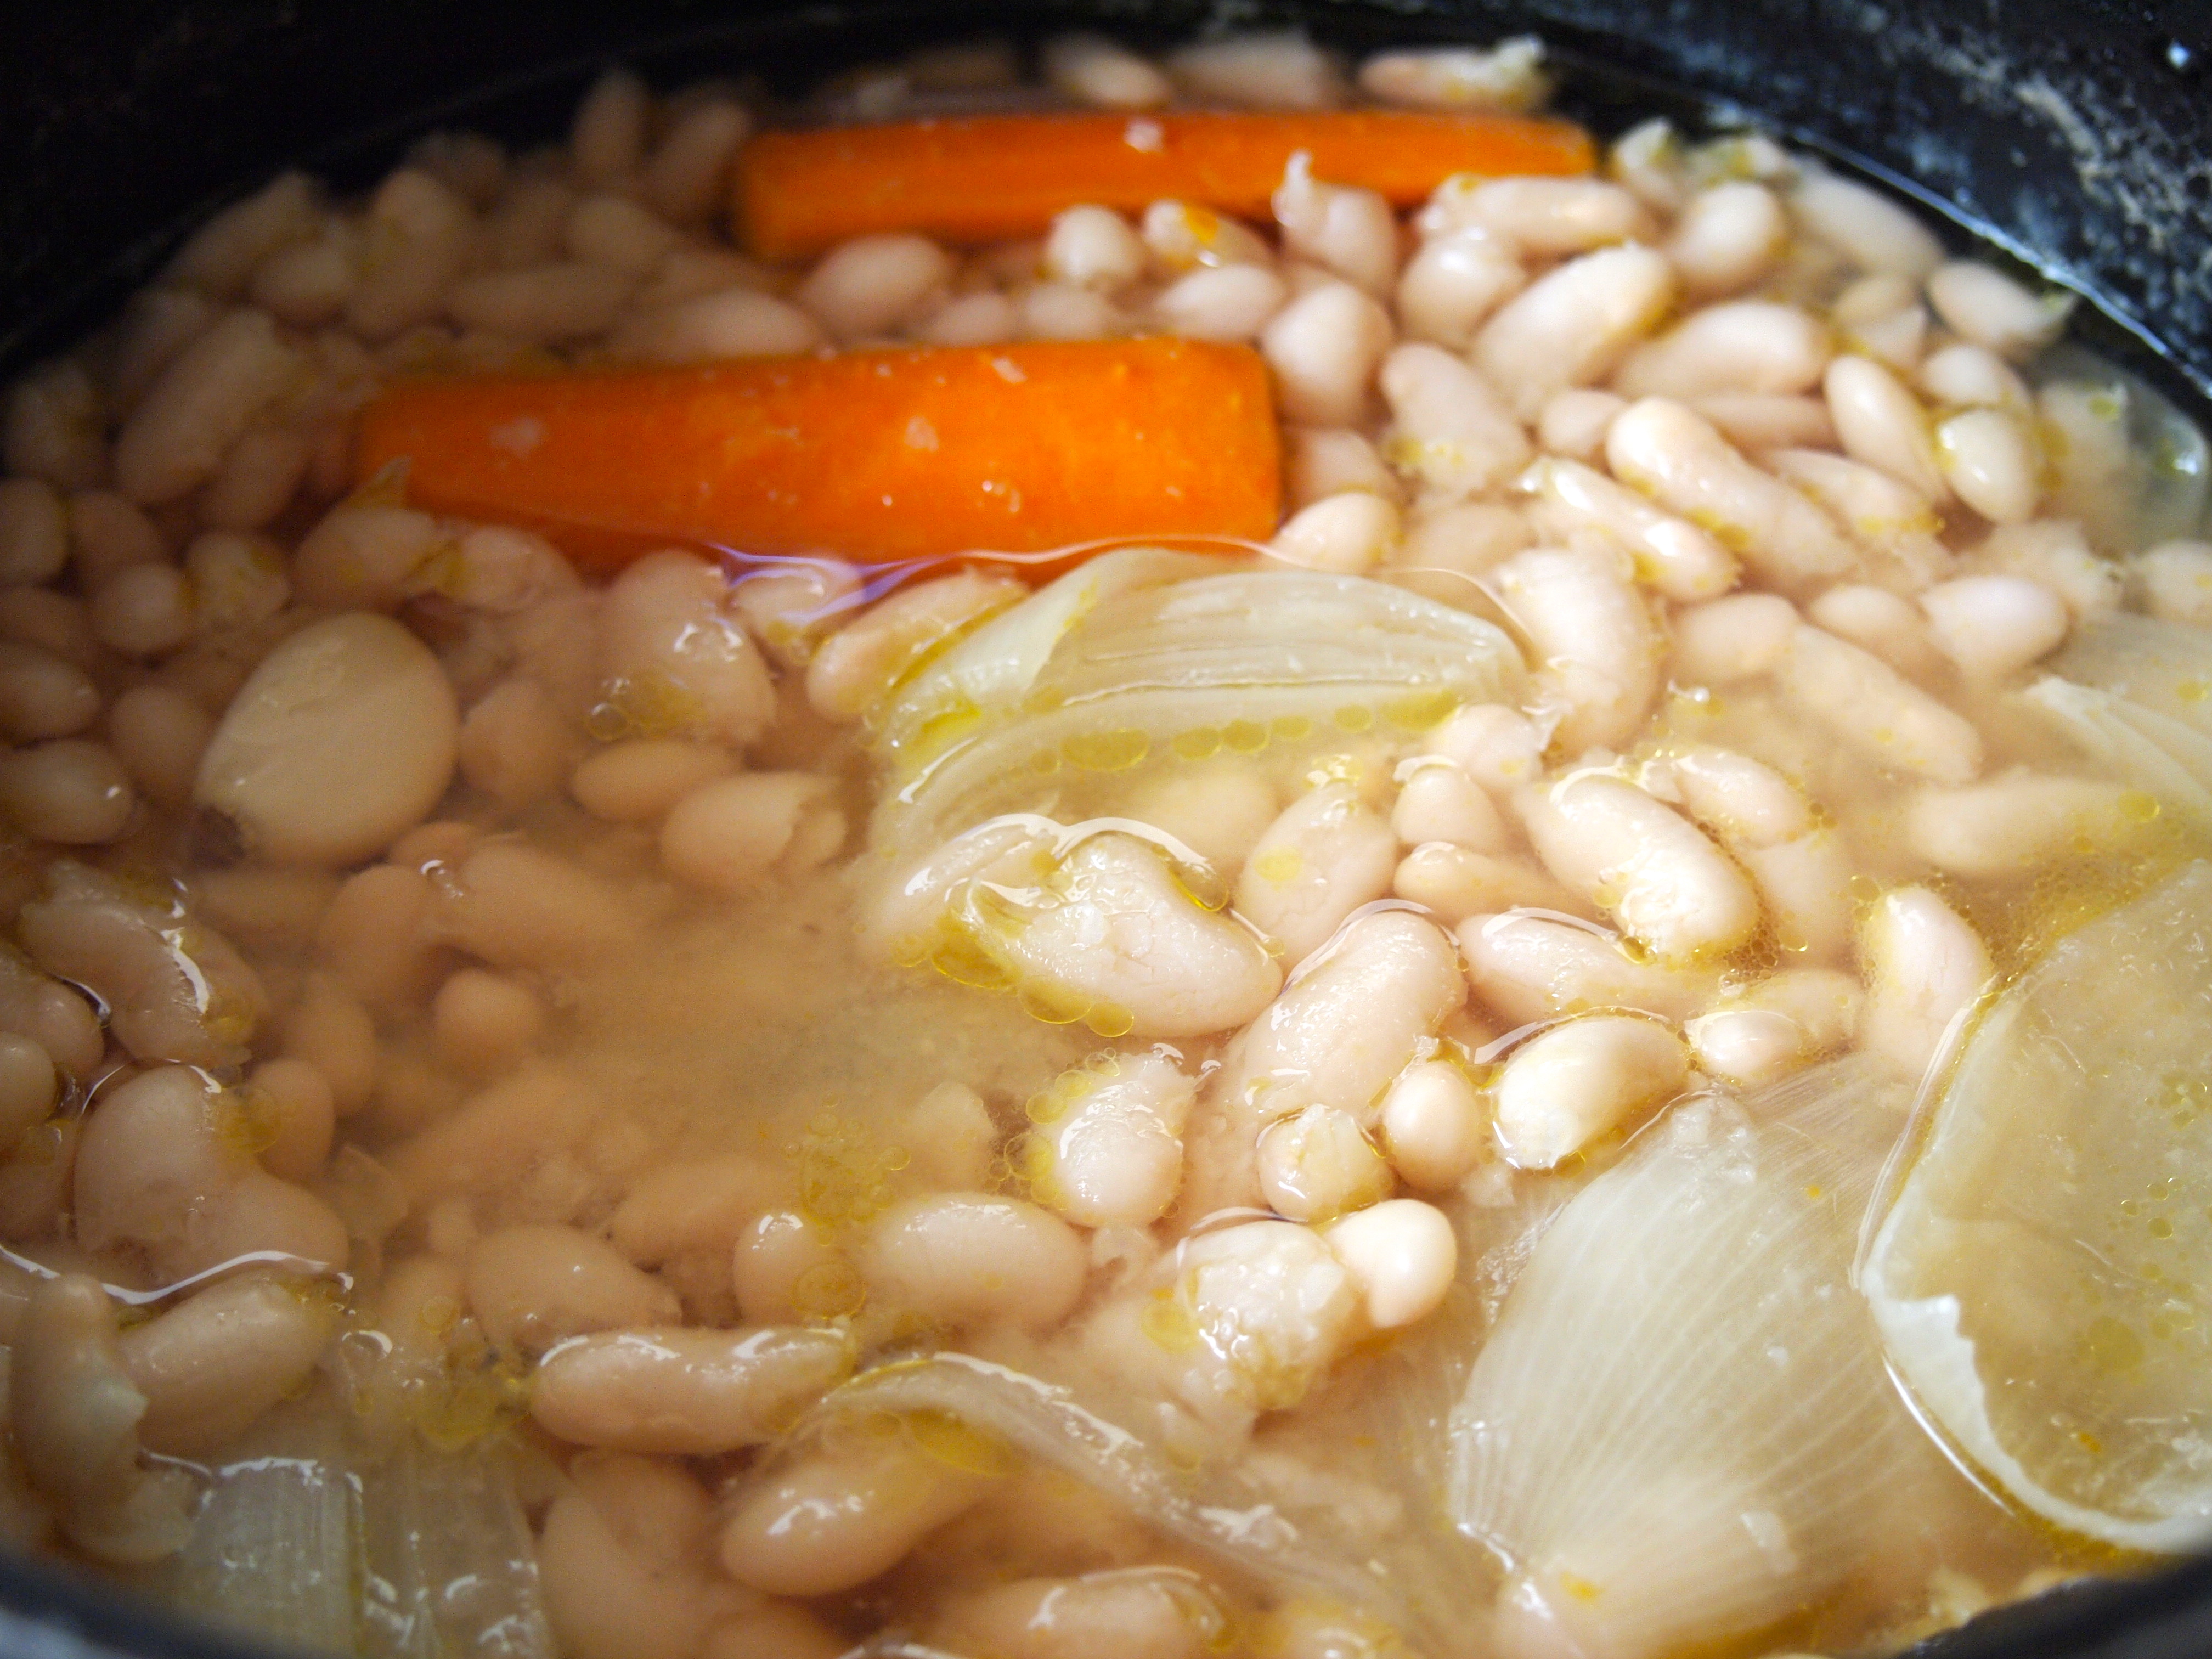
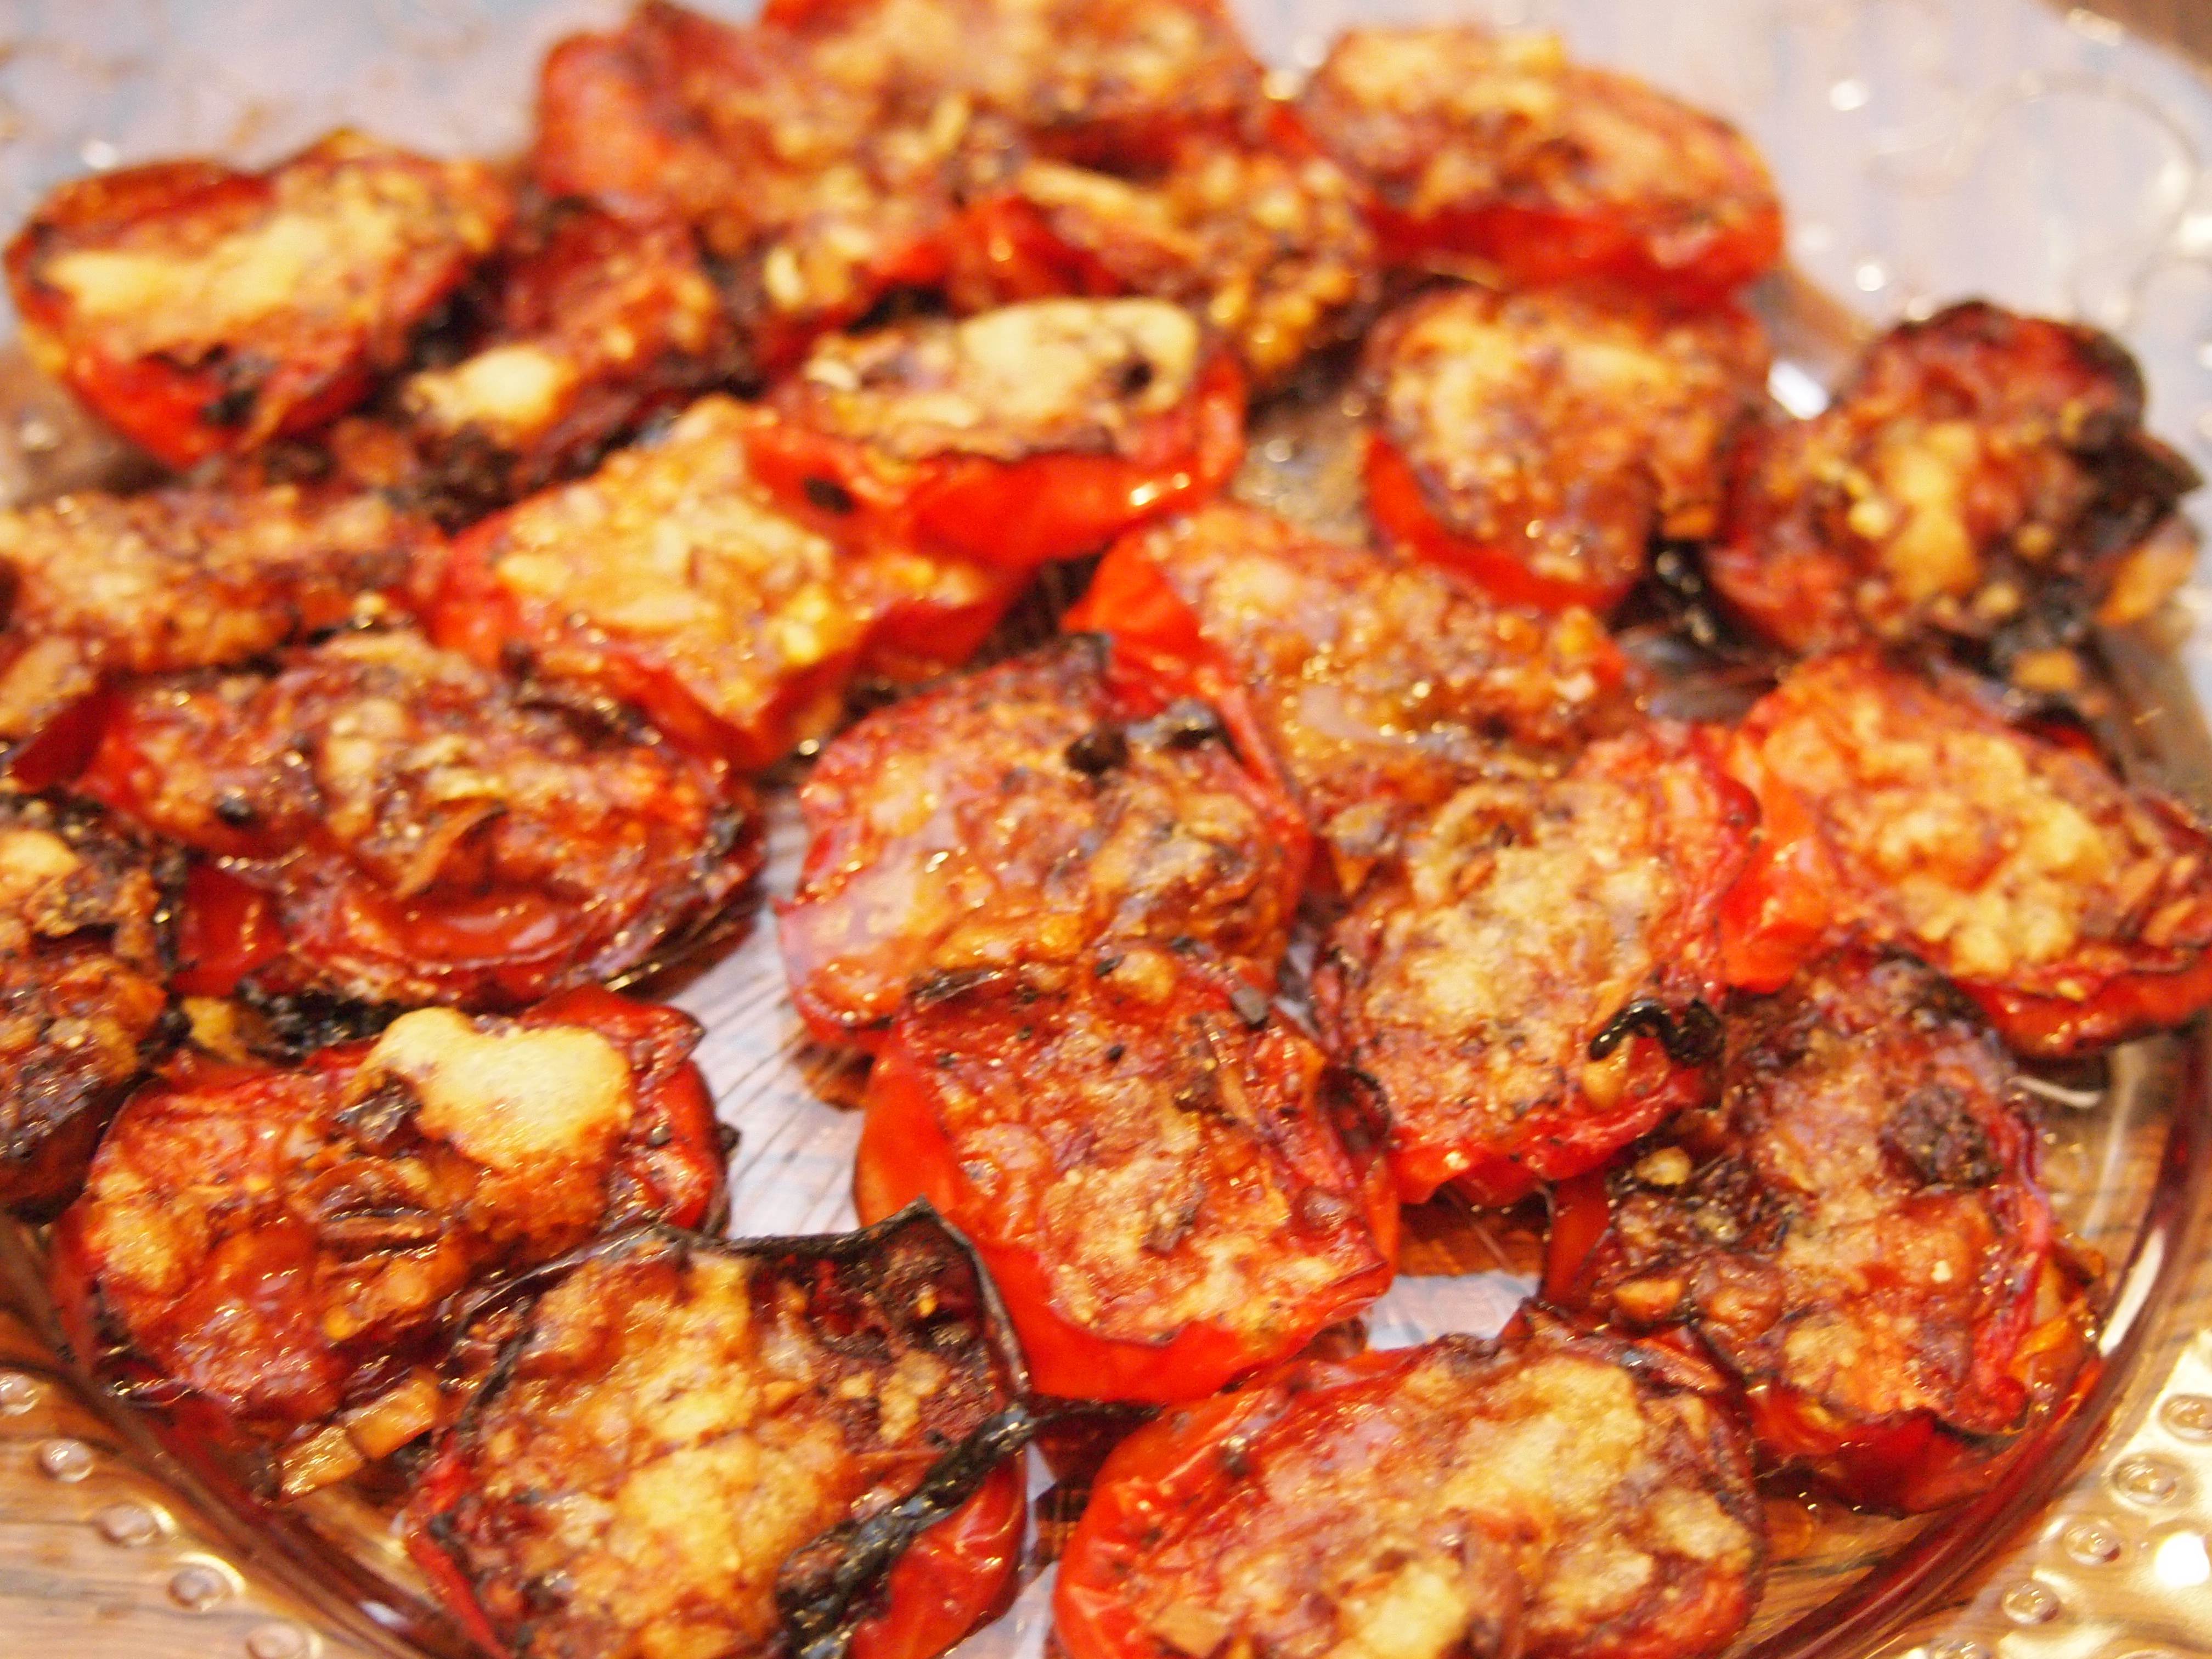
Nov 28, 2012
mustardwithmutton

no comments

Cannellini Beans from Scratch with Creamy Leeks

I love any type of legume but cannellini beans are my favourite.  People seem to shy away from cooking dried beans from scratch, maybe because of the pre soaking they require.  But the difference in taste between home cooked dried beans and the canned version aren’t comparable.  Having said that I always keep a variety of canned beans in the pantry for those times when I need beans in a hurry.  They’re a great time saving ingredient but cooking dried beans is so easy and the results so delicious that it’s a shame not to try and cook them every now and then.  I often soak and cook more than I need and keep them in the fridge covered with their cooking water and they last for a good 4-5 days. They’re so versatile too – put them into salads, puree them to make a mash or a dip, or add them to other vegetables to make a delicious side dish as I’ve done here. I used leeks and slowly softened them in butter with garlic and then added the cooked cannellini beans with a little of their cooking liquid and cream.  This was a lovely mild and creamy side dish for some pan fried John Dory fillets but it would go just as well with some roast chicken or other seafood like grilled prawns.

Ingredients – Serves 4 (or 2 with leftover beans)

2 cups dried cannellini beans
1 carrot, peeled and quartered
1 onion, peeled and quartered
3 cloves of garlic, peeled but left whole
2 bay leaves
2 tablespoons olive oil
2 tablespoons butter
2 leeks, trimmed washed and sliced
2 cloves of garlic extra, chopped
Salt & freshly ground black pepper
½ cup cooking liquid from the beans
¼ cup cream

Method

Place the beans in a large bowl and cover with plenty of cold water.  Cover and leave to soak over night.  The next day drain the beans and place them into a large saucepan with the onion, carrot, garlic, bay leaves and olive oil.  Cover with enough cold water to come 1 inch above the beans.  Bring to the boil then lower the heat, cover the pan and leave to simmer for 1 hour. Test the beans at this point, they should be soft but still retaining their shape.  If they are not soft continue cooking, checking every 10 minutes until they are done.  How long they take to cook depends on the freshness of the dried beans.  Mine were done in an hour.  Turn off the heat and add 1 heaped teaspoon of salt, give the beans a gentle stir and replace the lid and let them sit for about 15 minutes.  Drain the beans, reserving the cooking liquid and discard the onions, carrots and bay leaves – the garlic may have disintegrated into the beans, which is fine.


Heat the butter in a large frying pan over medium heat and add the sliced leeks and a pinch of salt. Cook stirring for a few minutes to coat them in the butter. Lower the heat and cover the pan and let them cook for about 10 minutes. Remove the lid and add the garlic and cook for a further few minutes.  The leeks should be completely wilted and soft.  Add the cannellini beans (add the amount you like, there maybe some leftover which you can put back into the cooking liquid and keep refrigerated to use later), ½ cup of the cooking liquid and cook until the liquid has incorporated into the beans and leeks, but don’t let it completely dry out.  Season with salt and pepper and add the cream.  Give one final stir and serve.

Nov 26, 2012
mustardwithmutton

no comments

Japanese Katsu Curry

 The Japanese have a fondness for curry which I find quite bizarre not only because it’s not indigenous to their cuisine but it seems so at odds with the very clean and precise flavours that Japanese food is known for. We’re not just talking any curry either but the real old fashioned tasting curry.  The kind made in the seventies using powder from a bright yellow tin, garish in colour and slightly sweet. But you know what? It actually tastes great. Things get stranger when you find out that the curry is made using a curry paste that looks like a bar of chocolate and which the Japanese refer to as “curry roux”. You could make the curry roux yourself but it’s a bit like puff pastry, the store bought version is so good there’s no point going through the effort to make it yourself, and I suspect making the curry roux from scratch would be an effort. So I did what any good Japanese housewife would do and purchased a block of S&B brand Golden Curry roux from the Asian aisle at the supermarket. It comes in mild, medium and hot. I used the medium but it’s by no means as spicy as “medium” heat in terms of Indian or Thai food. The Katsu part of the curry refers to the crumbed meat that accompanies the sauce. Now this meat can be either chicken or pork but it shouldn’t be thin like a schnitzel. I used pork, a cut they referred to as sirloin steaks and they were a good thickness, at least 1cm, if not more. I think the main reason why this curry works and has become so addictive and popular in both Japan and overseas is, in part, due to the breaded and fried meat it’s served with. Crispy meat accompanied by a ladle full of  old fashioned but cosily familiar curry sauce is a great combination.

Ingredients – Serves 4

4 pork steaks, not too thin
2 tablespoons plain flour
1 egg and 2 tablespoons milk, lightly beaten
Panko breadcrumbs, enough for crumbing the steaks
Vegetable oil for shallow frying pork
2 tablespoons vegetable oil, extra
1 large onion, thinly sliced
300g button mushrooms, quartered
1 cooking apple, peeled and grated
1 large carrot, peeled and cut into 1/2 cm dice
1 block S&B brand curry sauce
600ml vegetable stock
Salt & freshly ground black pepper

Method

Preheat oven to 150C. Season the pork steals with salt and pepper. Dust lightly with flour, then dip in beaten egg and coat with breadcrumbs, patting them on well.  Next make the curry sauce. Heat oil in a frying pan and fry the onions until soft. Add the mushrooms and carrot and fry until mushrooms are soft. Add the apple  and fry for about 5 minutes over a moderately low heat. Pour in the stock and bring to the boil. Add the curry block, breaking it up ito small chunks and stir until melted and distributed in the sauce. Add salt and pepper to taste.


Cover and leave to simmer gently, stirring occasionally. Heat some oil in another frying pan to lightly coat the bottom. When the oil is hot add the  pork steaks and cook for a few minutes on each side until golden brown. Transfer to a sheet pan and place in the oven for about 8 minutes to ensure the steaks are cooked through.  To serve, cut the steaks into finger width strips and place one on each plate. Add a generous serve of the curry sauce to partially cover the meat and serve straight away with some steamed rice.

Nov 23, 2012
mustardwithmutton

no comments

Just in Time Pumpkin Pie

Phew, made this pie in the nick of time for Thanksgiving.  My tardiness wasn’t due to the fact that I was disorganised, in fact my pie crust was made and ready to go and the filling ingredients were sitting on the counter but then the door bell rang and I remembered I’d booked to have my oven cleaned that afternoon. I didn’t realise that you can’t actually use your oven after it’s been cleaned for at least a few hours and by that time it was going to be way too late to get started.  So I had to wait a day which bought me to Thursday, which is why this post is only getting written a day after Thanksgiving!  So it might be too late to make this pie for your Thanksgiving lunch or dinner but truly, it’s so good that you could make this for dessert anytime!  This is the first time that I’ve made a pumpkin pie using condensed milk. I’ve tried evaporated milk and sugar, which is the norm, and also making my own custard with milk and eggs and both produced great results but this was by far the best and I don’t think I’ll veer away from this super easy recipe going forward. Hope your Thanksgiving was wonderful and if you missed out on a  slice of pie, then make this soon, it’s never too late for pumpkin pie!

Ingredients – Makes 1 x 10 inch pie

For the crust   (The qualities below make one crust but I doubled the quantities to make two pie crusts and froze one)
85g very cold unsalted butter, cut into dice
1½ cups all-purpose flour
¼ teaspoon salt
1 tablespoon sugar
35g  very cold vegetable shortening
¼ cup ice cold water

For the Filling
1 x 420g can pumpkin puree, such as Libby’s – not pumpkin pie filling
1 large egg
3 egg yolks
1 x 400g can sweetened condensed milk
¼ teaspoon freshly, and very finely ground nutmeg
1 teaspoon ground cinnamon
¼ teaspoon ground ginger
¼ teaspoon fine salt

Method
To make the crust place the flour, sugar and salt into a food processor and pulse to combine.  Add the butter and shortening and pulse until the mixture resembles very course bread crumbs, you still want to see some butter solids. With the motor running add the ice cold water until the mixture just starts to form a ball in the machine.  Remove the dough and form it into a disk and refrigerate for 30 minutes.  After the resting time place the dough on a floured surface and roll it out to be about 1 inch larger than your pie dish. Keep moving the dough and flouring the board to ensure it doesn’t stick. Carefully place the dough into the pie dish and roll the overhang around the edge of the pan to create a rim and then crimp.  Place the pie crust into the fridge until ready to bake.


Preheat oven to 210C. To make the filling put the pumpkin puree into a large bowl.  Add the egg and egg yolks and whisk to combine.  Add the condensed milk and whisk to combine again.  Add the spices and give it a final whisk to make sure everything is well distributed.


Pour the filling into the pie crust and tap it on the counter a couple of times to get rid of any air bubbles. Place the pice in the preheated oven and bake at 210C for 15 minutes.  Then lower the heat to 180C and bake for a further 30-35 minutes or until the pie just has a slight wobble in the centre, it will continue to cook and set as it cools.  Bring the pie to room temperature before chilling or attempting to slice.  Serve with a dollop of whipped cream with a little extra grated nutmeg on top.

Nov 21, 2012
mustardwithmutton

no comments

Chili Braised Brisket

For some reason we always seem to crave Tex-Mex food on a Friday night. There’s something so festive about this style of food which makes it a great celebratory introduction to the weekend.  I’ve never cooked a whole brisket before, mainly because it’s not a cut that’s commonly seen in butchers here.  It’s never on display, well not at the butchers near me, but it is a cut they’ll prepare for you if you pre-order it.  The other option is to purchase it from the Kosher meat section of the supermarket where it’s in plentiful supply but at a rather hefty cost, and that’s not what brisket is all about. My butcher prepared a nice large brisket for me that weighed about 1.5kg. It was quite thin on both ends which scared me a little as I was sure it would become tough but I needn’t of feared.  It was pull apart tender and the chipotle spiked chill sauce which coated it made it even better.  I pulled the brisket apart and smothered it in the sauce and then used it as a filling for white corn tortillas with all the usual fixings of avocado, tomato salsa, sour cream and cheese. This makes a lot of brisket but it freezes well and tastes even better the second time round.

Ingredients – Serves 4-6

1 whole brisket weighing about 1.5kg – my piece was very long so I cut it into 2 to make it easier to handle
4 tablespoons olive oil
2 onions sliced
6 cloves of garlic, chopped
1 teaspoon garlic powder
1 teaspoon onion powder
2 teaspoons cumin
1 teaspoon smoked paprika
1 teaspoon oregano
½ teaspoon Mexican chilli powder
1 tablespoon chipotle in adobo
¼ cup cider vinegar
3 tablespoons brown sugar
1 can diced tomatoes
2 cups beef stock
Salt & freshly ground black pepper

Method

Preheat oven to 160C.  Season the brisket generously on both sides with salt and pepper. Heat a large lidded oven proof pan over medium-high heat, add 2 tablespoons of the oil and when hot add the brisket and sear for a few minutes on each side until lightly brown.  Remove and set aside.  Lower the heat to medium and add the remaining oil to the pan and fry the onion and garlic for about 5 minutes or until soft and starting to colour. Add the garlic powder, onion powder, cumin, paprika, oregano, chilli powder and chipotle peppers. Stir well and cook for a couple of minutes until fragrant. Add the vinegar, brown sugar, tomatoes and beef stock and stir to combine with the onions and spices.


Return the brisket to the pan and nestle it in the sauce.  There should be enough liquid to just cover the meat.  Bring to the boil, put on the lid and transfer to the oven for 3-4 hours or until the meat is fork tender.  Check the meat and sauce every now and then to make sure that the liquid isn’t reducing too much.  When the brisket is cooked remove the meat from the sauce and slice or shred it on a board and return it to the pan to smother it in the sauce until ready to serve.

Nov 19, 2012
mustardwithmutton

2 comments

Sausage & Saffron Risotto

For a recent family get together I wanted to make a risotto, mainly because I love how easy risottos are to make.  Sure there’s a little bit of prep involved and then some stirring time just before dinner but compared to a lot of meals, I find risottos quite stress free. I decided on a sausage and saffron risotto and it was very good.  The saffron is infused in red wine which not only gives the risotto a wonderful aroma but a rich colour as well.  I prepare the risotto in advance to the point where the rice and the first ladle of stock have been added.  I then turn off the heat, put a lid on the pan and resume the cooking process about 20 minutes before we’re due to eat.  This means less time at the stove when guests arrive and my risottos have never suffered for it. We prefer our risottos a little less al dente so I find the cooking time takes closer to 30 minutes than the 20 minutes most recipes stipulate but I do insist that the end product has enough liquid creaminess to be able to move on the plate and not sit in a solid lump.  This delicious risotto got a thumbs up from the family and it’s one that’ll be going in the make again recipe file.

Ingredients – Serves 6

600g best quality sausages – I used organic beef as we had some pork averse diners but I think a good Italian sausage would be best
¾ cup red wine
½ teaspoon saffron threads
1 large white onion, chopped as finely as possible
3 tablespoons olive oil
1 tablespoon butter
500g risotto rice – I used Carnaroli
5 cups best quality beef stock
Salt and freshly ground black pepper
1 cup frozen peas, defrosted
30g butter, extra
½ cup freshly grated parmesan cheese, plus extra for serving

Method

Place the red wine into a small saucepan and bring to the boil. Turn off the heat and add the saffron, put the lid on the saucepan and let the wine and saffron infuse. Remove the sausages from their casing a crumble into evenly sized 2cm chunks.  Place the stock into a pan and bring to a simmer. Heat 2 tablespoons of the oil in a large saucepan over medium heat and add the sausages.  Cook, stirring often until the sausages have browned and are slightly golden.  Remove with a slotted spoon and set aside.  To the same pan add the other tablespoon of oil and the butter.  When the butter melts add the onion and a large pinch of salt and cook until translucent and tender.  Increase the heat slightly and add the red wine and saffron mixture. Bring to the boil, scraping any residue from the bottom of the pan and let it bubble away until reduced by half.  Add the rice and cook, stirring until all the grains are well coated and the wine has almost evaporated.  Add the simmering stock a ladleful at a time, stirring constantly and waiting for the stock to evaporate before adding the next ladle.  You want the heat to be at a nice even simmer, not boiling too vigorously but not too low either.


During this process season the rice in the pan with a pinch or two of salt.  I find that if the risotto is only seasoned at the end the dish just tastes salty rather than having flavour.  How much salt you add will depend on the stock you’re using, be mindful also that you’ll be adding parmesan.  Test the rice at the point where it looks like you only have a couple of ladles of stock left.  The rice should be almost ready and one final addition of stock should bring your rice to the perfect level.  At this stage add the sausages to the rice and finish incorporating the stock. When all the stock has been used add the extra butter and parmesan and very vigorously stir it into the rice, this process is called mantecato and it’s what really helps achieve the very creamy consistency of risotto dishes.  Add the peas and give it one more stir. Remove from the heat and place a lid on the pan and let the risotto rest for a few minutes.  Serve and eat immediately with some extra grated parmesan.

Nov 16, 2012
mustardwithmutton

2 comments

Barbecued Butterflied Leg of Lamb with Middle Eastern Flavours

A butterflied leg of lamb is a great cut for the barbecue.  A large leg will feed 6-8 people, with side dishes, and a smaller one will easily do 4 people.  The nice thing about grilling a butterflied leg is that due to it’s being uneven in size and width you get a range of meat cooked to various levels of doneness.  The thinner ends will appeal to people who like their lamb well done and the other sections will range from light pink to medium rare – there’s something to please everyone.  I have the butcher butterfly the leg for me then trim it at home of any excess fat, but don’t take too much off as you don’t want the meat to dry out while it’s cooking.  I also skewer the lamb together with some thin metal skewers to make it easier to turn and handle on the grill.  A marinade of lemon juice, rosemary, garlic, Moroccan spices and a little melted clarified butter makes the lamb incredibly tender and full of flavour.  To enhance the Middle Eastern flavours in the lamb I like to rest it on a bed of hummus, as the lamb rests the juices meld with the hummus to create a wonderful sauce.  I served this with a quinoa tabbouleh and some pita bread to sandwich the sliced lamb in.

Ingredients  – Serves 4

1 leg of lamb – about 1.5kg, butterflied and trimmed of excess fat
Juice of 2 lemons
6  cloves of garlic, chopped
3 large stalks of rosemary, leaves removed and roughly chopped
2 tablespoons honey
1 tablespoon Ras el Hanout (a Moroccan spice blend available from Good Delicatessens, if you can’t find it you can substitute with any Moroccan spice blend)
¼ cup of melted clarified butter or ghee
Salt and freshly ground black pepper
2 store bought tubs of hummus

Method

Lay the butterflied lamb on a large baking sheet and sprinkle very generously with salt and pepper on both sides.  Put the lemon juice, garlic, rosemary, honey, spices and melted butter into a small bowl and mix well.  Pour the mixture over the lamb and massage it into the lamb, making sure the marinade reaches all parts of the lamb on both sides.  Cover the lamb with cling film and refrigerate for as long as you can, overnight would be ideal but even a couple of hours is fine.  Light up your barbecue and bring the lamb to room temperature.

Set your barbecue to a medium heat and when hot place the lamb fat side down first and let it sear for a few minutes then turn it over.  It should take about 18 minutes in total to cook and you want to keep flipping and turning it every 4 minutes or so.  While the lamb is cooking pour the hummus onto a large plater and spread it around.  When the lamb is done, sit it on top of the hummus and cover with foil and let it rest for 10 minutes.  Remove the foil and cut the lamb into thick slices and serve with the lamb juice soaked hummus, warm pita bread and tabbouleh.

Nov 14, 2012
mustardwithmutton

no comments

Steakhouse Sides – Creamed Spinach & Roast Parmesan Tomatoes

You may have noticed from the posts here that we’re partial to our steaks.  We normally barbecue a steak at least once a week and the only problem that poses is what to serve with it.  It’s hard trying to come up with different side dishes, especially if you take potatoes out of the equation which is what we’ve been trying to do.  Here are a couple of side dishes that always please – creamed spinach and roast tomatoes.  Creamed spinach is a steakhouse favourite and I cook it in a couple of different ways.  When I’m short of time I just cook the spinach with some garlic, drain it of excess water , add a little nutmeg and cream and blend it with a stick blender.  It’s delicious but not the traditional way of making creamed spinach. The recipe below is the more classic method and it’s very good.  The other side dish that goes great with grilled meats is roast tomatoes.  Steakhouses normally serve some sort of tomato side dish, usually a tomato salad with a steak sauce dressing but I find roasting the tomatoes with a little balsamic and garlic and then finishing off with a little parmesan gives then incredible flavour, even if your tomatoes weren’t that great to start off with.  So next time you’re in a quandary as to what to serve with your steaks go the steakhouse route – they’re classics for a reason!

Ingredients – Serves 4

Creamed Spinach
2 large bunches of english spinach, leaves removed from stalks and thoroughly washed and drained
1 tablespoon olive oil
Salt & freshly ground black pepper
1 small white onion, finely diced
2 cloves of garlic, finely minced
30g butter
1 heaped tablespoon flour
1 cup milk
1/4 teaspoon freshly grated nutmeg

Roast Parmesan Tomatoes
12 mini Roma tomatoes, if you can’t find these use a punnet of larger cherry tomatoes or 4 regular plum tomatoes and increase the cooking time
Olive oil
4 cloves of garlic, finely chopped
Balsamic vinegar
Salt & freshly ground black pepper
1 teaspoon sugar
2-3 tablespoons freshly grated parmesan

Method

To make the creamed spinach heat the olive oil in a large skillet or frypan over medium heat.  Add the washed and drained spinach along with a large pinch of salt and cook, stirring frequently until the spinach has completely wilted.  Remove from the pan and put into a colander over a bowl to drain of excess liquid. In the same pan add the butter and when melted add the onion, garlic and another pinch of salt and cook until the onions are very soft, make sure the heat isn’t too high as you don’t want to colour the onions or the garlic. Add the flour and cook for a couple of minutes stirring the flour into the onion and butter mixture.  Using a whisk add the milk and cook whisking until the milk has incorporated into the sauce and has thickened.  Reduce the heat to very low, add the nutmeg and season with salt and pepper.  Add the spinach back to the pan, squeezing it beforehand to make sure there is no excess liquid and stir into the sauce until well combined and the spinach has heated through.


To make the roast parmesan tomatoes preheat oven to 180C.  Wash and halve the tomatoes and place on a shallow baking sheet lined with baking paper.  Sprinkle with salt and pepper and drizzle on a little olive oil followed by  a little balsamic vinegar over each tomato half.  Place some of the garlic on each tomato and sprinkle with the sugar.  Place in the oven for 20 minutes or until the tomatoes have roasted and starting to turn a little brown on the edges.  Remove from the oven and sprinkle with parmesan cheese and roast for a further 10 minutes.


Nov 12, 2012
mustardwithmutton

1 comment

Braised Sticky Pork Ribs with Black Beans & Garlic

There’s no doubt that some of the best tasting rib dishes in the world come from the American South but I think the Chinese run a close second.  They seem to understand pork and relish it for all it’s fatty, juicy goodness and pork belly along with ribs are right up there on their top 20 list of dishes. These ribs are meltingly tender and so tasty. They’re braised slowly for a few hours in a sauce of soy, black beans, garlic, ginger, and some sugar to bring in a sweet note to counteract the savouriness of the black beans and soy.  Once again it’s one of those braises that’s very quick to put together but it needs a while in the oven – for me that qualifies as an easy meal as my involvement is minimal. I made this dish in my Chinese clay pot which I love and which you can buy at Asian supermarkets for about $15.  But you can also braise this in a regular oven proof baking dish which has a lid or a dutch oven. All you need to accompany this is some steamed rice, a few bibs and a big plate for all the sucked clean bones.

Ingredients – Serves 4

1½kg, meaty pork spare ribs  (American style ribs), cut into individual ribs
2 tablespoons vegetable oil
1 long red chilli, seeds removed and chopped
6 spring onions, white and green parts thinly sliced
6 large cloves of garlic, peeled and chopped
1 thumb size piece of ginger, peeled and chopped
4 tablespoons fermented black beans
2 tablespoons dark soy sauce
2 tablespoons light soy sauce
2 tablespoons Chinese rice wine, or dry sherry
¼ cup sugar
¼ cup tomato ketchup
1 cup water
For garnishing
1 long red chilli sliced thinly on the diagonal
2 spring onions cut into thin long strips

Method

Preheat oven to 160C (unless you’re cooking the ribs in a clay pot, in which case you will need to place the pot into a cold oven and then turn the heat on, this prevents the clay pot from cracking). Heat a large non stick fry pan over medium hight heat.  When hot, add the oil and sear the pork ribs in batches until lightly coloured. As the pork ribs are cooked remove them and put them in your braising dish. To the remaining oil in the pan add the red chilli, spring onions, garlic and ginger.  Cook, stirring over medium heat for a few minutes.  Add the black beans, dark soy, light soy, rice wine, sugar, ketchup and water.  Bring to the boil and pour over the pork ribs.


Cover the ribs tightly and place in the oven for 3-4 hours or until the meat is falling off the bone.  Remove the ribs from the oven and place on a deep platter.  Taste the sauce and adjust the seasoning by adding more soy or sugar and if the sauce is too thin reduce it by simmering it uncovered over medium heat.  Pour the sauce over the ribs and top with the garnishes.