Aug 31, 2012
mustardwithmutton

2 comments

Corned Beef with Parsley Mustard Sauce

Corned Beef is often viewed as being an old fashioned retro dish which is a shame as it’s actually a delicious and warming winter meal.  The cuts used for corned beef differ from country to country.  In Australia, silverside is the cut most often found at butchers and in the States it’s brisket.  Both are equally delicious, with the silverside being a little leaner, not necessarily a good thing here as a little bit of marbling helps keep the meat moist. I like to keep to the basic classic method of slow poaching corned beef but I do think that the sharpness of the parsley sauce below is a much nicer and more up to date accompaniment than the traditional white sauce.  Having said that, I served it with a cauliflower gratin which added that creamy element.  The only vegetable I cooked in the broth were carrots but by all means you can add peeled small potatoes as well as turnips if you wish.

Ingredients – Serves 4

1.5 kg Corned beef
3 onions, peeled and halved
6 cloves
2 bay leaves
4 cloves of garlic, peeled
12 black peppercorns
A few sprigs of fresh thyme
1/4 cup brown sugar
1/4 cup cider vinegar
1 bunch baby carrots, peeled and trimmed

Parsley Mustard Sauce   Adapted from Suzanne Goin, Sunday Suppers at Lucques

1/4 cup plus 2 tablespoons finely diced shallots (French eschallots)
1/4 cup red wine vinegar
3/4 cup chopped flat-leaf parsley
1 tablespoon whole grain mustard
1/3 cup extra-virgin olive oil
Juice of half a 1/2 lemon
Salt and freshly ground black pepper

Method
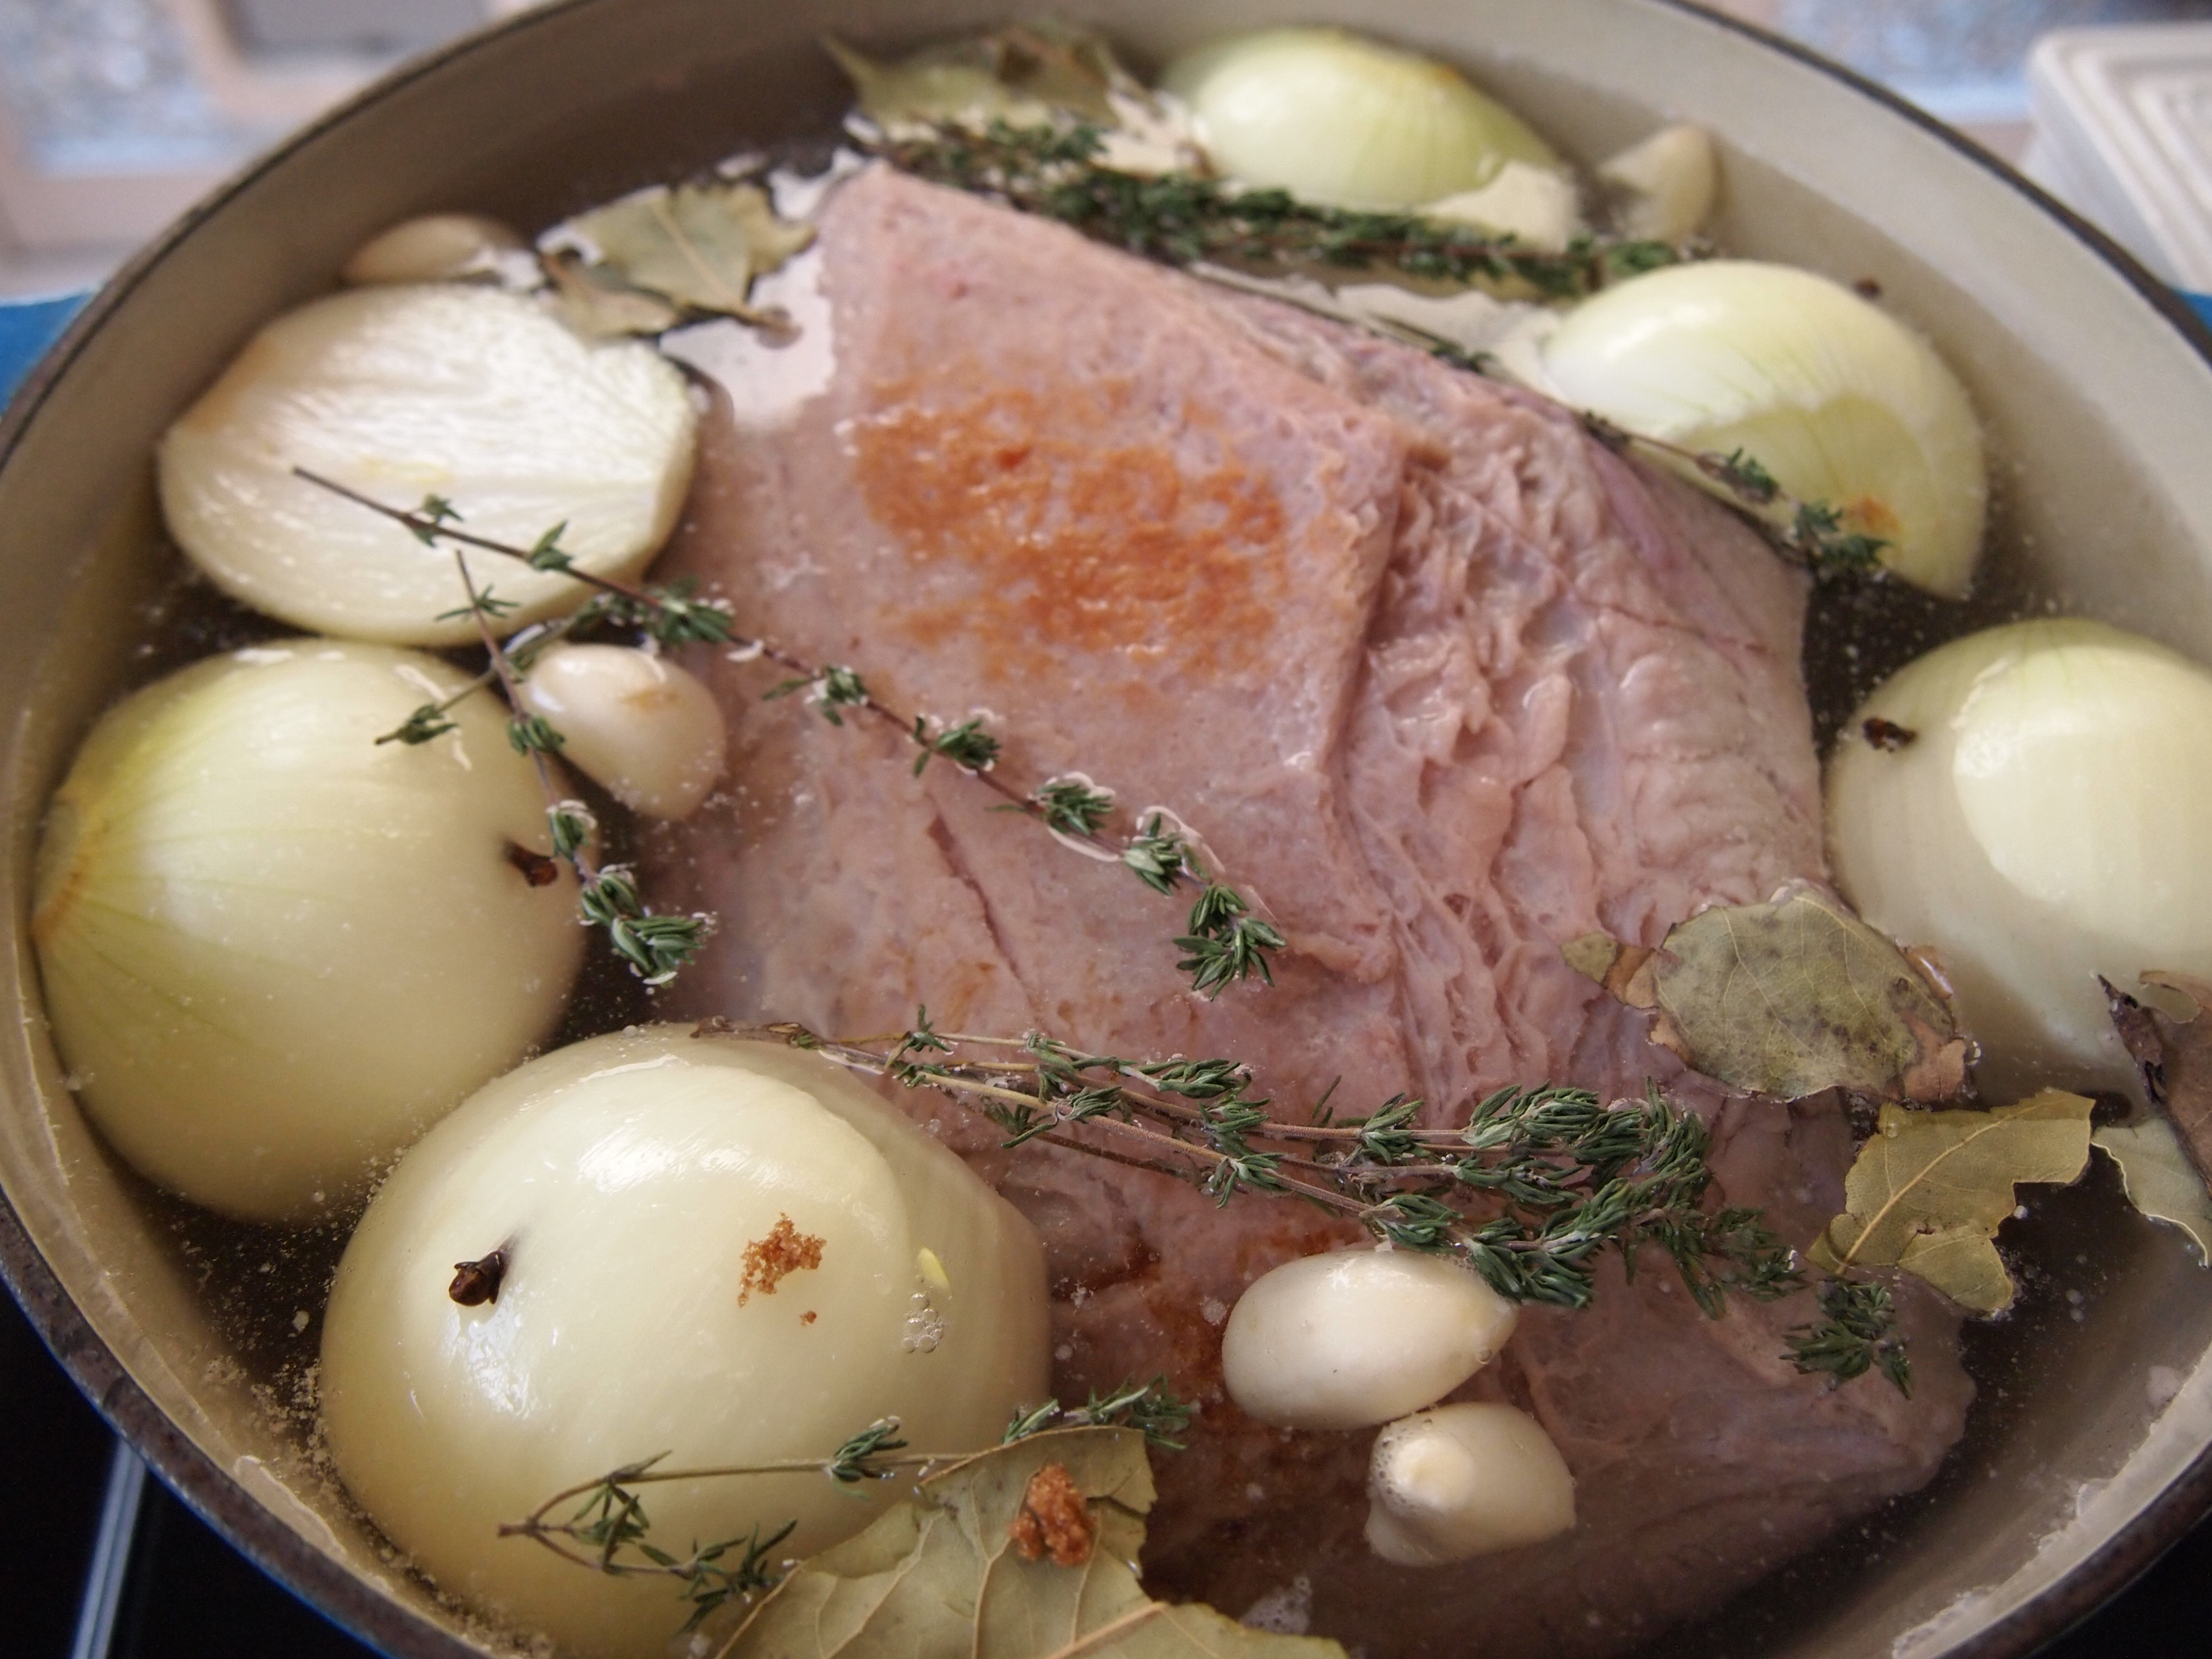
Put the corned beef into a large deep saucepan and add enough cold water to cover.  Bring to the boil and discard water.  Clean the pan and return the beef to it.  Stud the onion halves with the cloves and add the rest of the ingredients except for the carrots.  Cover with fresh cold water and bring to the boil over medium heat.

Once boiling cover with a lid, reduce the heat and simmer for at least 3 hours.  The meat should be fork tender at this stage.  Drain and reserve the broth and discard the vegetables.  Place the beef back into the pan and add the reserved broth, taste and add some salt to the broth if it requires it.  Add the carrots to the pan and cook for a further 10 minutes or until the carrots are tender.

To make the sauce place the shallots, vinegar, and 1/4 teaspoon salt in a small bowl, and let sit 5 minutes. Pound the parsley with a mortar and pestle and add it to the shallots. Whisk in the mustard and olive oil, and season with a squeeze of lemon juice, a pinch of pepper and a pinch more salt, if you like.

To serve carve the beef into thick slices.  Ladle some of the broth onto a platter and arrange the corned beef slices on top.  Arrange the carrots around the beef and top with the parsley mustard sauce.

Aug 29, 2012
mustardwithmutton

no comments

Wedge Salad with Basil Green Goddess & Blue Cheese Dressing

Wedge salads are a traditional steakhouse side dish and normally served with a blue cheese dressing.  Whilst I’m fond of blue cheese dressing, my favourite dressing is Green Goddess.  Green Goddess dressing was first created at the Palace Hotel in San Francisco in the 1920’s in honour of the hit play, the Green Goddess.  The original version uses tarragon but Ina Garten revamped this classic and used basil instead, which I think is even better.  I made this wedge salad using Ina’s Basil Green Goddess dressing but added some crumbled blue cheese at the end in a nod to the classic wedge.  This is a fantastic barbecue side dish and the Green Goddess dressing makes the wedge salad seem a little lighter than full blue cheese version.

Ingredients – Serves 4

1 iceberg lettuce, outer leaves removed, washed and cut into quarters
Some speck or thick cut bacon cut into cubes
6 cherry tomatoes halved

Dressing   Adapted from Ina Garten

1/2 cup good quality whole egg mayonnaise (I use Hellmans)
3 chopped scallions/spring onions, white and green parts
1/2 cup chopped fresh basil leaves (about half a small bunch)
Juice of 1 lemon
1 clove of garlic, chopped
1 teaspoon anchovy paste
1 teaspoon kosher salt (or half a teaspoon normal salt – kosher salt is much milder)
1/2 teaspoon freshly ground black pepper
1/2 cup sour cream
1/2 cup of crumbled blue cheese (I like something a little milder for this and use a Danish blue)

To make the dressing place the mayonnaise, scallions, basil, lemon juice, garlic, anchovy paste, salt and pepper in a blender and blend until smooth. Add the sour cream and process just until blended. Place into a bowl and gently stir in the crumbled blue cheese. (If not using immediately, refrigerate the dressing until ready to serve.)

Heat a small frypan on medium heat and add the speck/bacon and cook until crispy.  Drain on absorbent paper.  To serve place the lettuce wedges on a platter and drizzle generously with the dressing.  Place the tomato halves around the lettuce and sprinkle the crispy speck over the lettuce and tomatoes.

Aug 27, 2012
mustardwithmutton

4 comments

Persian Poached Garlic Chicken with Rice

I’m calling this Persian because it’s something my mother would often make for us growing up.  I’m not sure how traditional this is or if other households eat a similar dish but many meat and poultry dishes in Persian cuisine that are cooked to accompany rich rice (polow) dishes are cooked very simply, as this is, as the polow is the main star of the show.  This is such a simple dish but so comforting and familiar.  It’s what I crave when I’m sick or when I just want something that’s very tasty but gentle on the stomach.  In fact it’s normally the first dish we eat when we’ve returned home from a trip.  In some ways it reminds me of Hainanese chicken rice but in my opinion it’s much much better. The chicken is covered with water, some garlic and salt and left to bubble away until only a half cup or so of liquid remains – this can take anywhere up to 3-4 hours.  Unlike chicken soup where the chicken has given all it’s goodness to the broth and needs to be discarded, here the broth is allowed to soak back into the chicken, making it the most tender and flavourful chicken – you can literally eat it with a spoon; and that half a cup of liquid that’s left is pure gold and perfect for pouring over the accompanying basmati rice.  I actually don’t think this needs any accompaniments but a salad of finely diced tomatoes and cucumbers with a vinegar or lemon dressing goes very well with it.

Ingredients – Serves 3-4

4 free range or organic chicken maryland pieces (i.e. entire leg of thigh and drumstick)
12 cloves of garlic peeled and halved lengthways
1 1/2 teaspoons salt
Freshly ground black pepper

Method

Trim the chicken pieces of all extraneous fat, take your time doing this step as you want to take off as much fat as possible but leave on the skin.  Wash the chicken pieces and place them in a medium size saucepan.  Cover with cold water and bring to the boil.  Once boiling let it cook for a few minutes to let all the skum rise to the surface.  Drain the water from the pot.  Clean the pot and rinse the chicken pieces in cold water.  This ensures that you end up with a very “clean” broth.  Put the chicken back into the cleaned pot and add enough fresh cold water to just cover the chicken pieces, then add the garlic, salt and some freshly ground black pepper.

Bring to the boil again then lower the heat to a gentle steady simmer. Place the lid on the pot at a slight angle to let the steam escape and evaporate slowly.  Cook the chicken for as long as it takes for the water to evaporate, leaving just  1/2 to 3/4 of a cup  in the pan.  The timing for this will vary depending on how low you have your heat – mine took about 4 hours. Keep your eye on it towards the end of the cooking time as the last of the liquid can evaporate very quickly.  If you find that your pan has run dry add a little bit of boiling water to bottom of the pan and turn off the heat and put the lid on. Carefully transfer the chicken pieces to a platter (the chicken will be very soft and the bones are likely to pull right out) and top with the garlic pieces and juice. The chicken is best served with plain basmati rice which I made using a Persian Rice Cooker.  This ingenious product cooks the rice into perfect long, separate grains and develops the beautiful crunchy rice base (tadig) which is so loved by Persians.


Aug 24, 2012
mustardwithmutton

6 comments

The Ultimate Apple Tarte Tatin

This recipe comes from the Martha Stewart’s Pies & Tarts cookbook that was first published in 1995.  It’s my sister’s signature dessert and she makes it better than anyone including, I think, Martha!  The secret to her success is to cook the apples in the caramel for a very long time.  Martha stipulates 20 minutes in her recipe but I followed my sister’s advice and cooked them for upwards of an hour and the extra cooking time resulted in the most amazing dark caramel and fork tender apples.  Most recipes for Tarte Tatin use puff pastry but in Martha’s version a shortcrust pastry is used and it’s so much better. Puff pastry is delicate by nature and once the tarte is inverted I find the puff pastry becomes soft and soggy.  I highly recommend a Le Crueset, or similar, cast iron pan for this, you need a vessel that can be transferred from the stove to the oven.  Le Crueset manufacture a specific Tarte Tatin dish which is what I use but my sister has a Le Crueset cast iron skillet which works equally well.

Ingredients – Makes 1 x 9 or 10 inch tarte   Adapted from Martha Stewart’s Pies & Tartes

1 quantity sweet shortcrust pastry – click here for recipe from previous post
3/4 cup sugar
3 tablespoons water
4 tablespoons (60g) butter
7-8 medium sized tart apples (I used Braeburn)

Method

In an 9 inch cast iron skillet (tarte tatin dish or other oven proof sauté pan) combine the sugar and water.  Bring the mixture to a boil, lower the heat, and cook over medium heat until it begins to thicken and turn amber coloured.  It’s important to just swirl the pan and not stir it.  Remove from the heat and add the butter.

Halve and core the apples.  Leaving half an apple for the centre of the tarte, quarter the rest of the fruit and decoratively arrange the slices around the edges of the skillet on top of the caramelised sugar, cut side up.  Remember that since the tarte tatin is inverted after it’s cooked, the fruit on the bottom will be visible when served.  Place the apple half in the centre.

Return the skillet to the stove and cook over low heat for about an hour.  Make sure your heat is low enough that the caramel is just very gently bubbling away.  At the end of the cooking time the apples will have shrunk a little and the syrup thickened.  Do not let the syrup burn.  Remove from the heat and let it cool down to room temperature.

Preheat oven to 180C.  Roll out the pastry to a thickness of 1/8 of an inch and place it over the apples.  Trim the edges.  You can poke the pastry into the sides of the dish but I actually made a rim around the dish and sealed it against the dish.

Bake the tarte for about 30-35 minutes, until the pastry is golden brown.

Remove from the oven and let it cool for 15 minutes, then loosen the pastry form the pan using a sharp knife.  Place a serving dish or platter over the tarte and quickly invert.

Aug 22, 2012
mustardwithmutton

no comments

Pâte Sucrée à la Martha – The Best Shortcrust Pastry

Martha Stewart, the doyenne of cooking, styling, homemaking and everything in between is the person I turn to for anything pastry related. Martha’s done a lot of amazing things in her career but for me the highlight was the original 1995 publication of Martha Stewart’s Pies and Tarts.  I believe she’s recently published a new version but I can’t imagine how the original could be improved upon.  This is my go to recipe for sweet shortcrust pastry.  It’s incredibly short, easy to make and easy to handle.  I made this recently as the base for an apple tarte tatin from the same book (I’ll be posting this next) and it was amazing.  If you need a reliable, foolproof short crust pastry, Martha’s recipe can’t be beat.

Ingredients – Makes 1 large tart shell   From Martha Stewart

1 1/4 cups all-purpose flour, plus more for work surface
1 1/2 tablespoons sugar
Pinch of salt
125g chilled unsalted butter, cut into small pieces
1 large egg yolk
2 Tablespoons cold water

Directions

Place flour, sugar, and salt in the bowl of a food processor fitted with the metal blade, and pulse to combine. Add butter, and process until mixture resembles coarse meal, about 10 seconds.

In a small bowl, lightly beat yolks with the water. With machine running, add yolk mixture and process just until dough holds together, no more than 20 seconds.

Form the dough into a flat disk and wrap in plastic. Chill in refrigerator until ready to use, at least 2 hours. Can also be frozen for up to a month and defrosted before use.

Aug 20, 2012
mustardwithmutton

1 comment

Roast Duck Breast with Orange Cranberry Sauce

Many people are intimidated to cook duck at home but in fact it’s one of the easiest game and poultry dishes to tackle.  Unlike chicken which needs to be completely cooked through but still remain juicy, duck can be served medium or medium rare.  I prefer the breasts to be pink and the legs to be slow cooked and falling off the bone and both cases are very easy to achieve.

Duck is viewed as being a rather unhealthy meat to indulge in due to the high fat content but the fat is mostly in, or just under the skin and much of it is rendered away during the cooking process – the actual meat of the duck is quite lean. In any case recent studies show that duck fat has some surprising health benefits. The U.S. Department of Agriculture’s National Nutrition Database lists duck fat weighing in at 62% unsaturated fat and 33% saturated fat. So it’s a much better choice than cooking in butter, which is 50% saturated fat. Plus, duck fat has a huge 62% of the heart-healthy unsaturated fat and the only other fat that can compete with that is olive oil. There must be some truth to this as the Gascony region of France whose population consumes the most amount of duck fat in the world has the lowest rate of heart attacks – 80 in every 100,000 (middle-aged men) compared to the Unites States at 315 (middle-aged men) in every 100,000.  So next time don’t feel guilty ordering that duck dish.  As the French say, everything in moderation, including moderation!

Ingredients – Serves 2  Adapted from Julie Le Clerc Feast @ Home

2 Duck breasts
Zest of 1/4 of an orange
Juice of half an orange
1/2 cup dried cranberries
1/4 cup cranberry sauce
1/4 cup Cognac or brandy
1/4 cup chicken stock
Salt & freshly ground pepper

Method

Preheat oven to 190C. Using a sharp knife score the skin of the duck breast in a diamond pattern making sure that you don’t score into the flesh.  Season well with salt and pepper.

Heat an oven proof fry pan over medium heat and add a small drizzle of olive oil, about half a teaspoon.  When the pan is hot add the duck breasts, skin side down and cook without turning for 8 minutes.  The skin after this time will be golden and crispy.  The breasts will release quite a bit of fat so you’ll need to spoon this off a few times as it cooks (don’t throw the rendered fat out, you can use it the next time you roast potatoes).

Turn the breasts skin side up and transfer pan to the preheated oven and cook for a further 5-6 minutes for medium.  To make the sauce add the rest of the ingredients to a small saucepan and let it infuse off the heat for about 10 minutes.  Turn the heat on under the pan and bring to the boil, reduce the heat and simmer for 5 minutes or until the sauce is thick and syrupy.

Take the duck out of the oven and let it rest for 5 minutes.  Cut the breast in thick slices on the diagonal and serve with the sauce.

Aug 17, 2012
mustardwithmutton

3 comments

Guinness Lamb Shanks

This recipe is from Jamie Oliver’s latest TV Series, Jamie’s Great Britain.  On the show he refers to these as Persian inspired lamb shanks with ale.  The night before Jamie had dined at a Persian restaurant in Leeds and came up with this recipe – he’d also visited an ale factory the same day, hence the mingling of the two rather obscure themes.  I couldn’t really see the Persian influence in the dish but it looked delicious.  The unusual inclusion of ingredients such as marmalade, ketchup and raisins work together well and give this dish a hint of background sweetness.  The sauce at the end of the cooking time is pureed, which gives it a lovely smooth, velvety texture.  Jamie also said that the spring onion, mint and vinegar salad that is strewn over the shanks just before serving is a must, and to not even bother making the dish if you weren’t going to do that.  He was right, the addition of the sharp spring onions and mint woke the whole dish up.  I served it with celeriac mash as per Jamie’s suggestion. This quantity makes a lot of lamb and sauce and even though I was cooking for 2 I made the whole quantity and shredded the meat and sauce to serve with pasta on another evening (picture below).

Ingredients – Serves 6   

3 red onions, peeled
olive oil
sea salt and ground pepper
2 handfuls of raisins
2 tablespoons thick-cut marmalade
1 heaped tablespoon tomato ketchup
2 tablespoons Worcestershire sauce, plus extra for serving
200ml Guinness or smooth dark ale
6 large lamb shanks
8 sprigs of fresh rosemary
700ml chicken stock

To Serve
A small bunch of fresh mint leaves
2 spring onions, trimmed
Cider vinegar

Method

Finely chop the onions and put them into a large cast iron casserole, with a some olive oil and a good pinch of salt and pepper. Cook over a medium to high heat, stirring, until the onions start to caramelize. Add the raisins, marmalade and ketchup, then add the Worcestershire sauce and Guinness. Stir well, then leave to gently simmer.

Put the lamb shanks into a large frying pan on a medium to high heat with a drizzle of olive oil – cook in batches if necessary. Turn them every few minutes; once they have some good colour, add in the rosemary leaves and move them around in the pan to get crispy, being careful they don’t burn.

Transfer the shanks into the pan of onions, then pour in all their juices and the crispy rosemary. Add the stock and bring to a boil. Put the lid on, turn down the heat and leave to simmer slowly for around 3-4 hours, or until the meat falls off the bone easily. You can also put them into a 160C oven for 3-4 hours. Try to turn the shanks halfway through so they cook evenly.

When the lamb shanks are ready, carefully move them to a platter, making sure the meat stays intact. Liquidize the gravy with a stick blender until smooth, then allow to reduce down and thicken slightly. Finely slice up the spring onions and toss on a plate with the mint leaves, a drizzle of cider vinegar and a pinch of salt.

Add a little splash of cider vinegar and a few more splashes of Worcestershire to the sauce, then ladle it over the lamb shanks. Scatter with the vinegary spring onions and mint leaves all over the top.


Aug 15, 2012
mustardwithmutton

2 comments

No Knead Bread – Artisan Bread From Your Home Oven

A few years ago Mark Bittman from the New York Times challenged Jim Lahey of Sullivan Street Bakery in New York to come up with a recipe for home baked bread that was as good as any artisanal loaf from a bakery.  Jim met that challenge and the legend of the no knead bread was born. In fact, according to Jim this recipe is so easy that a six year old can produce bread that’s as good, if not better than any bakery in the country!  This recipe has been around the blogosphere for a long time and I’ve been baking it for just about as long.  The first time I made it my family didn’t believe that it was home made  and thought I’d purchased it, it really is that good and more importantly, very very simple.  The recipe is unique in that the water to flour quantity is very high and only a 1/4 of a teaspoon of yeast is used.  The reason for this being that the dough is rested  for a very long time.  You need to make the dough mixture a day ahead as it needs to prove for about 18 hours.  The bread is then cooked in an extremely hot oven and in an extremely hot cast iron pot with the lid on – thus replicating the heat, steam and intensity of a professional bakers oven.  Ingenious!  The dough for the loaf of bread above was made on a cold and windy afternoon and I don’t think I put the bowl with the dough mixture in a warm enough environment.  The dough mixture after the fermentation time should have lots of little holes on the top and mine didn’t have as many as it should. So I’d recommend you make sure that this dough sits in a warm environment and if your oven has a dough proving setting then this would be good to use on a  cold day.

Ingredients – Makes 1 loaf    From the New York Times

3 cups all-purpose or bread flour, more for dusting (I used Organic plain flour)
¼ teaspoon instant yeast
1¼ teaspoons salt
Cornmeal or wheat bran as needed.

Method

In a large bowl combine flour, yeast and salt. Add 1 1/2 cups warm water, and stir until blended; dough will be shaggy and sticky. Cover bowl with plastic wrap. Let dough rest at least 12 hours, preferably about 18, at warm room temperature. Dough is ready when its surface is dotted with bubbles.

Lightly flour a work surface and place dough on it; sprinkle it with a little more flour and fold it over on itself once or twice. Cover loosely with plastic wrap and let rest about 15 minutes. Using just enough flour to keep dough from sticking to work surface or to your fingers, gently and quickly shape dough into a ball. Generously coat a cotton towel (not terry cloth) with flour, wheat bran or cornmeal; put dough seam side down on towel and dust with more flour, bran or cornmeal. Cover with another cotton towel and let rise for about 2 hours.


When it is ready, dough will be more than double in size and will not readily spring back when poked with a finger. At least a half-hour before dough is ready, heat oven to 450 degrees. Put a 6- to 8-quart heavy covered pot (cast iron, enamel, Pyrex or ceramic) in oven as it heats. When dough is ready, carefully remove pot from oven. Slide your hand under towel and turn dough over into pot, seam side up; it may look like a mess, but that is O.K. Shake pan once or twice if dough is unevenly distributed; it will straighten out as it bakes. Cover with lid and bake 30 minutes.


Then remove lid and bake another 15 to 30 minutes, until loaf is beautifully browned. Cool on a rack.

Aug 13, 2012
mustardwithmutton

2 comments

Salmon with Braised Zucchini & Chorizo

We try to eat fish at least once a week, but out of all the proteins I struggle with cooking fish the most.  Finding new recipes and ways of cooking fish can be a little challenging and once I’ve found a recipe that appeals we have it quite regularly.  In trying to break the habit of repeating the same fish dishes too frequently I’m experimenting a little more and this recipe was the result.  The salmon is cooked in the usual method so nothing out of the ordinary there but it teamed up so well with the braised zucchini and the addition of crispy Chorizo on top of the salmon was a great textural contrast to the soft zucchini and tender salmon.

Ingredients – Serves 2

2 salmon fillets, seasoned with salt and pepper
Olive Oil
2 large zucchini, coarsely grated
4 cloves of garlic, finely chopped
1 anchovy, chopped (or 1/2 teaspoon anchovy paste)
large pinch of chilli flakes
handful of grated Parmesan
Salt & freshly ground black pepper
1/2  a large chorizo, very thinly sliced

Method

Preheat oven to 180C. Heat a frypan or skillet over medium heat and add enough olive oil to lightly coat the bottom of the pan.  Add the garlic, chilli flakes and anchovies and cook, stirring until the garlic has softened and the anchovy has melted into the oil, be careful not to brown the garlic.

Add the grated zucchini along with a good pinch of salt and stir the zucchini to coat with the garlic and oil.  Continue to cook and stir until the zucchini has wilted and is cooked through and soft.  It will initially let off some liquid and you need to cook until the water from the mixture has evaporated.  Add a handful of grated parmesan and stir through. Check the seasoning and adjust if necessary.

When the zucchini has cooked, leave it to sit on a  very low heat to keep warm.  Put the salmon fillets on a baking sheet that has been drizzled with a small amount of olive oil.

Place in the oven and cook for 8 minutes, remove and turn the salmon pieces over and cook for a further 7 minutes. Whilst the salmon is cooking put a small frypan over a medium heat and add the Chorizo in one layer.  Cook until the Chorizo is crispy on one side then flip them over and crisp up the other side.

 To serve place the Zucchini on a plate and place the salmon next it and top the salmon with the Chorizo.

Aug 10, 2012
mustardwithmutton

no comments

Sausage & Black Bean Chilli with Baked Eggs


The inspiration for this recipe comes from the popular Mexican breakfast, Huevos Rancheros.  As I was serving this for dinner I wanted to make the vehicle for carrying the eggs more substantial than the traditional tomato sauce used in Huevos Rancheros.  I thought a spicy sausage and black bean chilli would work well with the eggs, and it did.  Be careful not to over bake the eggs, you want the yolks to be soft and runny when pierced.  I served it was sour cream, tortilla and corn chips.  This was a knockout dish and something I’ll be making again, soon!

Ingredients – Serves 2-3

1 large red onion, finely chopped
3 cloves of garlic, finely chopped
Half a red capsicum, diced
Olive oil
2 spicy pork sausages (or beef ) – I used pork, garlic and red wine sausages
1 large Chorizo sausage
200g minced beef
1 teaspoon cumin
1/2 teaspoon paprika
1/2 teaspoon Cayenne pepper (more if you like it very spicy)
2 -3 teaspoons Chipotle peppers in Adobo
Salt
1 400gm tin of diced tomatoes
1 400g tin of black beans, rinsed and drained
2-3 eggs
1 long green chilli, sliced
Handful of coriander leaves
1/3 cup grated sharp cheddar

Method

Heat some olive oil in a large frypan over medium heat.  Add the onions, garlic and capsicum and cook for about 8-10 minutes until softened and starting to golden.

Add the cumin, paprika and chipotle peppers and cook for a further 2 minutes.  Take the pork sausages out of their casing and crumble coarsely and dice the Chorizo.

Add the sausages and the ground meat to the pan and cook, breaking up the meat with a wooden spoon until the meat has all changed colour and is starting to brown.

Season with salt and add canned tomatoes, black beans and 1 can of water.  Bring to the boil, lower the heat and simmer covered for 45 minutes, checking and stirring every now and then to ensure that it’s not catching.  If the pan is running too dry add some more water.  After 45 minutes, remove the lid and continue to simmer, uncovered for another 15 minutes or until the chilli has thickened. Preheat oven to 180C.  Transfer the chilli to a shallow sided baking dish and make a well in the chilli for each egg.  Carefully crack the egg into each cavity.

Sprinkle with cheddar cheese and sliced green chilli and bake for 15 minutes or until the eggs have just cooked through.  Remove from the oven and sprinkle with coriander leaves.  Serve with sour cream, tortillas and corn chips.