Aug 9, 2012
mustardwithmutton

no comments

Roast Potato, Parsley & Tomato Salad

If you feel like both roast potatoes and a salad to accompany your meal why not combine the two? Unlike traditional creamy potato salads where the main ingredient is the spuds this salad is lighter on the potatoes, with the emphasis on the salad components. You’ll consume less potatoes which is a good thing given how moreish these little golden, crunchy nuggets are – think bread croutons but made of potatoes instead. This recipe is a great barbecue side dish.  The salad and dressing can be prepped ahead and the hot potatoes tossed through at the last moment.

Ingredients – Serves 2-3

4 medium roasting potatoes (I used Desiree), washed and cut into small cubes, no need to peel the potatoes
Olive Oil
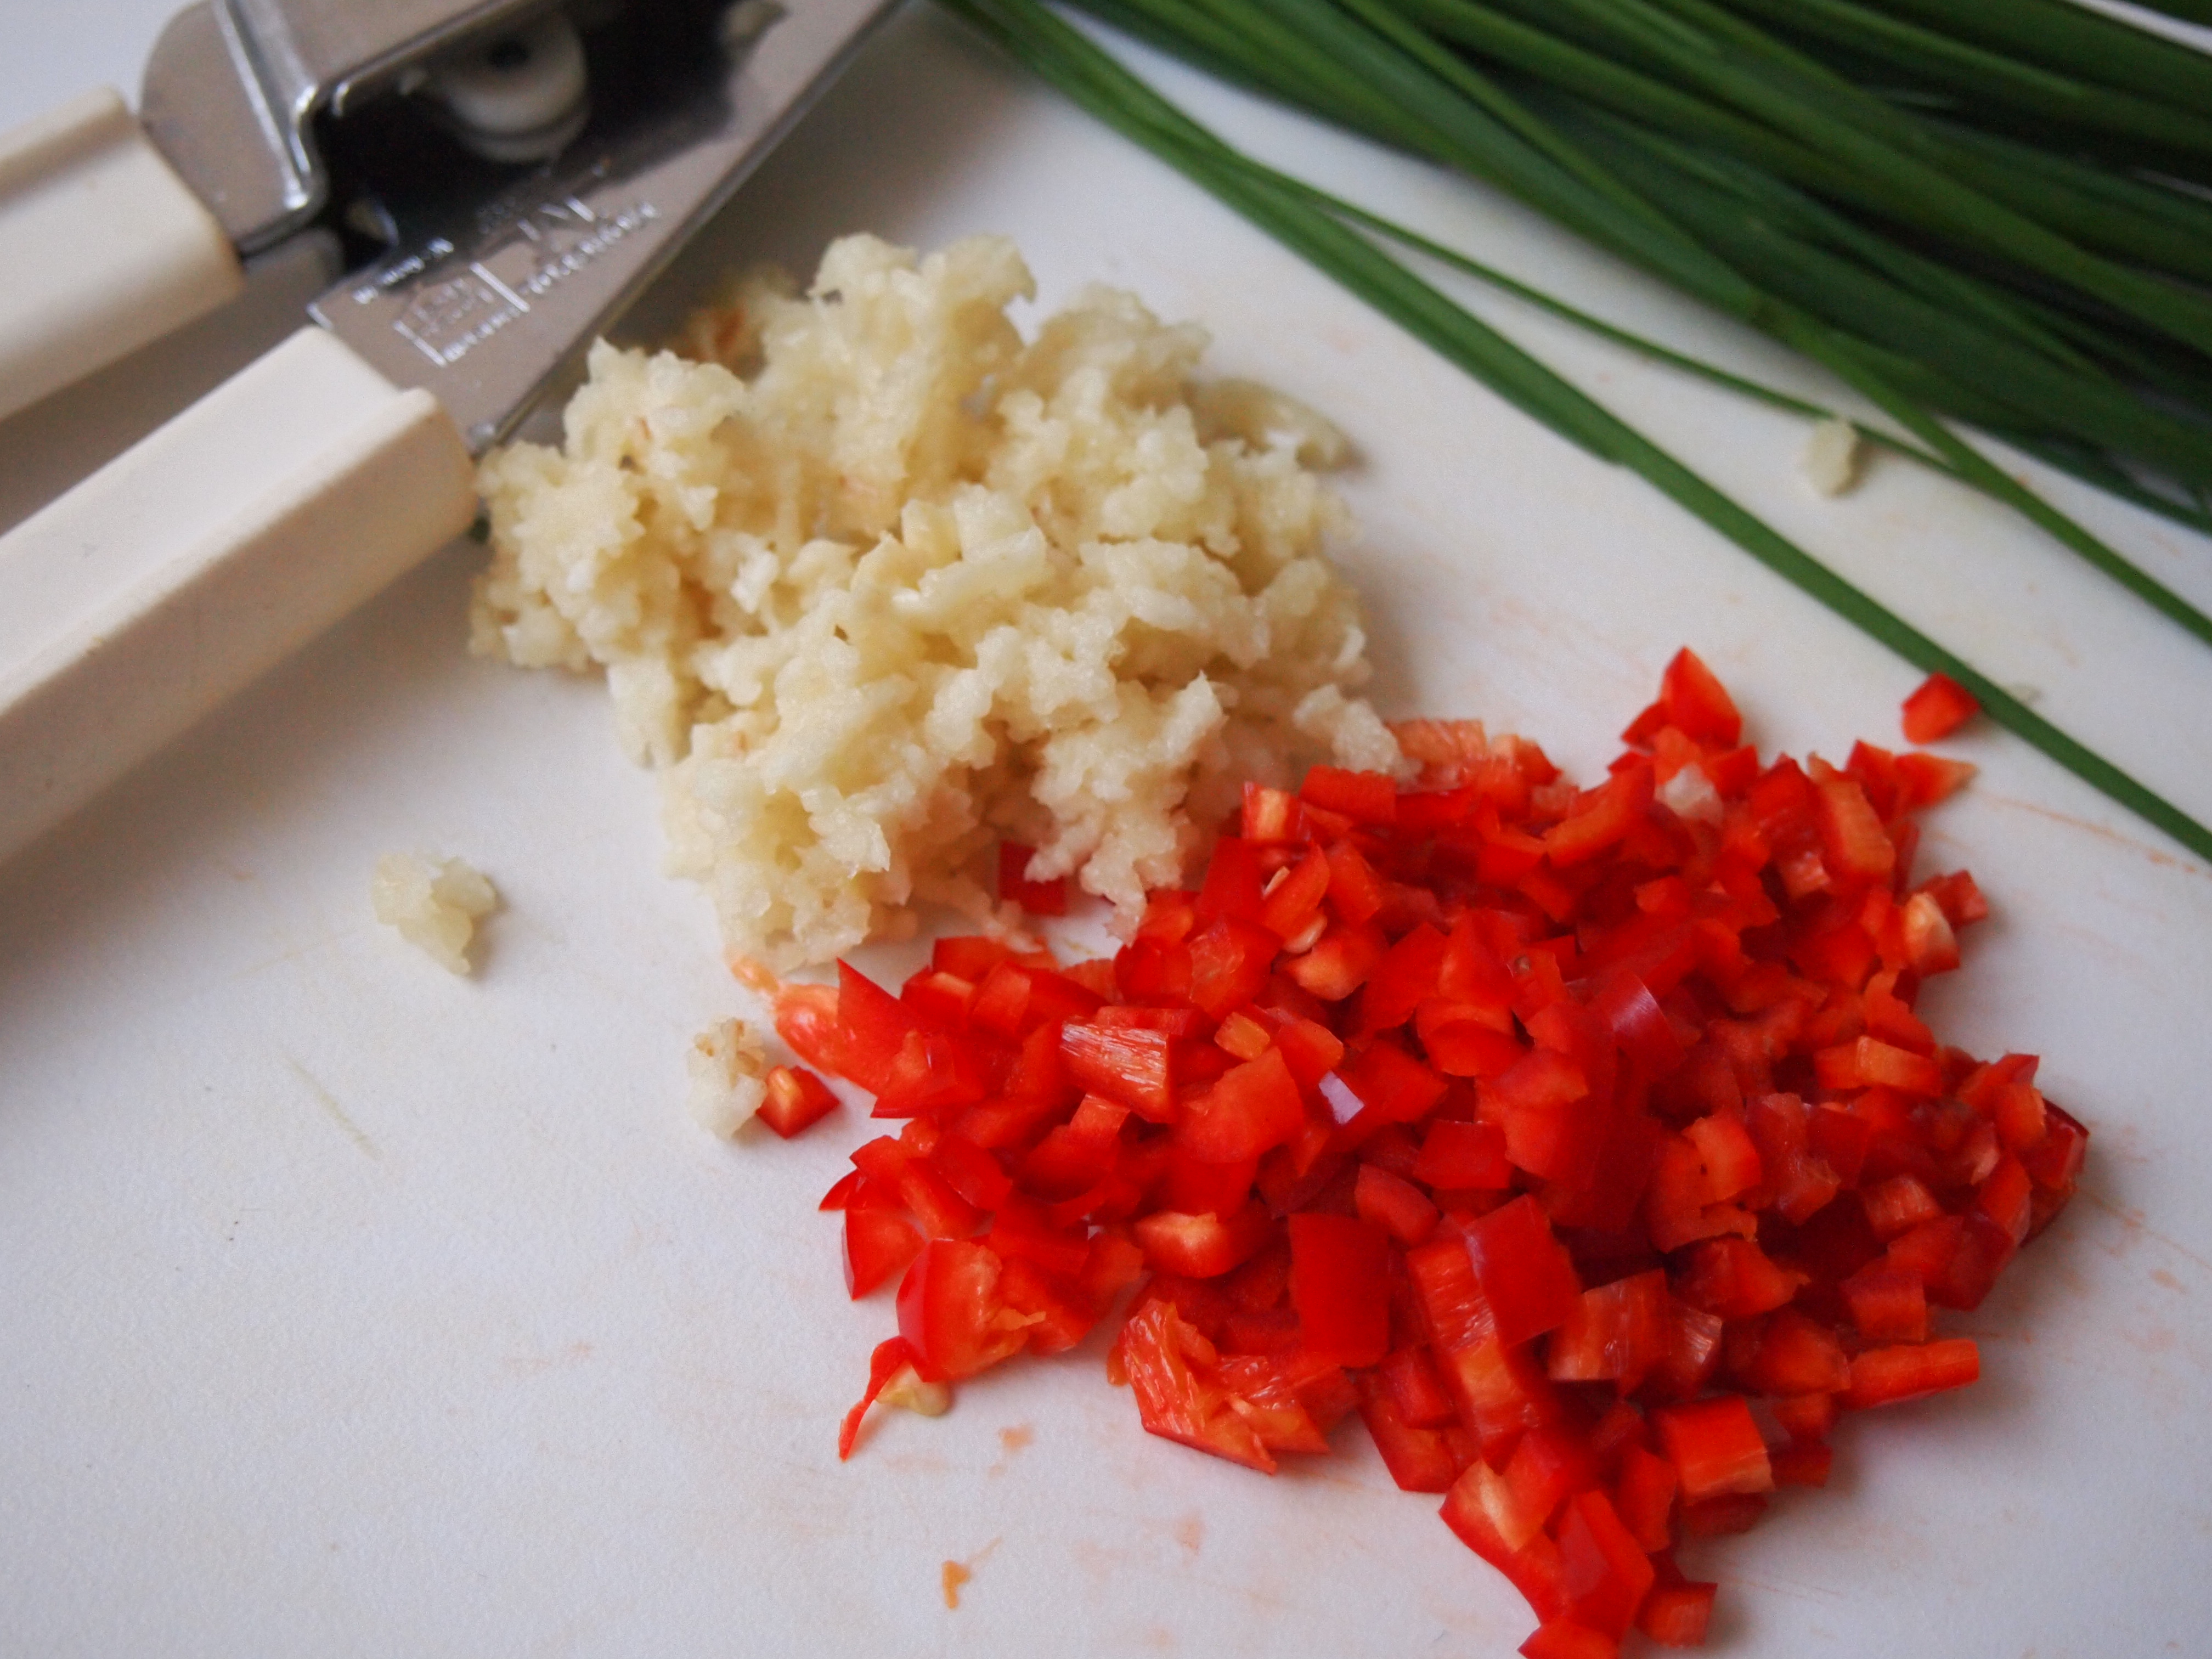
4 cloves of garlic, peeled and roughly chopped
1 large bunch of flat leaf parsley, leaves removed from stems
1 punnet of cherry tomatoes, cut into quarters
1 eschallot, halved and sliced thinly
The green ends of 4 spring onions, finely sliced
1 tablespoon capers
1/2 a red chilli finely chopped

Dressing
1/2 teaspoon salt
Juice of 1 lemon
1 teaspoon dijon mustard
2 Tablespoons Olive oil
1 tablespoons sweet chilli sauce

Method

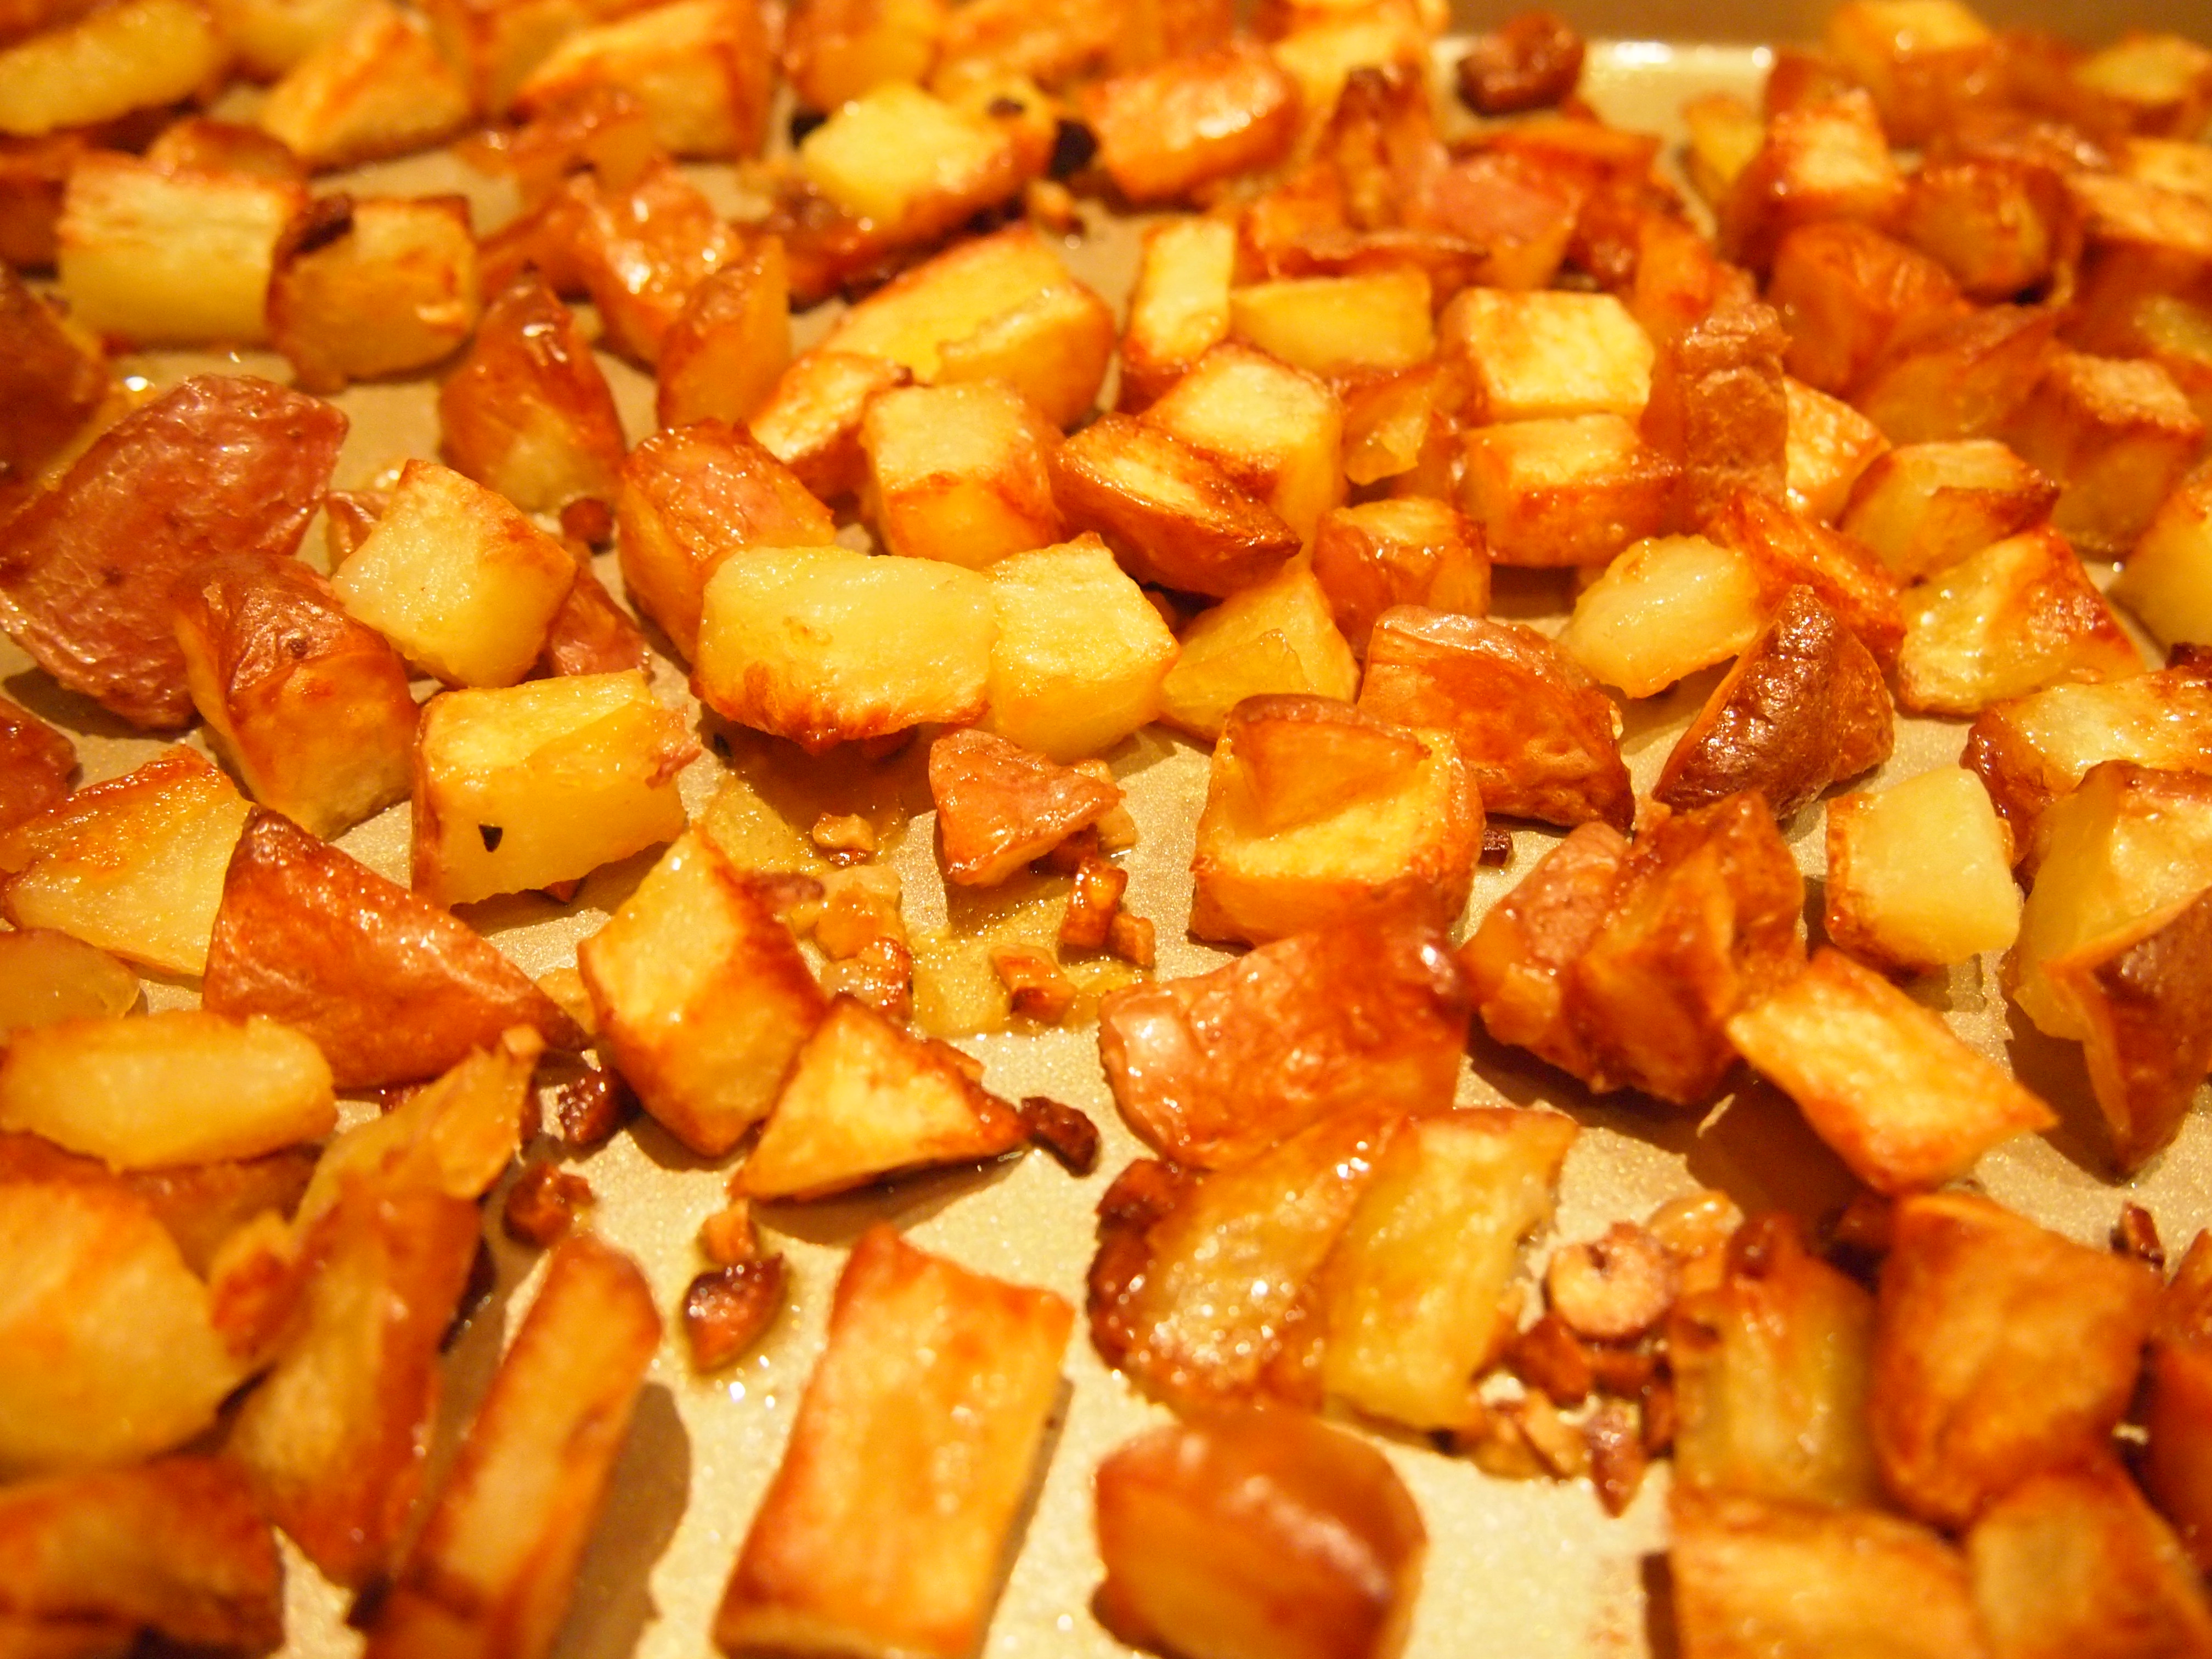
Preheat oven to 220C. place the potatoes in a shallow sided baking tray and drizzle with enough olive oil to coat them well.  Season with salt and bake for 30 minutes. After this time toss the potatoes around and add the chopped garlic and place them back in the oven for a further 20 minutes. If your potatoes are already golden at this point, lower the heat of the oven slightly to avoid burning.


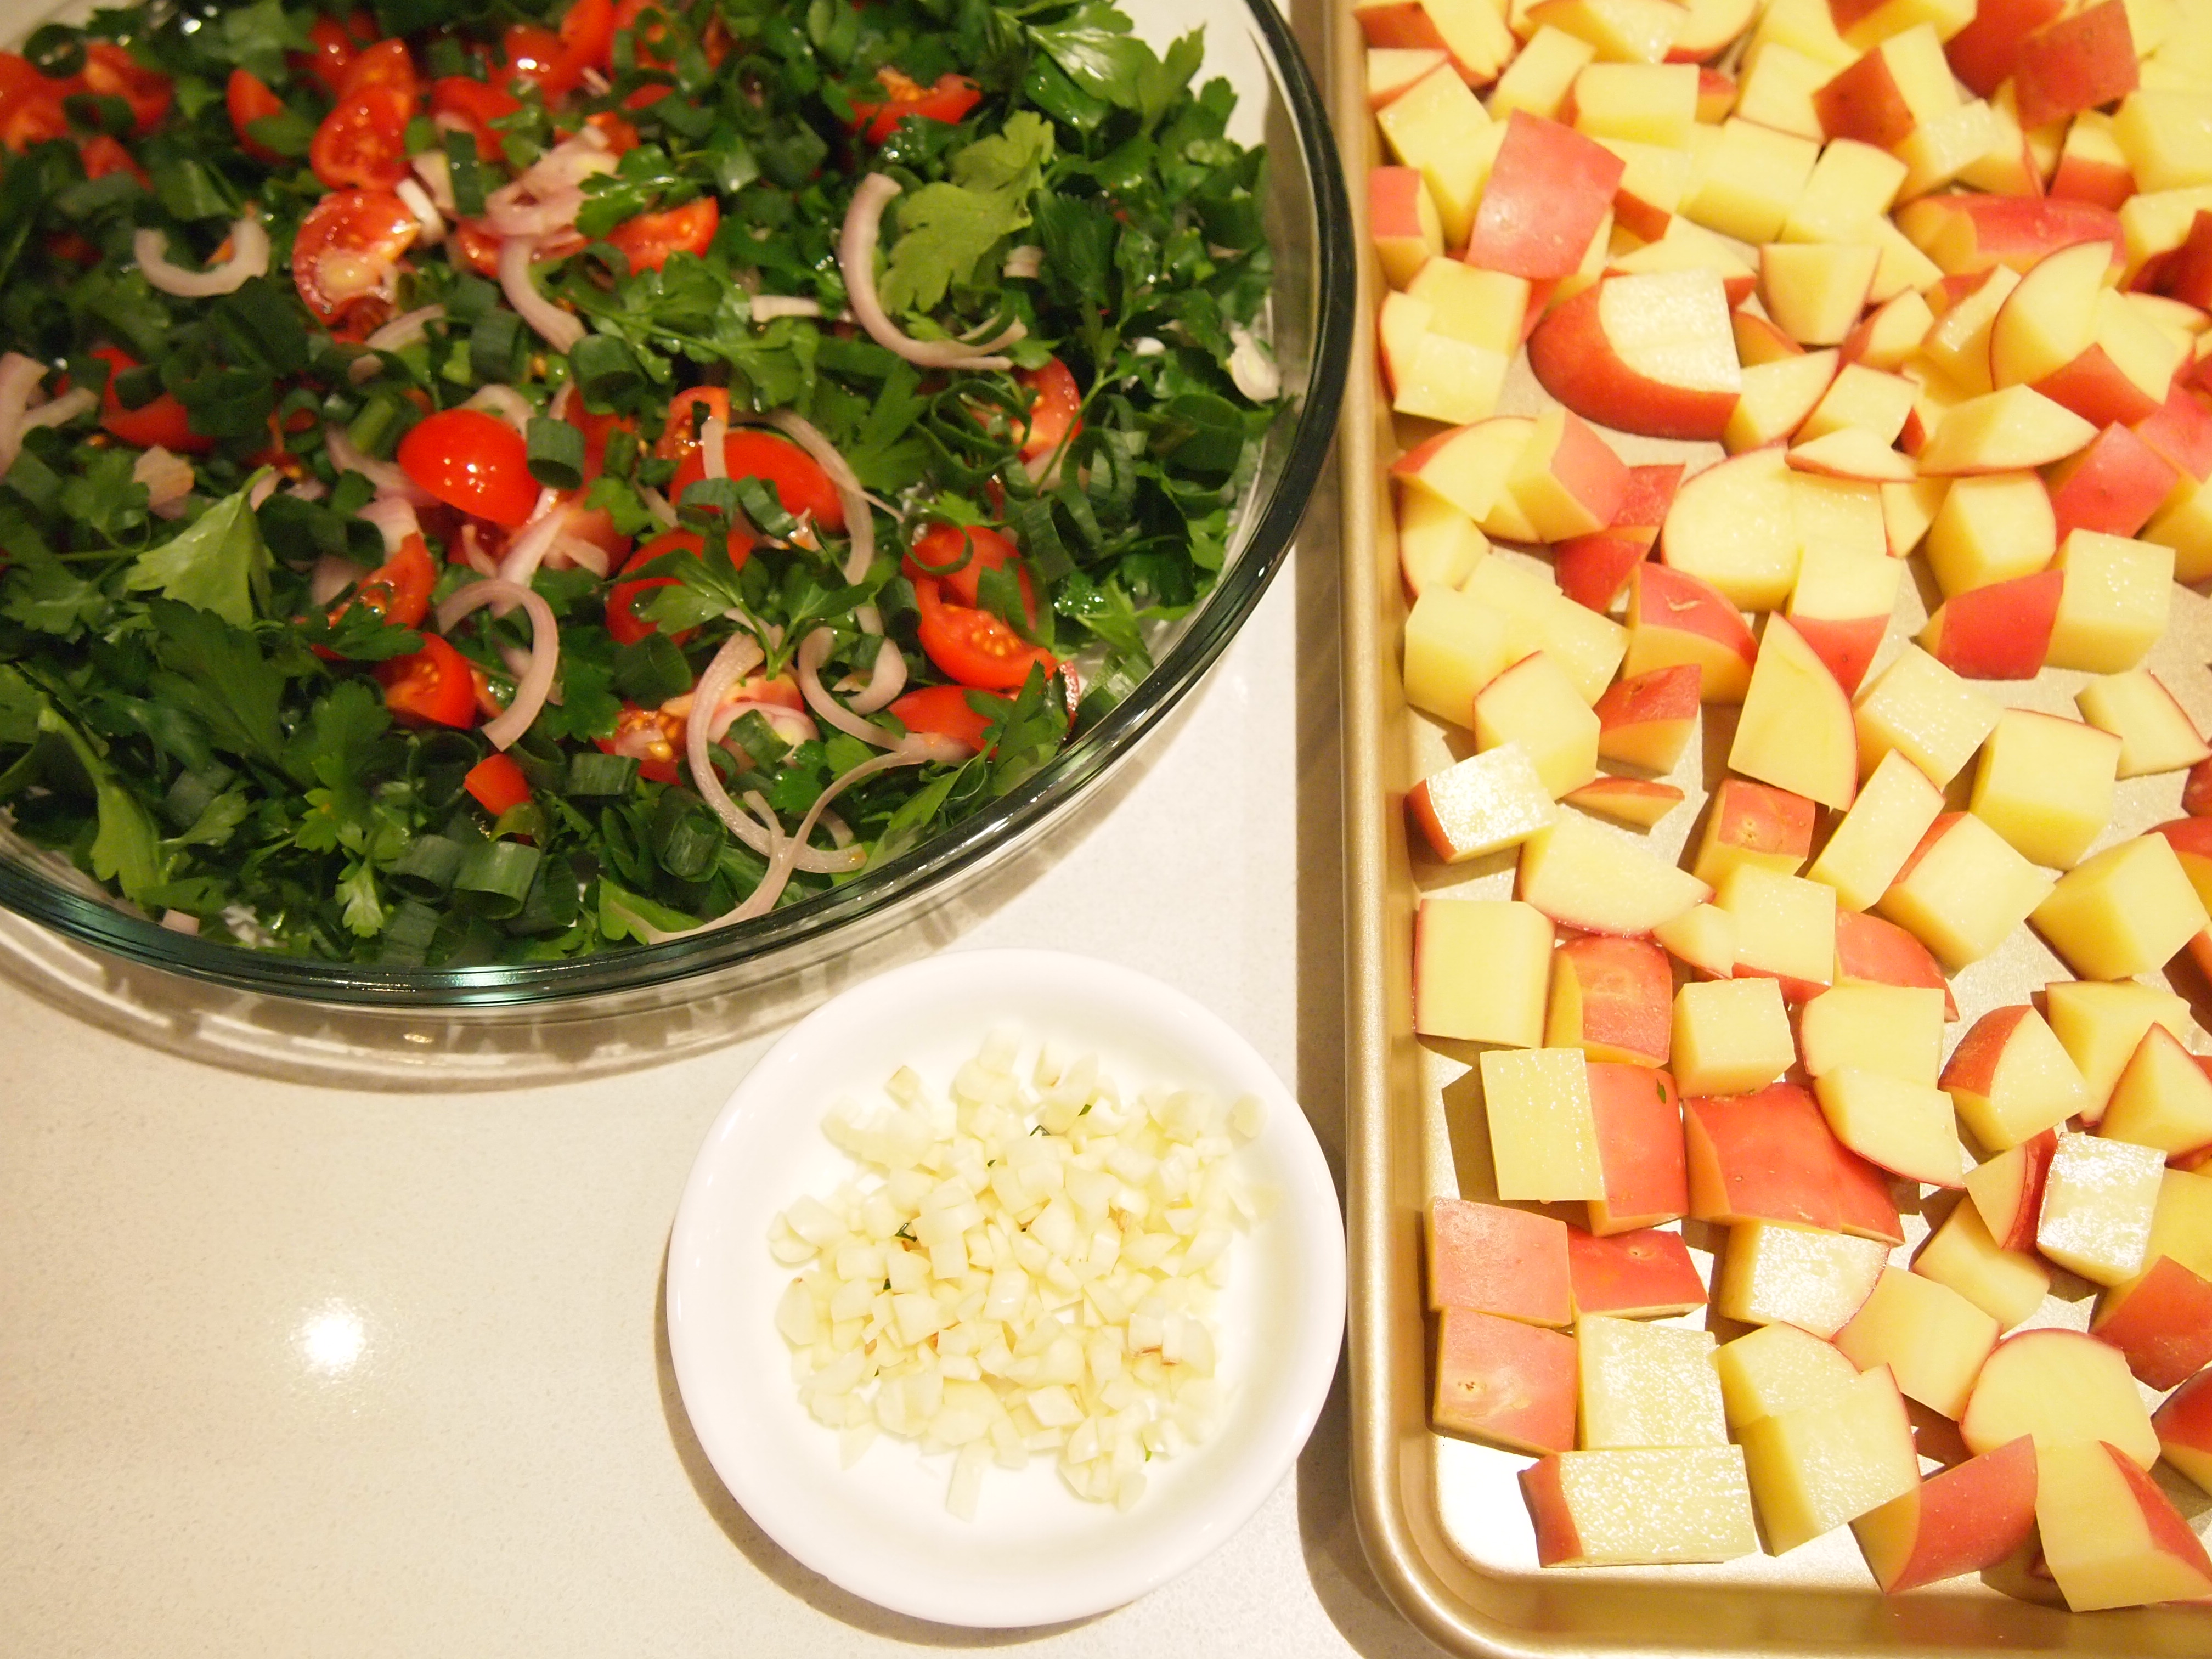
While the potatoes are roasting prepare the salad by combining all the remaining salad ingredients on a platter.  To make the dressing whisk all the ingredients in  a small bowl and check for seasoning.  You want it to be quite sharp. When the potatoes are ready, dress the salad with half the dressing and add the potatoes, toss them through the salad lightly and drizzle over the rest of the dressing.  Serve straight away while the potatoes are still hot.

Aug 8, 2012
mustardwithmutton

3 comments

Slow Roasted Rib of Beef – The Relaxed Way to Cook a Roast

Slow cooked roasts are all the rage at the moment.  Everyone form Neil Perry to Heston Blumenthal has a recipe for one.  Normally it involves either searing the meat before or after the cooking time and cooking the roast at extremely low temperatures (around 70C) for 4-5 hours.  This results in a perfect medium rare roast that is pink all the way through to the edges.  It is however fiddly with much meat thermometer probing to ensure that the roast doesn’t get beyond 55C.  I tried this a few times and, quite frankly found it too time consuming.

I recently discovered through food52.com that way back in the 60’s, before the age of celebrity chefs and molecular gastronomy, a New York cookbook author and sometime editor of Gourmet Magazine,  called Ann Seranne had come up with an ingenious, and for the time, ground breaking concept. The recipe was posted in a 1966 issue of the New York Times with the simple caption to “Relax”.

Finally a rib roast that takes care of itself.  Basically you bring the roast to room temperature and preheat your oven to 250C.  Season the beef with salt and pepper and dust the fat with some flour. Place it in the hot, hot oven for 30 minutes, then turn the oven off and leave it undisturbed – do not open the door – for 2 hours.  After this amount of time the roast will be a perfect medium. I must admit that I opened that oven door with some trepidation.  I couldn’t believe that it would actually work, and that if it did why anyone would still cook a roast using any other method.  But work it did and now my only question is why Ann Seranne isn’t a household name!

I used a 3 bone roast that weighed 1.7 kgs (fed 4 people easily) and next time I’ll remove it after 1 1/2 hours as we prefer our roasts medium rare.  This is just the easiest way to cook a roast and even someone with no cooking skills whatsoever will be able to turn out a prefect rib roast.  If you’re feeding a crowd and have a very large rib roast I would carve it in 2 to make sure that the cooking times work. I would caution however that this recipe may not work for oven’s that are not well insulated and I would imagine that convection ovens might also prove problematic.  I just have a normal modern oven with fan and non fan settings and it worked brilliantly.

Aug 7, 2012
mustardwithmutton

1 comment

Sticky Date Pudding with Hot Butterscotch Sauce

When I think of puddings, I think of British desserts. Images of  boarding school classics such as Jam Rolly Polly or Spotted Dick instantly come to mind.  I’m not sure where Sticky Date Pudding originated but Australians have made it their own and I think it would have to be one of the most popular winter desserts down under, and for good reason.  The warm date filled pudding topped with the hot butterscotch sauce is a magical combination.  Add to that a scoop of vanilla ice cream and it’s heaven on a plate.  I made these as individual puddings but the same recipe will yield a 20cm cake. These cakes can be made the day before and frozen for up to 3 months. They can then be defrosted and heated in the microwave.

Ingredients – Makes 8 Individual Puddings or 1 x 20cm cake  Adapted from Australian Women’s Weekly

275g seeded dried dates
1 1/4 cups (310ml) boiling water
1 tablespoon bicarbonate of soda
1/2 cup (110g) firmly packed brown sugar
50g butter
2 eggs
1 cup (150g) self raising flour (or 1 cup plain flour plus 2 teaspoons baking powder)

Sauce
3/4 cup (165g) firmly packed brown sugar (use a dark brown sugar if you want a darker coloured sauce)
300ml cream
80g butter

Method

Preheat oven to 180C.  Grease 8 Dariole moulds well with butter.  Combine dates and water in a food processor.  Stir in soda, cover with the lid and let stand for 5 minutes.  Process date mixture with butter and sugar until pureed.  Add eggs and flour.  Process until just combined.  Pour mixture into the moulds.  There will be just enough batter to fill the moulds to the 3/4 mark.  Bake for 25 – 30 minutes.

Make butterscotch sauce by stirring all the ingredients in a small saucepan over medium heat until the sauce is smooth and thickened slightly.  Stand cakes for 10 minutes then turn onto a serving plate. Serve warm with the hot butterscotch sauce and icecream.

Aug 6, 2012
mustardwithmutton

2 comments

Chicken With Caramelised Shallots

This baked chicken dish from David Lebovitz is so much greater than the sum of it’s parts.  You would never guess from the short ingredient list that the finished dish could be so tasty and complex and for such little effort.   In 45 minutes dinner is on the table and better still there’s only one dish to wash up.  According to David, soy sauce is an often used ingredient in French cooking.  I’ve even heard it said that the secret ingredient to those salad dressings one eats in Paris but can never quite recreate at home is soy sauce – who knew!

Ingredients – Serves 4  Adapted from David Lebovitz

8-10 chicken pieces (I used thigh cutlets)
4 large shallots (eschallots), peeled and finely chopped
3 tablespoons olive oil
4 tablespoons red wine vinegar
2 tablespoons soy sauce
Salt & freshly ground black pepper

Method

Preheat oven to 220C.  Season the chicken pieces with salt and pepper and place them in a roasting or baking dish that will hold them snuggly in one layer.  In a small bowl mix together the olive oil, vinegar and soy sauce. Pour the mixture over the chicken and add the shallots.  Using your hands mix the chicken pieces and the sauce together.


Spread them evenly in the pan, skin side up and bake for 20 minutes.  Turn the chicken pieces over basting them in the sauce and cook for 10 minutes skin side down.  After 10 minutes turn them skin side up again and cook for a further 10 minutes until the skin is golden brown. There will be quite a bit of fat in the bottom of the pan and this needs to be skimmed off before serving.

Aug 3, 2012
mustardwithmutton

2 comments

Black Label Burger My Way – The Juiciest Burger Ever

Americans take their burgers seriously. Gone are the days when burgers were just the domain of fast food joints. Now big name restaurants are getting into the act and everyone’s after the “best burger in town”, and willing to pay for it. Minetta Tavern in New York City charge $26 for their Black Label Burger (and it’s still almost impossible to get a table!).

What separates a great burger from a mediocre one is the meat and New York Butcher Pat La Frieda is the man they turn to for it. La Frieda sources and minces the meat for restaurants such as Minetta Tavern, Spotted Pig, Union Square Café and Shake Shack and the blend for each establishment is customised and kept highly confidential. Whilst the blend for each restaurant is secret it seems that beef short ribs and brisket are a staple starting point. Higher end cuts are added but the fat content and how it’s aged is a matter for speculation. So armed with this information I thought it was time to create my own “Black Label Burger”. I minced at home a combination of the cuts above and made sure that I didn’t make it too lean (fat is flavour and burgers, just like sausages, need to have a good ratio of fat to lean). This would have to be the juiciest and best burger EVER. There are no spices or sauces or herbs added to the burger – it’s all about the meat and the better the quality, the better the burger. I stuck to the normal accompaniments of lettuce, tomato and cheddar and recreated the secret Shake Shack burger sauce which really took this burger over the top.

 Ingredients – Makes 8 Burgers

400g brisket
400g beef short rib off the bone – make sure that the meats have a good percentage of fat on them.
400g best quality, dry aged Sirloin
Sliced tomatoes
Sliced mature cheddar
Baby cos leaves
Ketchup
Toasted hamburger buns

Fake Shake Shack Burger Sauce – Adapted from Serious Eats                          


½ cup mayonnaise
1 tablespoon ketchup
1 tablespoon yellow American mustard
1 large or a few small dill pickles finely chopped
1 eschallot finely chopped
¼ teaspoon garlic powder
¼ teaspoon paprika
Pinch of cayenne pepper

Combine all the ingredients in a small bowl and mix well.

Method

Mince the meats into a large bowl and using your hands combine well. Do not salt the meat, only season the burgers just before they go on the grill. Divide the mixture into 8 evenly sized burgers (use a kitchen scale if you can), place on a tray and refrigerate until well chilled.

Just before your ready to cook take the burgers out of the fridge (the burgers shouldn’t come to room temperature before you cook them, they need to be fridge cold) and season them well with salt. Have all your condiments to hand and once the burgers are cooked on one side flip them and put a slice of cheddar on each burger so it melts whilst the other side of the burger cooks. Place a generous dollop of the burger sauce on the bottom of each roll. Top with lettuce and tomato, and a squirt of ketchup. Place the burger on top of the ketchup. Add another dollop of the sauce to the other half of the bread roll and place on top of the burger. Secure with a bamboo skewer and devour whilst hot. Here is a useful link of tips for making and cooking better burgers.

Aug 2, 2012
mustardwithmutton

no comments

Red Wine Lentils

The Puy lentils of France are my favourite lentil.  They retain their shape and bite no matter how long they seem to cook for.  In this recipe red wine and beef stock are the liquids used to cook the lentils and as they reduce down during the cooking time they become a wonderful sticky sauce that coats the lentils beautifully, almost like a demi-glace sauce.  I served this with chicken and caramelised shallots (recipe coming soon).  I made extra lentils and few nights later warmed them through and added a little bit of red wine vinegar, some diced tomatoes and finely chopped chives and it became a wonderful salad to serve along side some fish.

Ingredients – Serves 4 (or 2 with leftovers for another night)

1 cup Puy Lentils
2 tablespoons olive oil
1 red onion finely chopped
1 carrot, peeled and finely diced
2 stalks celery, finely diced
2 cloves of garlic, finely chopped
A few sprigs of fresh thyme
8 mushrooms diced
500ml red wine
1 cup good quality beef stock
Salt and freshly ground pepper
finely chopped parsley

Method

Heat the olive oil in saucepan over medium heat.  Add the onion, carrot, celery, garlic, thyme and a pinch of salt and cook for about 8 minutes or until all the vegetables are softened.

Add the lentils and stir through.  Increase the heat and add the wine and stock.  Bring to the boil and continue to cook at a rapid simmer, with the lid off, until the liquid has reduced by a third.

Lower the heat and cover the pan and continue to cook for 30-40 minutes checking occasionally to make sure the pan hasn’t run dry.  Whilst the lentils are cooking, heat a small frypan with a little olive oil and when hot add the diced mushrooms and cook them until they are soft and golden.  Season with salt and pepper and set aside.

After 30-40 minutes test the lentils, they should be tender but still have a slight bite to them.  At this stage assess whether the liquid in your pan needs to be reduced more – there should only be a few tablespoons of liquid left to coat the lentils.  If there’s more than that, continue to cook over a medium high heat, uncovered, until the liquid in the pan has reduced. Remove the thyme stalks and add the mushrooms along with some finely chopped parsley.  Season with salt and pepper and serve on a warm platter with some extra parsley on top.

Aug 1, 2012
mustardwithmutton

no comments

Balsamic Lamb Cutlets


I’m not a big fan of marinating steaks, I prefer them au natural.  Lamb however, and especially cutlets, benefit from a marinade and this recipe is one that I use often. The Balsamic and red wine tenderised the meat and the hint of honey enhances the lambs natural sweetness.  If it’s not barbecue weather I cook these on a griddle pan inside.

Ingredients – Serves 4

12 lamb cutlets
1/3 cup Balsamic Vinegar
1/4 cup red wine
1 tablespoon honey
Juice of half a lemon
3 cloves of garlic, chopped
leaves form 3 sprigs of rosemary, roughly chopped
Salt and freshly ground pepper

Method

Sprinkle the lamb cutlets with salt and pepper.  Combine the rest of the ingredients in a container that will hold the lamb cutlets comfortably and mix well, making sure the honey is dissolved.  Add the lamb to the marinade and toss to coat each side well.

Marinade the lamb for as long as you can, anything from 30 minutes to overnight.  Bring the lamb cutlets to room temperature and barbecue or cook on an indoor griddle pan for about 3 minutes per side for medium, spooning some of the marinade over the cutlets as they cook.

Jul 31, 2012
mustardwithmutton

no comments

Garlic, Rosemary & Parmesan Pizza

I’m constantly looking for good garlic bread recipes.  I’ve tried many different ones, from baguettes to pull apart loaves to sliced ciabatta, with cheese or without, olive oil versus butter etc etc .  This garlic pizza bread which I made recently was really good and probably the garlic bread I’ll revert to going forward.  If you have the time it’s even better when you make your own dough but I was a little rushed the other day and just used a store bought pizza base and it was great.  If you’ve got the barbecue fired up then putting this on the grill is the best way to cook it.  A few minutes to crisp up the base then put the lid down for another couple of minutes to melt the cheese and it’ll taste like it’s come out of a wood fire oven.  Otherwise just put your oven on it’s highest setting and bake for 8-10 minutes, depending on how hot your oven gets.

Ingredients

1 Pizza base – home made or store bought
3 cloves of garlic crushed in a garlic press (more if you like it really strong)
100ml good quality olive oil
A small pinch of chilli flakes
Sea Salt
Leaves form 2-3 sprigs of rosemary
1/2 cup of grated Parmesan

Method

Put a small saucepan over low heat and add the olive oil, garlic, chilli, and rosemary.  Gently heat the oil until it’s just warm then turn off the heat and let it sit to infuse for 10 minutes or more.  Using a spoon generously cover the base of the pizza base with the oil mixture being sure to spoon on the garlic and rosemary and spread it around evenly.  You may have some mixture left over and this can keep in the fridge for weeks. Sprinkle the base with some seas salt and cover with Parmesan.

Either grill on the barbecue (see note above) or put into a preheated hot oven for as long as it take for the base to get crispy and the parmesan to melt.  On 220C this should take about 8-10 minutes.

Jul 31, 2012
mustardwithmutton

15 comments

Linguine with Creamy Prawn & Garlic Sauce

Prawns, garlic and cream are a heavenly combination.  This pasta is one of my favourites but maybe not something to indulge in every day. It’s rich and delicious and just the thing for a cold night when you don’t have much time to get dinner on the table but want something super tasty.

Ingredients – Serves 2-3

250g Linguine
1/4 cup olive oil
6-7 prawns per person, shelled and deveined
6 cloves of garlic, pressed in a garlic press
1 long red chilli, deseeded and finely chopped (keep the seeds if you want it more spicy)
1/4 cup white wine
300ml single cream
A handful of freshly grated Parmesan
1 bunch of chives finely chopped
Salt

Method

Heat the olive oil in a skillet or frypan and add the garlic, chilli and a pinch of salt. Sauté over medium low heat until the garlic is fragrant and softened but be careful not to get any colour on it.  Increase the heat and add the prawns. Sauté for a minute or two, turning the prawns occasionally, until they have changed colour. Add the wine and simmer for a couple of minutes to reduce slightly.  Add the cream and some more salt and continue to cook until the cream has thickened.  This should take about 8-10 minutes.


Whilst the sauce is thickening bring a large pan of well salted water to the boil and cook the linguine until al dente and drain reserving a half cup of the pasta cooking water. Once the sauce has thickened take it off the heat and add the Parmesan and chives.  Add the drained pasta to the sauce and toss to coat the pasta.  If it looks like the pasta has absorbed all the sauce add a little of the pasta cooking water to the skillet and toss again.

Jul 30, 2012
mustardwithmutton

no comments

S’Mores Pie – Chocolate & Marshmallow Goodness

S’Mores are a classic American campfire tradition.  Chocolate and marshmallow are wedged between Graham Cracker biscuits and held over the fire until melted and gooey.  Sounds great and incorporating that concept into a pie is even better.  This pie is rich so small slices are called for. The best way to cut it is when it’s very cold and with a greased knife but once sliced the pie tastes best when heated up in the microwave for about 10 seconds – eating it cold doesn’t really capture the campfire s’more taste.

Ingredients – Adapted from How Sweet It Is

2 cups Graham Crackers crumbs (I used Digestive Biscuits)
100g butter, melted
1 cup cream
1/2 cup milk
300g good quality cooking chocolate chopped (you can use milk or dark, whatever you prefer)
2 eggs, lightly beaten
1 bag marshmallows

Method

Preheat oven to 160C.  Mix biscuit crumbs and melted butter together until well combined and press into a 9 inch pie dish.  Bake in the oven for 10 minutes and remove. For the filling, heat the cream and milk in a saucepan until just below simmering point. Take off the heat and add chocolate and stir until mixture is smooth and chocolate has melted. Slowly stir in the beaten eggs.  Pour the mixture into the pie dish and bake for 30 – 35 minutes until the centre of the pie wiggles only  slightly when moved.  It might be best to keep checking it after 20 minutes but in my oven it took about 35 minutes.

Remove the pie from the oven and allow it to cool for 10 minutes then top it with a single layer of marshmallows.  Using a kitchen blow torch carefully singe the marshmallows, it will only takes seconds and some of mine came out darker than I would have liked.  Alternatively heat the grill in your oven to high and grill for a few minutes, again keeping a constant eye on it.  Place the pie in the fridge to chill for 3-4 hours.  To serve grease a sharp knife to slice and then heat in the microwave for about 10 seconds until just warm.