Apr 23, 2013
mustardwithmutton

no comments

Chicken Chow Mein

Chicken Chow Mein
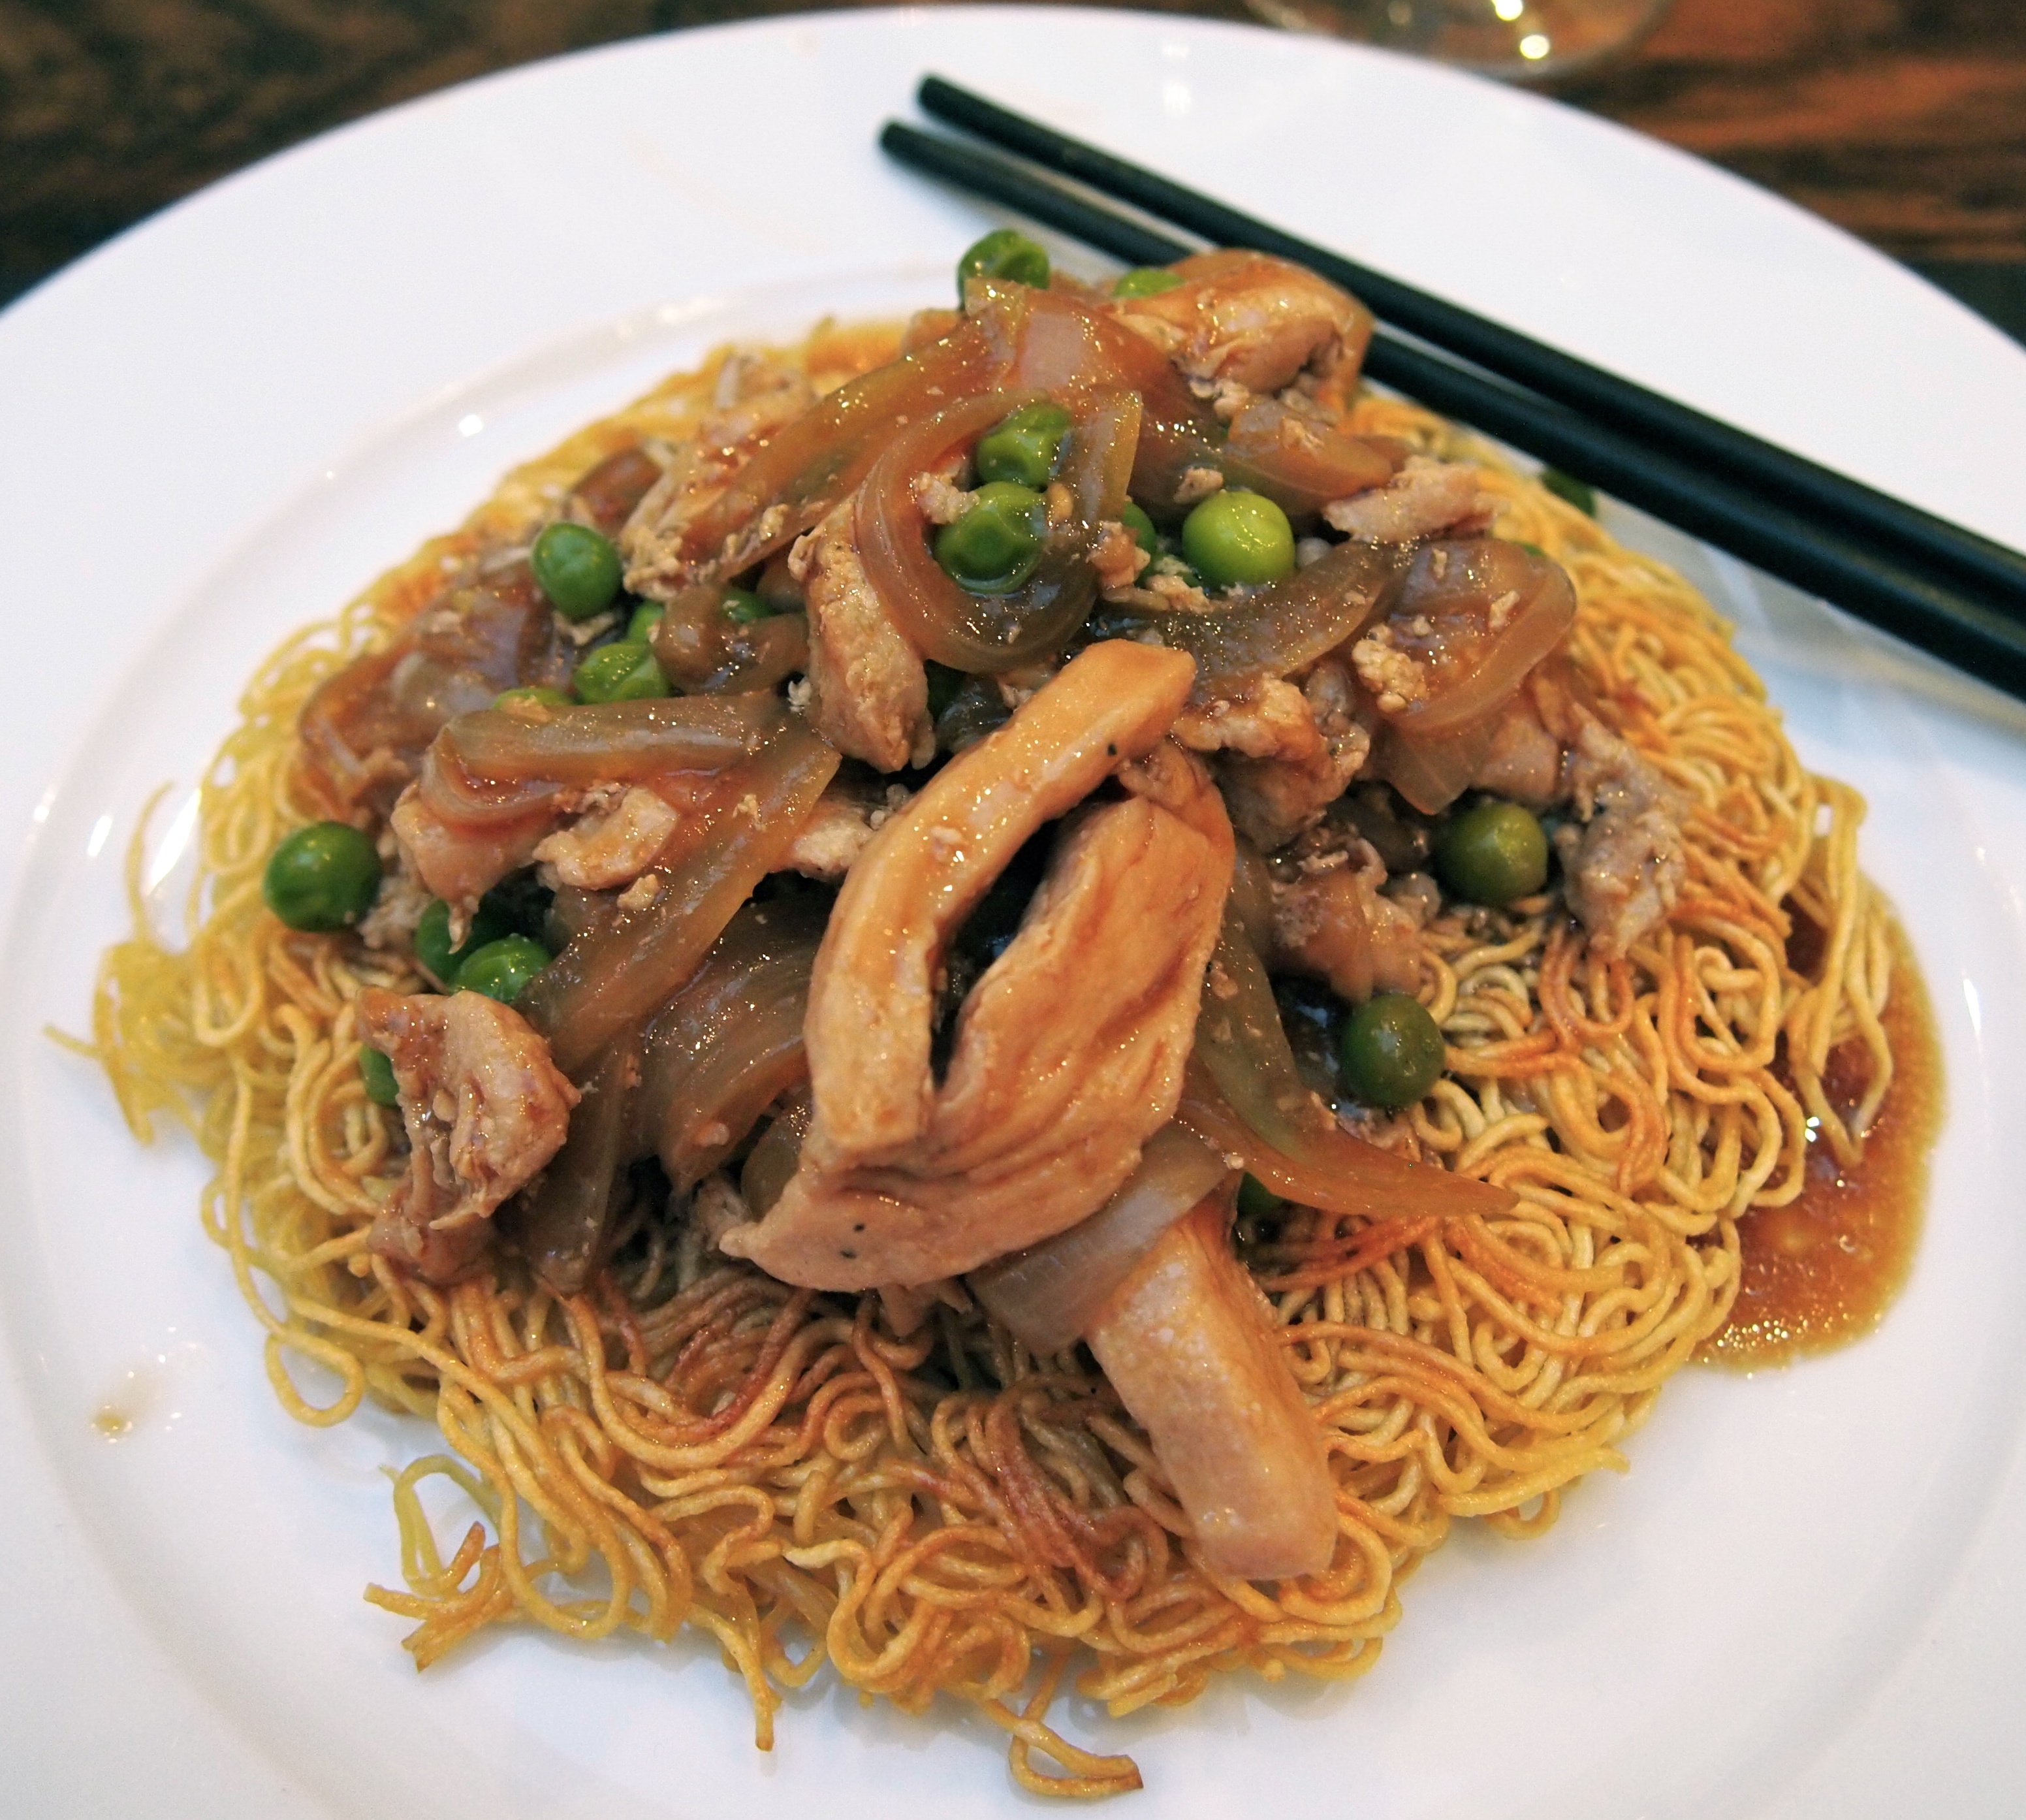
When I was growing up in the northern suburbs of Sydney, Asian grocers and ingredients were hard to come by outside of China Town. Sure most neighbourhoods had the obligatory Chinese restaurant but finding the raw materials wasn’t so easy and that Asian ingredient aisle in the supermarket just didn’t exist. One day a new store opened in our local shopping centre. It was packed to the brim with exotic Chinese and Asian ingredients including a large fridge with the most amazing array of fresh noodles and dumplings. It was my new favourite store! On one shelf there was a small selection of Chinese cook books and my mother chose one to purchase. I still remember the cover of a smiling Chinese lady with large bouffant hair standing by a rice cooker. The book  had no illustrations but every dish sounded amazing. The first recipe my mother recreated was this Chicken Chow Mein and now, many many years later, we still cook and love this dish. This is one of the few recipes we haven’t tweaked or changed from the original in any way and that’s saying a lot for a recipe we’ve been cooking for over 30 years. Knowing what I do now about Chinese cuisine it’s good to know that this recipe is actually quite authentic. Chow Mein dishes have been hugely modified over the years but this is pretty much true to its original roots. Don’t be fooled by the short list of ingredients – all the flavour you could wish for will be there. This recipe is quick and easy to prepare which makes it a great meal for mid-week. The only slightly fiddly element is the frying of the noodles, but I always make the sauce and boil the noodles first then 20 minutes before we want to eat I start frying the noodles – it’s shallow frying too so no deep frying to contend with. Unfortunately I’m not sure what happened to that cook book and I can’t remember the name or the author to give credit but I wish I could lay my hands on it now as I’m sure it would contain a treasure trove of other great recipes.

Ingredients – Serves 2 generously and leftovers heat up well 

2 large or 3 small chicken breast fillets, shredded into thin 1cm sliced
2 teaspoons light soy sauce
¼ teaspoon black pepper
2 large pinches sugar
2 egg whites
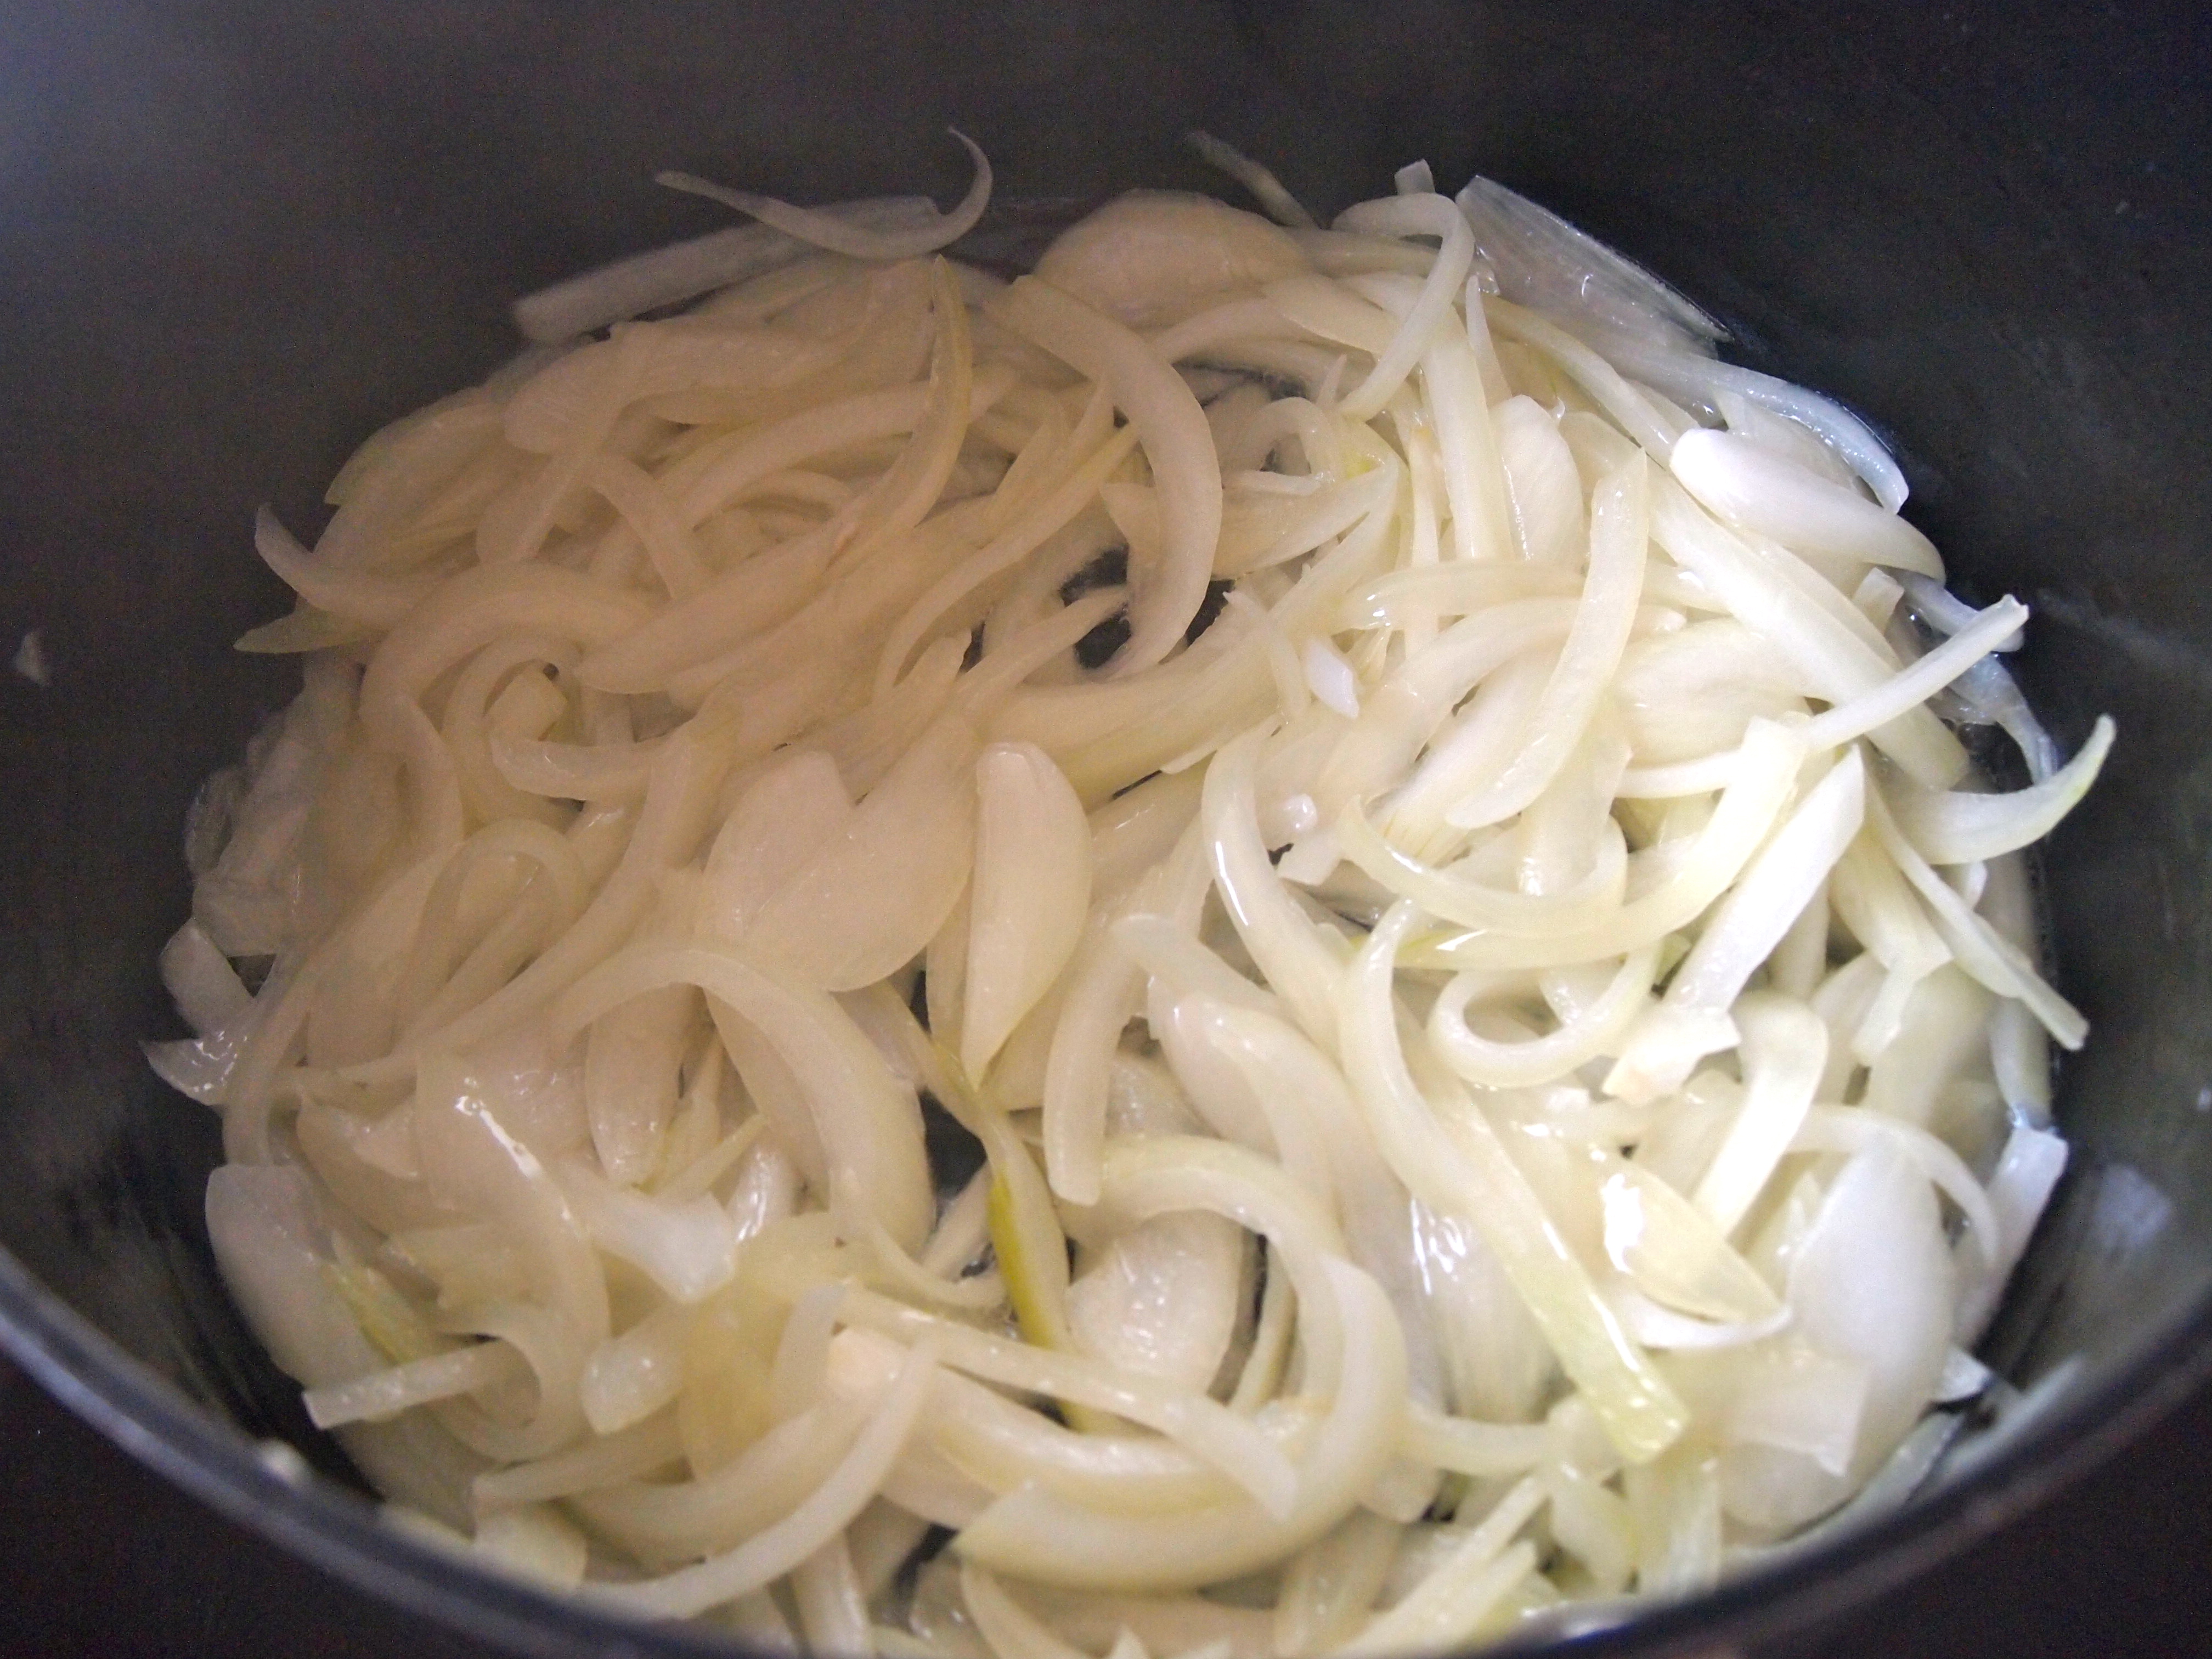
2 large onions, peeled, cut in half and cut into thin slices (not too thin)
Vegetable oil – peanut or rice bran oil
1 teaspoon salt
2 cloves of garlic, finely minced or crushed with garlic press
1 cup water
3 teaspoons corn flour
1 teaspoon salt, extra
2 teaspoons dark soy sauce
1 teaspoon sesame oil
1 cup frozen peas
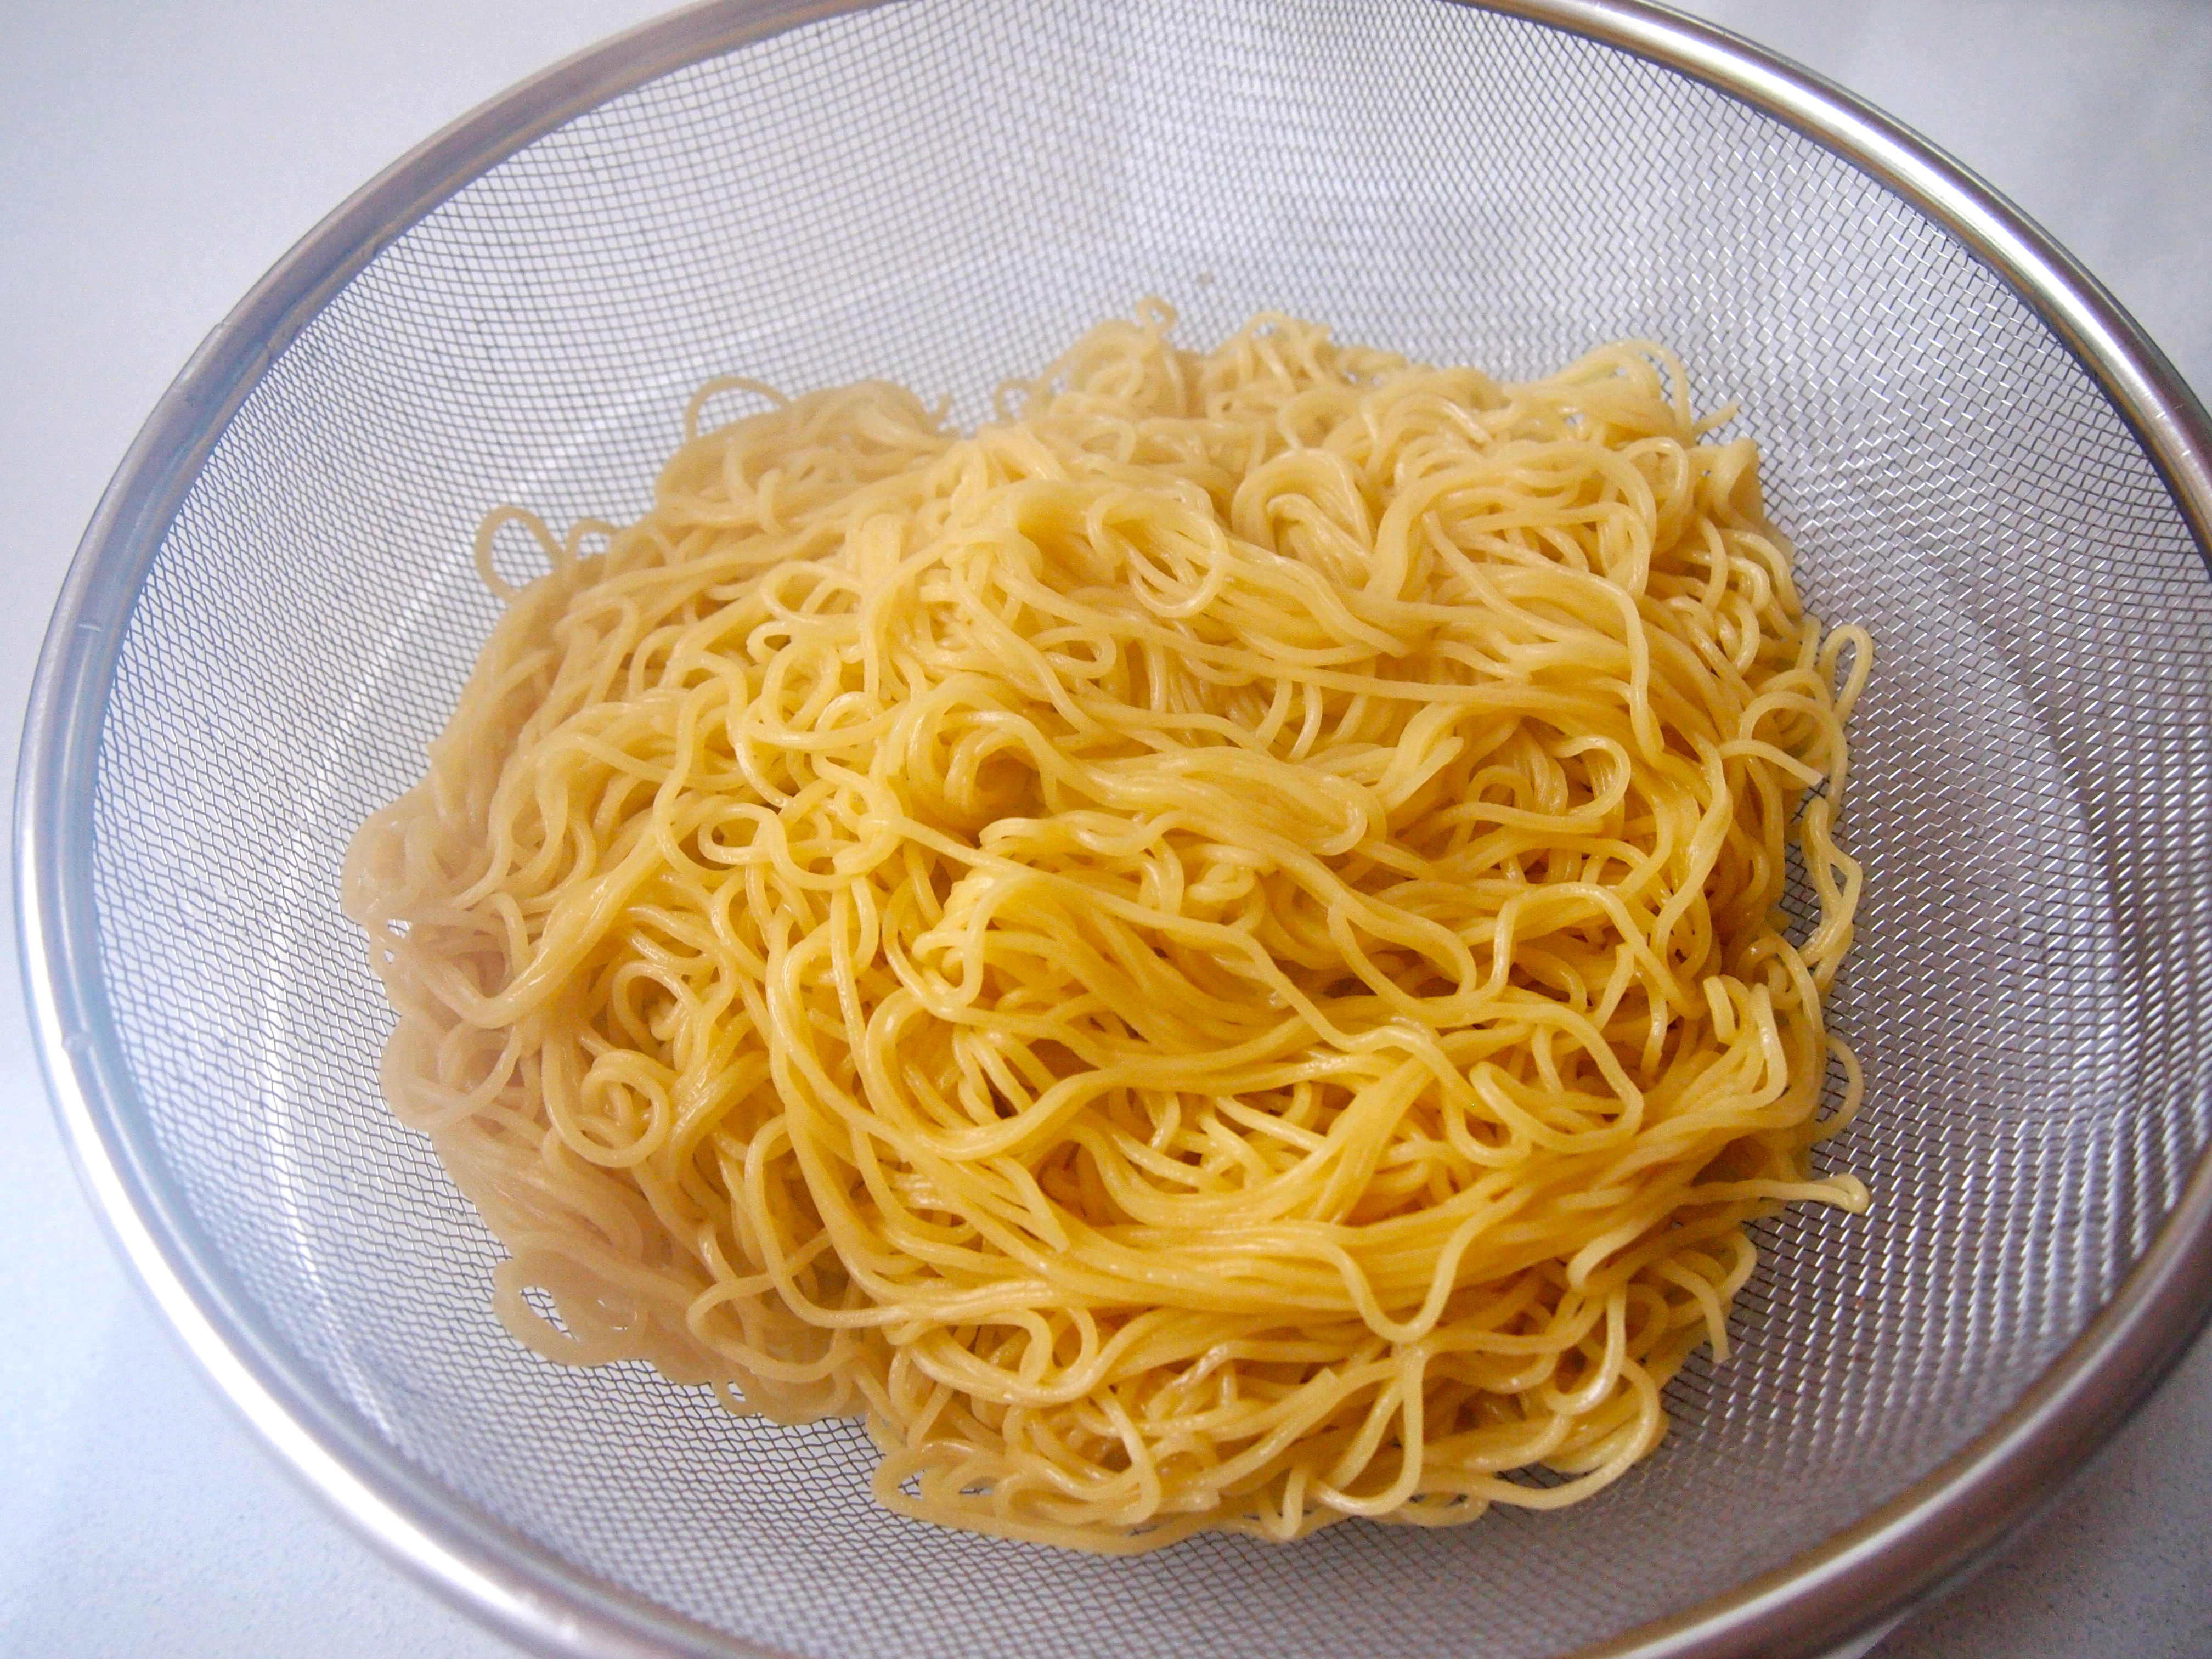
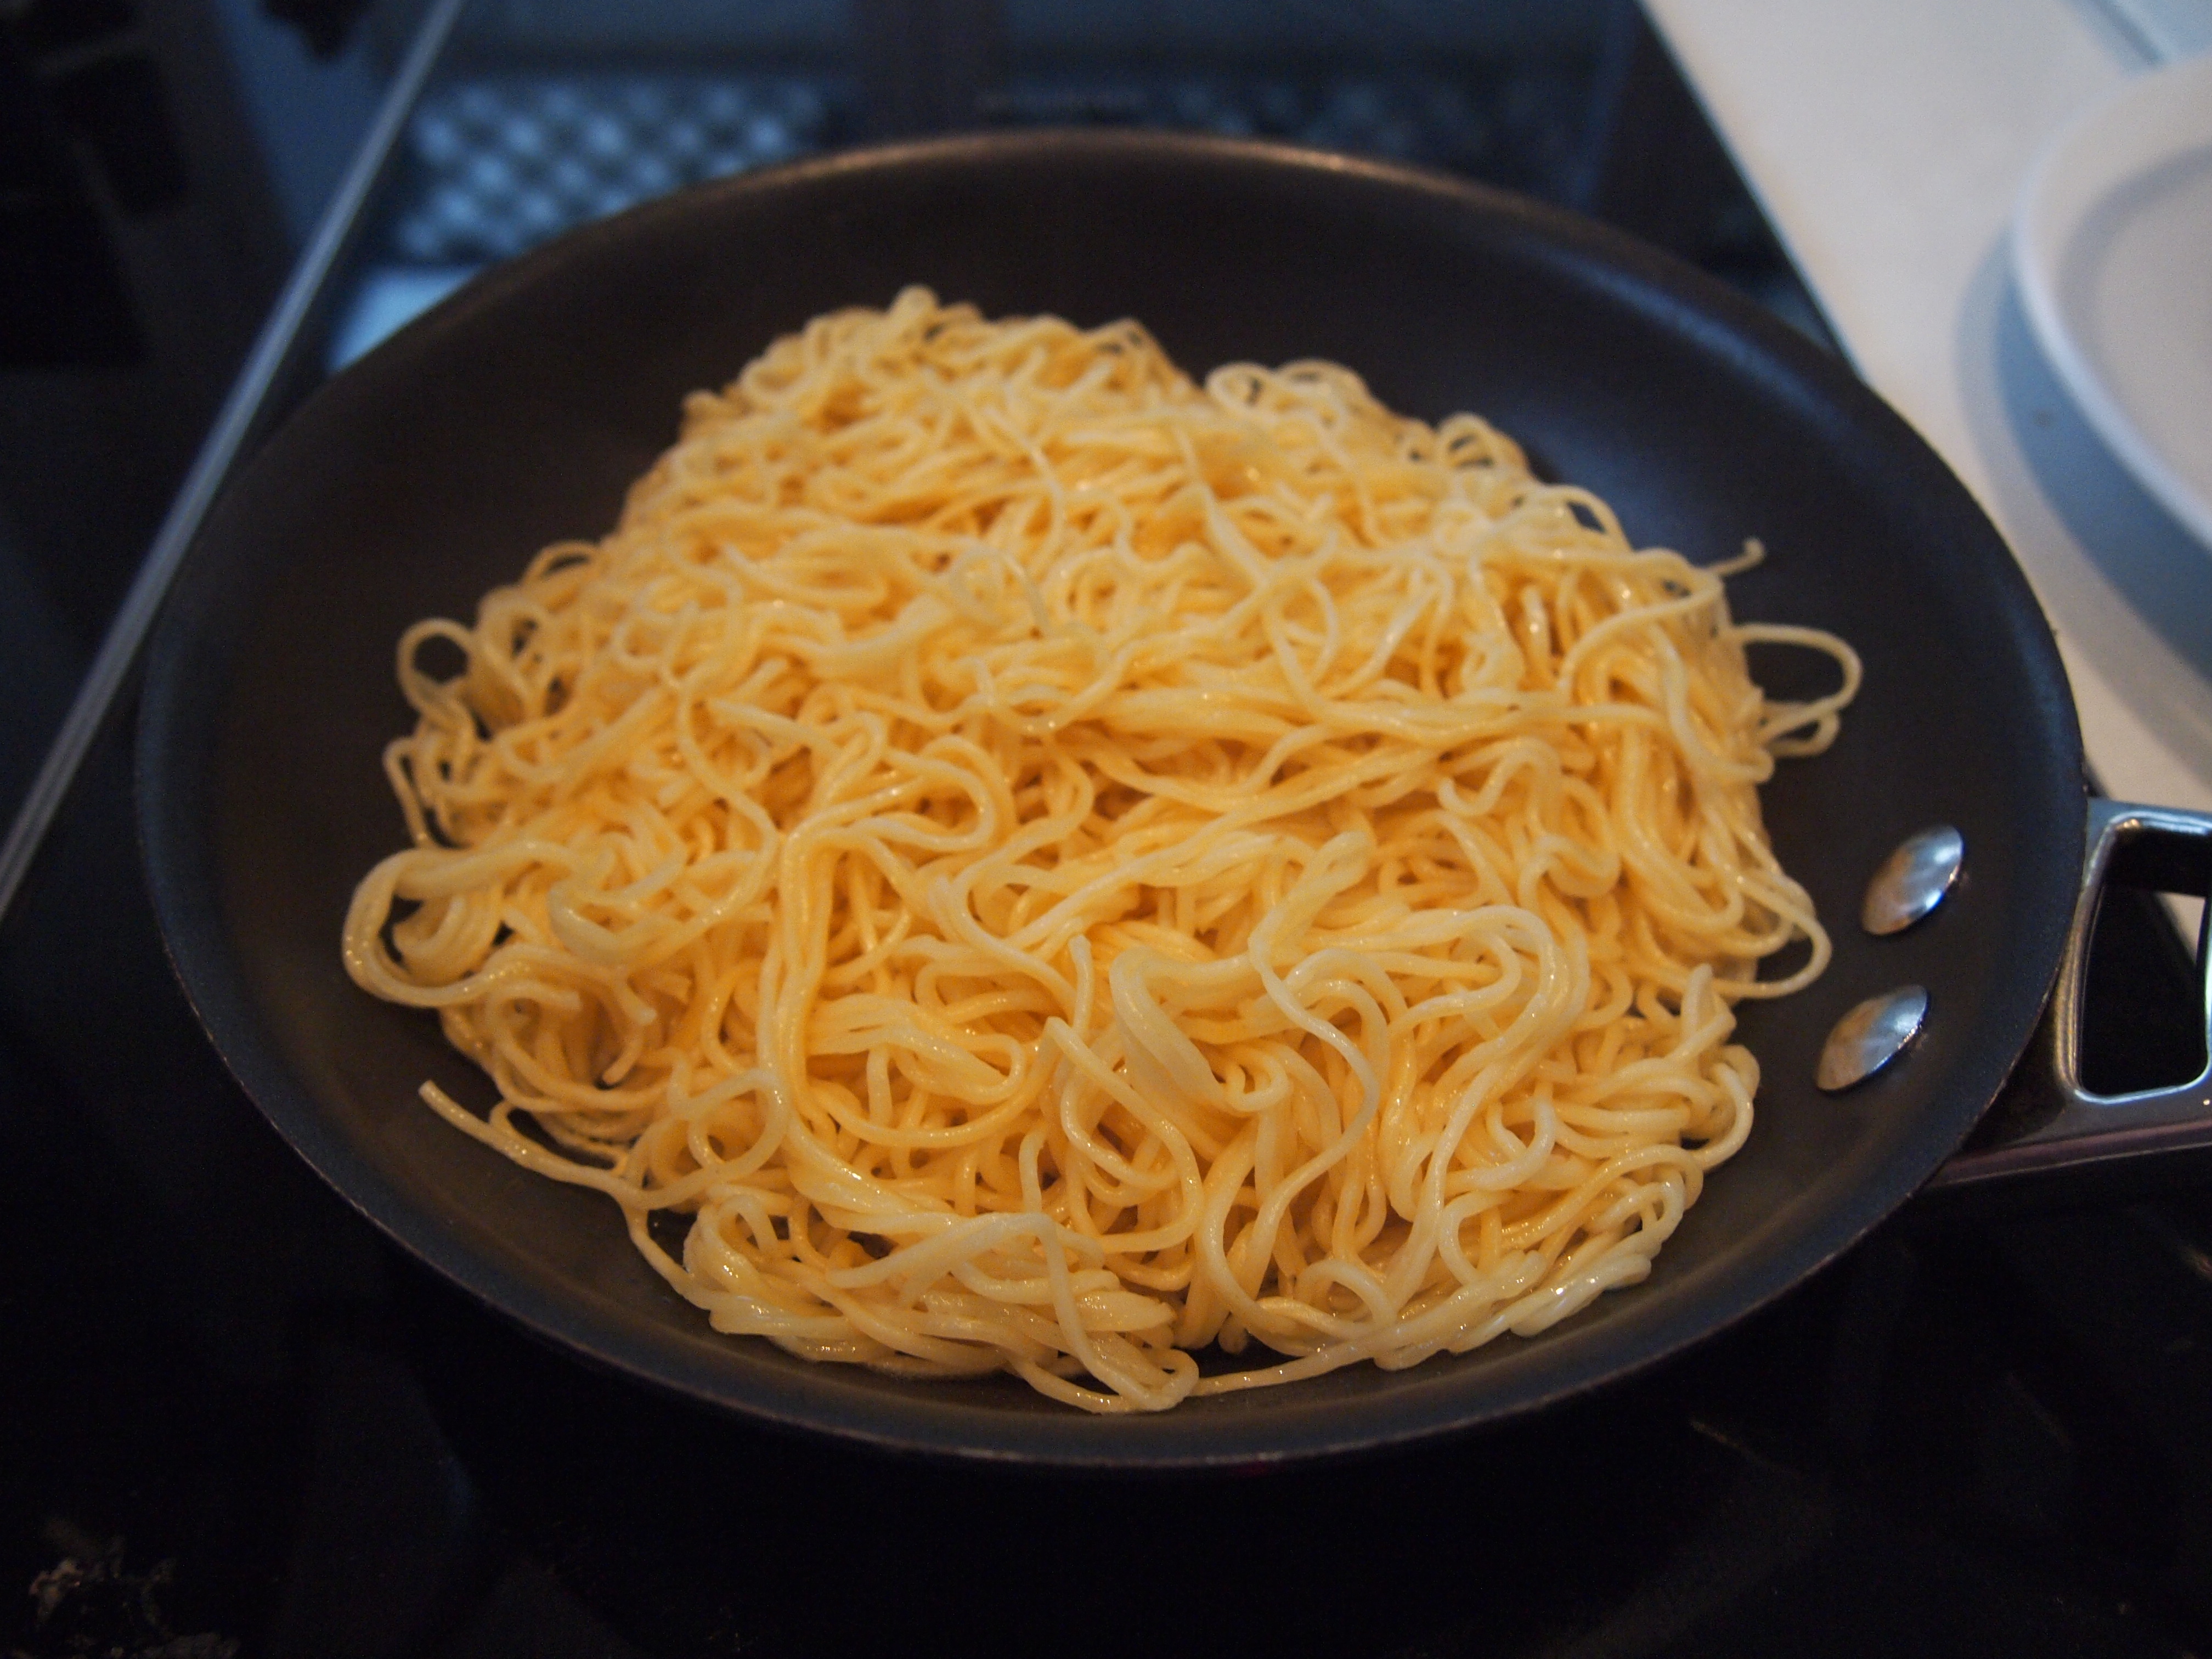
400g fresh thin egg noodles

Method

Drop the noodles into salted boiling water, loosen and cook for a few minutes until just done. Drain and rinse with cold water then set aside to cool. In a bowl whisk together the light soy, pepper, sugar and egg whites; add the chicken and marinate for 10 minutes

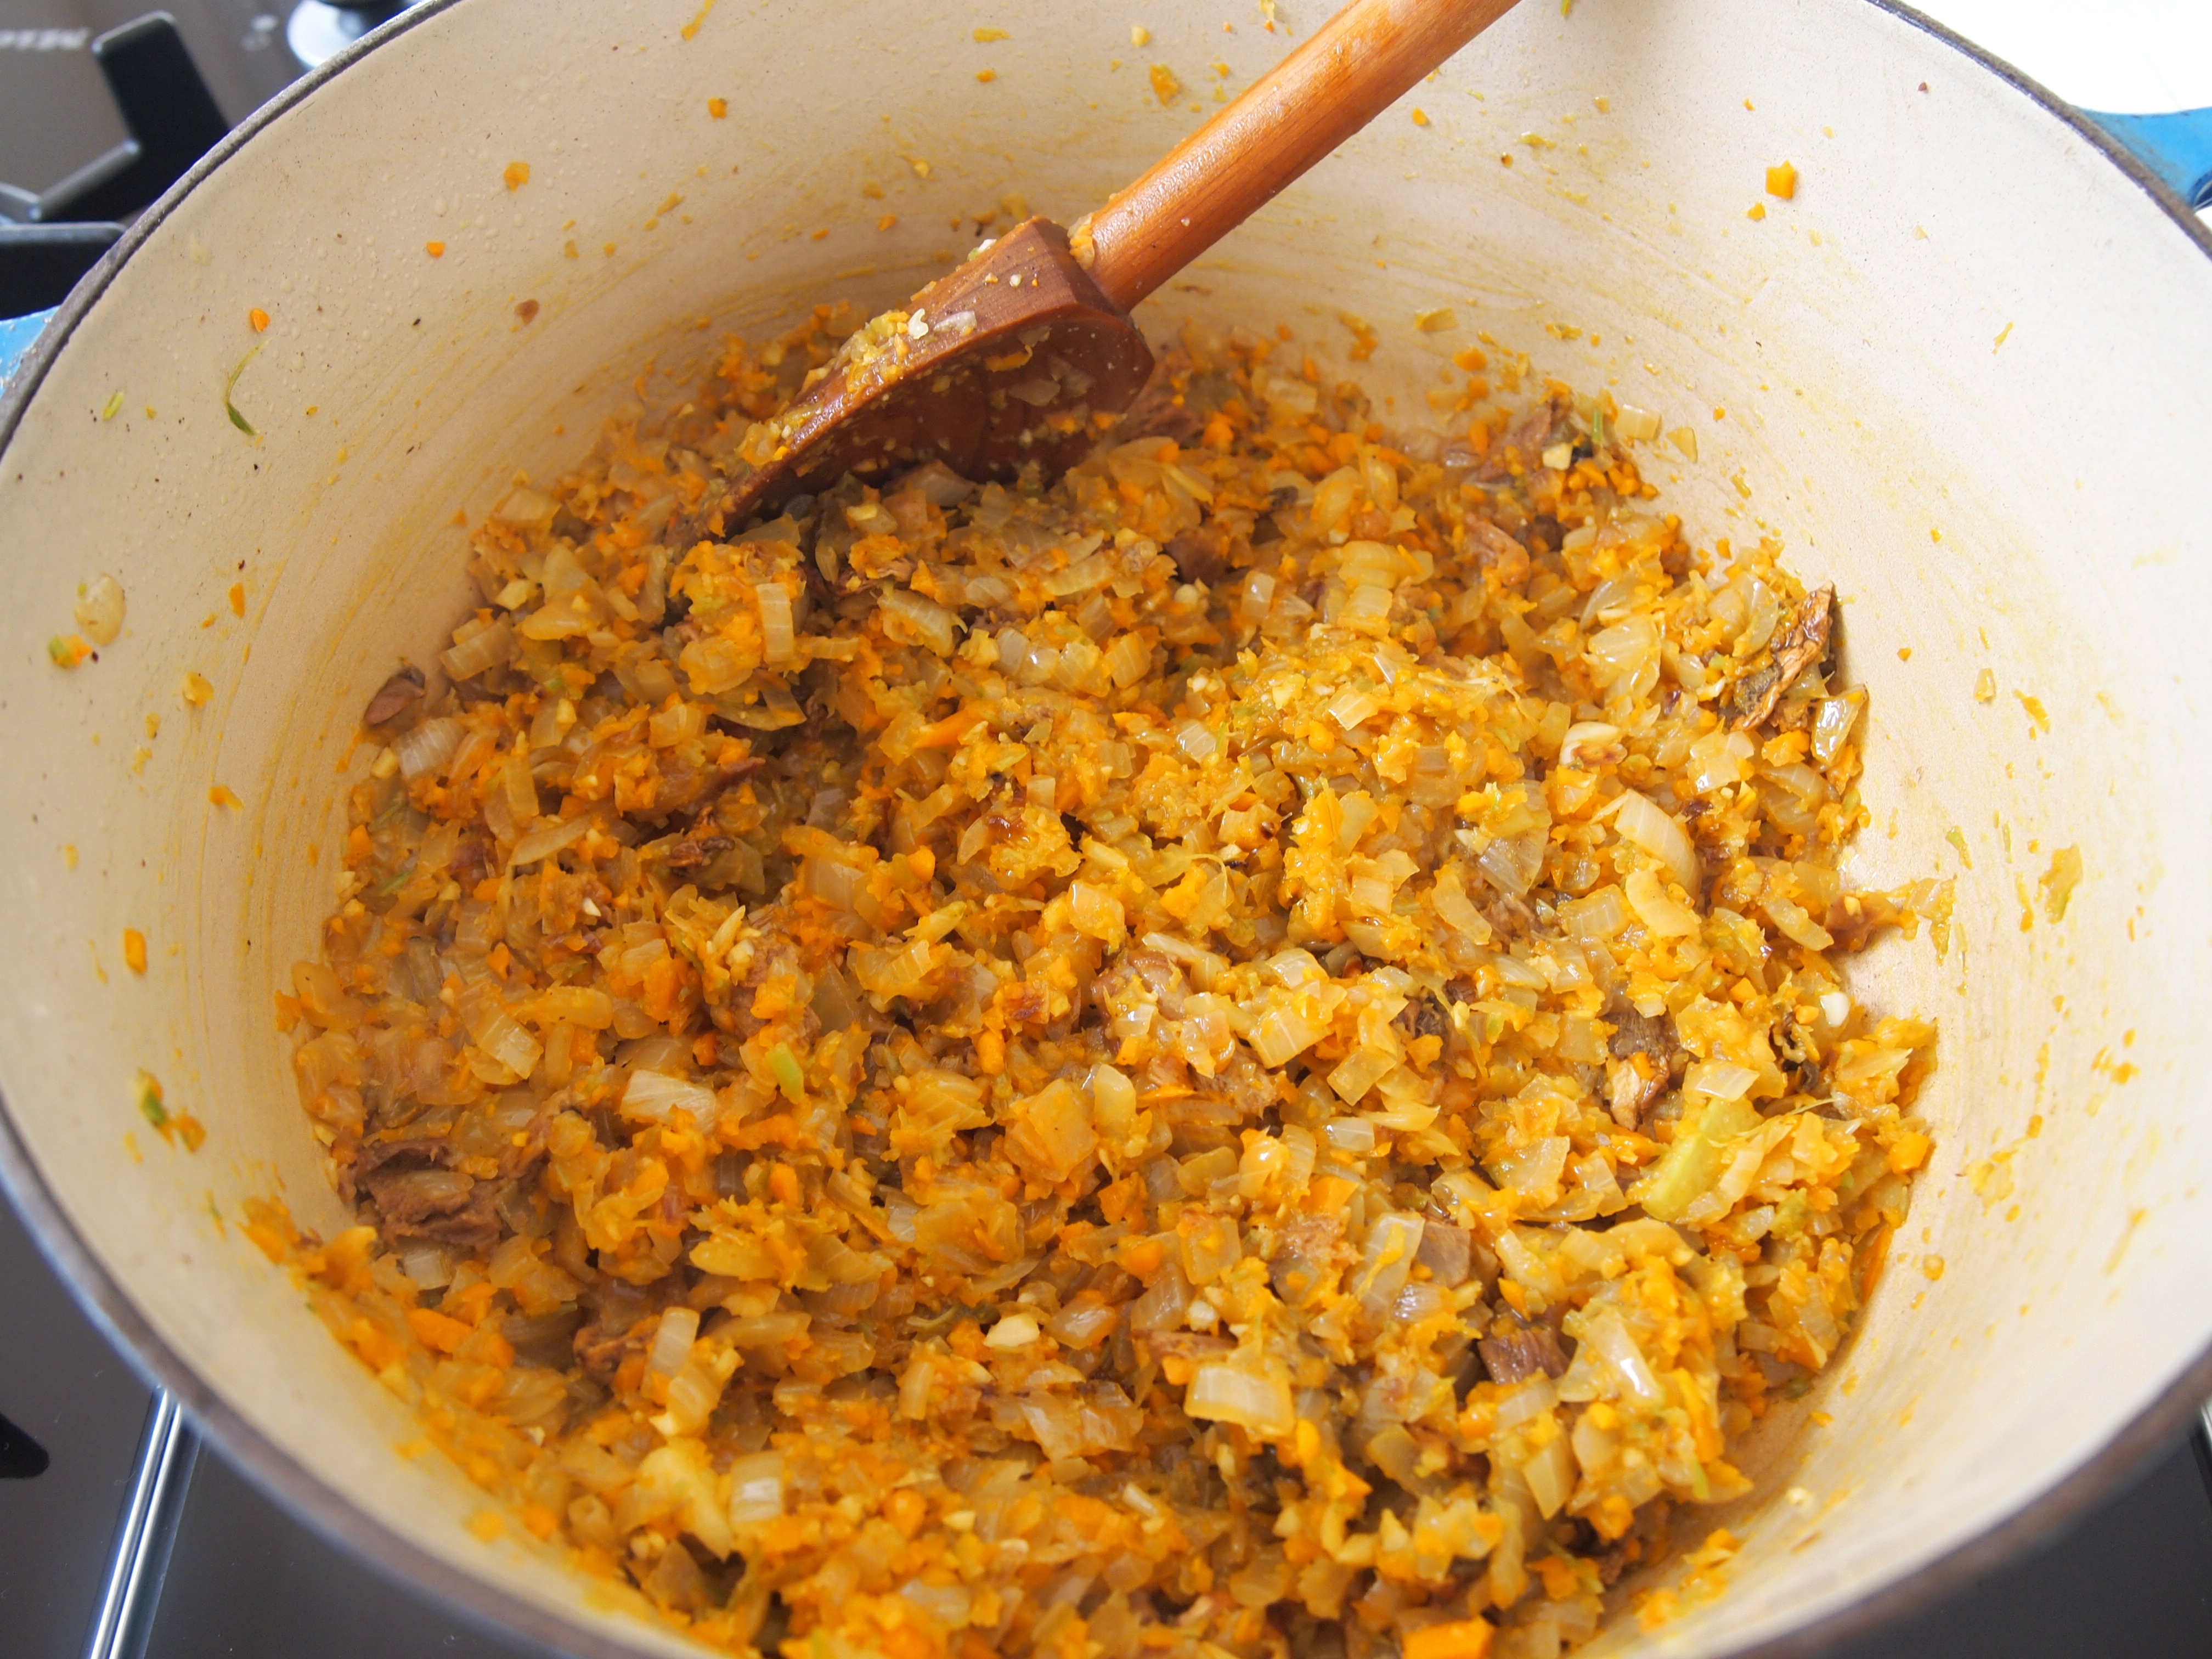
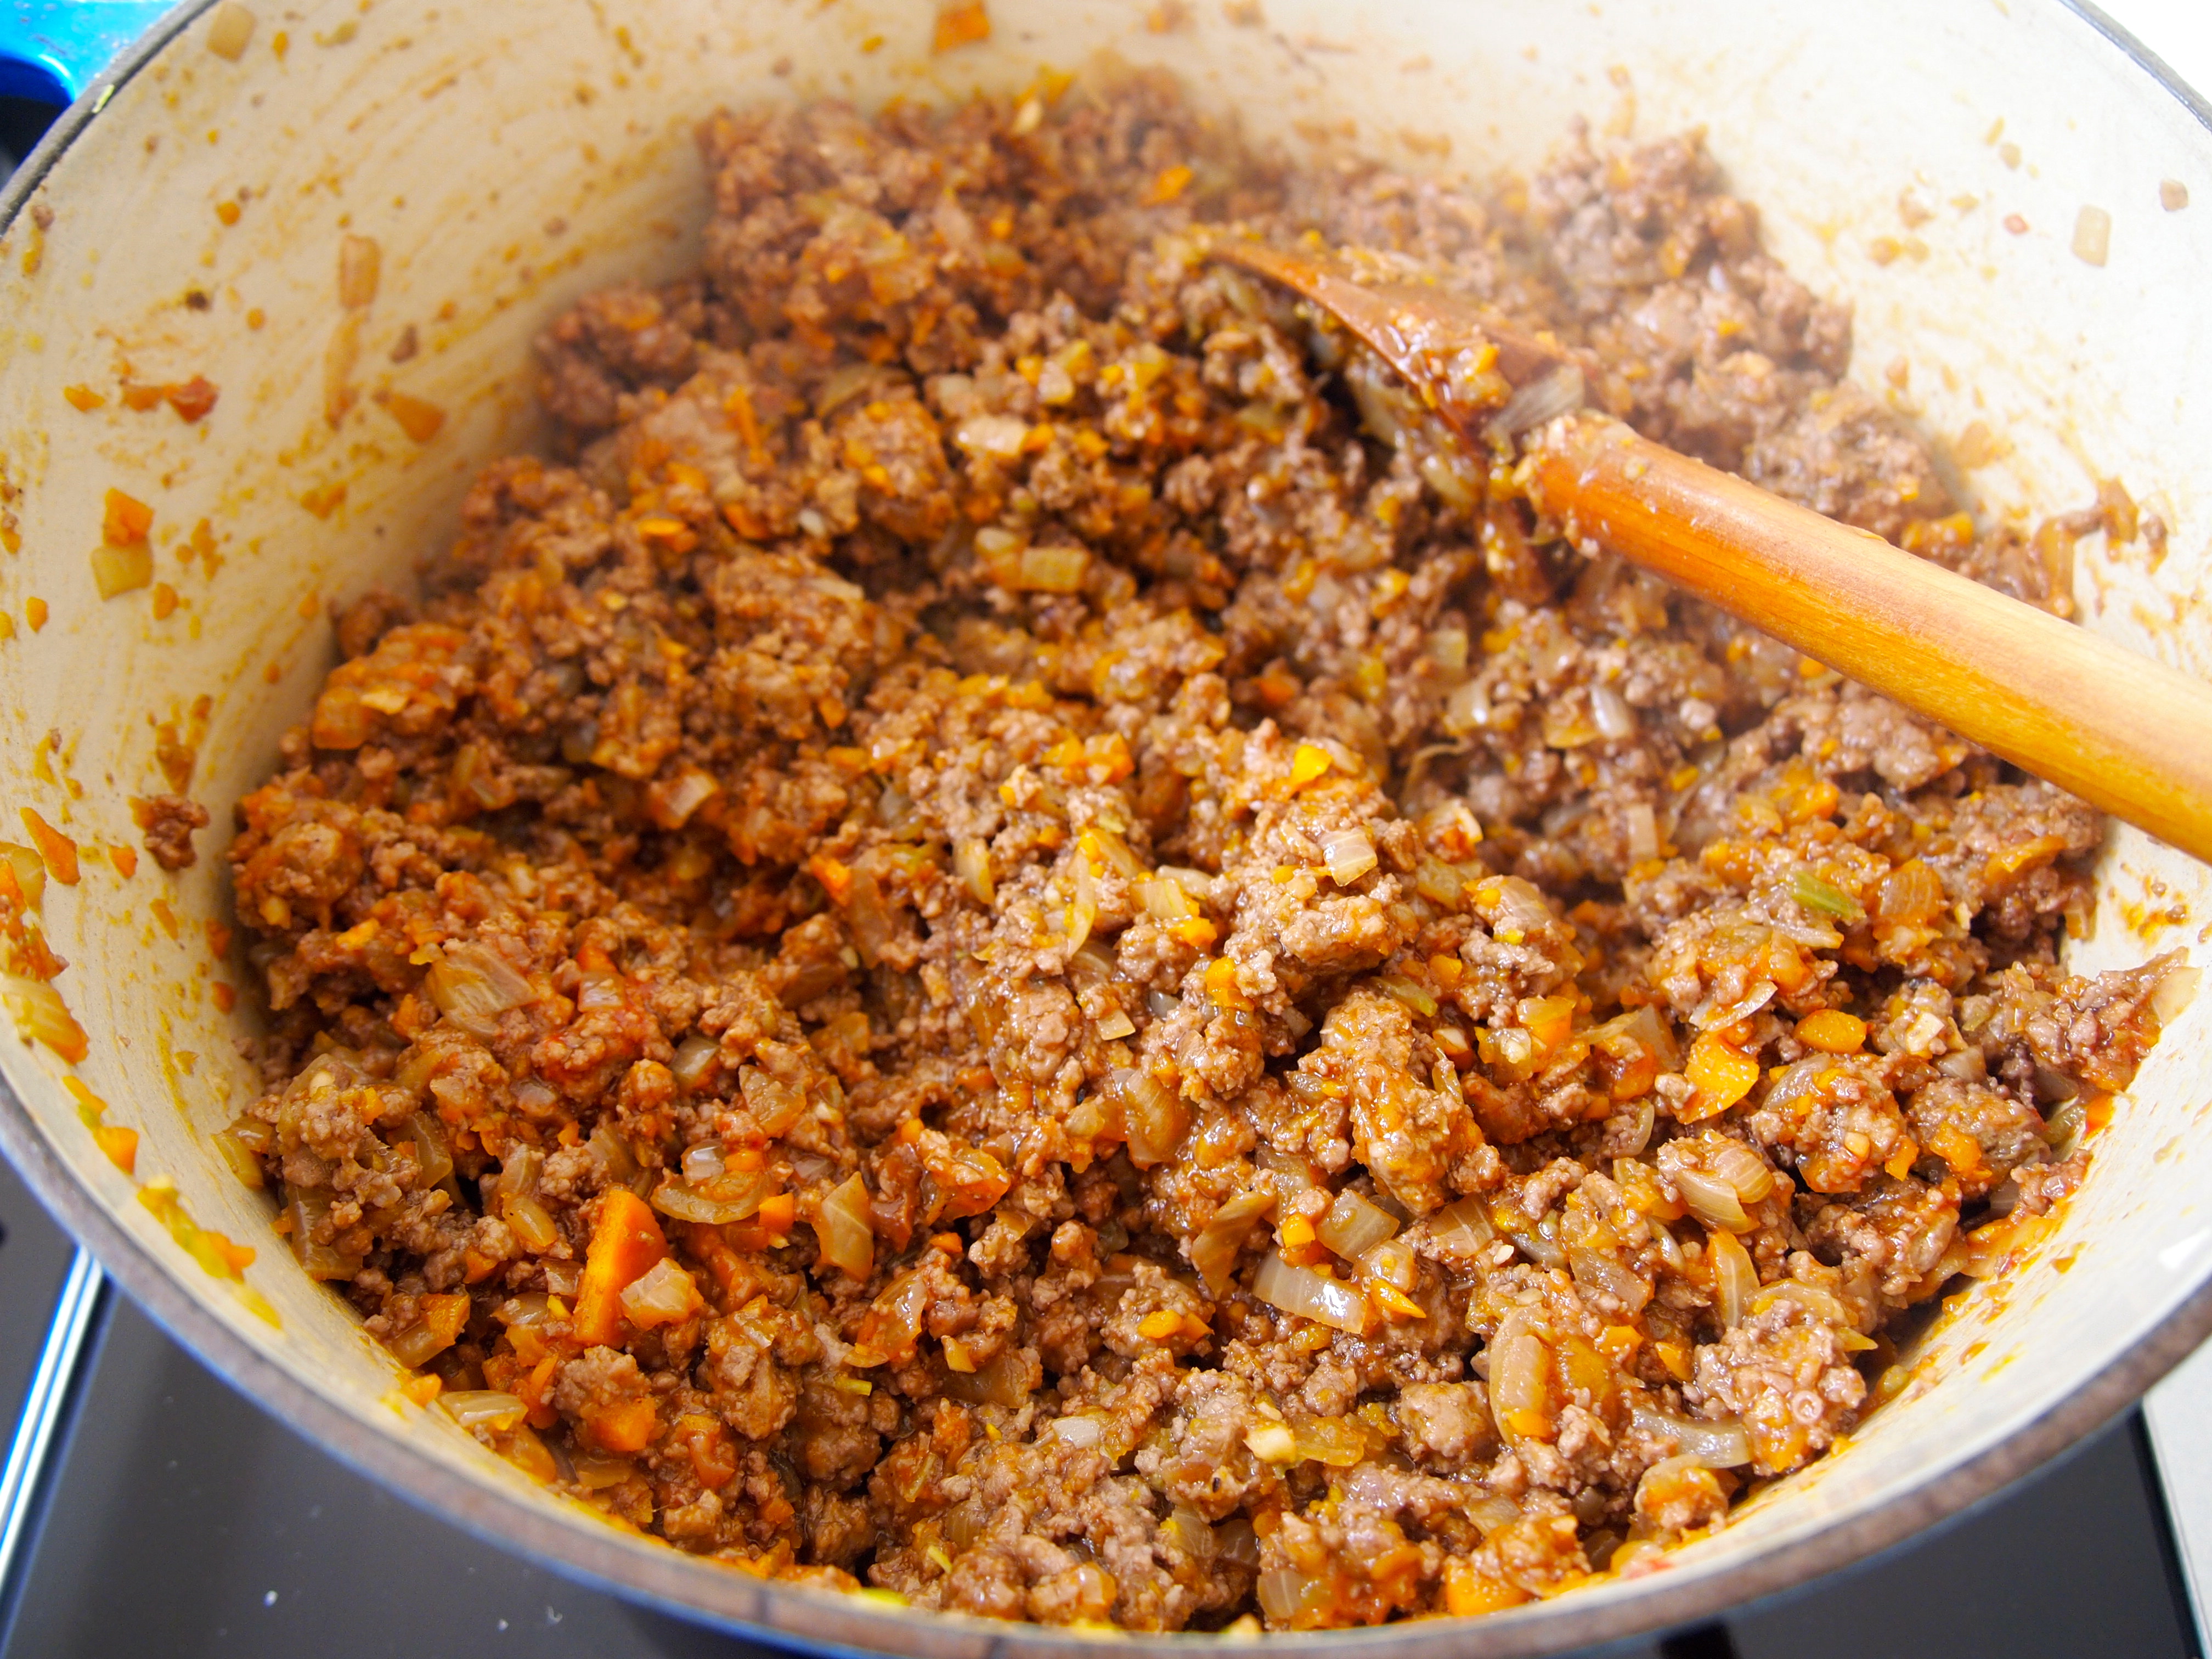
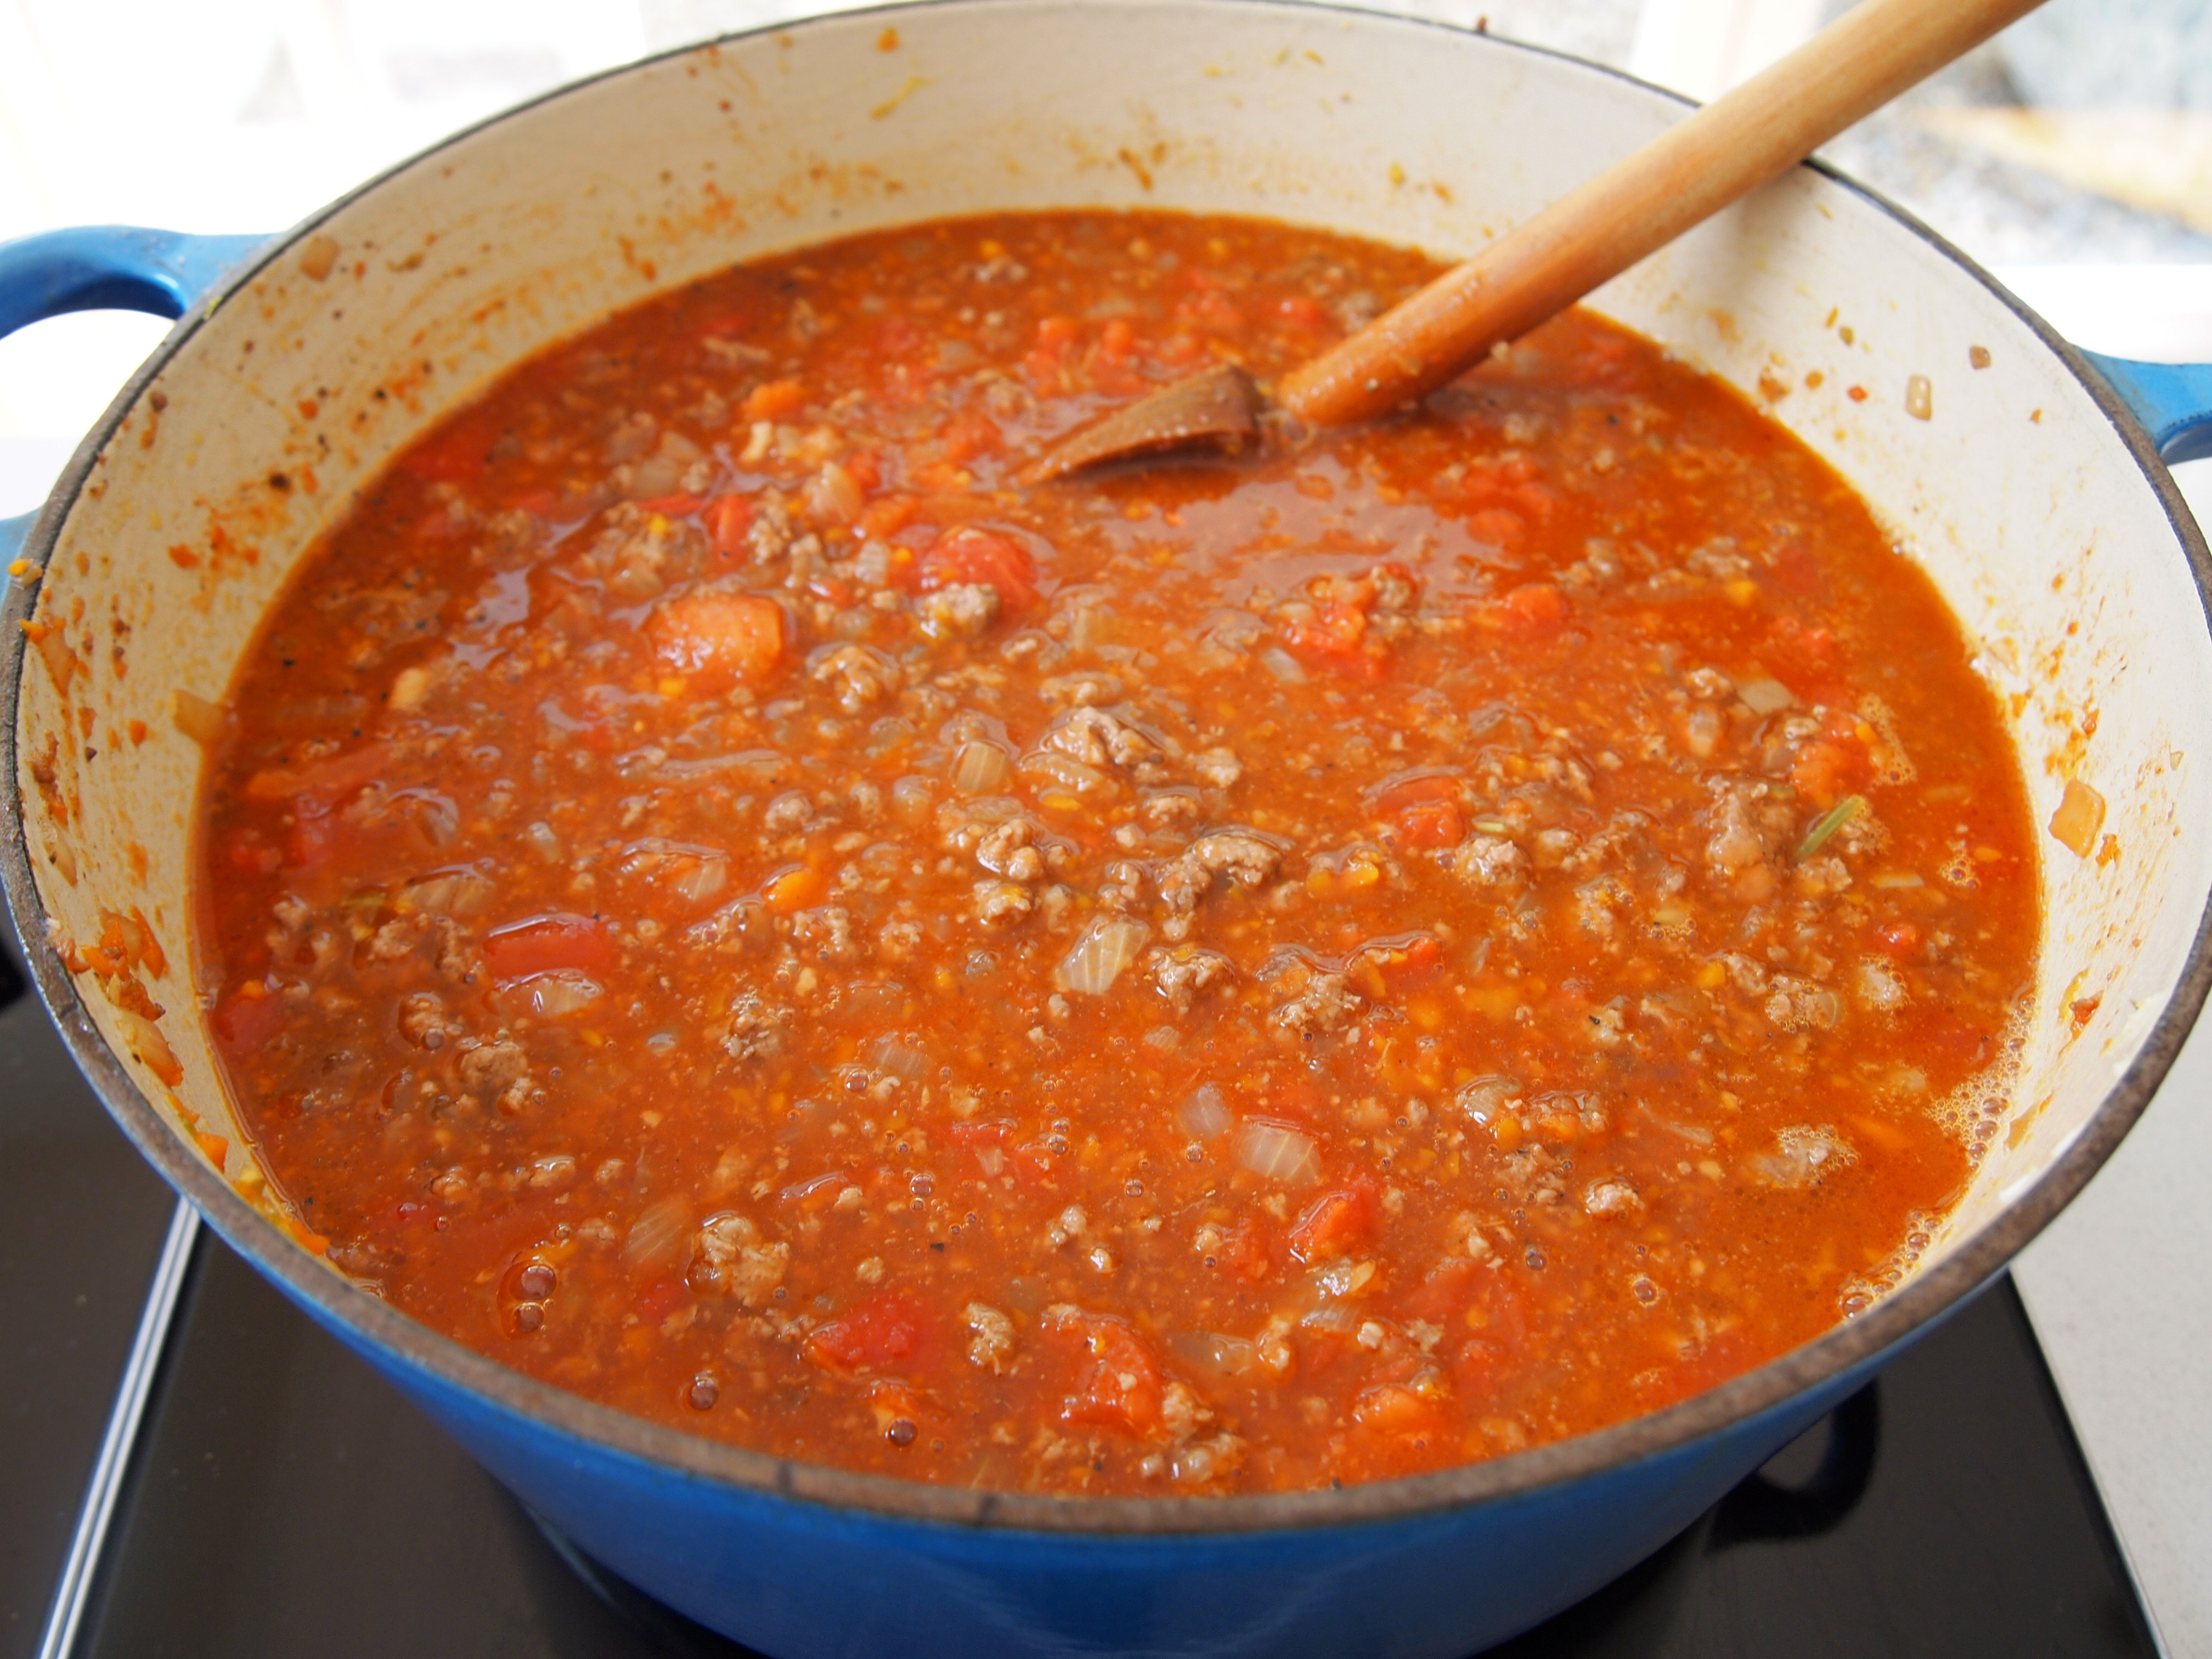
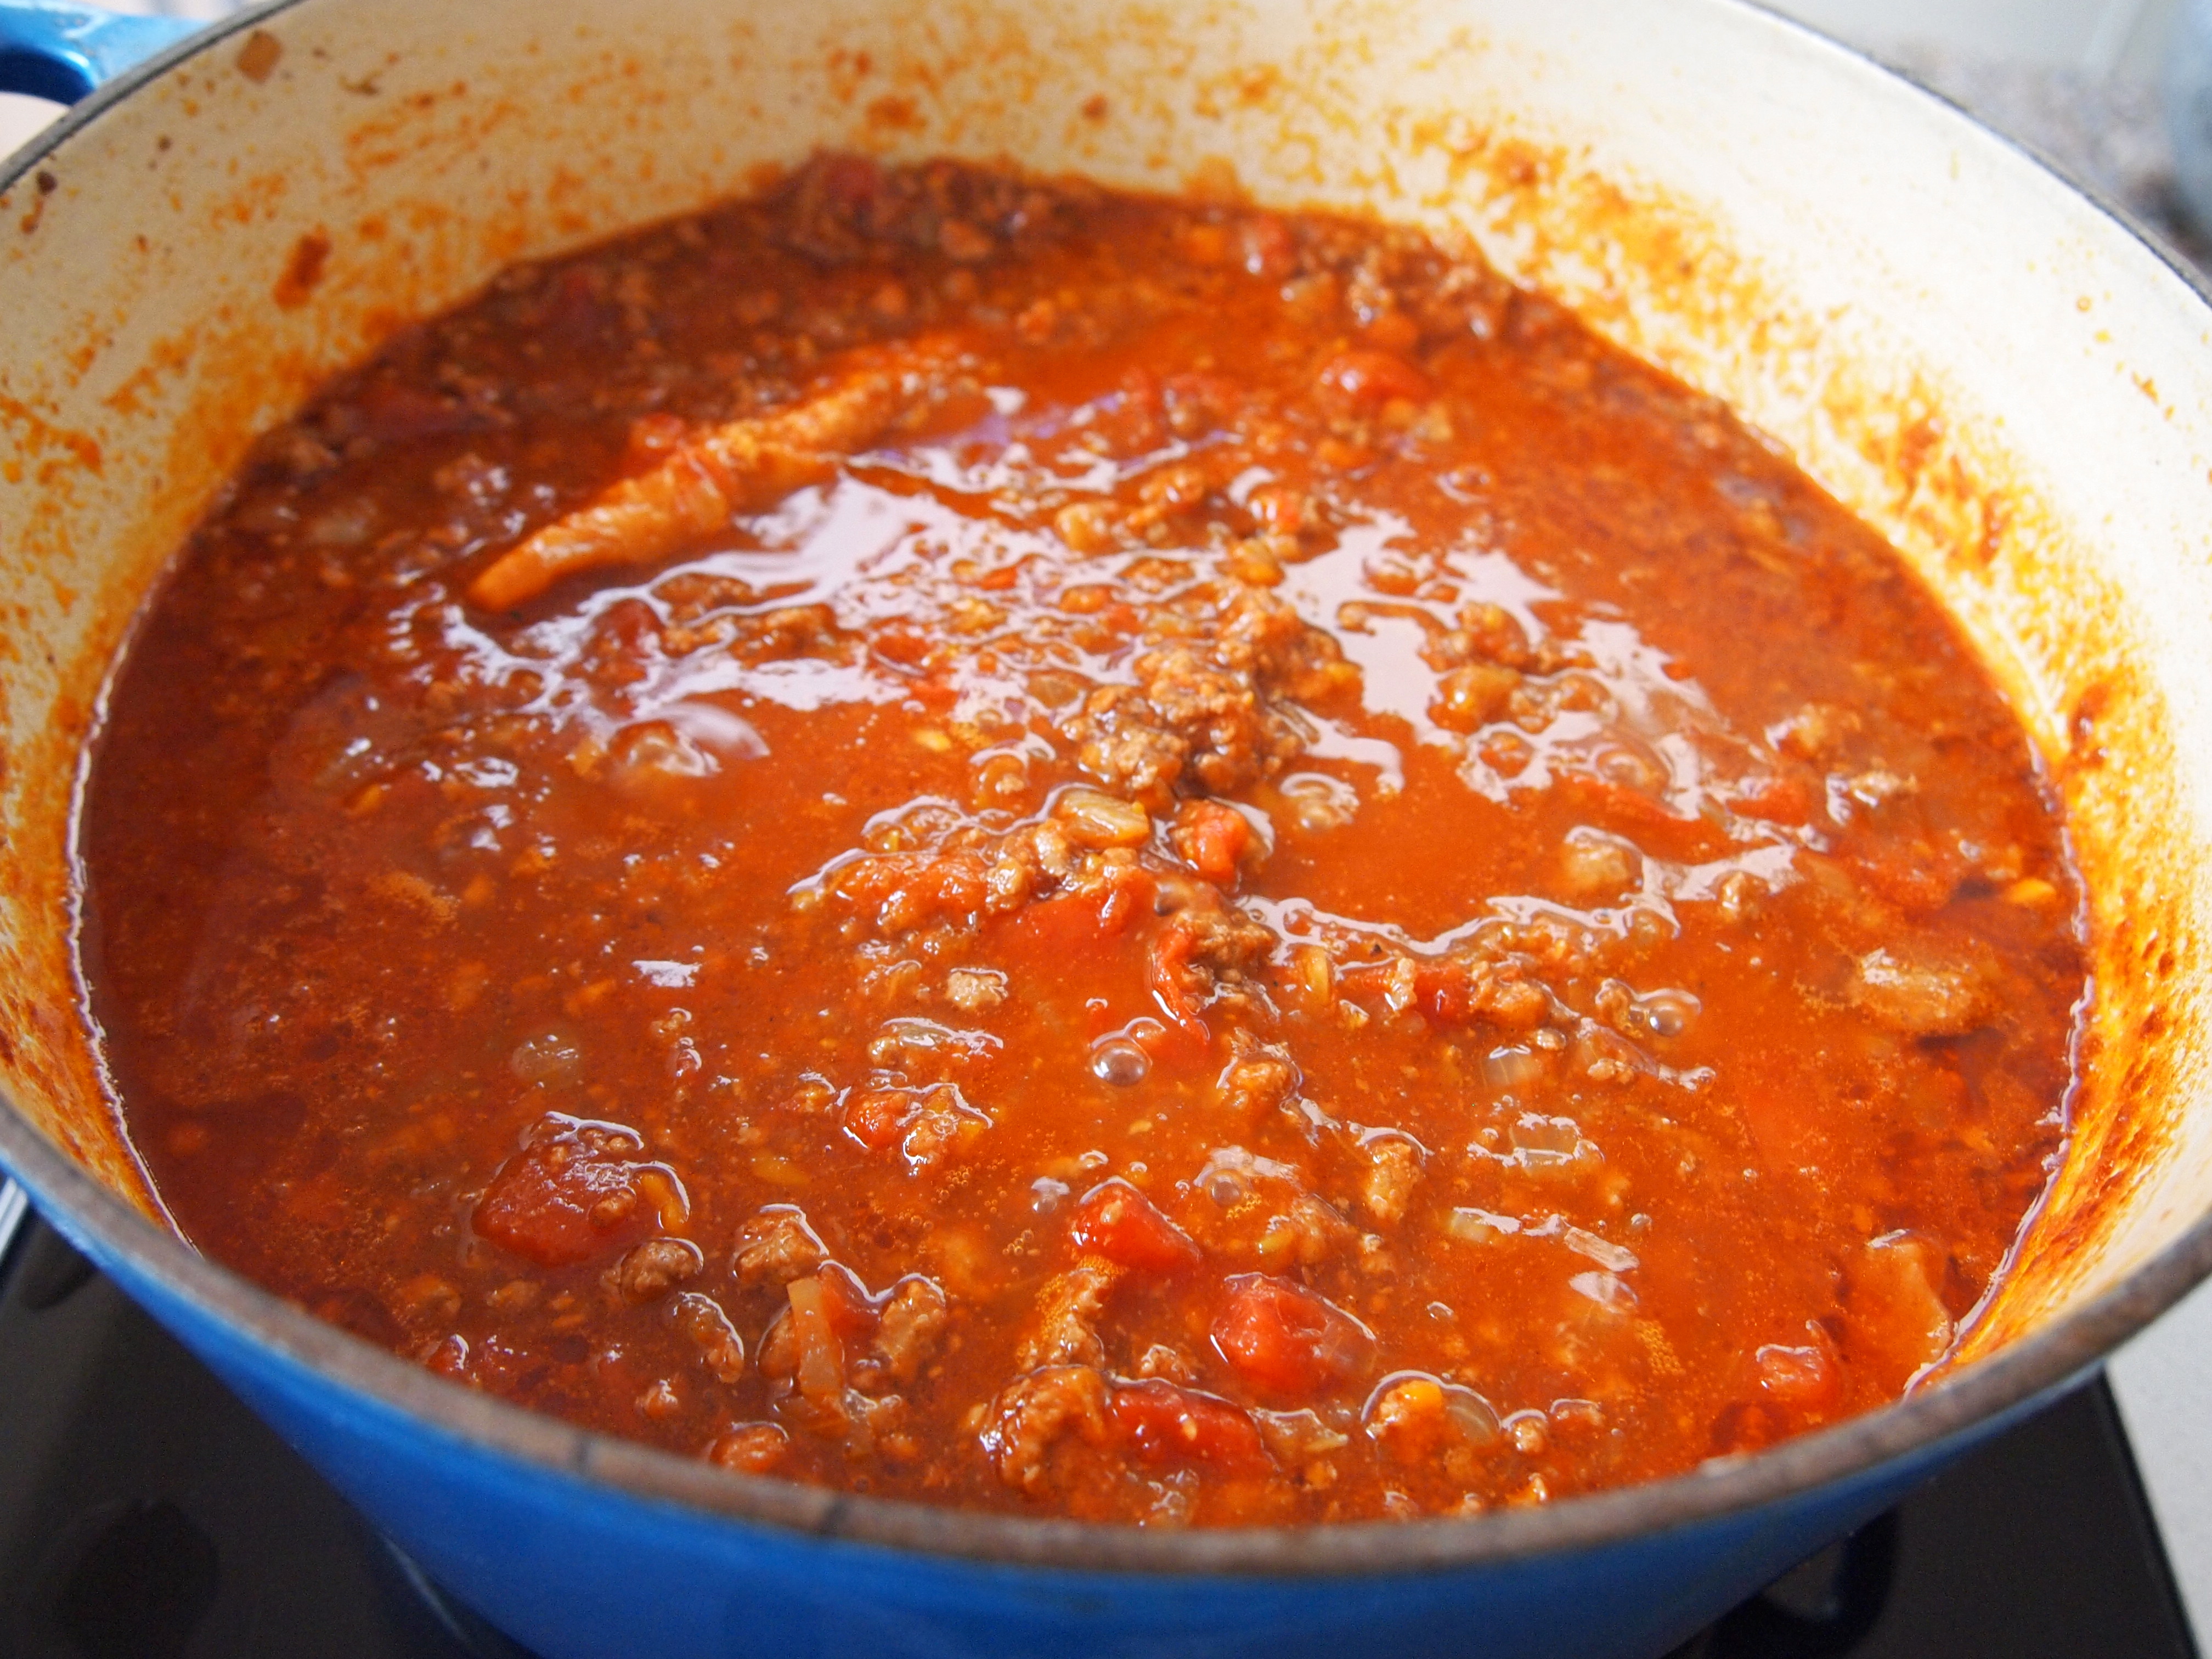
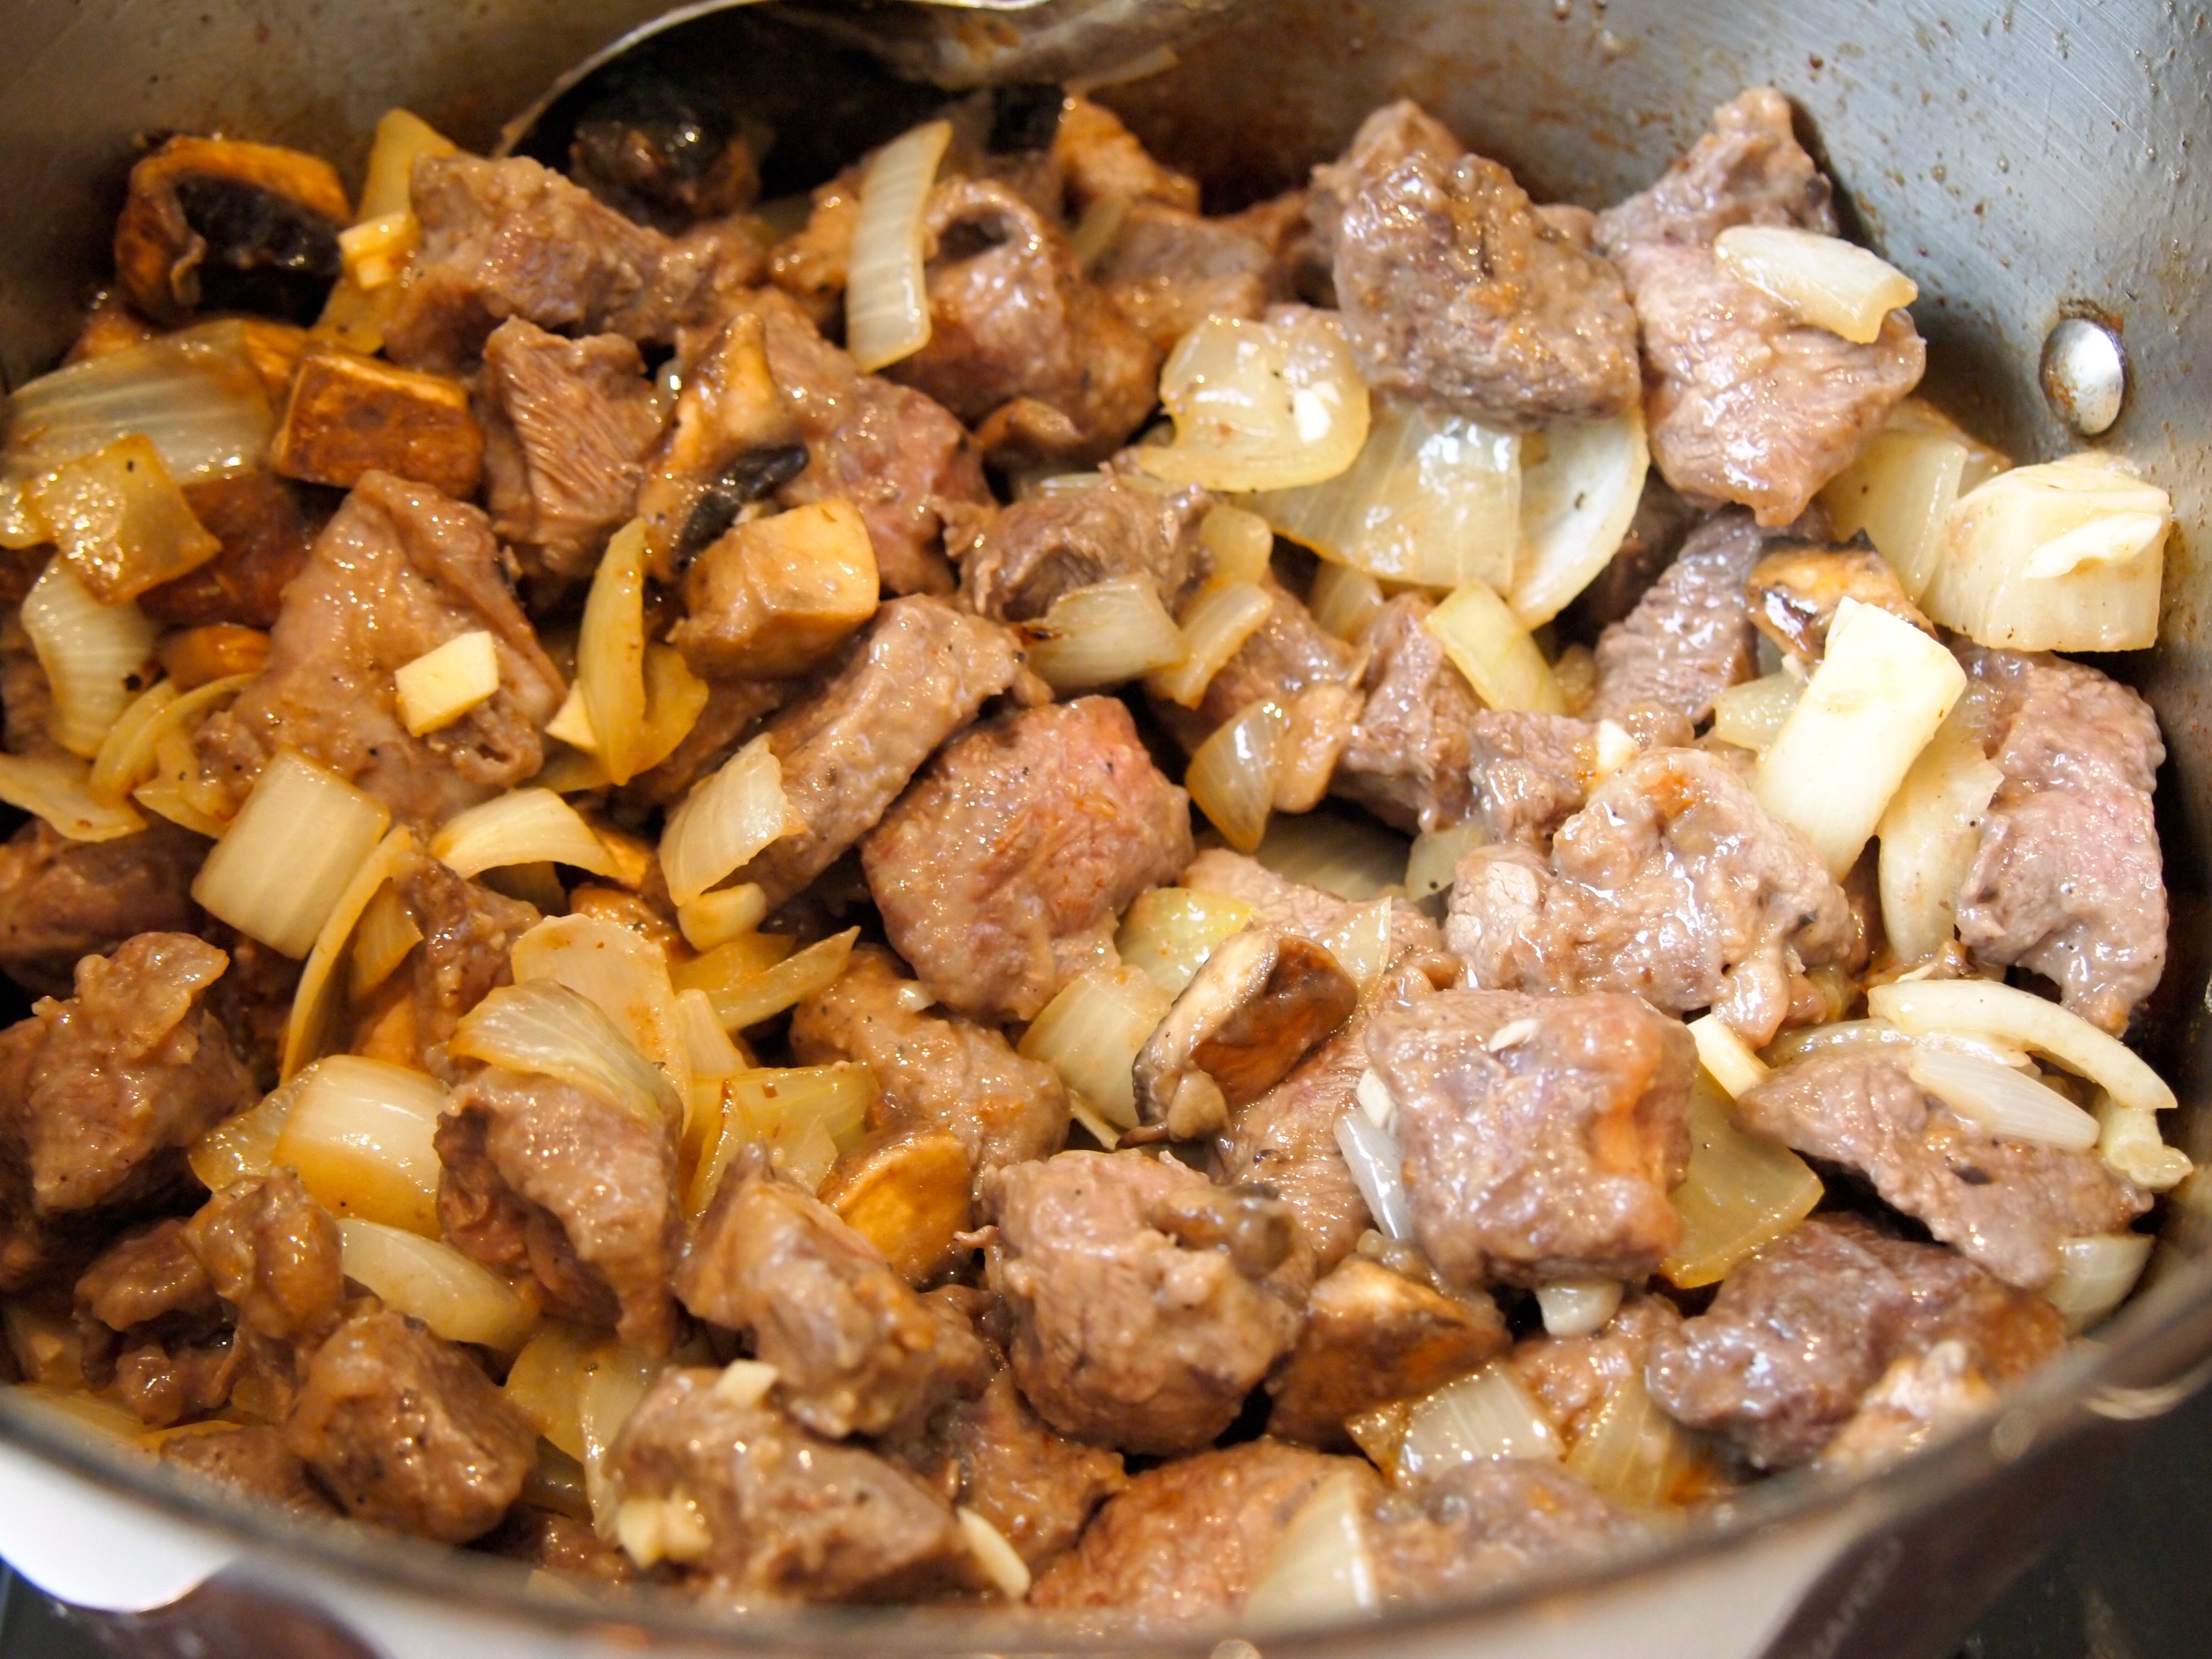
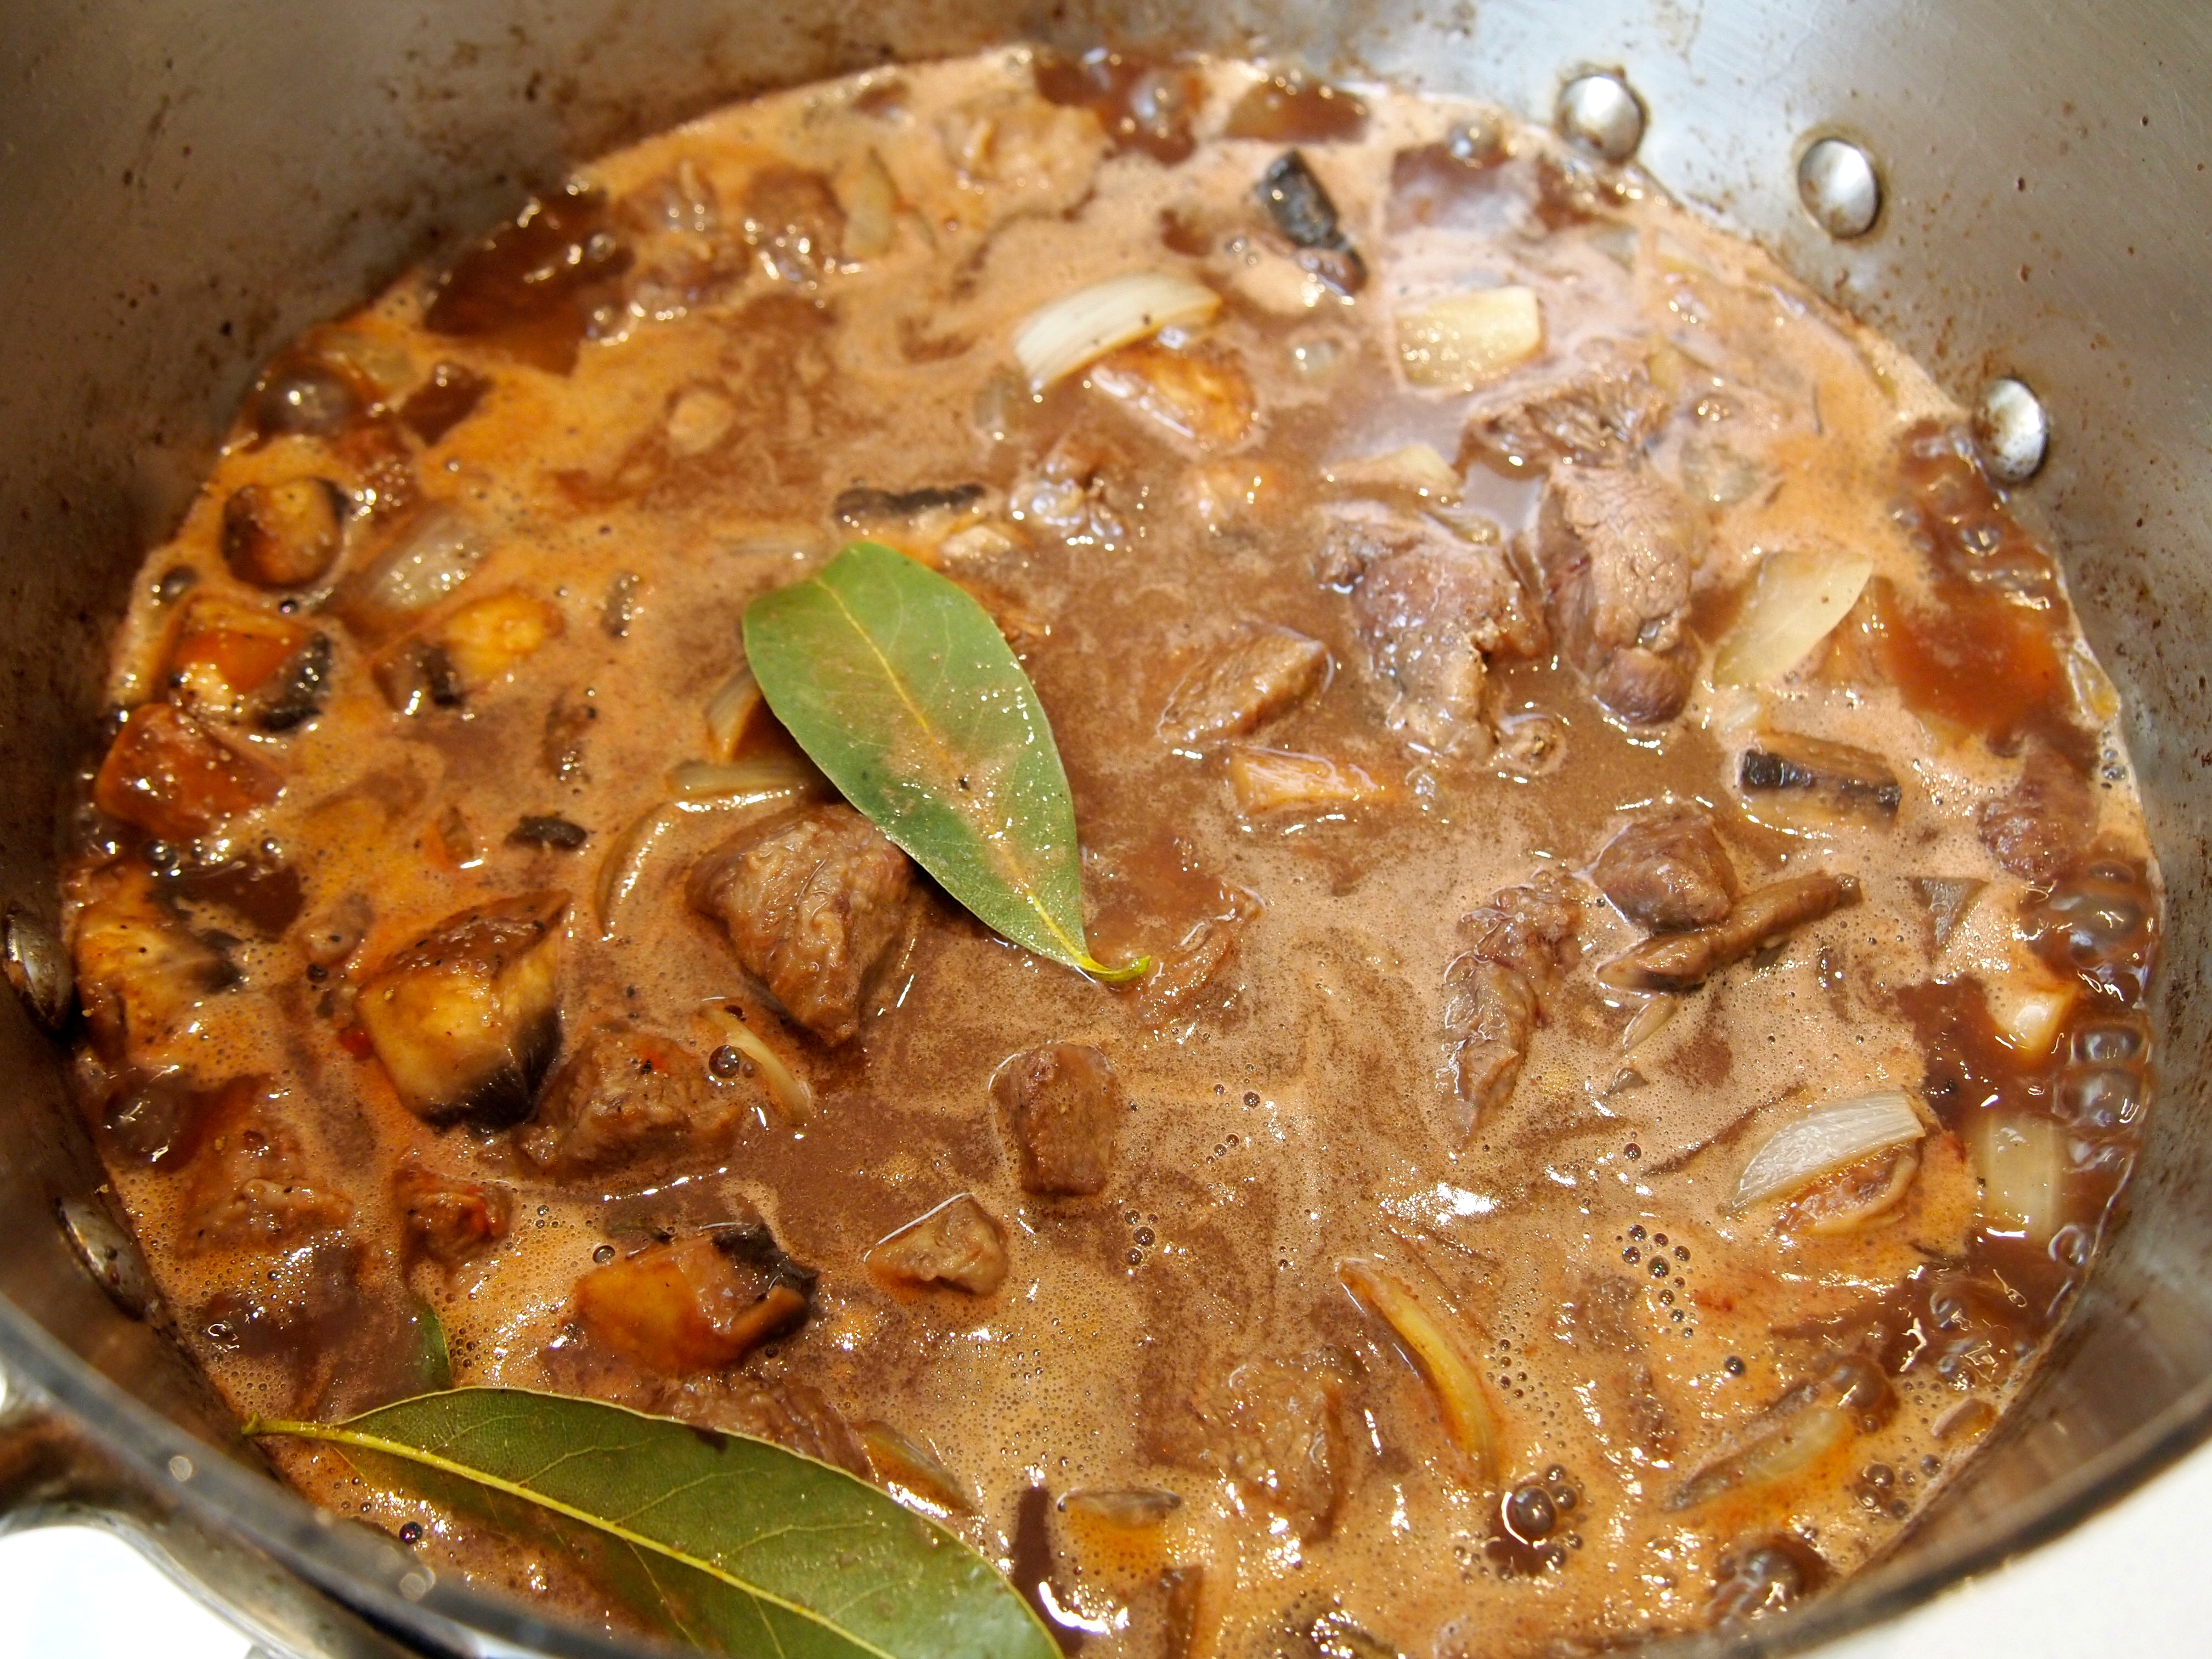
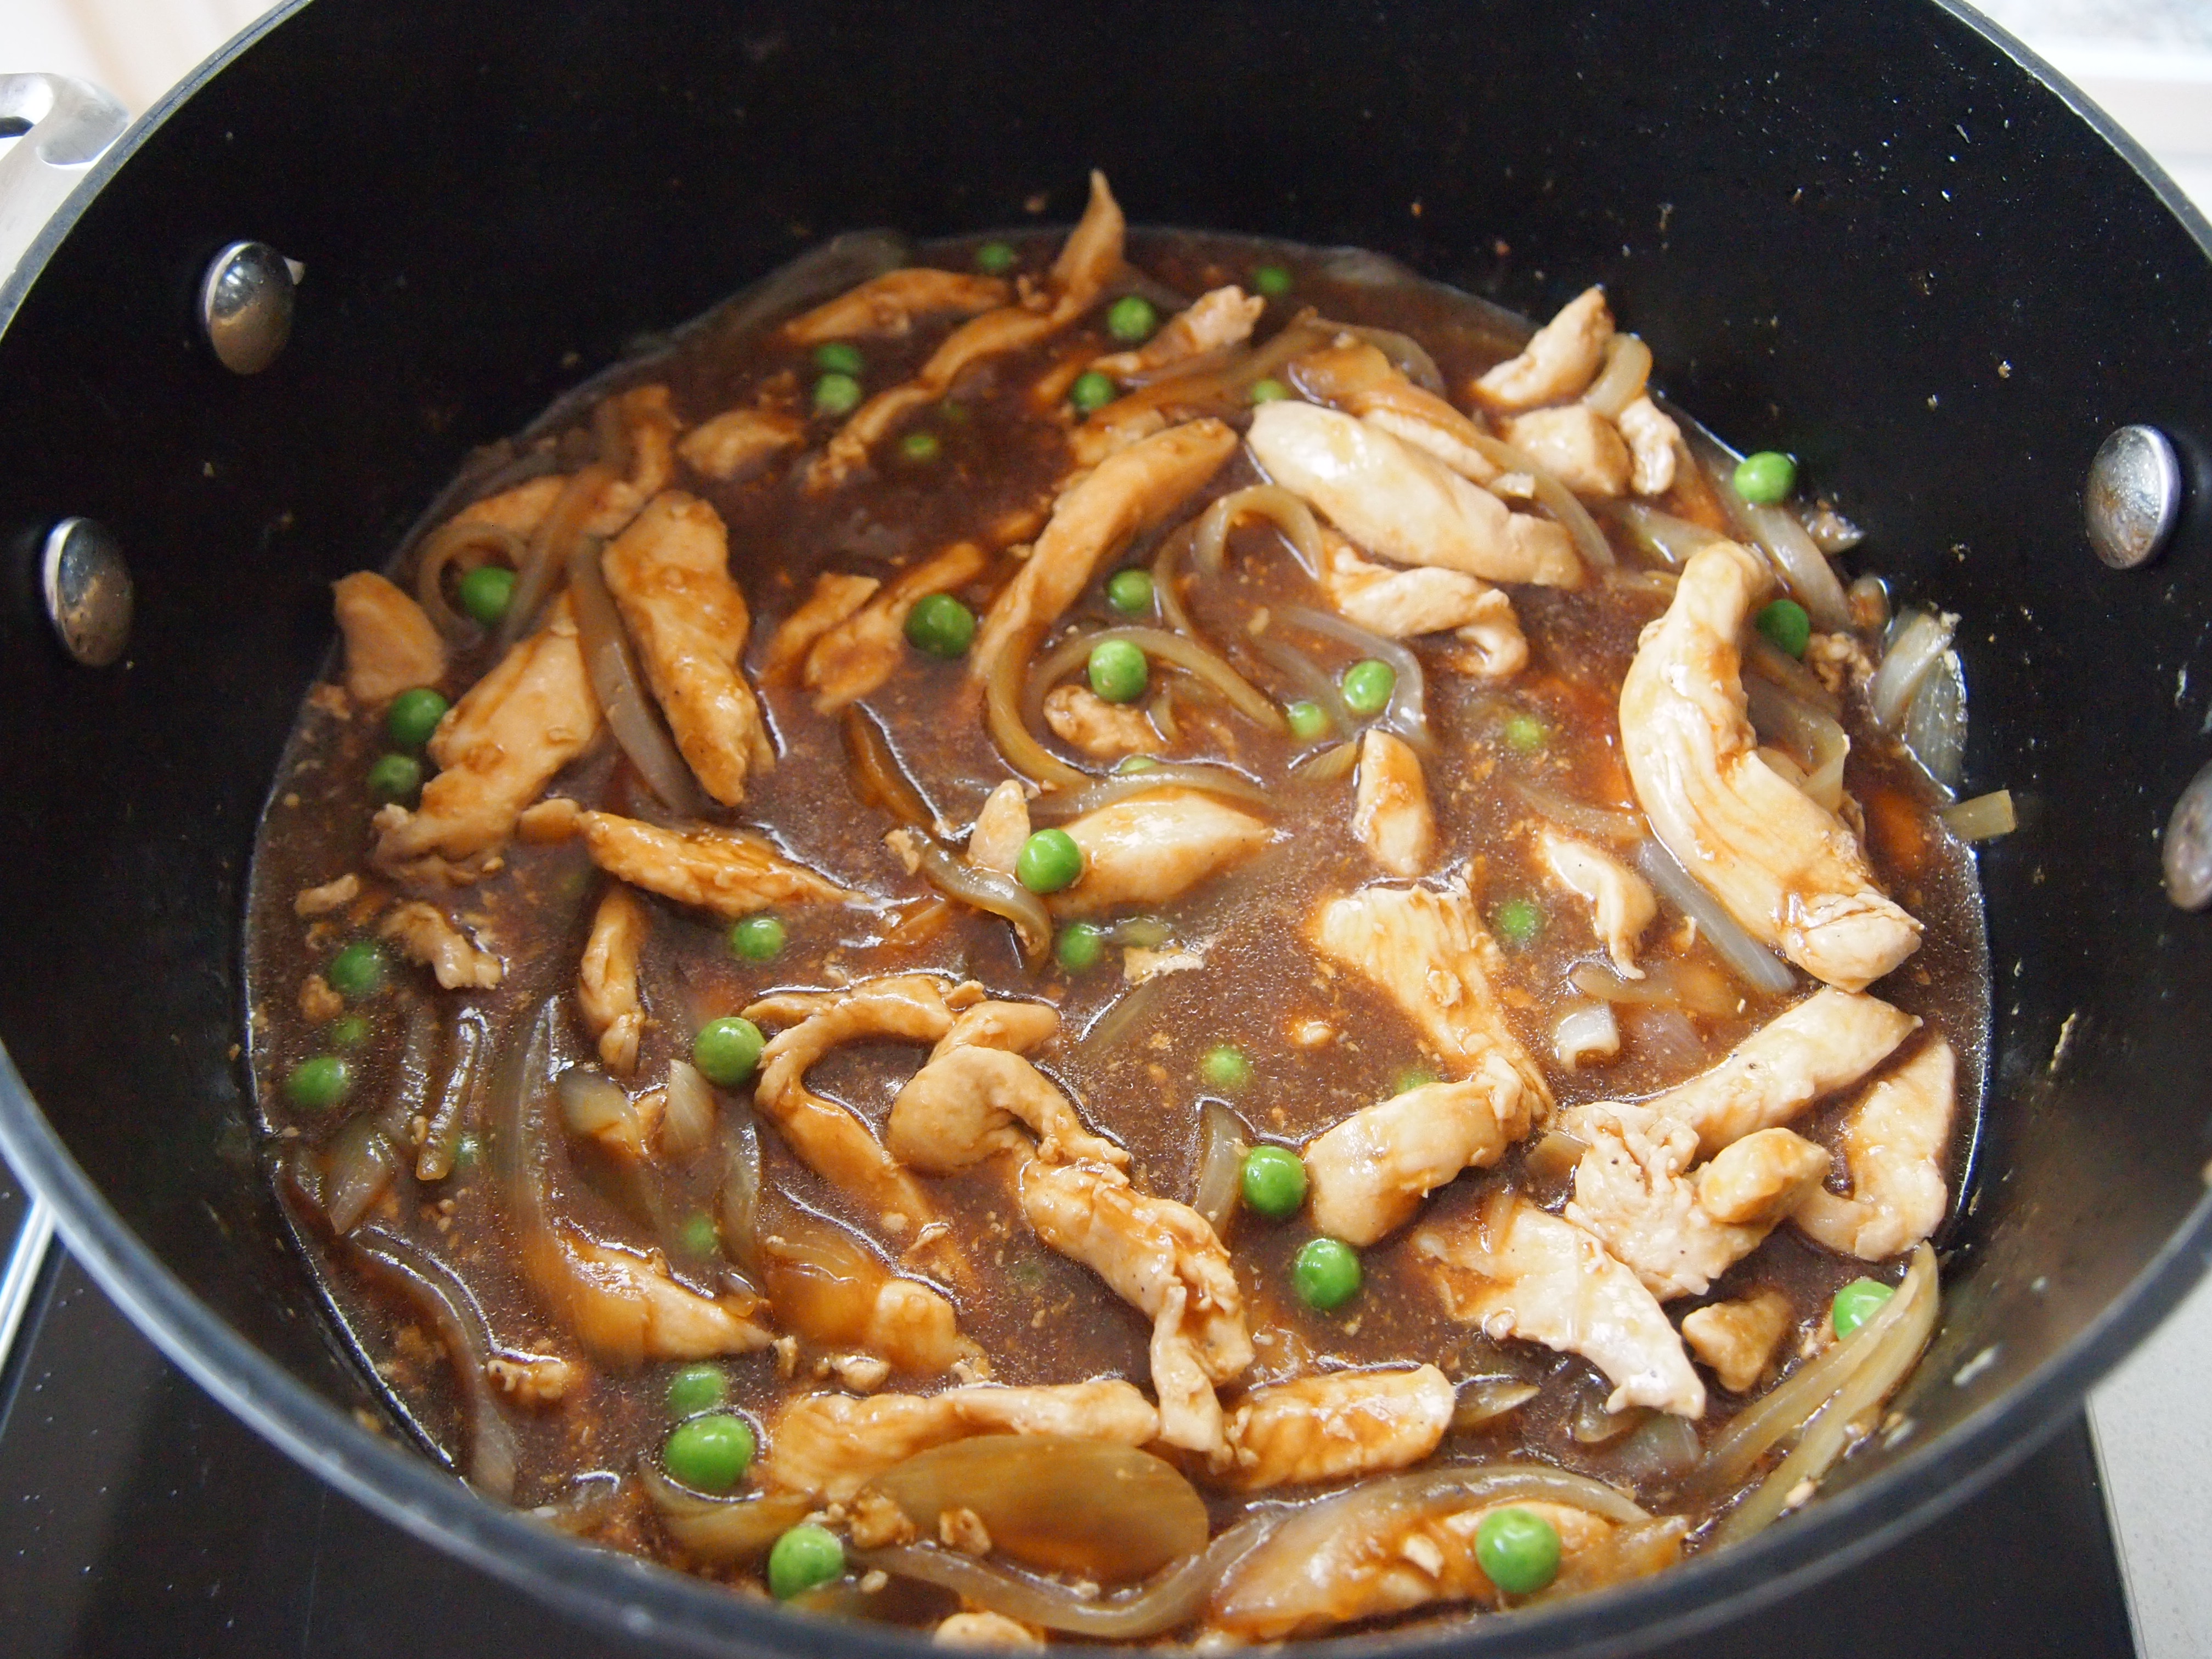
In a medium size saucepan heat about 3 tablespoons of oil. When hot add the onions and the first measure of salt. Saute for at least 5 minutes or until the onions have softened, being careful to not get any colour on them. Remove the onions with a slotted spoon and set aside. To the oil remaining in the pan (add a touch more if you need to) add the garlic and cook until the garlic is starting to brown, and in this instance it’s good to get a little colour on the garlic; then add the chicken and cook stirring often, over medium heat, until the chicken has changed colour. Return the onions to the pan and mix well. In a small bowl mix the water, cornflour, second measure of salt, dark soy sauce and sesame oil. Stir until the cornflour has dissolved and add the mixture to the chicken along with the frozen peas. As soon as it comes to the boil, reduce the heat to a low simmer and cook covered for 10-15 minutes. Whilst the sauce is cooking start frying the noodles (or you can make the sauce ahead of time and reheat when ready to serve).

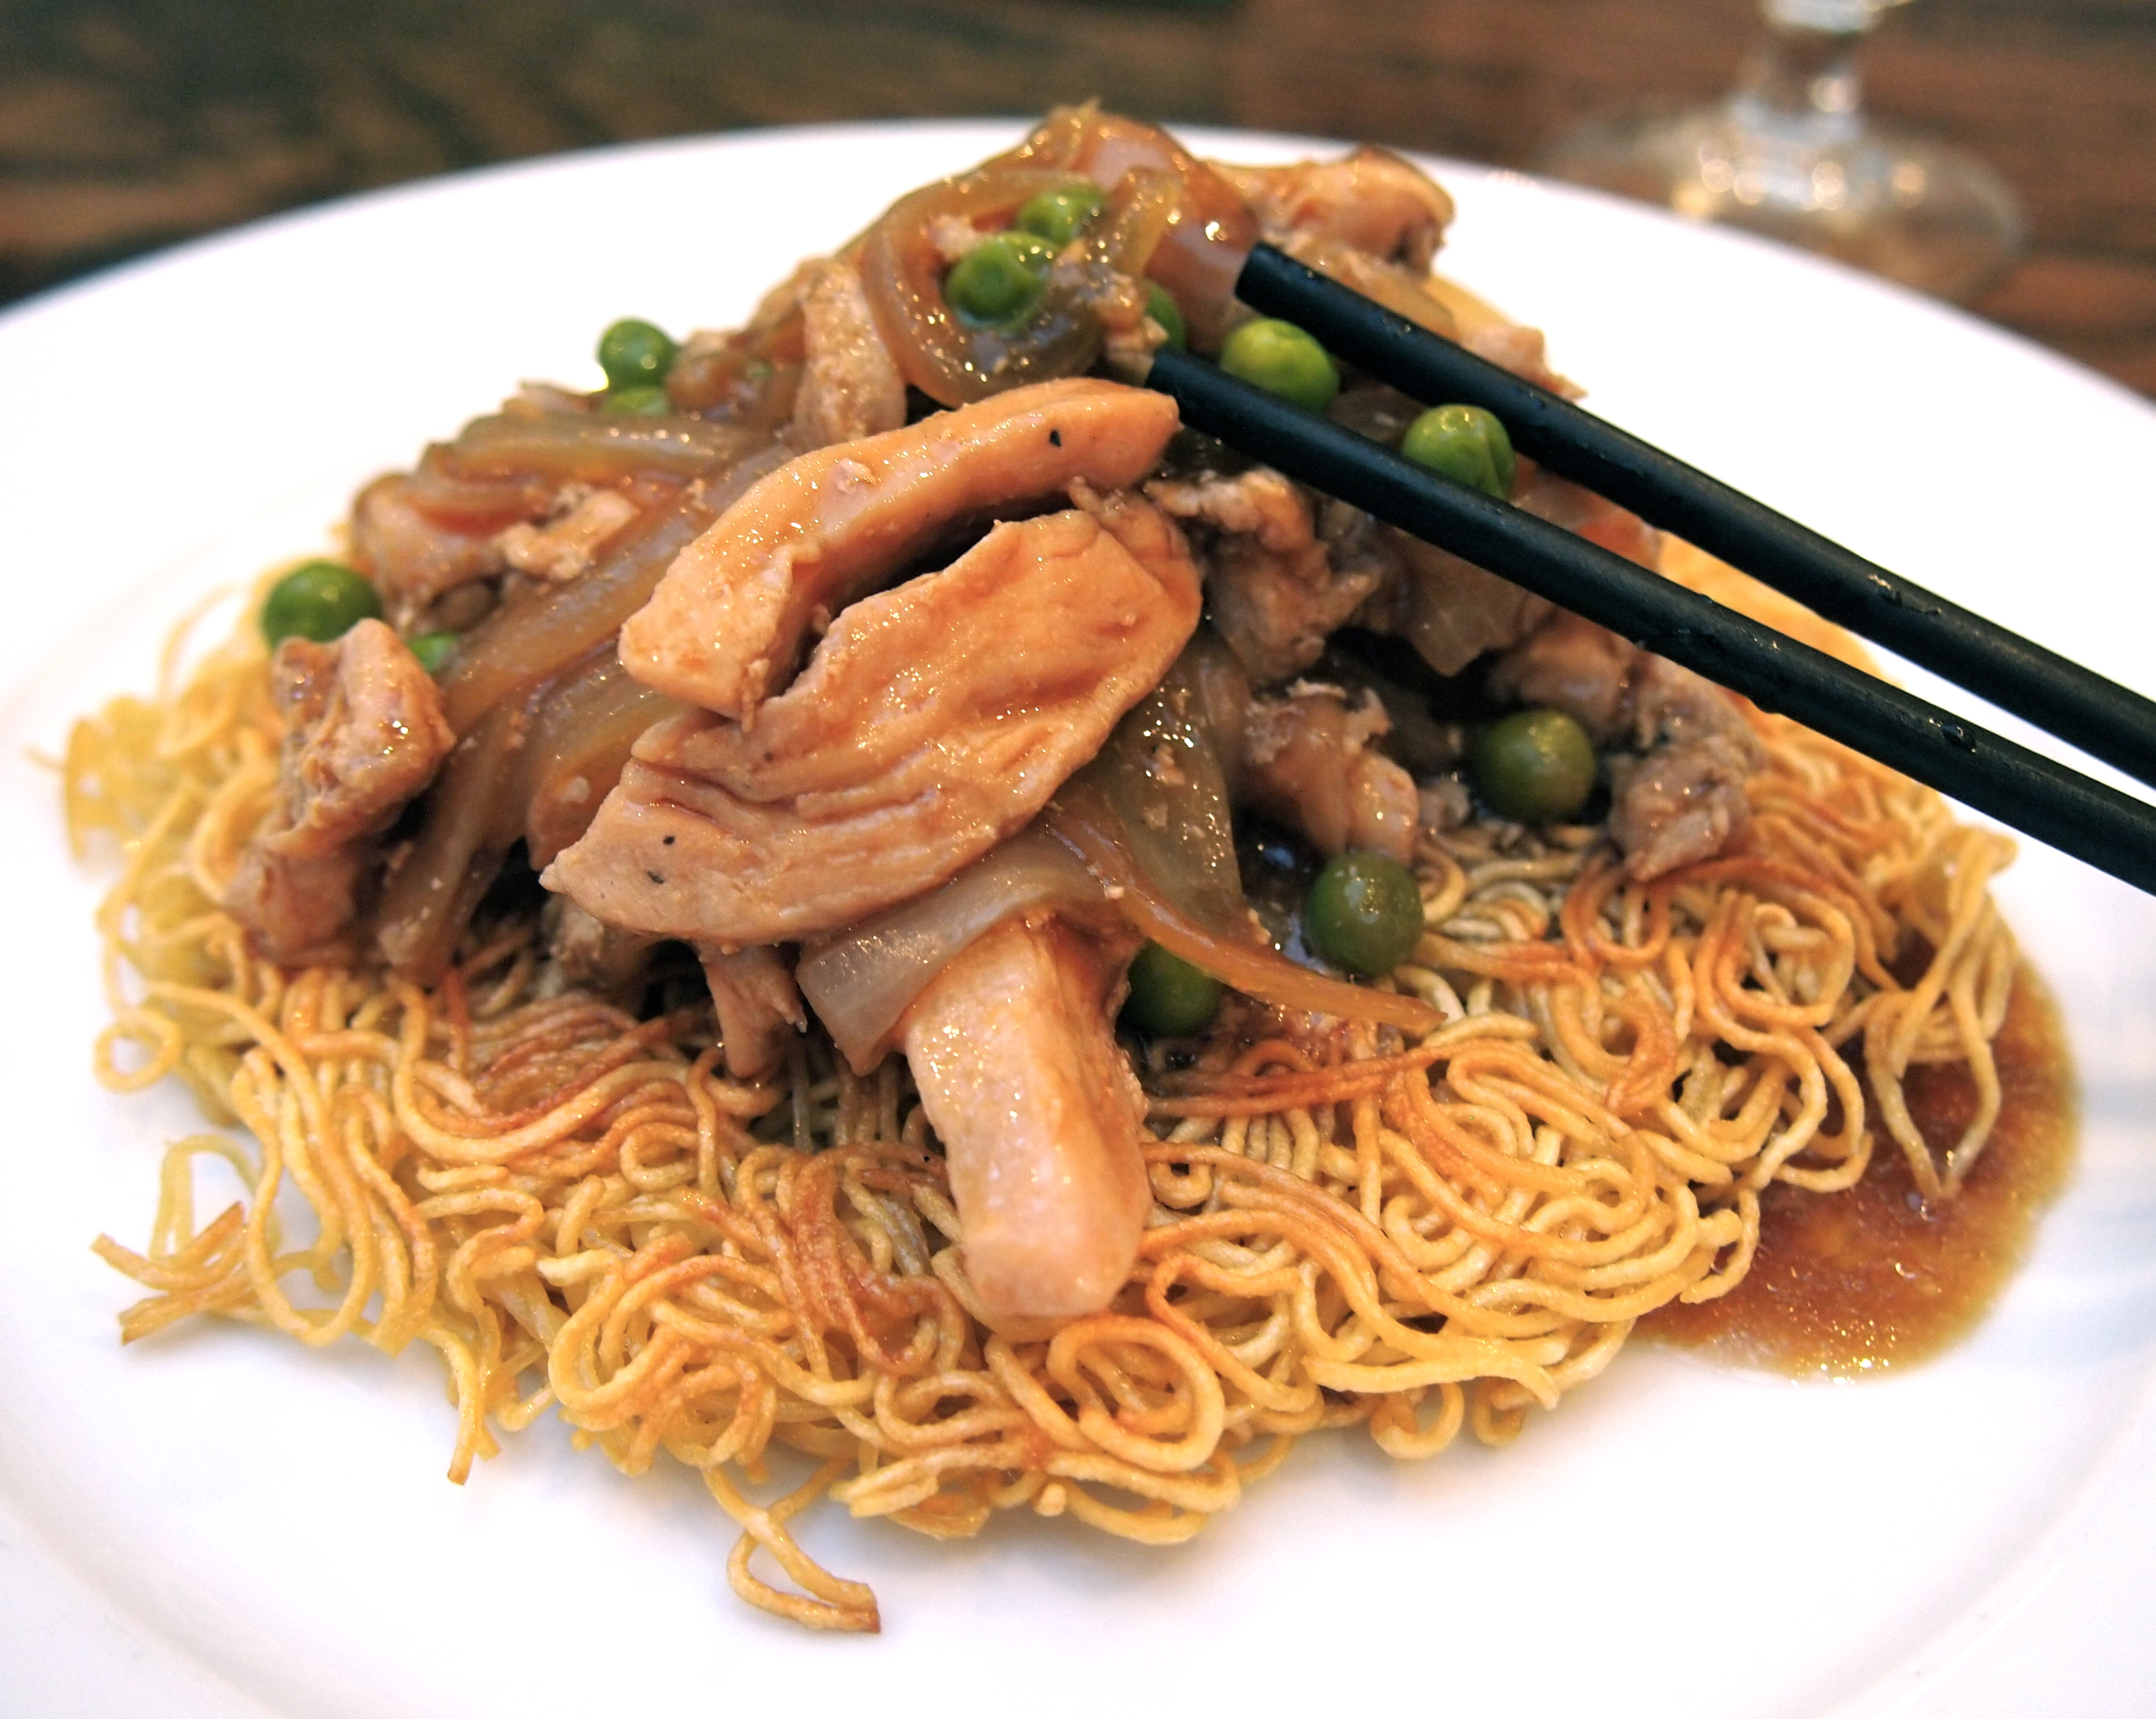
Heat 2 tablespoons of oil in a small non stick skillet or fry pan – I like to use a pan that is plate size and make a noodle cake for each person but you can make larger cakes if you wish. When the oil is hot, add enough of the cooked noodles to thickly cover the base of the pan, a thickness of about 2-3 cm is good. Cook over medium high heat, undisturbed for a few minutes or until the base of the noodles has turned golden brown. At this stage the cake will be easy to turn as the base has set. Cook the other side for a few more minutes until golden as well; you will end up with a firm cake, crispy on the outside but soft in the centre.

Noodles for Chow Mein

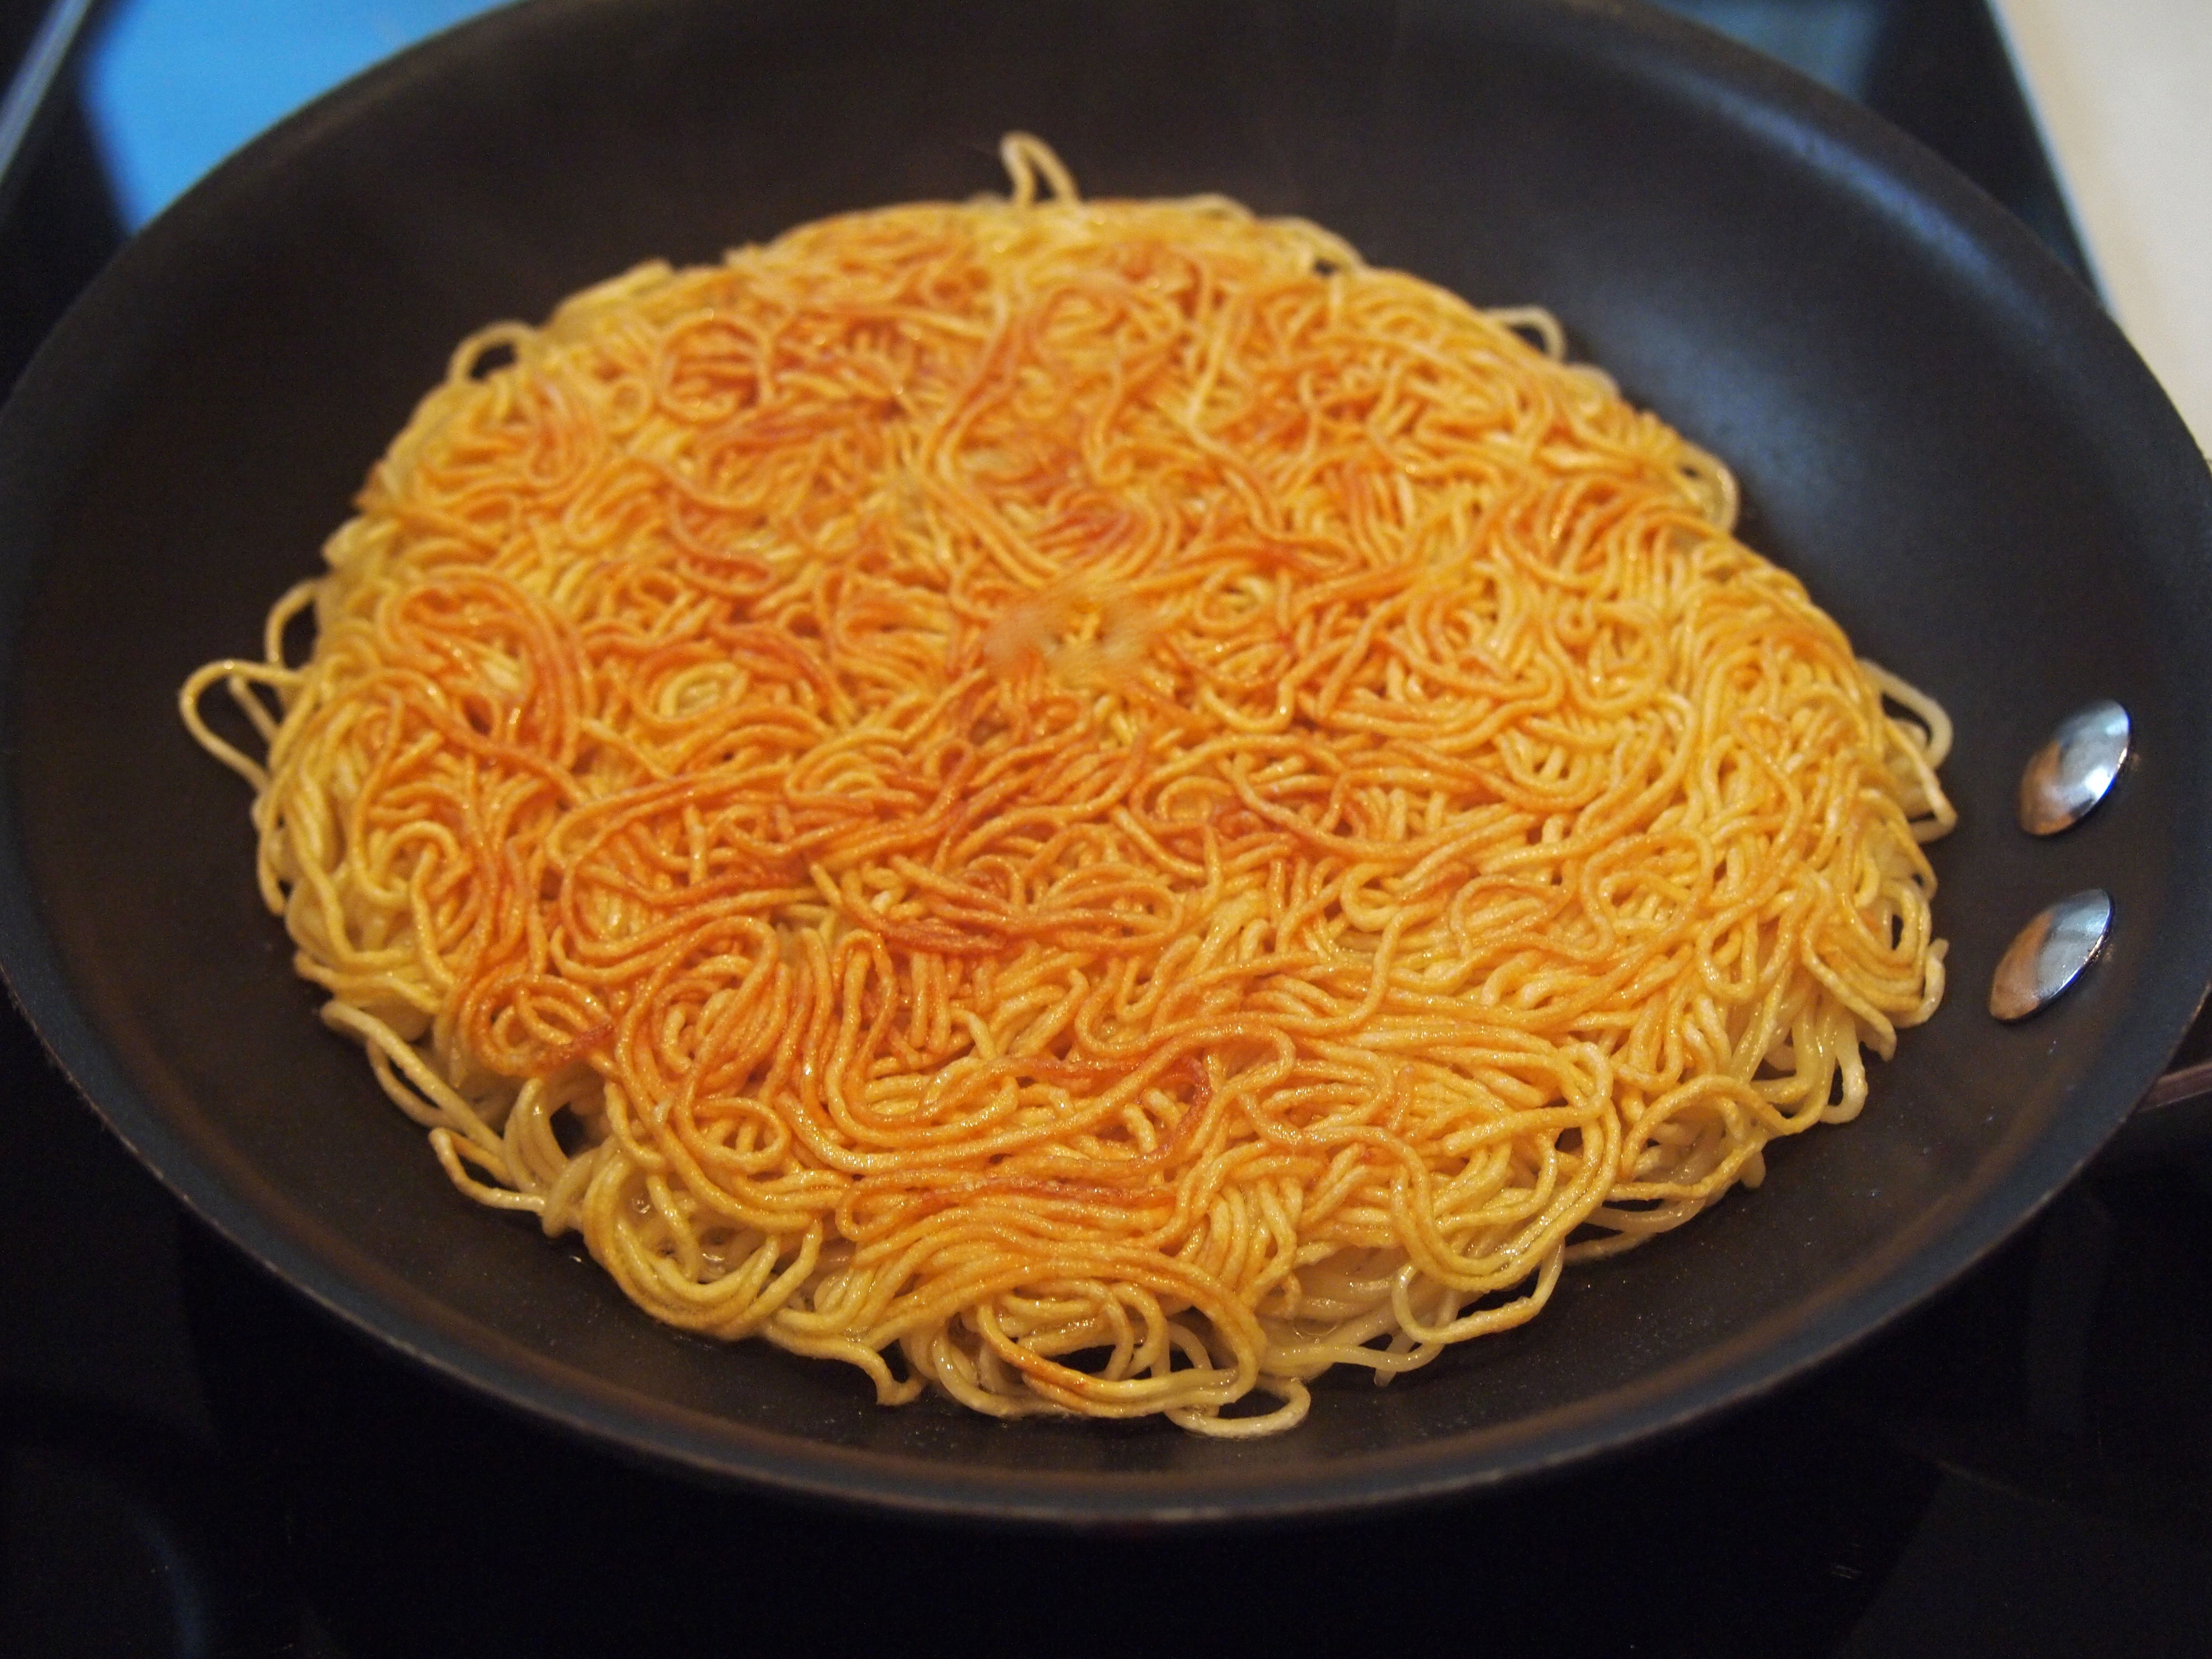
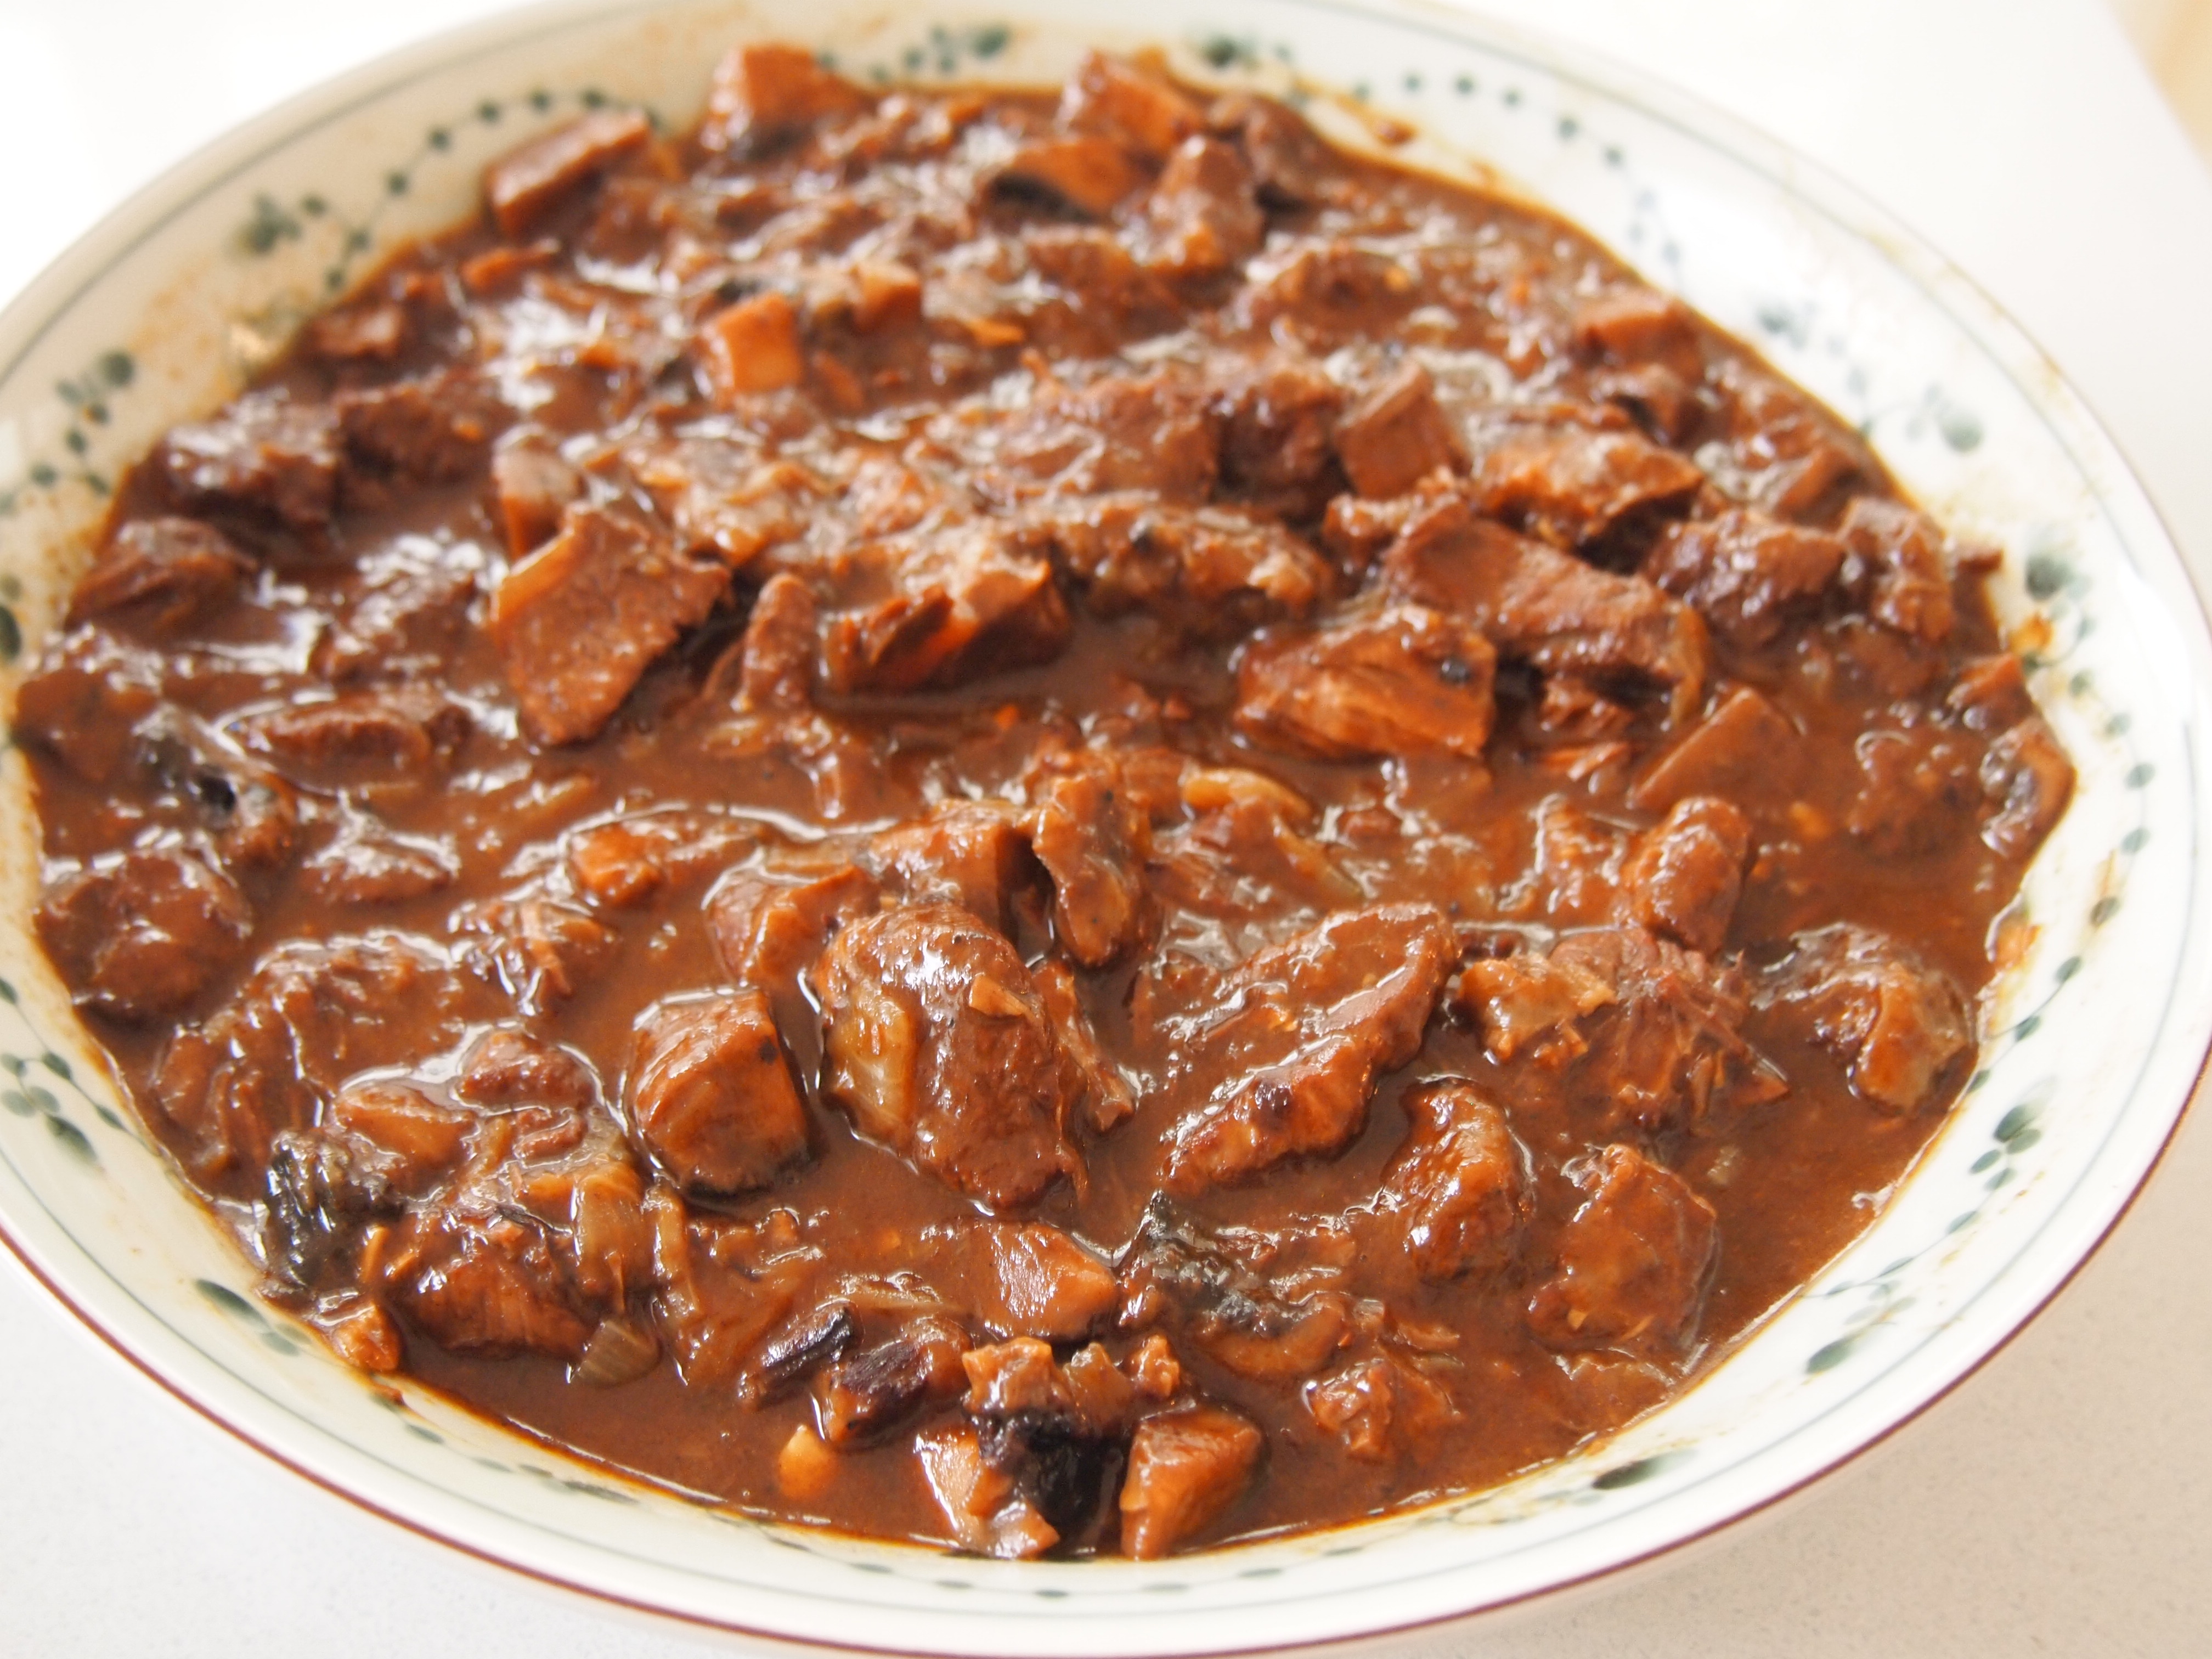
Transfer to a serving plate and keep warm (I like to put the fried noodle cakes in a warm oven until they are all done). Fry the remaining noodles in the same way, adding more oil to the pan for each cake. You should end up with 2 -3 cakes depending on the thickness. When all the cakes have been fried place one on each plate and top with a generous serving of the hot chicken sauce and serve straight away.

Chicken Chow Mein

Apr 19, 2013
mustardwithmutton

5 comments

White Chocolate & Almond Cake

White Chocolate & Almond CakeThis recipe is from Nigella Lawson’s Summer Forever cook book and it’s lovely. I haven’t for some reason made many of Nigella’s sweet dishes which is a shame, as the times I have, they’ve always come out very well. This cake is no exception. The white chocolate is quite subtle but with the addition of the almonds the cake has a lovely dense, almost marzipan quality to it. This cake is gluten free, relying on stiffly beaten egg whites for a little rise and it’s so nice to have an alternative gluten free cake that’s not the usual dark chocolate and almonds. Nigella suggests serving the cake with a side salad of fresh mangoes and raspberries dressed in some lime juice. The fruit pairs so well with the richly contrasting cake and adds a freshness and lightness which is very welcome if you’re serving this after a large meal. And whilst this cake makes an impressive dessert it would be just as good for morning or afternoon tea and the leftovers stay moist, for at least a few days if wrapped well.

Ingredients   Adapted from Nigella Lawson, Forever Summer

175g white chocolate
150g unsalted butter, softened
100g caster sugar
6 large eggs, separated
150g ground almonds
To Serve
2 mangos
150g raspberries
Juice of 1 lime

Method

Preheat oven to 180C. Grease and line a 23cm springform tin. Chop the chocolate and melt over simmering water or for a minute or two in the microwave, which is what I do. White chocolate will never melt to quite the smoothness of dark, so whenever it’s lost it’s shape, it’s melted enough; any more and it will start to seize. Put to one side.

Beat the butter until very soft, then add 50g of the sugar and cream again. Still beating, add the egg yolks one at a time, waiting until each one is incorporated before adding the next. Then slowly add in the cooled, melted chocolate, beating firmly as you do so. Once the chocolate is incorporated, add the ground almonds, beating again to mix.

In a large clean bowl whisk the egg whites till peaks being to form, then slowly add in the remain 50g sugar, until glossy and firm. Add a big dollop to the cake batter and stir well to lighten the mixture, then fold in the rest gently in three to four batches.


Pour the batter into the prepared tin, and bake for 45-50 minutes until cooked through. When the cake is ready it should be beginning to come away from the sides of the tin. You should check the cake after 30 minutes as you may need to cover the cake loosely with some foil to stop it burning. Remove from the oven and let it cool for 20 minutes before unspringing and inverting; then let it cool completely. Just before eating the cake, peel and dice the mangoes, as well as the juices from the skins, add the raspberries and the lime juice. Toss gently to combine and serve alongside the cake.

White Chocolate & Almond Cake

Apr 16, 2013
mustardwithmutton

no comments

Billionaire Bolognese – The Richest Bolognese Ragu

Ultimate Bolognese SauceSpaghetti Bolognese has been embraced the world over and it would be rare to find a household that didn’t eat this meal on a regular basis. Which means that most people have grown up eating some version or other of this sauce. So it’s no surprise that everyone also has their own methods and tips for making bolognese. Normally everyones favourite spag bol (which is the term fondly used here in Australia for spaghetti bolognaise) is the one their mother made. The version we had growing up was made with minced lamb, lots of caramelised onions and laced with a hint of turmeric. Nonnas the world over will be throwing their arms up in dismay that anyone could consider this a version of a ragu bolognese. But that’s the beauty of this dish – the traditional recipe has been reinvented so many times that people feel very comfortable adding, changing and adjusting it at will; and in cooking that can never be a bad thing.

I now find my mother’s version of bolognese far too sweet and to be honest I think she’s upped the amount of sugar over the years to make it extra enticing for her grandchildren but it’s too much for me. I’ve tried dozens of different methods and techniques to create the perfect bolognese; everything from adding pancetta, to livers, to milk, fresh tomatoes, tinned tomatoes and even no tomatoes for a bolognese bianco. The recipe below is the result of all my experimentation and to me is the ultimate, tastiest and richest ragu bolognese. I think the the main tip in this recipe is to brown your meat first. The caramelisation that you can achieve by browning the meat on it’s own leads to a far superior flavour than adding it the softened vegetables, which is normally the case. The addition of porcini mushrooms adds an earthy richness to the sauce as does the red wine. I also think using a variety of different meats makes a big difference in texture and mouthfeel. I prefer a very meaty bolognese so the ratio of meat to tomatoes is quite high. Lastly, this is not a meal that can be cooked quickly. It needs time to simmer slowly, for at least a few hours, so the sauce has time to reduce, thicken and intensify in flavour. Finally, and please don’t judge me, I sometimes like to flash fry some chicken livers and place them on top of the pasta and sauce just before serving. Trust me it takes ragu alla bolognese to another level entirely!

Ingredients – Makes  a lot – enough for at least 6-8. I always make a large quantity and then freeze it in portion sizes for 2

Olive Oil
500g minced beef
500g minced veal
200g minced pork – or you can use lamb
3 large onions, finely diced
1 carrot, finely grated
1 celery, finely minced
5 cloves of garlic finely minced or put through a garlic press
15g dried porcini mushrooms
1 cup red wine
2 x 400g tins of diced tomatoes
2 heaped tablespoons tomato paste
A piece of parmesan rind
1 cup beef stock
Salt & freshly ground black pepper
To Serve
Pasta – either spaghetti, fettucini or tagliatelle
knob of butter
Freshly grated parmesan cheese
Pan fired chicken livers – optional of course

Method
Heat a few tablespoons of oil in large, heavy based saucepan. When hot add the minced meat, crumbling it in as you add it and cook stirring and breaking up the meat until it is well browned. Season well with salt and remove with a slotted spoon and set aside. Add a few more tablespoons of oil to the same pan and add the onions and a pinch of salt. Cook for about 8-10 minutes over medium-low heat until the onions are soft and starting to brown. Add the carrots, celery and garlic and cook for a further 10-12 minutes or until all the vegetables are completely softened. Add porcini and mix well. Return the meat to the pan and stir to incorporate with the vegetables.

Add the red wine and increase the heat; cook until the red wine has almost all evaporated. Add the tomato paste, tinned tomatoes, parmesan rind and the beef stock – using the beef stock to wash out the cans of tomatoes. Season well with salt and pepper and bring to the boil. Reduce the heat to a simmer and partially cover with a lid and let it cook gently for a good 2-3 hours. The longer the better but ensure that you check and stir often and that your heat is gentle enough to just maintain a slow simmer (you may need to use a simmer mat if your stove is too fierce). After 3 hours check the seasoning and adjust if necessary.

Towards the end of the cooking time bring a large pan of salted water to the boil and add your pasta and cook until al dente. Drain the pasta. Add a couple of ladles of sauce to the pan that you cooked the pasta in and add the drained pasta back to the pan along with a good knob of butter. Toss to coat the pasta with the sauce and butter and serve in large plates or bowls and top each plate with another ladle of ragu. If you want to try it with some chicken livers just quickly flash fry a couple of chicken livers per person and place them on top of the pasta and sauce. Serve straight away with grated parmesan.

Best Ever Bolognese Ragu

Apr 12, 2013
mustardwithmutton

no comments

Crostini Two Ways – Prawn with Cannellini Bean & Tuna with Fennel Seeds & Marjoram

Prawn & Cannellini Bean Crostini Tuna Crostini with Fennel Seeds, Chilli & Marjoram Kicking off a special dinner with some delicious small bites and a glass of bubbly is such a great way to start an evening. Whilst this is something we only tend to indulge in when we entertain I do occasionally make appetisers on weekends when we’re on our own. These two crostini were made on separate occasions – the tuna just for the two of us and the prawn when we had some friends over. There’s no reason however you couldn’t make a little of both and serve them at the same time. These super tasty and easy to make crostini would also make perfect finger food for a cocktail party.

Ingredients

1 sourdough baguette
Olive oil

For the Tuna Crostini – Enough for about 8 slices of crostini

200g sashimi grade tuna cut into small dice
Large pinch of chilli flakes
Large pinch of flaky sea salt
1 scant teaspoon fennel seeds
Leaves from a few sprigs of marjoram
Juice of half a lemon
Drizzle of best quality extra virgin olive oil

For the Prawn Crostini – Enough for about 8 slices of crostini   Adapted from Karen Martini , Cooking At Home
10 tablespoons olive oil, divided
2 cloves of garlic sliced
1 x 400g tin of cannellini beans, drained
300ml stock or water
3 sprigs rosemary, leaves chopped
1 lemon
300g raw prawns, peeled, deveined and chopped into large chunks
Handful flat leaf parsley leaves, roughly chopped

Method

Cut the sour dough bread on an angle in 1 cm slices. Brush both sides with olive oil and cook on a hot ridged griddle pan until toasted and ever so slightly scorched. You can also toast the bread in a hot oven for five minutes but the smoky flavour from toasting on the griddle adds a lovely flavour. Set aside and assemble the toppings.

Grilled Bread for Crostini For the tuna crostini place  the fennel, chilli and salt in a mortar and pestle and pound lightly to break the fennel seeds up a little and release their fragrance. Place the tuna in a bowl and add all the other ingredients and stir gently to combine. Taste and adjust with more lemon juice, chilli and fennel if required. The mixture needs to be made just prior to serving otherwise the lemon juice will start to cook the tuna. Place a generous amount on the toasted baguette slices and top with a few more marjoram leaves and another drizzle of olive oil.

Sashimi Tuna with Fennel Seeds, Chilli & Marjoram for Crostini Tuna Crostini with Fennel Seeds, Chilli & Marjoram

To make the prawn crostini, heat 3 tablespoons olive oil in a frypan over medium heat. Add the sliced garlic and cook for a few minutes, then season with salt. Add the beans, stock or water and rosemary and cook for about 10 minutes or until the beans are very soft. Remove from the heat and drain, reserve the liquid. Mash the beans with a fork or the back of a spoon (add some of the reserved liquid if the paste is too dry) and drizzle with 3 tablespoons olive oil and a generous squeeze of lemon. Heat 4 tablespoons of olive oil in a frypan over medium heat. When hot add the chopped prawns and cook until just changed colour. Season, then add the parsley and a good squeeze of lemon juice. Spread the mashed cannellini beans generously over the toasted bread and spoon the prawns over the beans and season with a generous grinding of black pepper.

. Prawns for Crostini Prawn & Cannellini Bean Crostini

Apr 9, 2013
mustardwithmutton

no comments

Perfect Oven Chips

Perfect Oven ChipsThe search is finally over. You can now safely throw away your deep fat fryers, oil thermometers and vats of vegetable oil because you won’t be needing them any longer! Behold the glory of the perfect chip AND it’s made in the oven! Now lets face it who doesn’t like hot chips – crispy exterior, fluffy potato interior, glisteningly crunchy and made all the better with a little smattering of sea salt. But until now the only way to get to this potato nirvana was by the tiresome, messy and sometimes dangerous method of deep-frying – and according to the likes of Mr Blumenthal, up to 3 times! Sure there have been some good, even great, oven chips like these but this oven chip surpasses them all. The thing that makes these chips stand out is the way they are pre-cooked before being roasted in the oven. I’ve tried a number of methods with varying degrees of success. Originally I would cut the potatoes into chips and then parboil them but I’d often find the chips had absorbed too much water and wouldn’t get crispy enough when they were roasted. To eliminate this I then started boiling the potatoes whole and then cutting them into chips – much better. But in this recipe the potatoes are oven baked on a bed of sea salt which completely devoids them of any moisture resulting in ultra crispy chips. I can’t unfortunately take credit for the recipe, that belongs to Karen Martini who published it in her book Cooking At Home. The recipe however is at the beginning of the book under nibbles and she serves them with a tahini dipping sauce. I’m sure it’s because of the placement in the book that these have gone under the radar as the perfect way of oven roasting chips. So I will take credit for bringing them to your attention. You can thank me later!

Ingredients – Serves 4 -6  Adapted from Karen Martini

10 -12 large kipfler potatoes. Kipfler’s are a waxy potato but I think desiree or dutch cream would work equally well
500g rock salt
Olive oil
Sea salt

Method

Preheat oven to 220C. Spread the rock salt on a baking tray that is large enough to hold the potatoes in one layer. Wash the potatoes well and dry them thoroughly. Prick each potato 2-3 times with a fork and place on the rock salt. Bake for 40 minutes or until the potatoes are tender – timing will depend on the size of your potatoes so start checking after 30 minutes.

Remove the potatoes from the oven and when cool enough to handle cut the potatoes into chips. The potatoes can be prepared up to this stage ahead of time and left at room temperature. When you’re ready to roast them heat the oven to 200C and place the potatoes in a single layer on a shallow sided baking tray and drizzle generously with enough oil to lightly coat the chips. Season with salt and roast for 40 minutes or until golden and crispy.

Half way through the cooking time check them and if they can be easily lifted off with a spatula give them a toss around. If they can’t be lifted off easily check again every 5 minutes until they can and then give them a toss. When ready, remove to a serving platter and sprinkle with a little more sea salt and serve straight away.

Perfect Oven Chips

Apr 5, 2013
mustardwithmutton

5 comments

Beef & Red Wine Pie with Sour Cream Pastry

Beef & Red Wine Pie with Sour Cream Pastry

The days here in Sydney are getting cooler and it finally feels like autumn has arrived. I for one am quite looking forward to crisper days and the slow cooked braises and stews that come along with this time of year. This pie is a great dish to make on a cold and dreary day when you feel like being in the kitchen for a few hours and then sitting down to a warming and hearty meal. Whilst the pie filling takes time to braise it’s not complicated cooking and the sour cream pastry is a cinch to make and a joy to work with. The pastry comes courtesy of Maggie Beer who swears that it’s the only pastry you ever need to use and she may be onto something – especially if it’s a flaky pastry that you’re after which is of course perfect for pies, be they savoury or sweet. The clocks turn back this weekend and I always find it a little exciting on the day this occurs as it really heralds in the new season, but I know a lot of people dread the shortening days so if you need something to cheer you up and remind you that winter does actually have some advantages then this pie will definitely put a smile on your face.

Ingredients – Makes 1 large family size pie

1.2 kg beef shin, trimmed of fat and cut into large bite size pieces
Oil – vegetable is fine
Salt & freshly ground black pepper
¼ cup plain flour
2 large flat capped mushrooms, cut into large dice
3 large onions, cut into large dice
2 cloves of garlic, minced
1 ½ cups red wine
2 cups beef stock
1 tablespoon worcestershire sauce
1 tablespoon tomato paste
2 -3 bay leaves
2 tablespoons plain flour, extra
1 tablespoon red wine vinegar
2 tablespoons finely chopped parsley
1 egg beaten with 1 tablespoon milk

Maggie Beer’s Sour Cream Pastry
½ cup sour cream
250g plain flour
200g unsalted butter chilled

Method

To make the pastry, dice the butter, then pulse with the flour in a food processor until the mixture resembles fine breadcrumbs.Add the sour cream and continue to pulse until the dough starts to incorporate into a ball.Wrap the dough in plastic film and refrigerate for at least 30 minutes.

To make the pie filling season the meat well and dust with the flour. Heat a heavy based saucepan or dutch oven over medium heat and add a few tablespoons of oil. When hot add the meat in batches and cook until well browned on all sides. Remove and repeat with the remaining beef. To the oil left in the pan (add a touch more if you need to) add the mushrooms and sauté until golden, season with salt and pepper and set aside. Add a little more oil to the pan and add the onions along with a large pinch of salt and cook until softened. If the pan runs dry add a splash of water. Add the garlic to the onions and cook for a further 2 minutes. Add the beef and mushrooms back to the pan along with the red wine, stock, worcestershire sauce, tomato paste, bay leaves and a generous pinch of black pepper. The meat should only just be covered with liquid with only the meat tips showing through – if you need more liquid, top off with water. Bring to the boil and once boiling add the 2 tablespoons of extra flour, stir it in well to incorporate it into the liquid. Reduce heat and partially cover the pan and cook over a very low flame for 2 hours; then remove the lid and cook for a further hour. Check the pan regularly and stir the pie filling during the cooking time to ensure it’s not catching. When the meat is fork tender turn off the heat and add the red wine vinegar and parsley. Stir them in well and pour the mixture into a bowl with a large surface area so as it can cool down quickly.

 Filling for Beef & Red Wine Pie

To assemble the pie, preheat the oven to 220C and take the pastry out of the fridge. Divide the dough into 2 pieces – one that is 2/3 of the weight of the pastry for the base of the pie and the remaining third for the top. Roll out the larger piece of pastry on a lightly floured surface until 3mm thick and large enough to cover the base and sides of your pie pan. Carefully transfer the pastry to the pie pan and gently press it into the base and sides. Pour the cooled meat mixture into the pastry case. Roll out the smaller piece of pastry to fit the top of the pie pan and place it on top of the meat.

Sour Cream Pastry for Pie Beef & Red Wine Pie Filling Beef & Red Wine Pie with Sour Cream Pastry

Trim the base and top of the pie pastry to meet nicely and crimp the sides using a fork to form a seal. Use any remaining pastry to cut out some decorative leaves and place on top of the pie then make a few small slits in the pastry to allow steam to escape. Brush the pastry with the beaten egg and milk and place in the oven, immediately turning the heat down to 200C and bake for 30 minutes. Let the pie rest for 5 minutes before cutting. Serve with steamed greens such as spinach with peas and leeks.

Beef & Red Wine Pie with Sour Cream Pastry

Apr 2, 2013
mustardwithmutton

no comments

Ricotta Gnocchi with Tomato, Borlotti Bean Sauce & Roast Duck

Ricotta Gnocchi with Roast DuckThe star of this recipe is the ricotta and silver beet (Swiss chard) gnocchi with the tomato and borlotti bean sauce. The duck element is purely optional and can be replaced with another meat/poultry or even left out entirely as the gnocchi and sauce are delicious just on their own. I was making this for a dinner party and wanted to include a meat element to make it a more substantial main meal, hence the addition of the roasted duck breasts. Unlike potato gnocchi which can be tricky to get right, these ricotta gnocchi are very forgiving and almost foolproof. I’m a big fan of meals where everything can be prepared in advance, especially when entertaining, and this was perfect as I was able to make and form the gnocchi in the morning. I also prepared the sauce ahead of time so all that was required when it came time to serve was to bring the sauce to a boil and add the gnocchi. The duck breasts of course need to be cooked at the last minute but they don’t take long and don’t require too much attention. The dish is finished off with a generous drizzle of basil infused oil which brings all the elements together. Whilst this makes an impressive meal for entertaining it’s straightforward enough to make for the family and as I mentioned above you can replace the duck with anything you choose or leave it out entirely – next time I might pair it with some seafood such as a crisp skinned fish fillet or seared prawns and scallops.

Ingredients – Serves 4  Adapted from Delicious Magazine

½ cup olive oil
4 cloves of garlic thinly sliced
Pinch of chilli flakes
1kg vine ripened tomatoes, roughly chopped
3 cups chicken stock
2 cups fresh borlotti beans – you can use rinsed and drained canned beans if you can’t find fresh
½ cup basil leaves
2 duck breasts – use 3 if they are small, seasoned with salt and pepper and the skin finely scored
2 teaspoons olive oil extra
Salt and freshly ground black pepper
Ricotta & Silver Beet Gnocchi
300g silver beet (Swiss chard) leaves, stems removed, blanched and finely chopped
1 cup (200g) fresh ricotta
23 cup finely grated fresh parmesan, plus extra to serve
23 cup plain flour, plus extra for dusting
2 eggs
Salt & freshly ground black pepper

Method

To make the gnocchi, place the silver beet, ricotta, parmesan, flour, eggs, a large pinch of salt and pepper in a bowl and mix until a sticky dough forms. Roll tablespoonfuls of the mixture into balls and set aside on a floured tray. The gnocchi can be prepared in advanced and kept covered in the refrigerator until ready to cook.

To make the sauce, heat 2 tablespoons of oil in a large, deep sided frying pan over medium heat. Add the garlic and chilli flakes and cook for a couple of minutes. Add the tomatoes, stock and borlotti beans. Season with salt and bring to the boil and cook for 25 minutes. If you’re using canned beans add the beans in the last 10 minutes of cooking time.

Ricotta & Silver Beet Gnocchi

Preheat oven to 190C. While the sauce is cooking make the duck; place an oven proof skillet over a medium flame and add 2 teaspoons of olive oil. Place the duck skin side down into the pan and let it cook undisturbed for about 5 minutes or until the skin of the duck is nicely browned. Turn the duck breast over and place the pan into the preheated oven and cook for a further 8 minutes (for medium rare). Remove the duck to a carving board to rest for 5 minutes then slice thickly.

Roasted Duck Breasts Ricotta Gnocchi with Tomato & Borlotti Bean Sauce

When the sauce is ready add the gnocchi and cook, covered for 6-8 minutes or until firm. Place the basil and remaining oil in a small food processor, season with salt and process until finely chopped. To serve, place some of  the gnocchi and sauce onto each plate and arrange some duck slices in and around the sauce/gnocchi, then drizzle with the basil oil.

Ricotta Gnocchi with Tomato, Borlotti Bean Sauce & Roast Duck

Mar 28, 2013
mustardwithmutton

17 comments

Greg Malouf’s Salmon Tarator – Perfect for the Easter Table

 Greg Malouf's Salmon TaratorI’ve been wanting to make Greg Malouf’s salmon tarator ever since I first saw him cook it on the television series Food Safari when host Maeve O’Meara proclaimed it the best salmon she’s ever tasted. Now when I hear someone say that, especially Maeve whose had her fair share of incredible meals, I get very excited. And this is definitely a dish to get excited about. It’s such an unusual way of preparing salmon both in the cooking method, ingredients and serving style. It’s actually perfect for a buffet table and this being Easter a perfect dish to serve on Good Friday or Easter Sunday. Greg Malouf cooked a whole salmon and if you’re feeding a crowd this would be the way to go. I was making it for just 4 people so I used half of one side of salmon which weighed about 1kg. You could of course use a whole side of salmon that will easily feed 6-8 people and the leftovers are delicious. The salmon is baked in the oven, wrapped in baking paper, and then doused with a tahini spiked yogurt sauce and topped with a thick layer of very finely chopped coriander, red onion, chilli and walnuts – told you it was unusual! This is an easy dish to prepare but real time needs to be taken in finely chopping all the ingredients – getting lazy with this step will result in a poorer finished product. Don’t be sacred either by the short cooking time at a low temperature; the salmon will come out just on the verge of medium rare with an almost confit like texture that tastes even better than poached salmon. The final dish is served at room temperature so it can be prepared in advance which makes it even more entertainment friendly.

Ingredients  Adapted from Greg Malouf  via Food Safari

Fish
1 x 1kg side salmon, cut from the centre, pin bones removed but with the skin on
Salt & freshly ground black pepper
olive oil for brushing
Yoghurt Whipped Tahini
150g natural yoghurt
3 tablespoons tahini, well-stirred
1 clove garlic crushed with teaspoon sea salt
Juice of 1 lemon
1 teaspoon freshly ground black pepper
Tarator
100g walnuts
1 cup very finely shredded coriander leaves
1 small purple onion, very finely diced
1 long red chilli, seeded and very finely diced
½ teaspoon ground sumac
Juice of 1 lemon
60ml extra virgin olive oil
Salt & freshly ground black pepper

Method
To prepare the salmon, trim about 1.5cm from the belly so you have a neat, even sided rectangle. Remove all pin bones. Brush the salmon with olive oil and season all over with salt and pepper. Cover and refrigerate for 1 hour. Preheat the oven to 100C. Remove the salmon from the fridge and allow it to come to room temperature. Then wrap in baking paper and place skin side down, in a large baking tray. Bake for 12 minutes. Remove from the oven and carefully turn the salmon skin side up. Return to the oven for a further 12 minutes. Remove from the oven and leave to rest in the tray for 10 minutes. Unwrap and discard the paper. Peel away the skin, then gently scrape away all of the grey blood line from the fish. Set aside.


To make the yoghurt whipped with tahini, whisk all of the ingredients together until smooth and creamy.

To make the tarator, preheat the oven to 160C. Spread the walnuts out on a baking tray and roast for 8-10 minutes shaking them around from time to time so they colour evenly. Tip the nuts into a tea towel and rub vigorously to remove as much of their papery brown skin as possible. Chop the walnuts very finely and put in a mixing bowl with the coriander, onion, chilli and sumac. Pour on the lemon juice and oil, season with salt and pepper and mix well.

To serve the salmon, smear the exposed surface with the yoghurt-tahini sauce, I like to have a generous coating of this; then pack on the tarator topping neatly and evenly so it completely coast the fish. Serve at room temperature with some extra sauce on the side.

Greg Malouf's Salmon Tarator

Mar 26, 2013
mustardwithmutton

2 comments

Gyoza – Japanese Meat Filled Dumplings

Gyoza - Japanese Meat Filled DumplingsIt’s rare for me to make Japanese food at home on a regular basis as it’s a cuisine that we prefer to go out for, so this being the second Japanese recipe in just over a week is pretty unusual. But there are, in my opinion, two types of Japanese cuisine; the highly technical food such as perfectly prepared sushi, sashimi and tempura – which can all take years of training to perfect, and then there’s the more home style of Japanese cooking, the sort of food that I imagine the average family sitting down to during the week such as this and this. This home style of cooking is the Japanese food that I like to make and these gyoza’s are a good example. They are normally filled with pork but as I was cooking for pork averse diners I substituted lean minced lamb which worked wonderfully so I’m sure beef or even chicken would also work well. These dumplings make a great appetiser and I find them much less daunting than Chinese dumplings. It’s so easy to pan fry them on just the one side and then add water and let them steam in the the same frypan with the lid on. No large steamers with fears of dumplings sticking to the bottom and worries about doneness here. The combination of a slightly crispy exterior on one side and steamed pastry on the other makes these very moreish. Serve with a simple dipping sauce of soy, rice wine vinegar and sesame oil.

Ingredients – Makes 30 Gyoza

Half a head of Chinese cabbage (Napa cabbage), very finely shredded
½ teaspoon salt
250g minced lamb, you can also use pork, beef or chicken
1 inch piece of ginger, grated
2 cloves garlic, grated
2 spring onions, white and green parts finely chopped
2 teaspoons red miso paste
1 teaspoon sesame oil
A pinch of red chilli powder
¼ teaspoon sugar
30 round dumpling wrappers
4 tablespoons vegetable oil
½ cup water
1 teaspoon sesame oil
Dipping Sauce
4 tablespoons soy sauce
2 tablespoons rice vinegar
1 teaspoon sesame oil

Method
Place the cabbage and the salt in a large bowl and let it sit for 10 minutes. Using your hands squeeze the cabbage to drain the excess water. Add the lamb, ginger, garlic, spring onions, miso, sesame oil, chilli, and sugar. Mix everything together with your hands until very well combined. Then pick the mixture up and form it into a ball and throw it firmly back into the bowl. Do this several times to tenderise the mixture.

To form the gyoza lay a dumpling wrapper on a dry work surface, and place a heaping teaspoon of the meat mixture in the center of the wrapper. With a fingertip moistened with water, trace a line along half of the edge of the round wrapper. Fold the wrapper over to enclose the filling, and pinch the wrapper in the center to seal the edges together at that spot. Holding the filled half-circle, pleat the top of the wrapper in the middle, then working from the middle make small pleats going form the centre out on both sides. You should have 5-6 pleats in total. Place the dumplings on a tray lined with baking paper and repeat with the remaining mixture. At this point the dumplings can be covered and refrigerated until you’re ready to cook them.

Gyoza

To cook, bring the dumplings to room temperature and place a non stick frypan which has a lid over medium heat. Add 2 tablespoons of the vegetable oil  and when hot place as many of the dumplings that can fit in the pan – should be about half the dumplings (in the picture above I only cooked 6 of the dumplings and froze the rest). Cook the dumplings for a few minutes, or until nicely browned on the bottom. Once the bottoms are browned pour in  ¼ cup of the water. When the hissing and splattering dies down, drizzle in ½ teaspoon of sesame oil around the edge of the pan. Place the lid on the pan to trap in the moisture and lower the heat to keep the liquid at a bare simmer. Check the dumplings after 2-3 minutes. When the wrappers appear slightly translucent and the meat feels firm when pressed lightly with a spoon, remove the lid and raise the heat slightly. Continue to cook until all the water has evaporated and only the oil remains (about another 2 minutes). Once you hear a sizzling sound, shake the pan. The dumplings should slide about. If they seem to stick, move the pan away from the stove and replace the lid for a moment. Remove the dumplings to a platter and cook the remaining dumplings the same way. While the dumplings are cooking, make the dipping sauce by mixing all the ingredients in a small bowl. Serve the dumplings hot accompanied by the dipping sauce.

Gyoza

Mar 22, 2013
mustardwithmutton

no comments

Essential Kitchen Tips

Store Cupboard EssentialsBeing a whizz in the kitchen doesn’t only mean being an innovative chef. Organisation, classic recipes and cleanliness also play a part. A kitchen is the hub of a home, so being on top of things will have an effect on the smooth running in the rest of your household. Read on for top kitchen tips, which should transform you into a domestic god or goddess in no time!

Store cupboard essentials Cooking some recipes can require tricky-to-find items, though to deliver day-to-day meals a few store cupboard ingredients will enhance your dishes. Make sure cupboards are kept stocked up, so you’ll always have things to hand to whip up a meal in no time.

  • Tinned tomatoes: a cheap and tasty base for everything from stews to soups.
  • Herbs and spices: keep a range of dried and fresh varieties to add instant flavor.
  • Lemons: a squeeze will add zing to a salad in summer and cooked root veg come winter.
  • Vegemite/Marmite: love it or loathe it, a small jar will last for weeks and can be added to give body to dishes.
  • Tinned beans/chickpeas: a low-cost alternative to meat, pulses will instantly transform a light stew or soup into a hearty evening meal.

Don’t chuck leftovers! Tons of food is wasted each year as families throw out uneaten leftovers. Invest in a selection of plastic tubs and use these to store leftovers, which can be reheated to save time and money in the future. Buy a reel of plastic labels and ensure you label each tub with the date you cooked your items.

Choose your chopping board Hygiene in the kitchen is essential, so be mindful when preparing food. Use different chopping boards to prepare different items: cooked and raw meat and fish, veggies and baked goods should not be prepared together. If using plastic boards choose a variety of colours, or else clearly label a number of wooden boards.

Natural cleaning Chemical cleaners can be harsh on some kitchen surfaces and also irritate and cause allergies for some. For something a little gentler, use natural products which you may already have in your cupboard at home:

  • Baking soda mixed with water can be used to clean tiled floors and splashbacks.
  • Vinegar diluted in warm water gives shine to wooden floors.
  • Ketchup can be used to remove tarnish marks from copper and brass fixtures. Simply squirt a little ketchup on a damp cloth and gently rub, rinsing with warm water.
  • Clean a cast-iron pan by rubbing it with a few tablespoons of salt and a paper towel, and rinse.

Bake the perfect cake Your kitchen may look great with all that cleaning, though to really impress friends and family, why not treat them to a perfectly baked cake? A classic Victoria sponge uses 230g (8oz) of butter, 230g (8oz) of caster sugar, 230g (8oz) of self-raising flour and 4 medium eggs, cooked at 180C for 20-25 minutes. The secret? A lengthier creaming time allows more air bubbles to form, ensuring a perfectly-risen cake.